Fix: System Cooling Policy is Missing in Windows 11
A way to keep overheating in check on your PC
5 min. read
Updated on
Read our disclosure page to find out how can you help Windows Report sustain the editorial team. Read more
Key notes
- A System cooling policy can be used to protect against overheating, which can damage hardware components and cause them to fail.
- The setting is not enabled by default so if it's missing in Windows 11, you have to enable it and we show you how in this article.
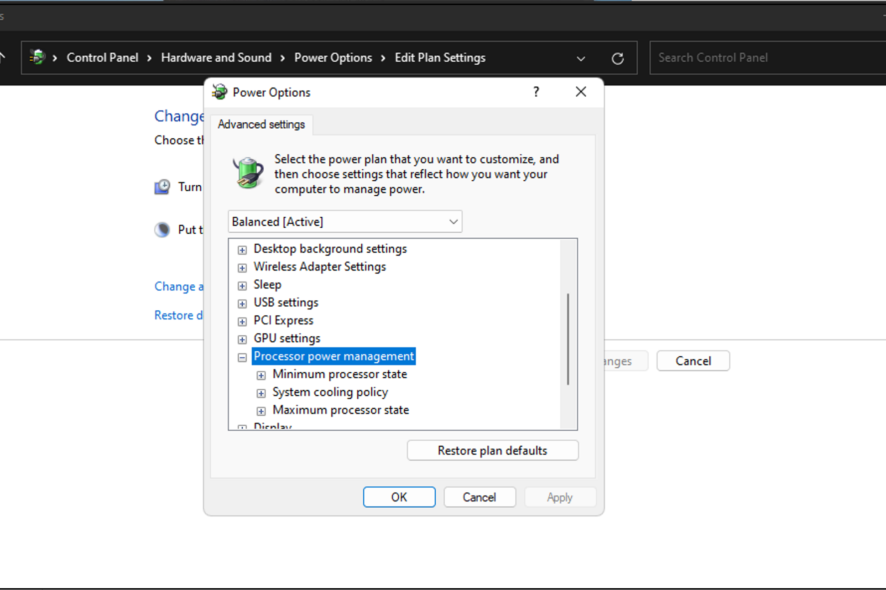
System cooling policy is the set of guidelines and rules used to manage the temperature of a computer system. The main goal is to keep the system cool and running smoothly. With Windows 11 coming feature-packed, users need all the help they can get to keep their systems running optimally.
If you find that the System cooling policy is missing from your PC, all you have to do is enable it. In this article, we show you different ways to make it reappear.
What is the System cooling policy?
The System cooling policy is a set of instructions that tell a computer what to do when its internal temperature rises above or falls below a certain level. This includes its CPU and RAM components.
If you’re wondering why you can’t find the System cooling policy in Windows 11, it is because it’s not installed by default. Since it’s not enabled by default, you may wonder whether it plays an important role in your PC. The answer is Yes. Some of the benefits include:
- Improve the performance of your computer – System cooling policy mostly applies to gaming given the graphic-intensive and CPU-intensive games. It helps keep the CPU cooler and allows it to operate at its full potential as the PC tends to overheat while gaming.
- Reduce the number of computer crashes – A system crash can also cause your PC to overheat and shut down unexpectedly. This can be dangerous if you’re using your computer while it’s overheating.
- Increase overall system efficiency – Running your computer with a properly functioning fan will keep it cooler and allow for more reliable performance.
- Efficient Power usage – The better the airflow within your computer, the less power it uses, and the more efficient the airflow, the less energy is needed to keep everything cool and running smoothly.
- Increase the lifespan of your hardware components – System cooling ensures that your computer stays cool throughout its entire lifetime. You don’t have to keep checking your CPU’s or GPU’s temperature.
Which is better active or passive System cooling policy?
System cooling policy has two settings: Active and passive. Active system cooling is the best policy because it can always provide the maximum amount of cooling.
If you have an active system, you can constantly monitor the temperatures of your CPU, GPU, and other components and make adjustments to achieve optimal performance.
This is not possible with passive systems. This is because they cannot control the temperature of their components as well as active ones which rely on fans to move air across their heat sinks. That being said, it doesn’t mean Passive systems are useless.
Passive systems are better at keeping temperatures down when they’re under load, but they’re less effective at preventing overheating when a computer is idle. In such cases, you may need to tweak some settings to get the best power efficiency.
Passive cooling does not require an active cooler as it relies solely on convection for cooling. This means that there are no moving parts involved, hence making it more efficient than active cooling methods since there is no need for fans.
With active cooling, the fan speed can also be controlled by software in order to ensure that no overheating occurs. You’ll need more space than passive cooling offers in order to fit the components required for active cooling.
How do I get a System cooling policy?
1. Via Group Policy Editor
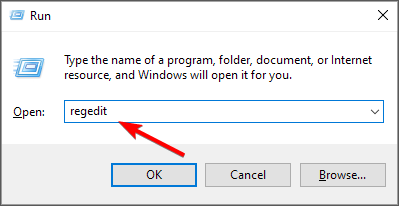
- Hit the Windows + R keys to open the Run command.
- Type Regedit in the dialog box then hit Enter.
- Navigate to the following location:
HKEY_LOCAL_MACHINE\SYSTEM\CurrentControlSet\Control\Power\PowerSettings\54533251-82be-4824-96c1-47b60b740d00\94d3a615-a899-4ac5-ae2b-e4d8f634367f - On the right pane find Attributes, right-click on it and select Modify. If it is missing, right-click on an empty space and select New DWORD (32-bit) Value and rename it to Attributes.
- Now, double-click on Attributes, and under the Value field, add 2 to add the System Cooling Policy in the Power Options box.
- Press OK and close the Registry Editor.
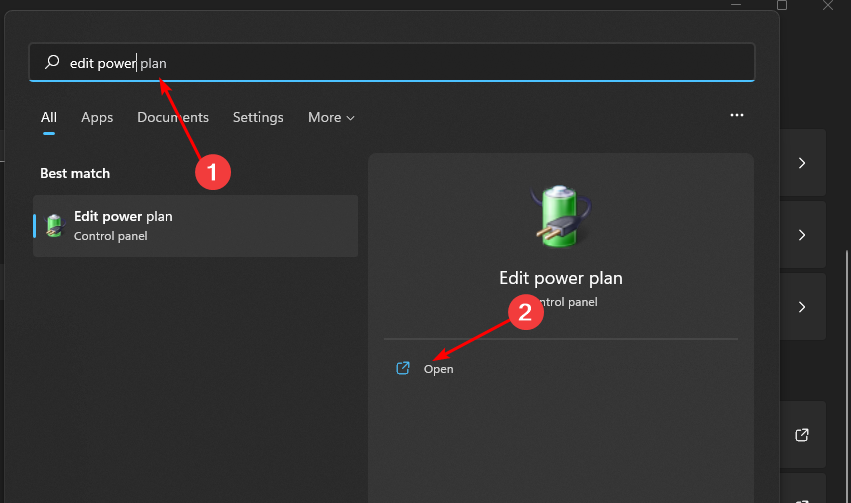
- Hit the Search icon on the Taskbar, type Edit power plan, and click Open.
- In the Power Options dialog box that pops up, navigate to Processor power management and click to Expand.
- The System cooling policy option should now appear under the Processor power management section.
- In case it doesn’t restart your PC to effect the changes.
Remember that editing the Registry is risky especially if you don’t know what you’re doing. If you’re unsure, we recommend that you seek assistance from a tech expert or proceed to the next step.
2. Via Command Prompt
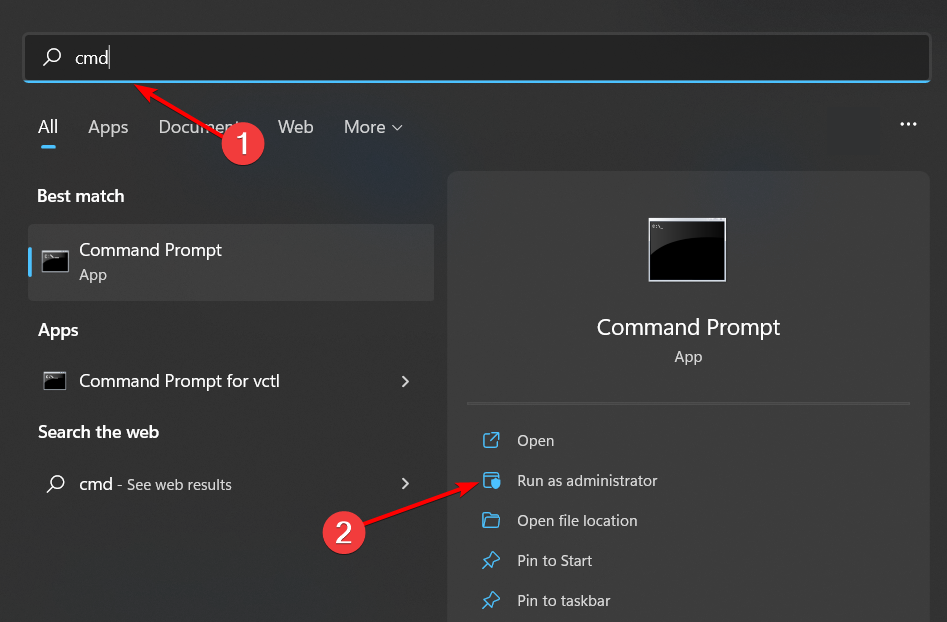
- Hit the Windows key, type cmd in the search bar, and click Run as administrator.
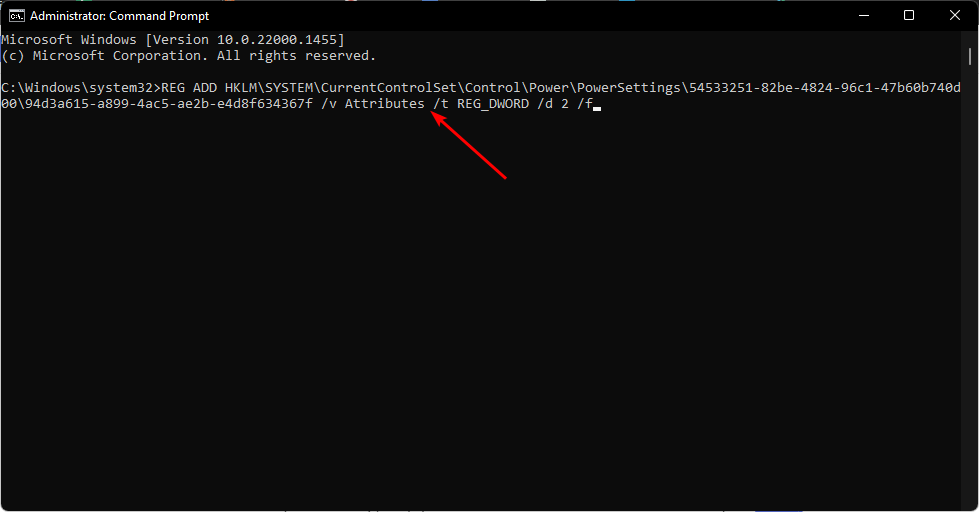
- Type the following command and hit Enter:
REG ADD HKLM\SYSTEM\CurrentControlSet\Control\Power\PowerSettings\54533251-82be-4824-96c1-47b60b740d00\94d3a615-a899-4ac5-ae2b-e4d8f634367f /v Attributes /t REG_DWORD /d 2 /f - Close the Command Prompt Window.
- Hit the Search icon on the Taskbar, type Edit power plan, and click Open.
- In the Power Options dialog box that pops up, navigate to Processor power management and click to Expand.
- The System cooling policy option should now appear under the Processor power management section.
Aside from the System cooling policy, you can also check out other recommended ways to reduce overheating on your Windows device.
If you encounter an issue where your PC is overheating while charging, don’t hesitate to check out our guide on how to address the problem.
Let us know if you have been able to restore the System cooling policy in the comment section below.








User forum
0 messages