Device Encryption is Missing on Windows 11? How to Get it Back
Secure your PC with our quick fixes
5 min. read
Updated on
Read our disclosure page to find out how can you help Windows Report sustain the editorial team. Read more
Key notes
- Device Encryption, a key security component in Windows, is often missing due to incompatibility.
- Recent changes to the PC may disable Device Encryption or remove the setting altogether.
- Read this guide to find out the solutions that worked for others.
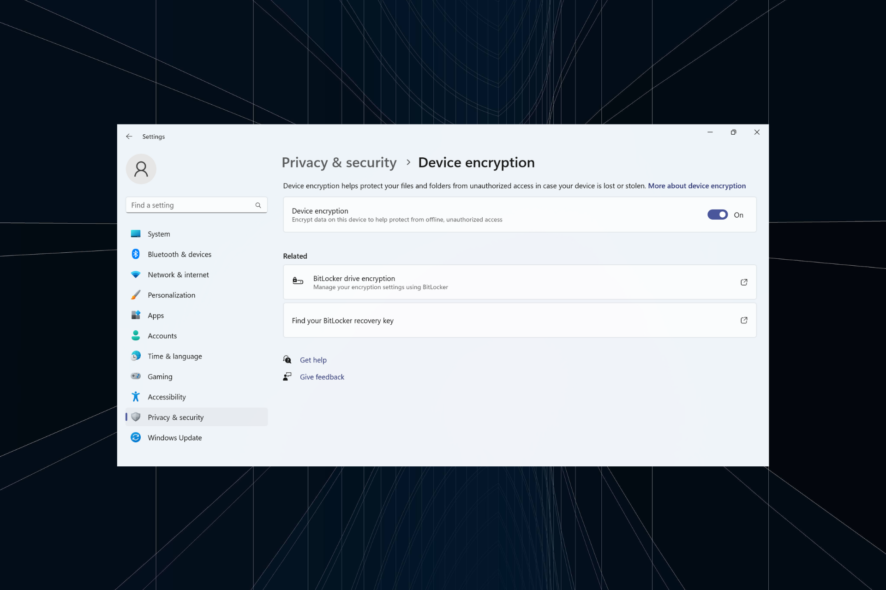
Security remains a vital aspect, given the rise in online and offline threats. To combat the problem, Microsoft introduced Device Encryption, but a few users found that the setting was missing in Windows 11.
The Device Encryption feature encrypts your data and renders it unreadable to unauthorized users or hackers if the device is stolen or hacked. To retrieve it, you will use the provided recovery key. Remember, Device Encryption is available on the Windows 11 Home edition.
Why is Device Encryption missing from Windows 11?
- TPM or Secure Boot is not enabled.
- The PC doesn’t support UEFI (Unified Extensible Firmware Interface).
- Your device is missing vital updates.
- The user account doesn’t have administrative privileges.
- Your PC doesn’t support Modern Standby.
What can I do if device encryption is missing on Windows 11?
Before we start with the slightly complex solutions, try these quick ones first:
- Check for any pending Windows updates and install them.
- If you have a third-party encryption software, disable it and use Device Encryption in Windows 11.
- Verify whether your PC is encrypted by default, and check if it’s using BitLocker. PCs that run BitLocker use it instead of Device Encryption.
- Update the BIOS if a newer version is available.
- Make sure you are signed in with a Microsoft account and not a local user profile.
If none work, head to the fixes listed next.
1. Check if your device is compatible (and the reason for incompatibility)
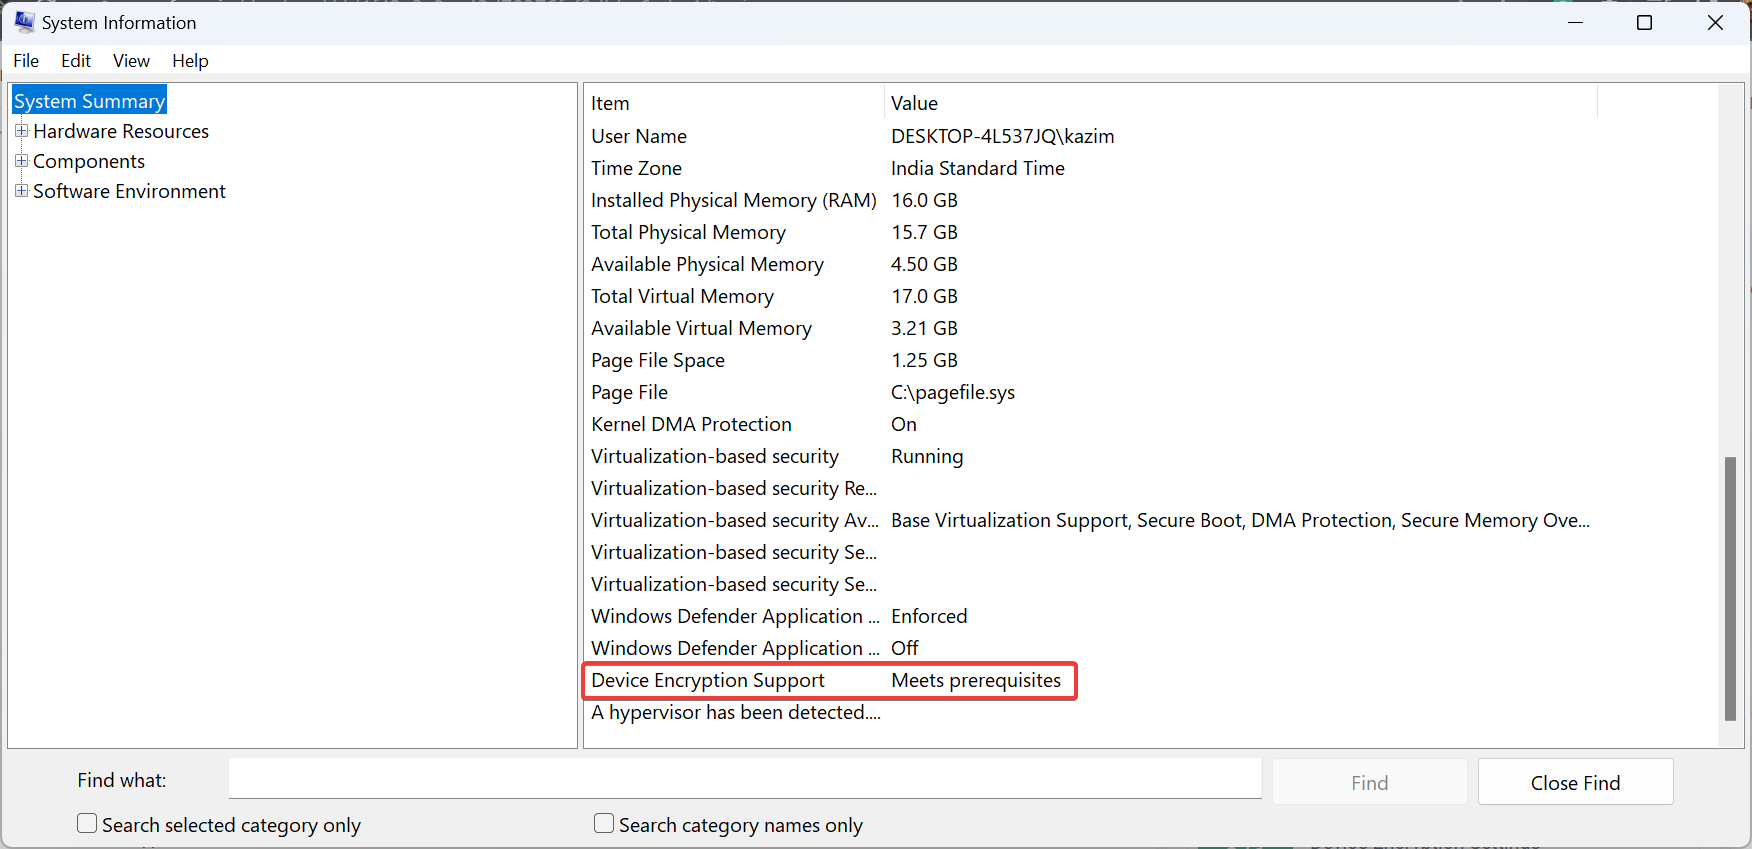
- Press Windows + R to open Run, type msinfo, and hit Ctrl + Shift + Enter.
- Scroll down on the right side and check what it reads next to Device Encryption Support.
The various messages here mean:
- Meets prerequisites: Your PC supports device encryption.
- Elevation required to view: You are not running System Information with administrative privileges. Make sure to launch the app as an administrator.
- Any other codes: Critical settings are disabled, or the PC doesn’t meet the system requirements.
2. Enable Secure Boot
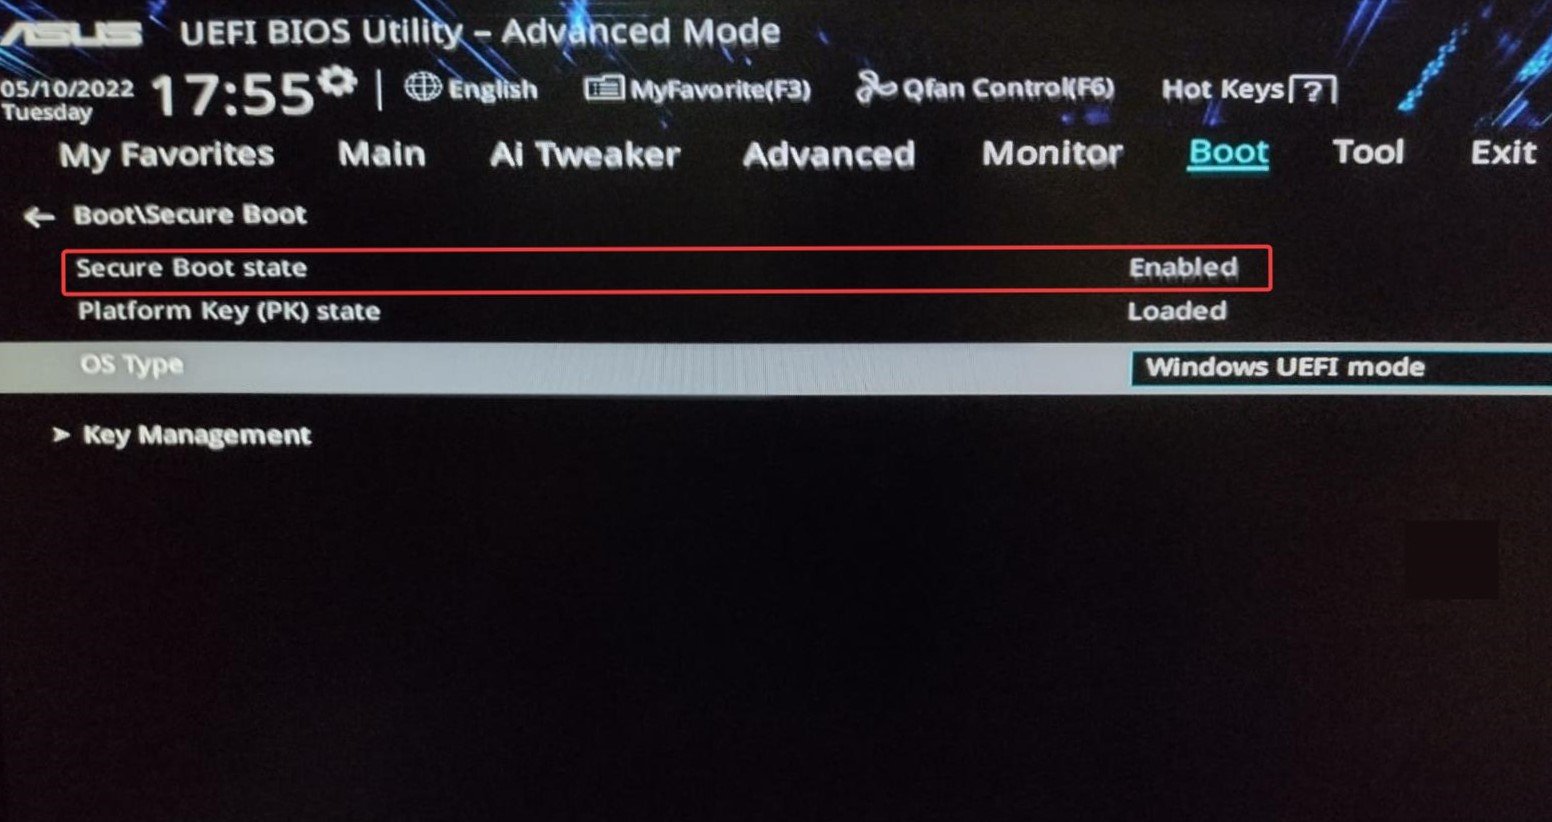
- Turn off the computer, then power it on, and as soon as the display lights up, repeatedly press the F1, F2, F10, or Del keys, depending on the system manufacturer, to launch the BIOS.
- Now, navigate to the Boot tab or the related section.
- Select Enabled for Secure Boot.
Your primary approach when Device Encryption is missing in Windows 11 should be to enable Secure Boot from within the OS or from the BIOS.
If you get an error code, clear any inconsistencies or reconfigure the BIOS settings. Usually, changing the other suboptions should fix the problem.
3. Enable TPM
- Boot the PC into Recovery Mode and launch the BIOS. Or you could do it by pressing the dedicated key after turning on the PC.
- Now go to the Advanced tab, locate the TPM entry, and select Enabled from the dropdown menu next to it.
A vital requirement for Device Encryption is TPM support. Besides, it’s not just the chip that should be present. You will also need to enable TPM from the BIOS.
4. Switch to an administrator account
- Sign in with an administrator account on the PC.
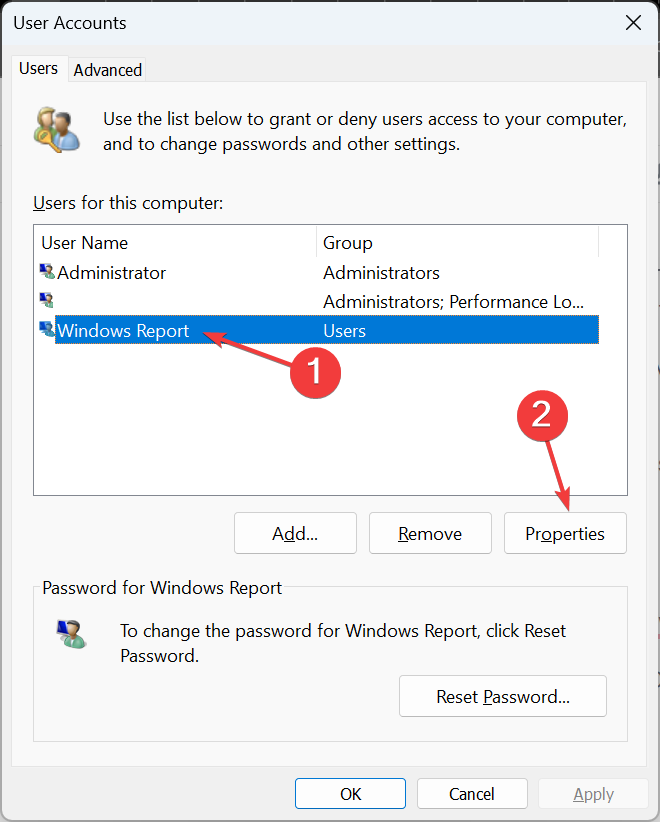
- Press Windows + R to open Run, type netplwiz in the text field, and hit Enter.
- Select the user account that doesn’t show Device Encryption and click on Properties.
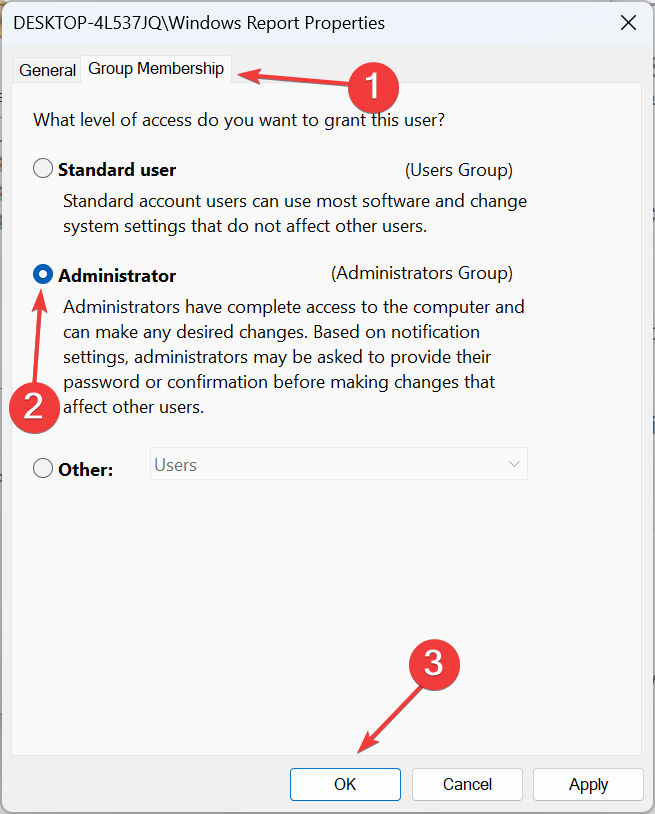
- Go to the Group Membership tab, select Administrator, and click OK to save the changes.
- Sign in with the problematic account and check whether Device Encryption is now available in Windows 11.
5. Reconfigure the local policies
- Press Windows + S to open the Search menu, type Local Group Policy Editor, and click the relevant search result.
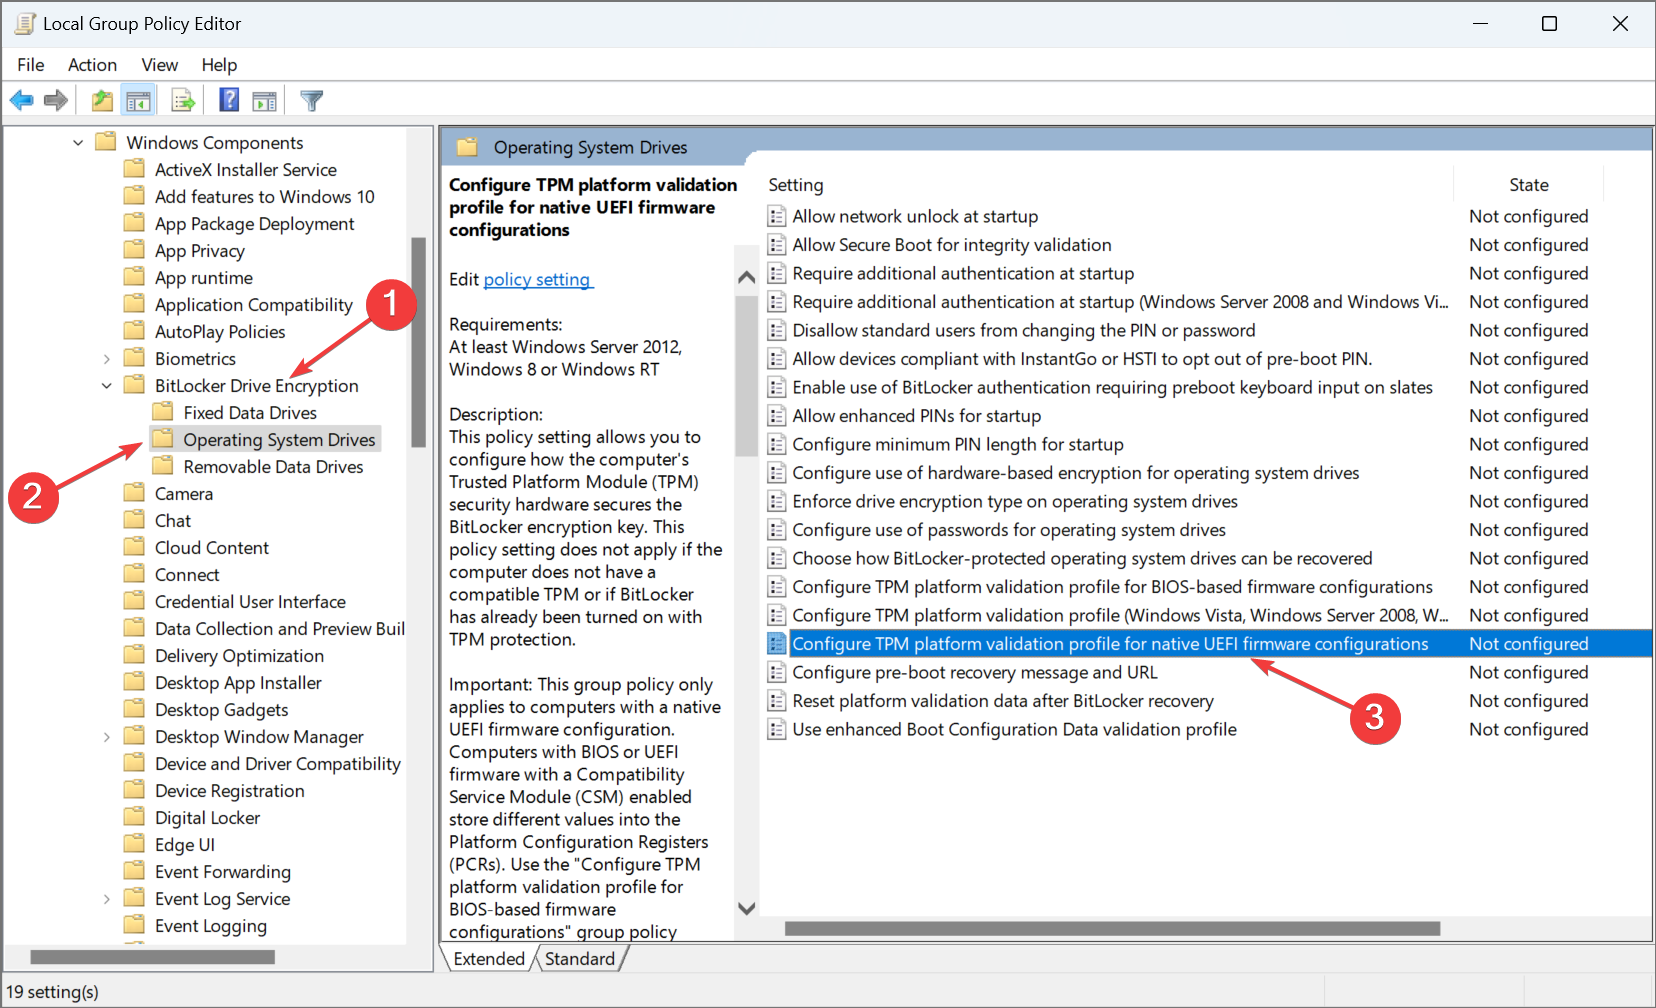
- Expand Administrative Templates under Computer Configuration from the left pane, and then double-click on Windows Components.
- Select BitLocker Drive Encryption, then choose Operating System Drives under it, and double-click on Configure TPM platform validation profile for native UEFI firmware configurations on the right.
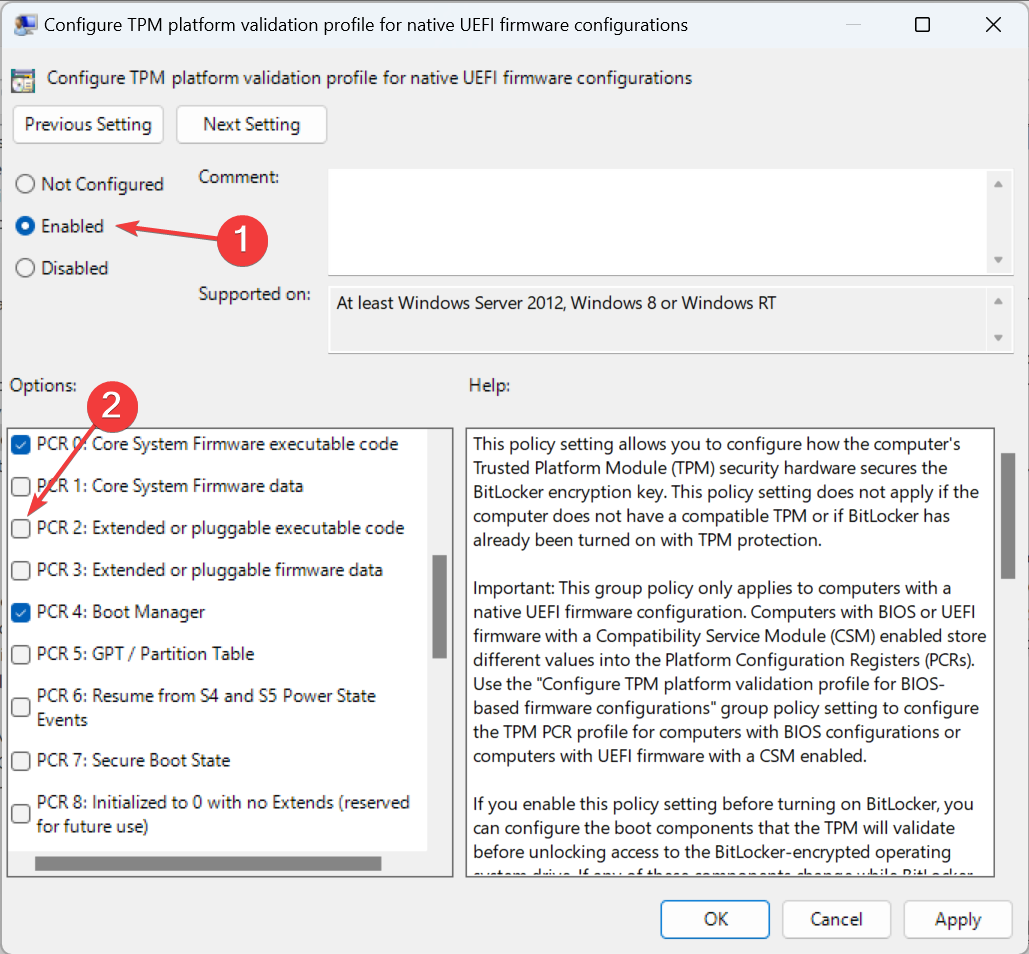
- Select Enabled, then untick the checkbox for PCR 2: Extended or pluggable executable code.
- Finally, click Apply and OK to save the changes, and restart the computer.
Reconfiguring the dedicated local policies may help when the Windows 11 Device Encryption is not showing. But users running the Home edition of the OS will need to manually install the Local Group Policy Editor (gpedit.msc).
Alternatives to device encryption on Windows 11
Device Encryption and BitLocker have long been a source of errors, in addition to incompatibility issues. When faced with either of the two, you may download an effective third-party encryption solution. Here are a few:
- VeraCrypt
- EasyLock
- Dell Data Protection
These are just as good and employ advanced encryption algorithms to protect your data. Besides, you get access to a wide array of security features.
After you have fixed things and Device Encryption is not missing anymore, enable it from Privacy & Security in Windows 11. Also, you can easily adjust the Device Encryption settings or get a copy of the recovery key.
Remember, even after enabling Device Encryption, you may find the Encrypt contents to secure data option greyed out, but it’s easy to fix with a quick Registry edit.
If you know of other fixes or workarounds, drop them in the comments section below.





User forum
0 messages