Solved: Your PIN is no Longer Available on Windows 11
If there are no critical files stored, reset the PC
6 min. read
Updated on
Read our disclosure page to find out how can you help Windows Report sustain the editorial team. Read more
Key notes
- To fix Your pin is no longer available in Windows 11, delete the NGC folder through the recovery environment.
- The problem arises due to changes in the security settings on the device.
- Keep reading this guide to find out how our experts fixed the problem!
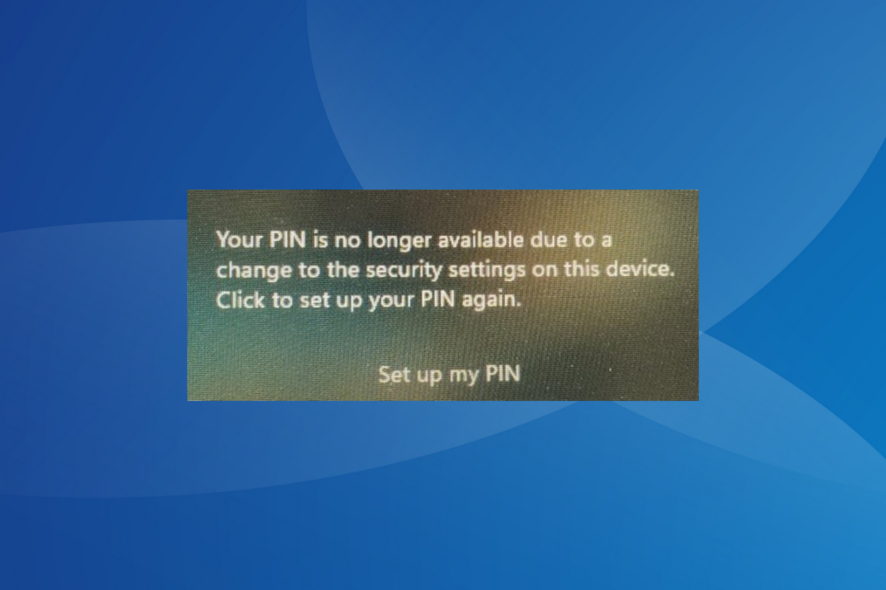
Often, after updating the PC or performing a factory reset that wipes out everything, you may come across, Your PIN is no longer available due to a change to the security settings on this device in Windows 11. The message appears whenever Windows detects a major change.
This includes changes to both the hardware and software and even some OS updates that reconfigure the security settings. Clicking the Set up my PIN button is fruitless in this case. Remember, a reset is not the only solution. We found many more!
How do I fix the Your PIN is no Longer Available error on Windows 11?
Before we start with the slightly complex changes, try these quick ones first:
- Restart the computer.
- In case you haven’t made any changes to the PC, disconnect all external devices.
- Try setting up a new PIN a couple of times, even if it doesn’t work on the first attempt.
- If you recently disabled any services or performed a clean boot, re-enable all the critical services.
- Force crash the PC thrice and let automatic startup repair kick in the fourth time. It will try to fix any misconfigurations with the boot settings.
If none work, head to the fixes listed next.
1. Change the PIN after logging in password
- On the login screen, click the Sign-in options entry and choose the one for your login password.
- Enter your Microsoft account’s password to sign in.
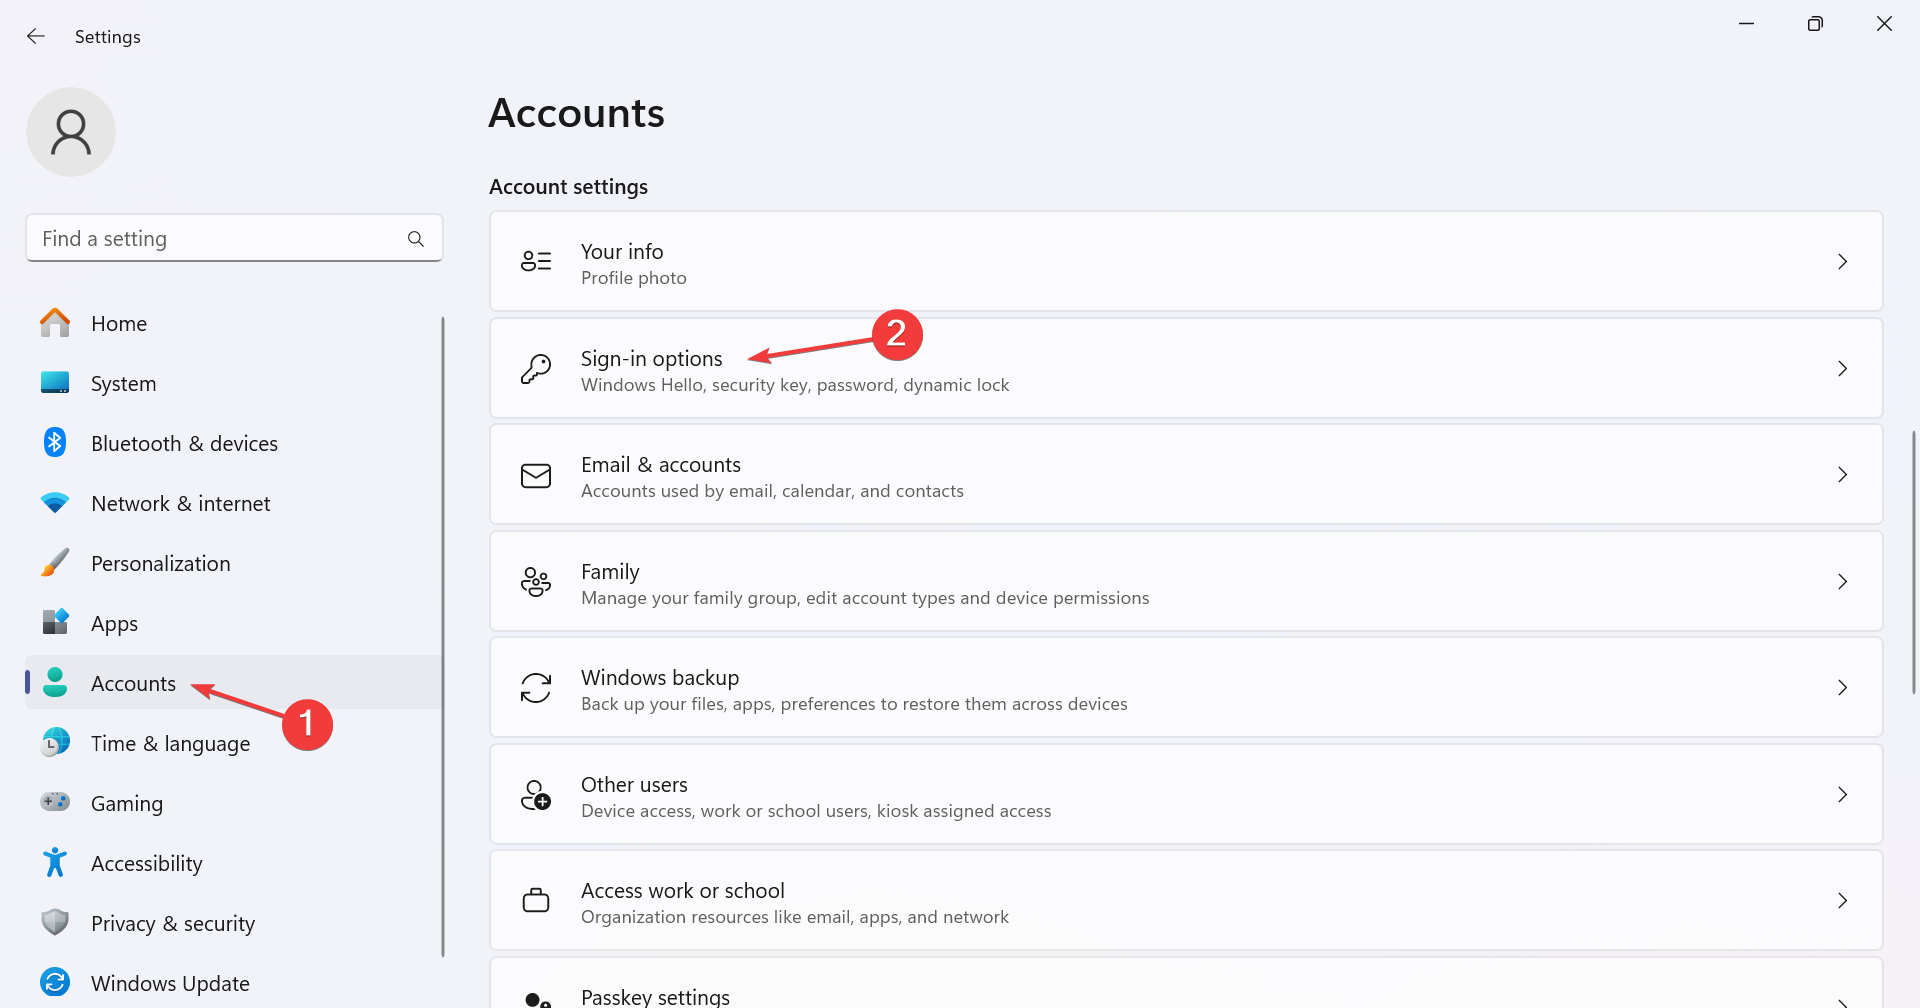
- Now, press Windows + I to open the Settings app, go to Accounts from the navigation pane, and click on Sign-in options under Account settings.
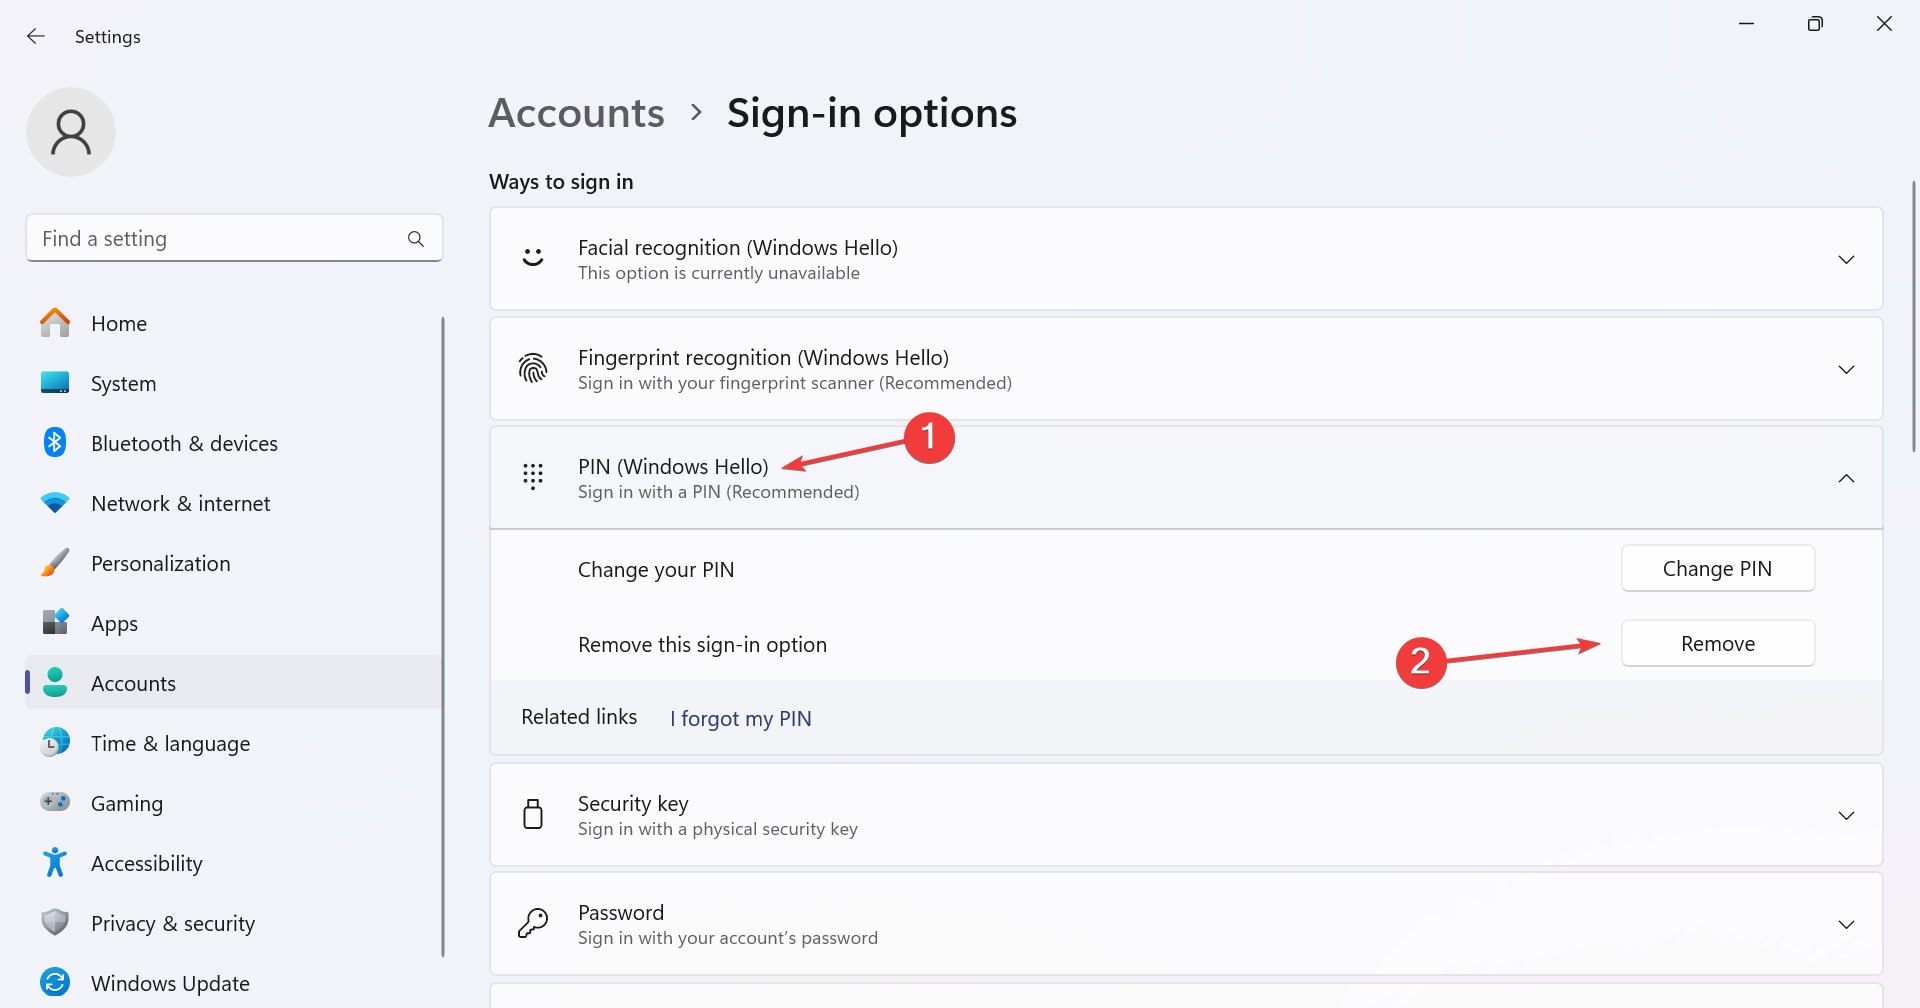
- Expand PIN (Windows Hello), and click the Remove button to remove the currently set PIN.
- Now, set up a new PIN, and you shouldn’t get an error message on subsequent sign-in attempts.
2. Clear TPM data
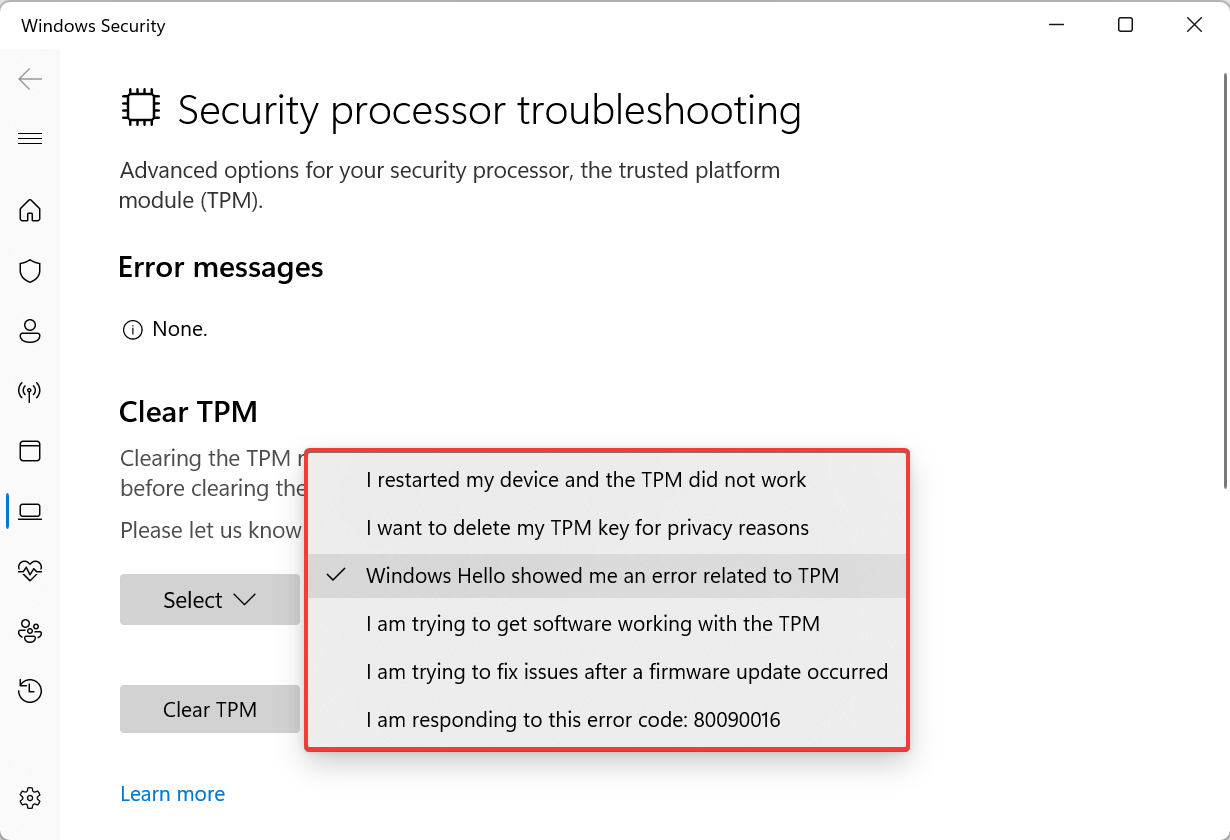
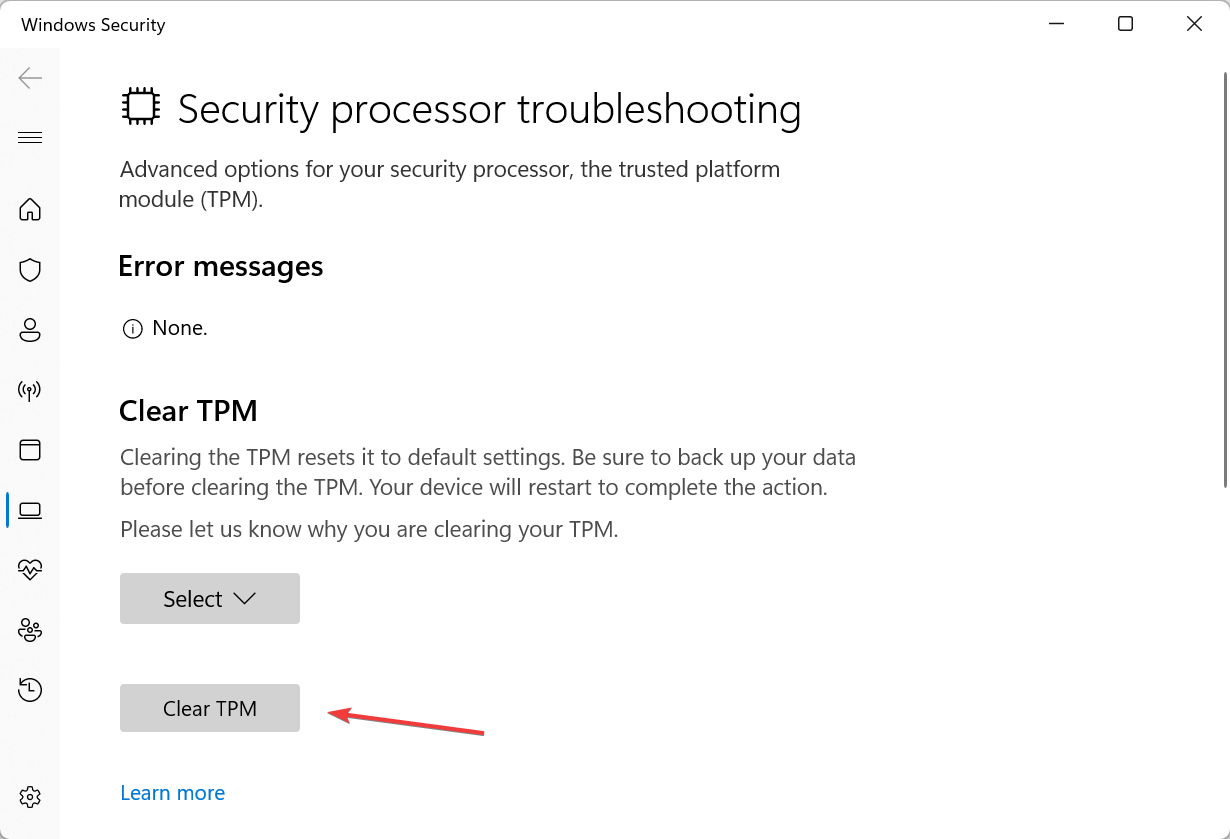
- Press Windows + S to open the Search menu, type Security processor troubleshooting in the text field, and click the relevant result.
- Select a reason for clearing the TPM, i.e., Windows Hello showed me an error related to TPM, from the dropdown menu.
- Now, click the Clear TPM button.
- Choose the appropriate response in case a confirmation prompt appears, then wait for the PC to restart.
- On the next login, you should be able to change the PIN.
Often, when the TPM (Trusted Platform Module) sees a change, you will come across the Your PIN is no longer available error in Windows 11. And unless you clear the TPM, no changes to PIN will be registered.
3. Delete the Ngc folder
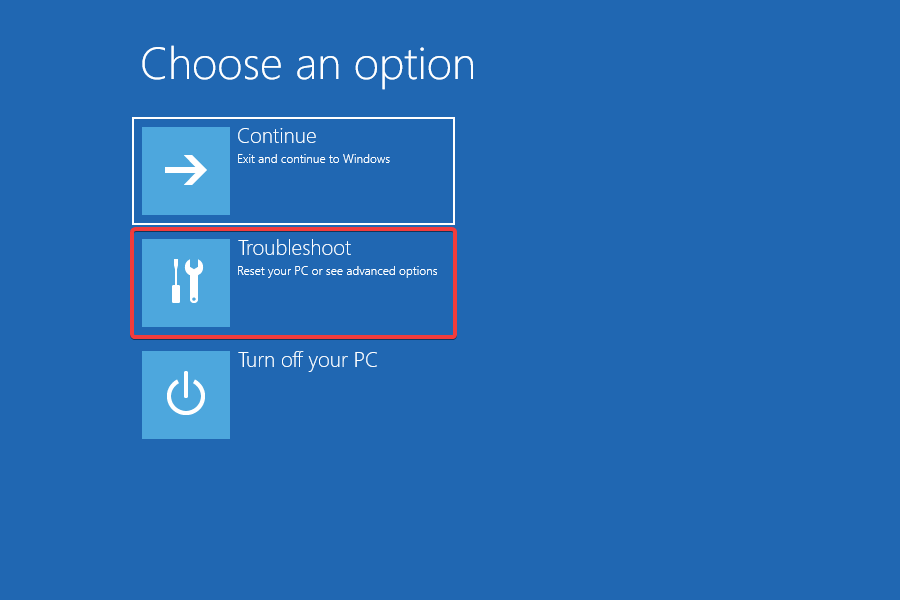
- On the login screen, click the Power icon, then hold the Shift key, and select Restart.
- Click on Troubleshoot.
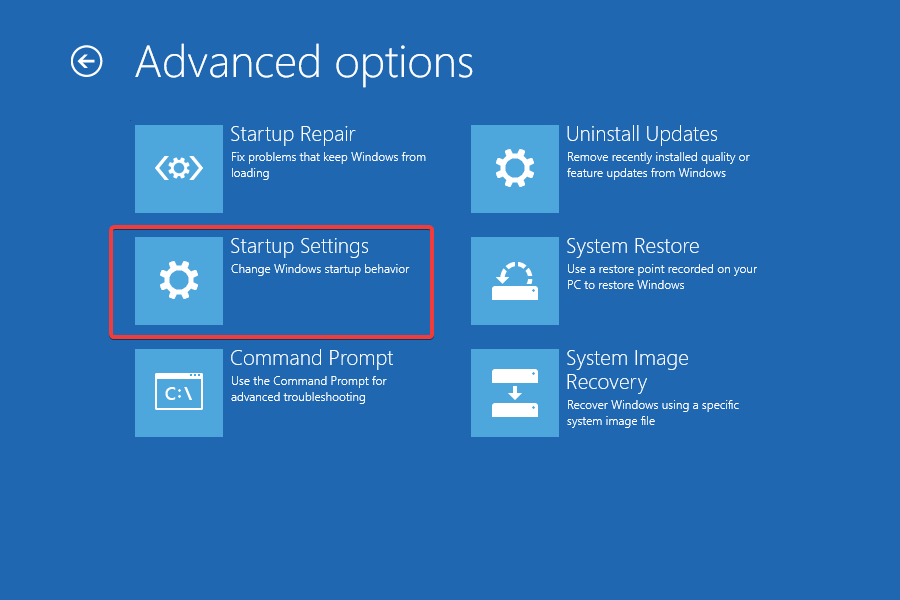
- Select Advanced options.
- Now, click on Startup settings. (This is the Windows Recovery Environment, and we will be referring to it in the subsequent solutions)
- Click Restart.
- Now, press the 4 or F4 key to access Safe Mode.
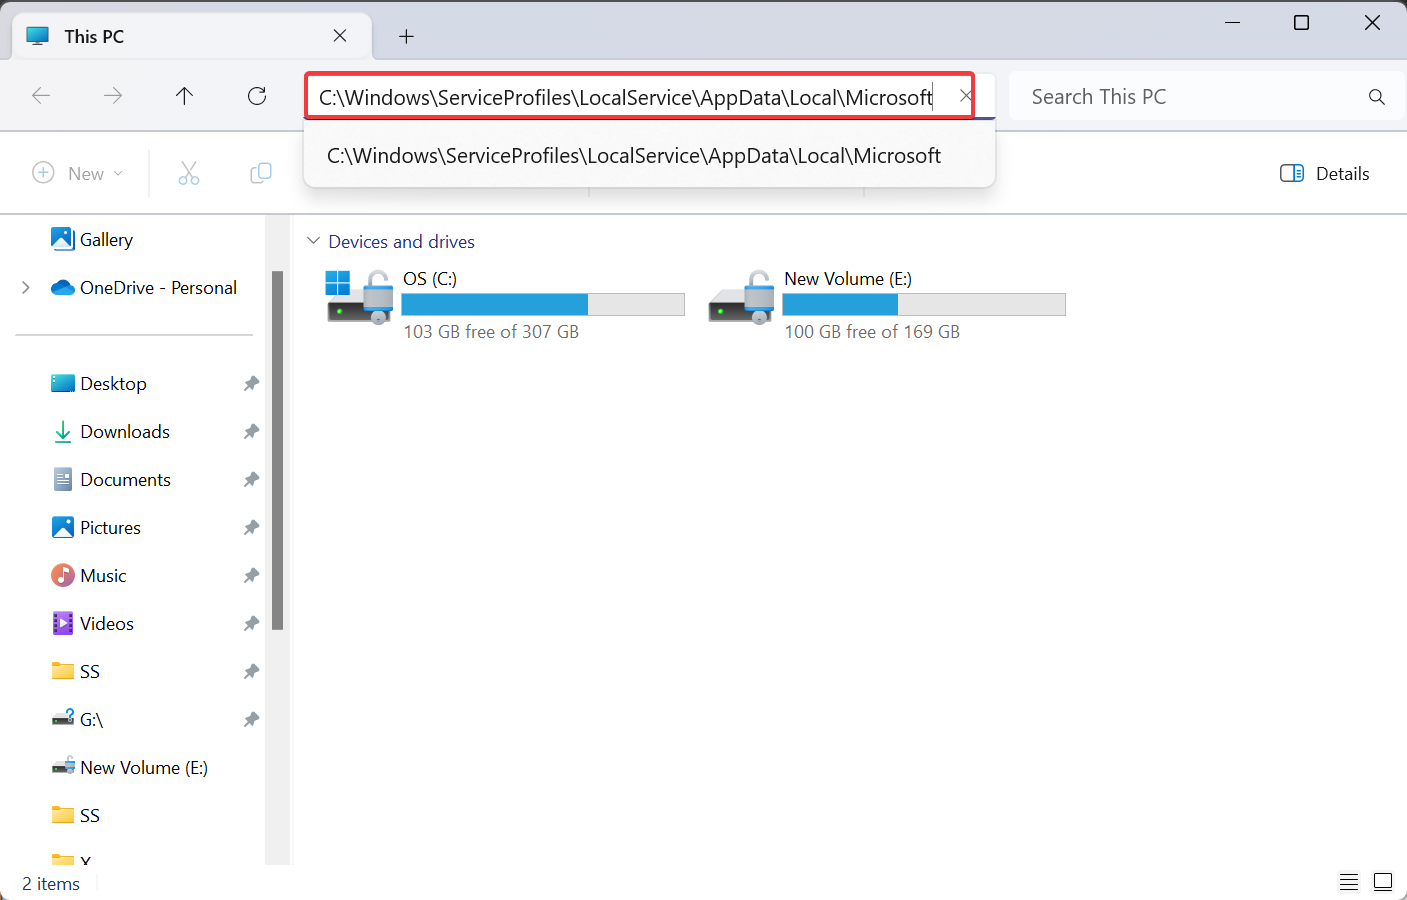
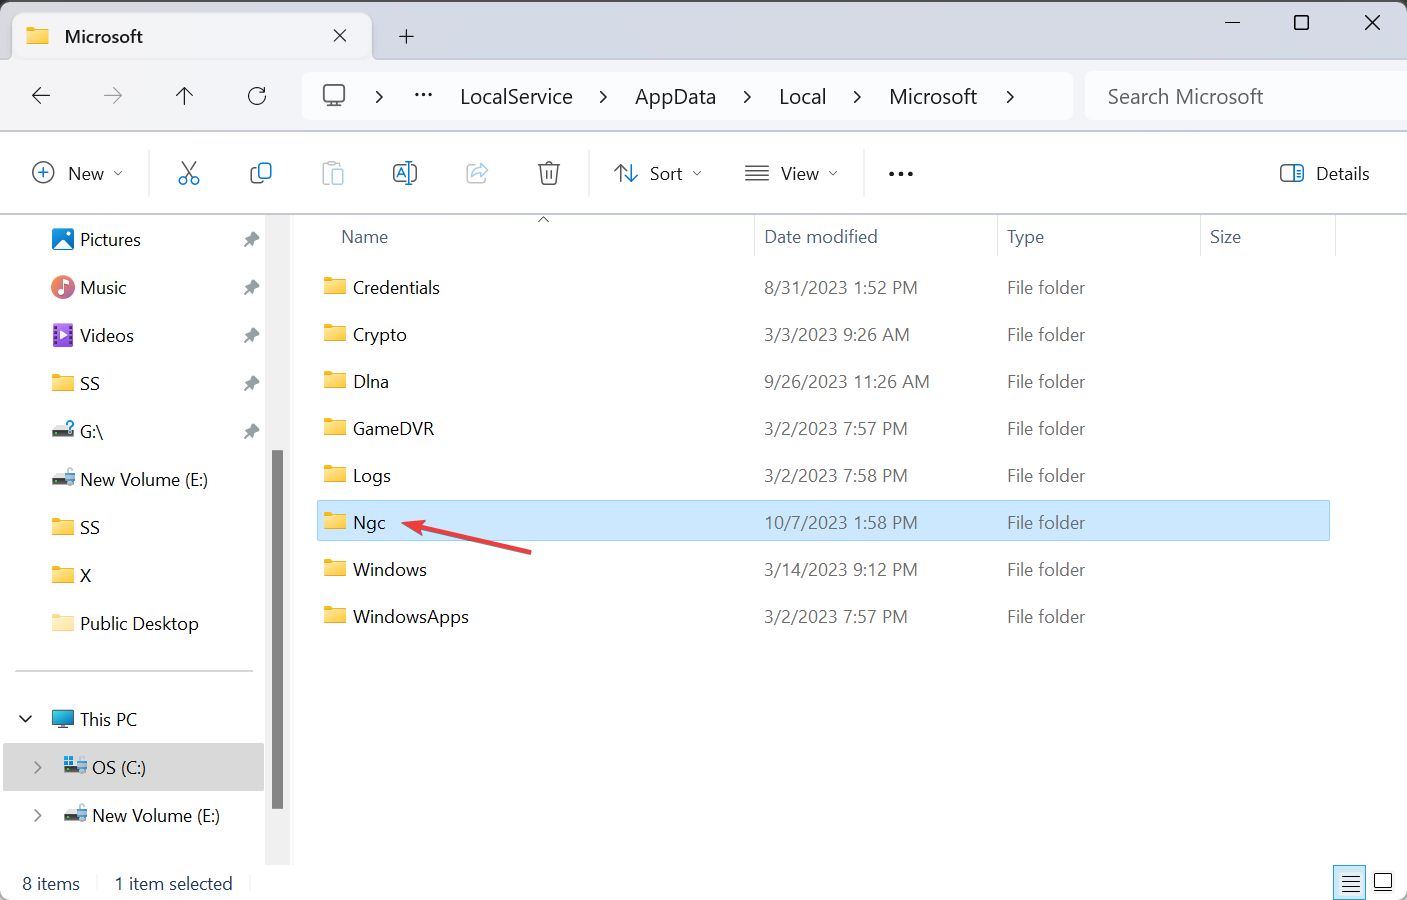
- Once Windows loads, press Windows + E to open File Explorer, paste the following path in the address bar and hit Enter:
C:\Windows\ServiceProfiles\LocalService\AppData\Local\Microsoft - Now, locate the Ngc folder, select it, and hit Delete.
- Restart the computer, and you shouldn’t be, ideally, asked for a PIN. Once you are signed in, create a new Windows PIN if required.
The NGC folder stores the sign-in information and can’t be accessed without the required privileges. In case it throws a permissions error when you try to delete it, make sure you are signed in with an administrator account and take full control of the folder.
This also helps when you can’t use Windows Hello PIN.
4. Modify the Registry
- From the lock screen, go to the Windows RE (Recovery Environment).
- Select Command Prompt from the options, and enter your user account and password if asked for.
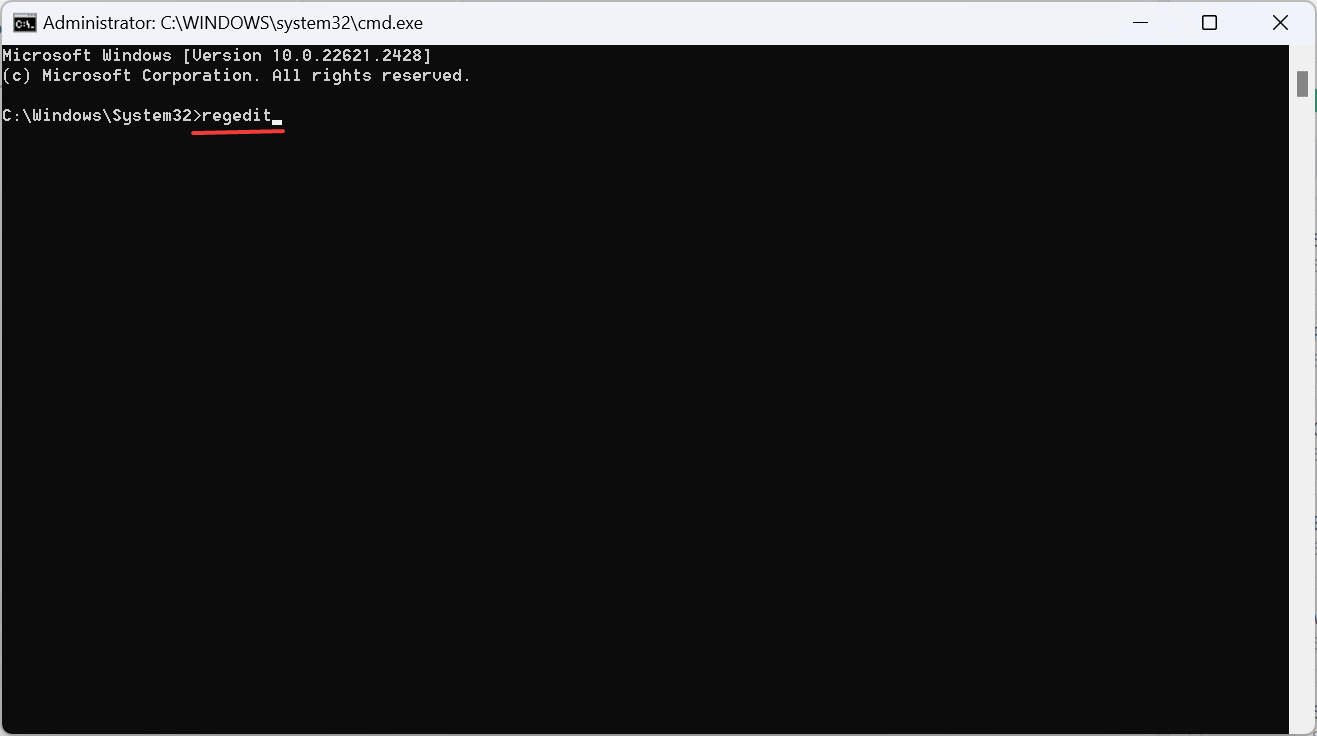
- Now, paste the following command and hit Enter:
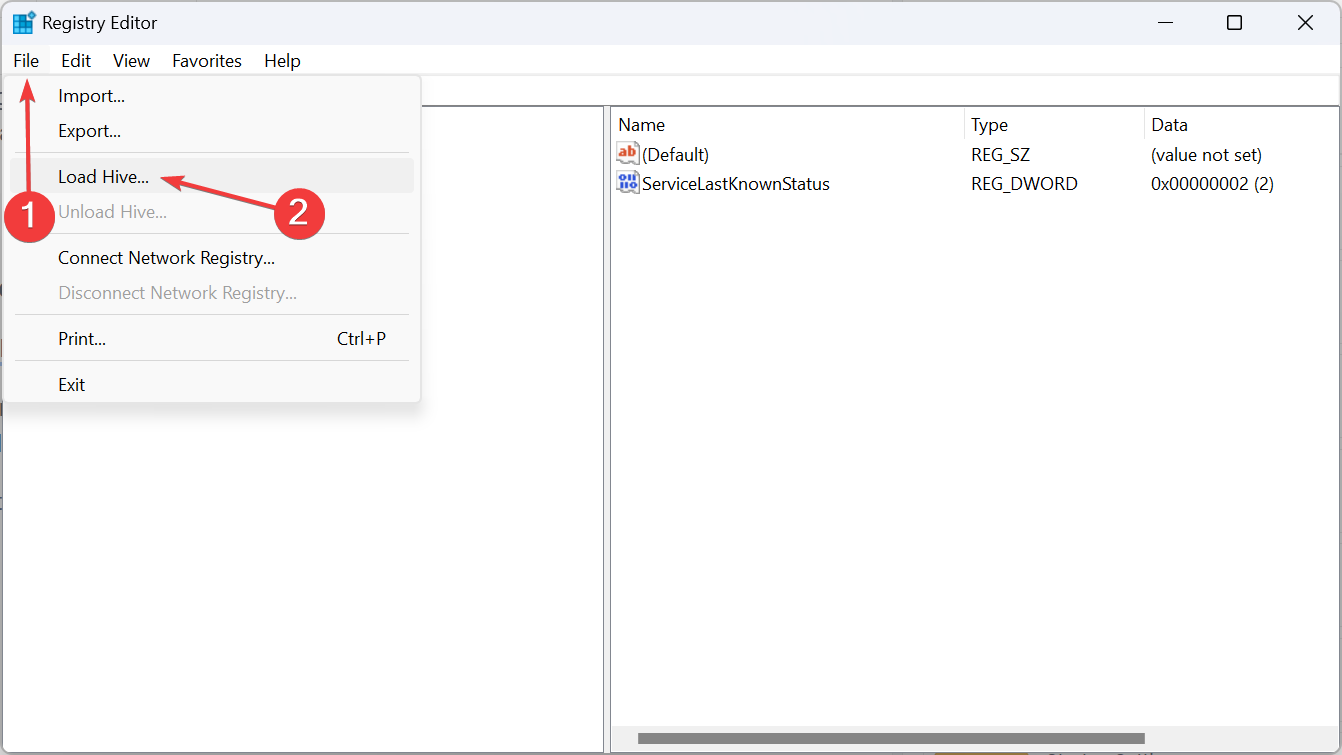
regedit - When the Registry Editor opens, select HKEY_LOCAL_MACHINE from the left pane, click the File menu, and select Load Hive.
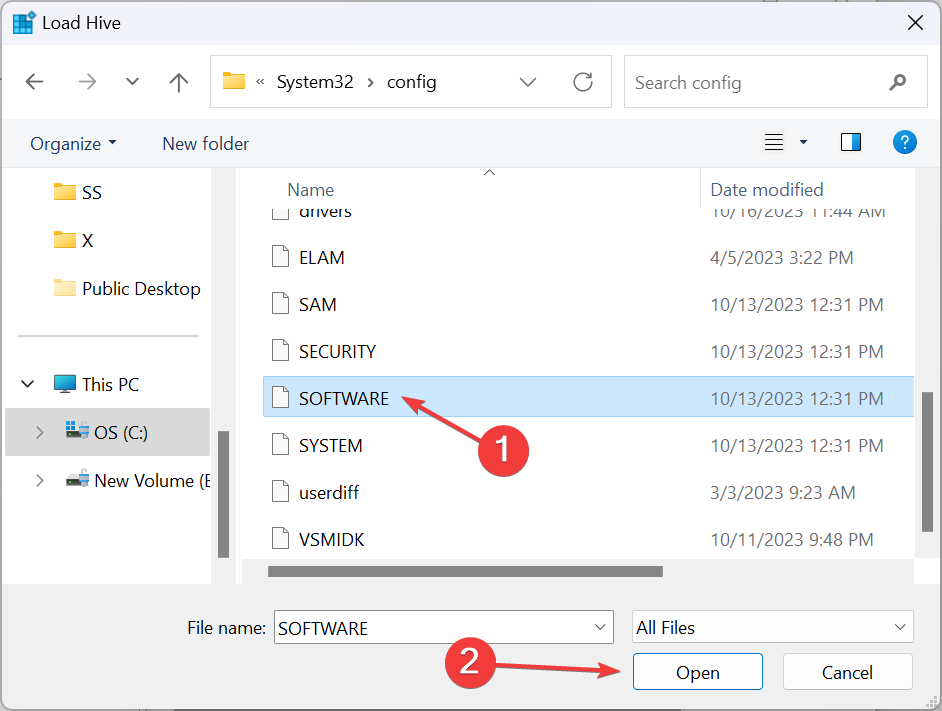
- Navigate the following path:
C:\Windows\System32\config - Select Software and click the Open button. If asked to enter a key name, use Software.
- Now, go to the following path using the navigation pane:
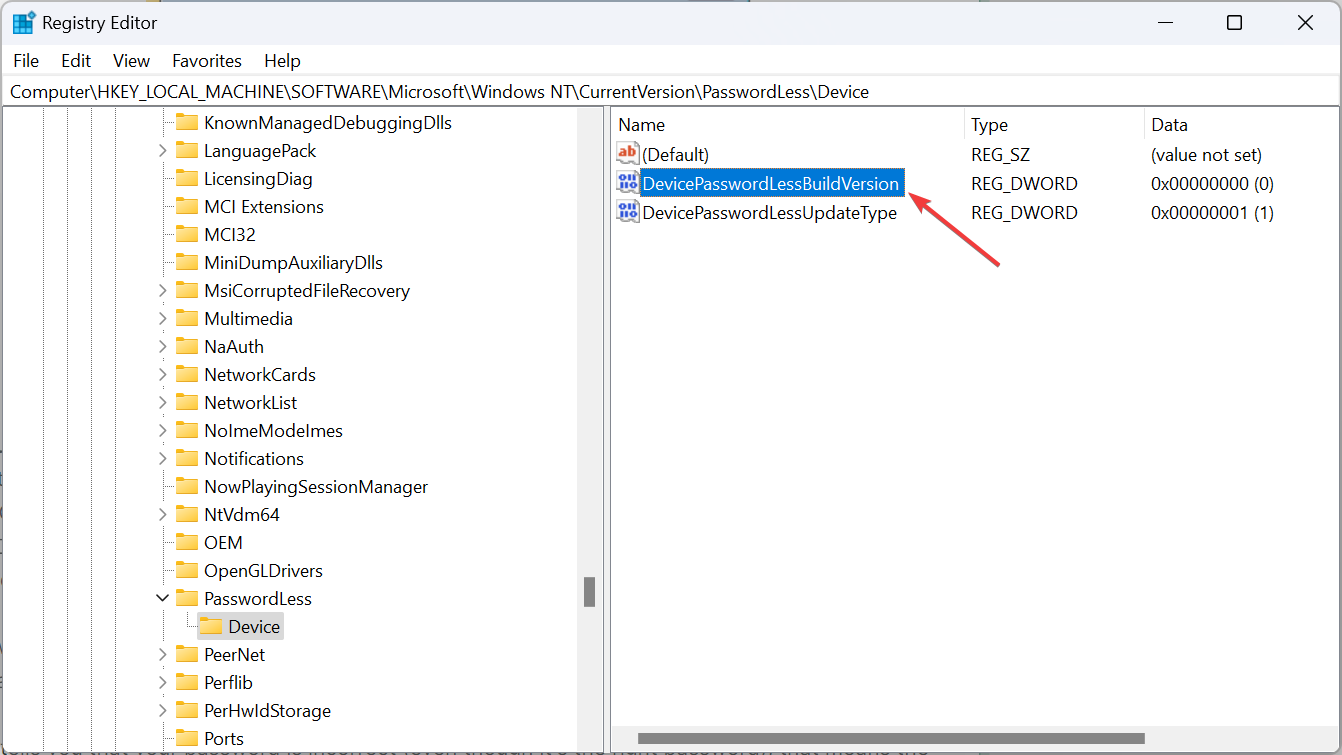
Computer\HKEY_LOCAL_MACHINE\SOFTWARE\Microsoft\Windows NT\CurrentVersion\PasswordLess\Device - Double-click the DevicePasswordLessBuildVersion DWORD on the right.
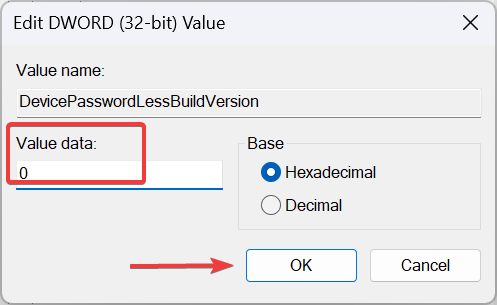
- Under the Value data field, enter 0 and click OK to save the changes.
- Restart the computer.
5. Reset the BIOS to the default settings
- Power off the computer, then turn it on and repeatedly hit the F2, F10, F12 or Delete key, depending on the system manufacturer, to enter the BIOS.
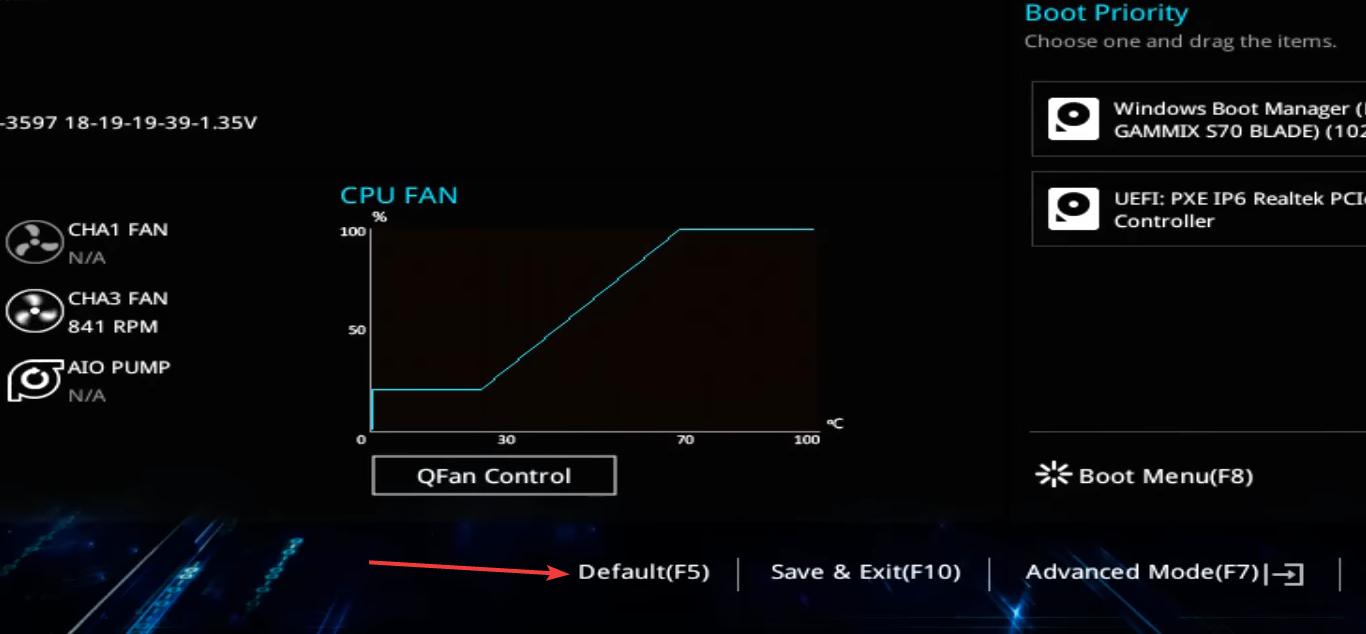
- Once in, select the Default or Reset defaults option. It could be on the main screen or within one of the sub-menus.
- Now, click OK to confirm the change, then restart the computer and check for improvements.
If you come across Your PIN is no longer available after a BIOS update, resetting the BIOS should do the trick!
6. Uninstall recent Windows updates
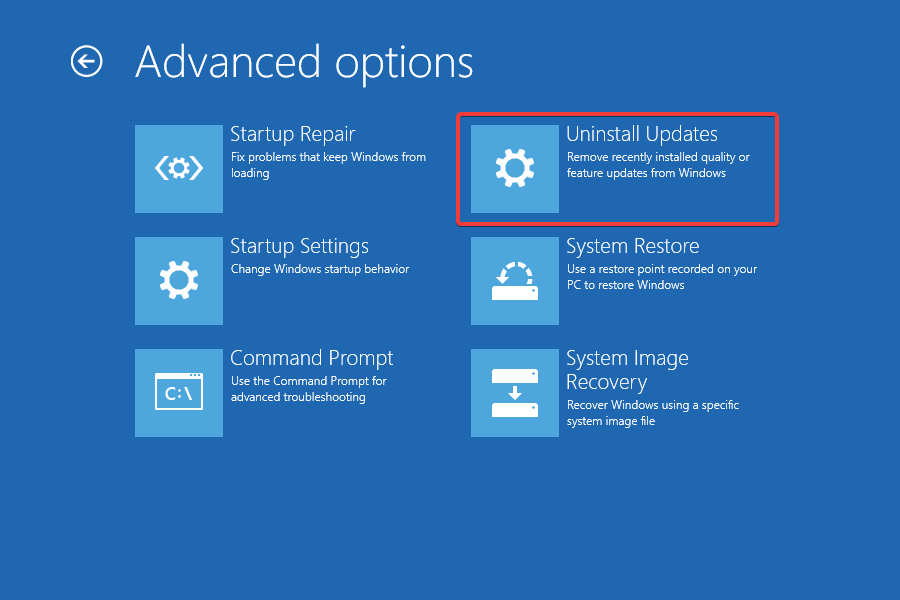
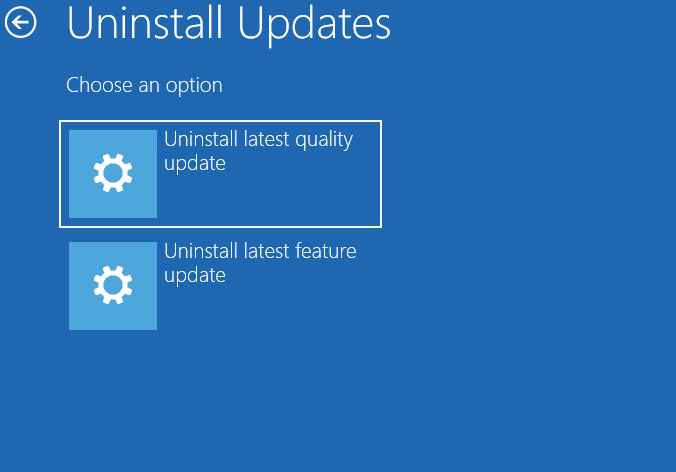
- Boot the PC into Windows Recovery Environment, and click on the Uninstall Updates option.
- Choose one of the entries depending on the update you want to remove, be it Uninstall latest quality update or Uninstall latest feature update. We recommend starting with the first and then moving to the second.
- Now, follow the on-screen instructions, choose the account and OS, and then confirm the uninstallation.
When the Your PIN is no longer available error appears in Windows 11, it could just as well be an update to blame. To fix things, simply uninstall the latest Windows update.
7. Reset the PC to factory settings
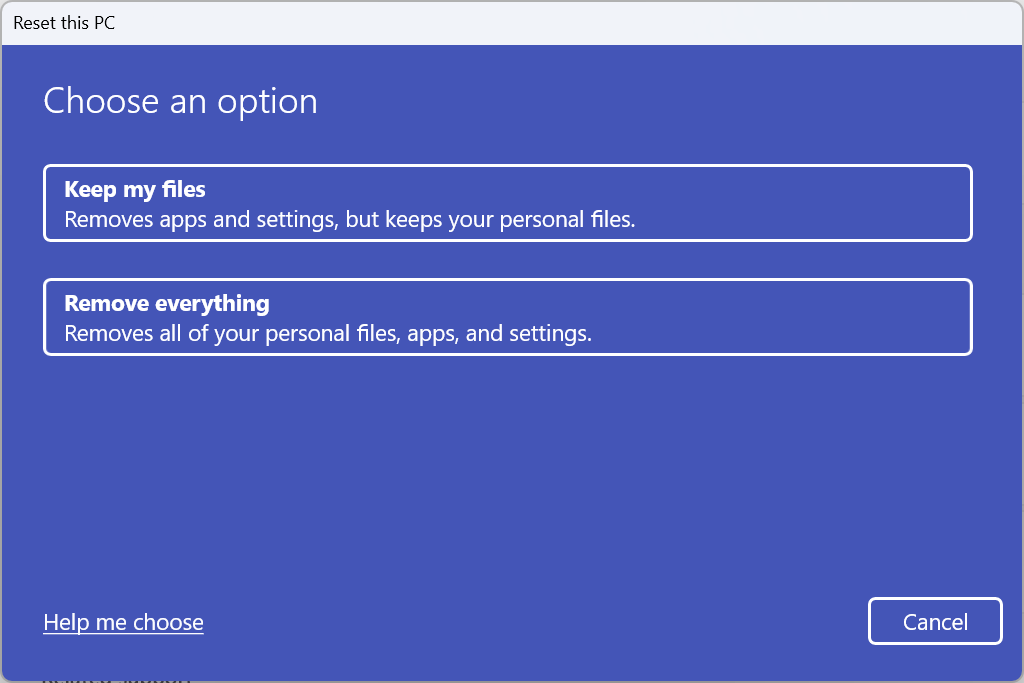
If nothing else works, another option is to reset Windows 11 to factory defaults. You will have to do it from Windows RE.
Remember, many users found that choosing Keep my files instead of Remove everything helped fix things! So, start with the former and choose Local Install. This will prevent any data loss. And it also works when you are unable to set up a PIN.
In case this, too, fails, you will have to create a bootable USB drive and reinstall Windows 11 through it. This will wipe out everything, including files and apps!
Error messages like Your pin is no longer available in Windows 11 are difficult to troubleshoot, and data loss is a likely outcome. You can prevent it with a systematic approach, but as per our findings, most had to reset the PC and start fresh.
Besides, many users encountered Error code 0xd0000225 due to similar underlying causes, and one of the solutions for it may work in this case.
Once you get your PIN back, consider changing your minimum PIN length to enhance security.
For any queries or to share what worked for you, drop a comment below.



User forum
1 messages