Snipping Tool: Recording Stopped Something Happened [Solved]
Make sure you are running the latest version
5 min. read
Published on
Read our disclosure page to find out how can you help Windows Report sustain the editorial team. Read more
Key notes
- To fix the Snipping Tool Recording stopped error, repair/reset the app, switch to the high-performance GPU, or change the projection mode.
- The problem arises due to misconfigured settings, conflicts between components, or a bug in the app.
- Keep reading to find out how our Windows Report experts fixed things!
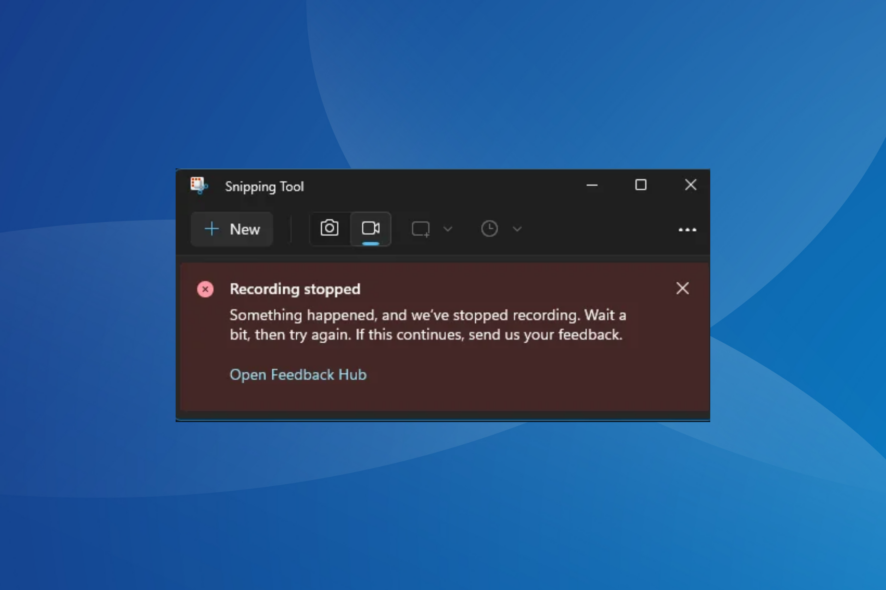
Snipping Tool is Windows’ built-in screen capture and recording utility. But when using the latter functionality, many got the Recording stopped error with a message that read, Something happened and we’ve stopped recording. Wait a bit, then try again. If this continues, send us your feedback.
The Recording stopped error primarily affected devices running Windows 11. What happens is, when you click the Record button, the Snipping Tool app will start the countdown and then immediately freeze while displaying the error message.
Why does Snipping Tool randomly stop working?
This is due to a bug in the app, given the high number of users facing the issue. More so, many reported that the Snipping Tool may automatically start working after a restart. Besides, conflicts with the graphics adapter (card) or misconfigured projection mode can also trigger the error.
How do I fix the Snipping Tool Recording stopped error?
Before we start with the slightly complex solutions, try these quick ones:
- Make sure you are running the latest version of Windows. Install any pending optional updates as well.
- Repair the corrupt system files using the DISM commands and SFC scan. This also helps when Snipping Tools keeps crashing.
- Terminate any active focus session or uninstall apps added around the same time the error first appeared.
1. Update Snipping Tool
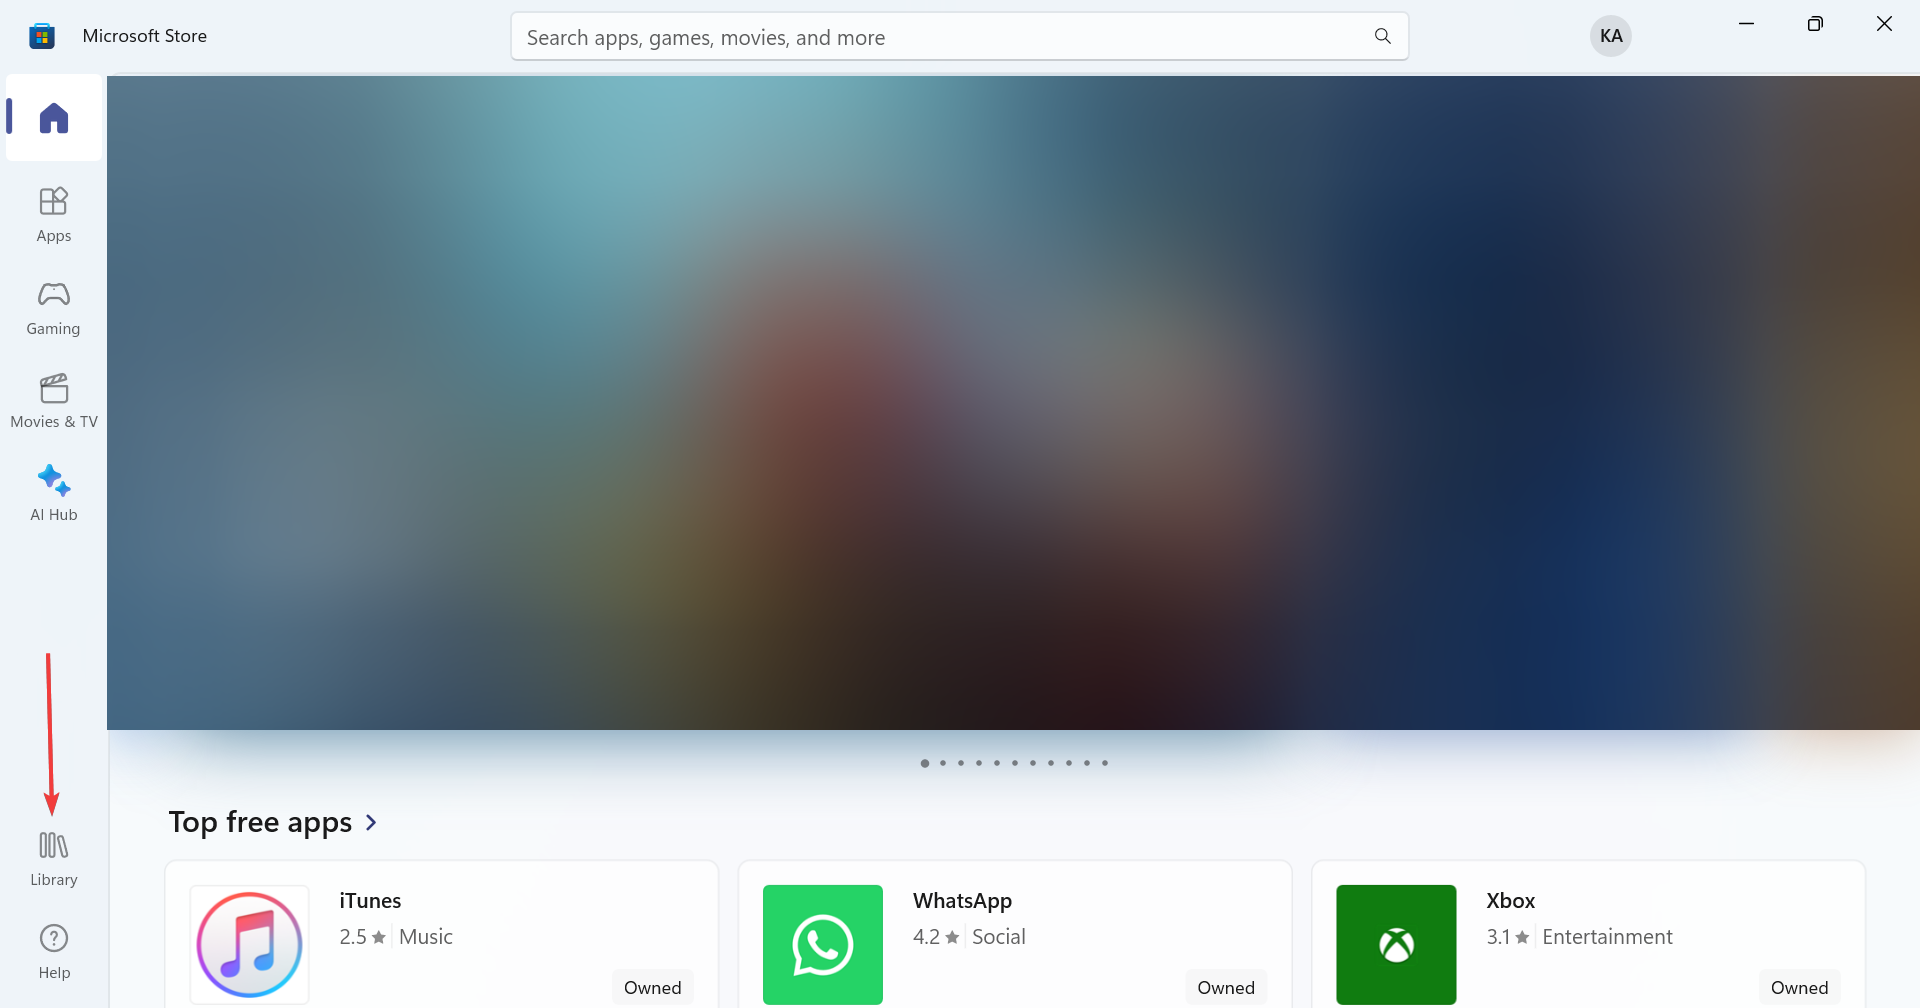
- Press Windows + S to open Search, type Microsoft Store in the text field, and click on the relevant result.
- Click the Library icon near the bottom-left corner.
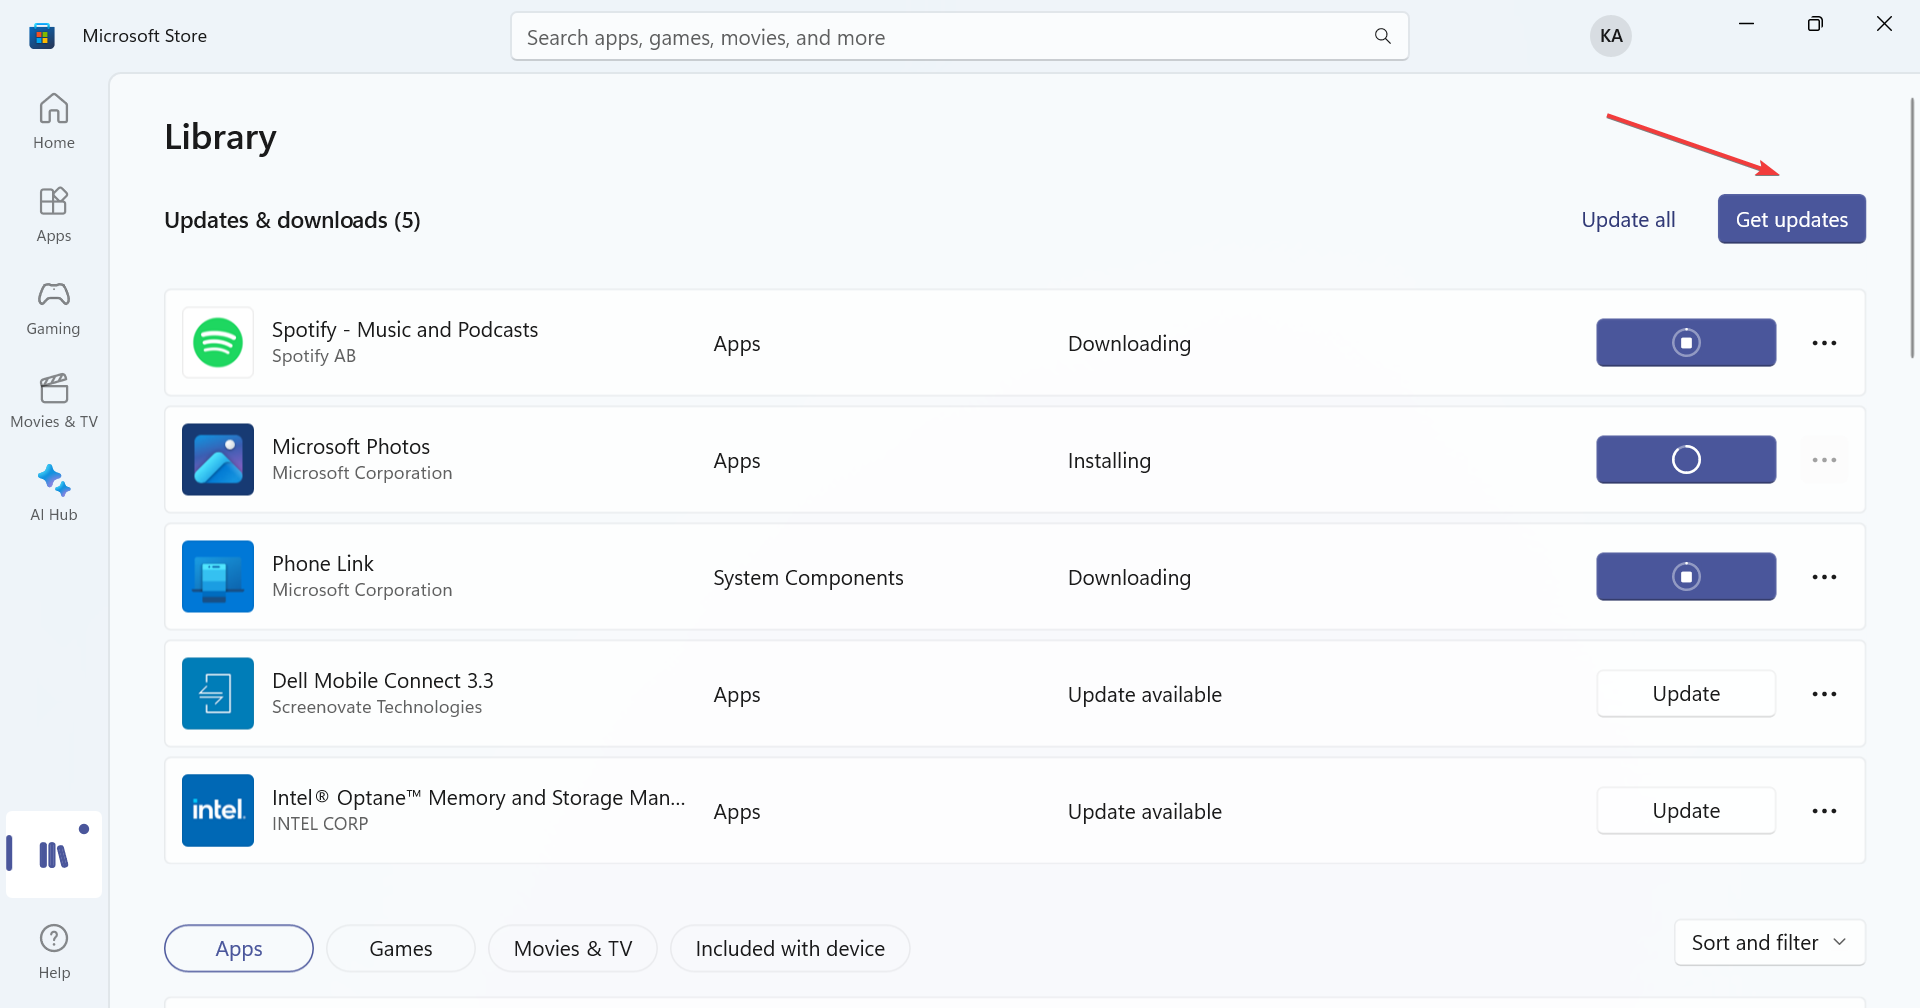
- Now, click the Get updates button.
- If an update is listed for the Snipping Tool, make sure to download it and then check for improvements.
2. Repair/reset the app
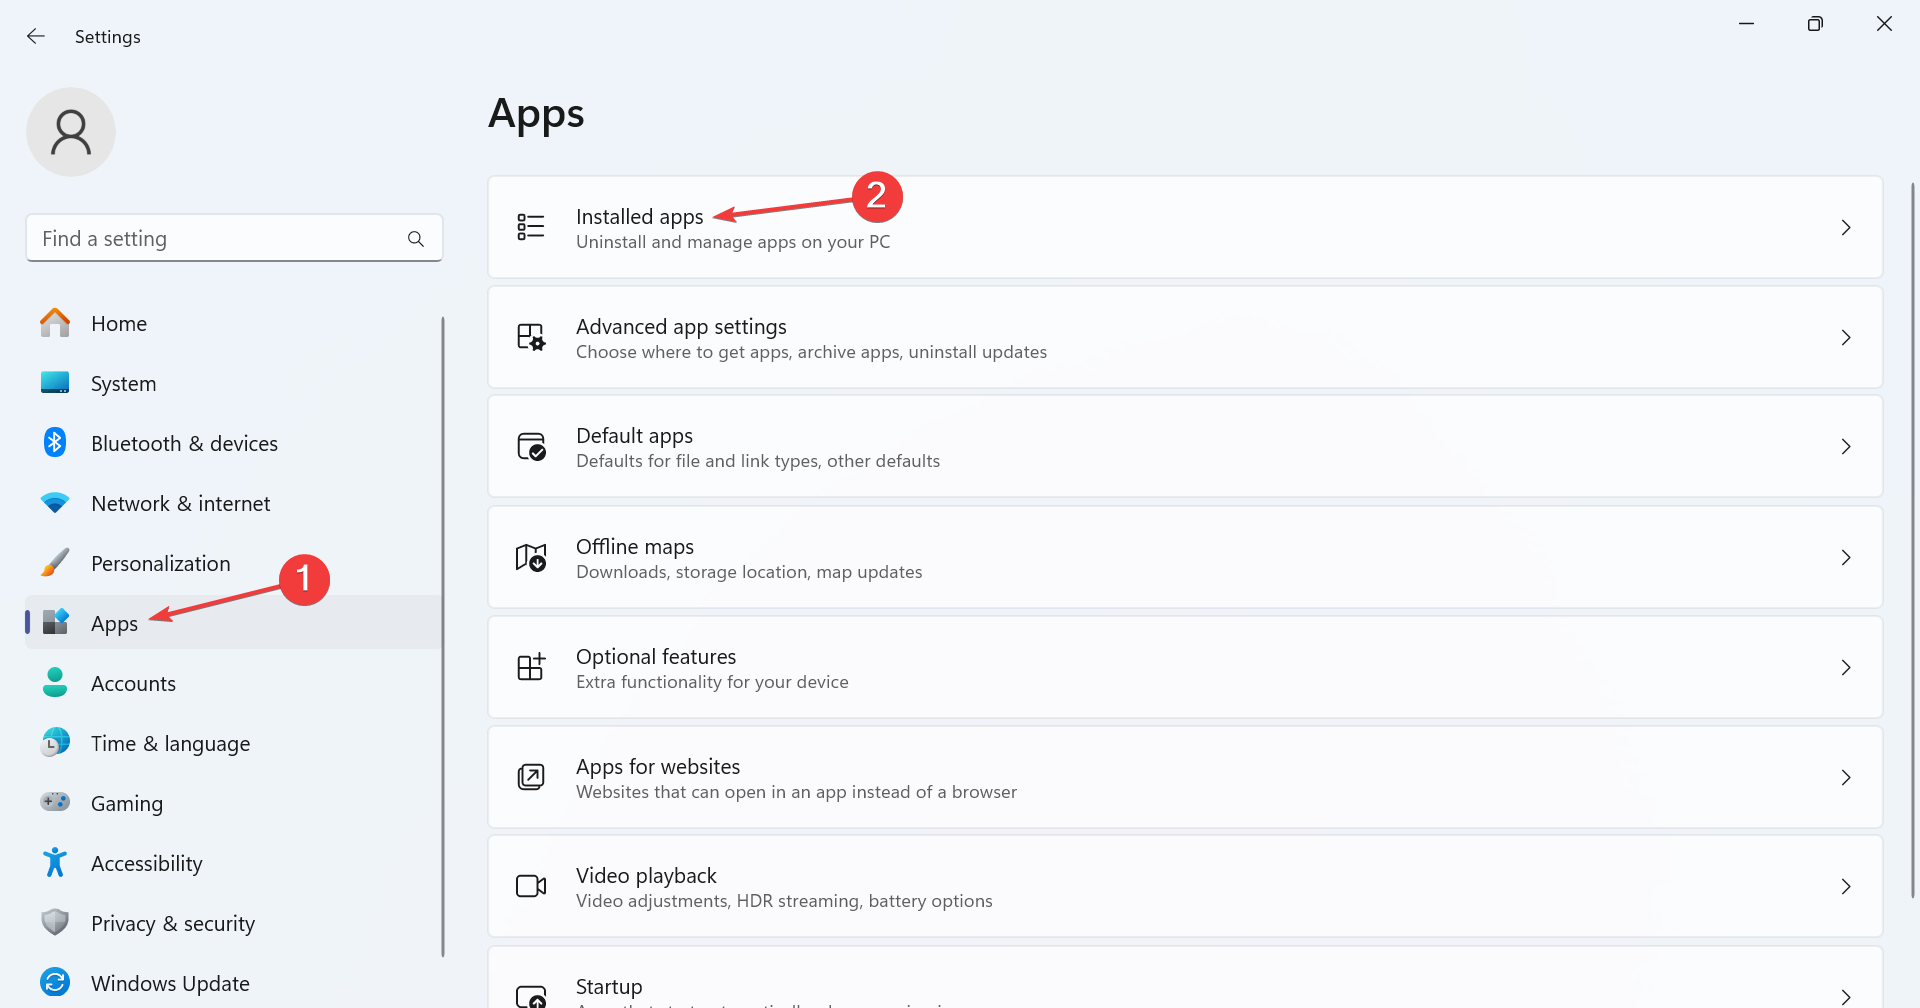
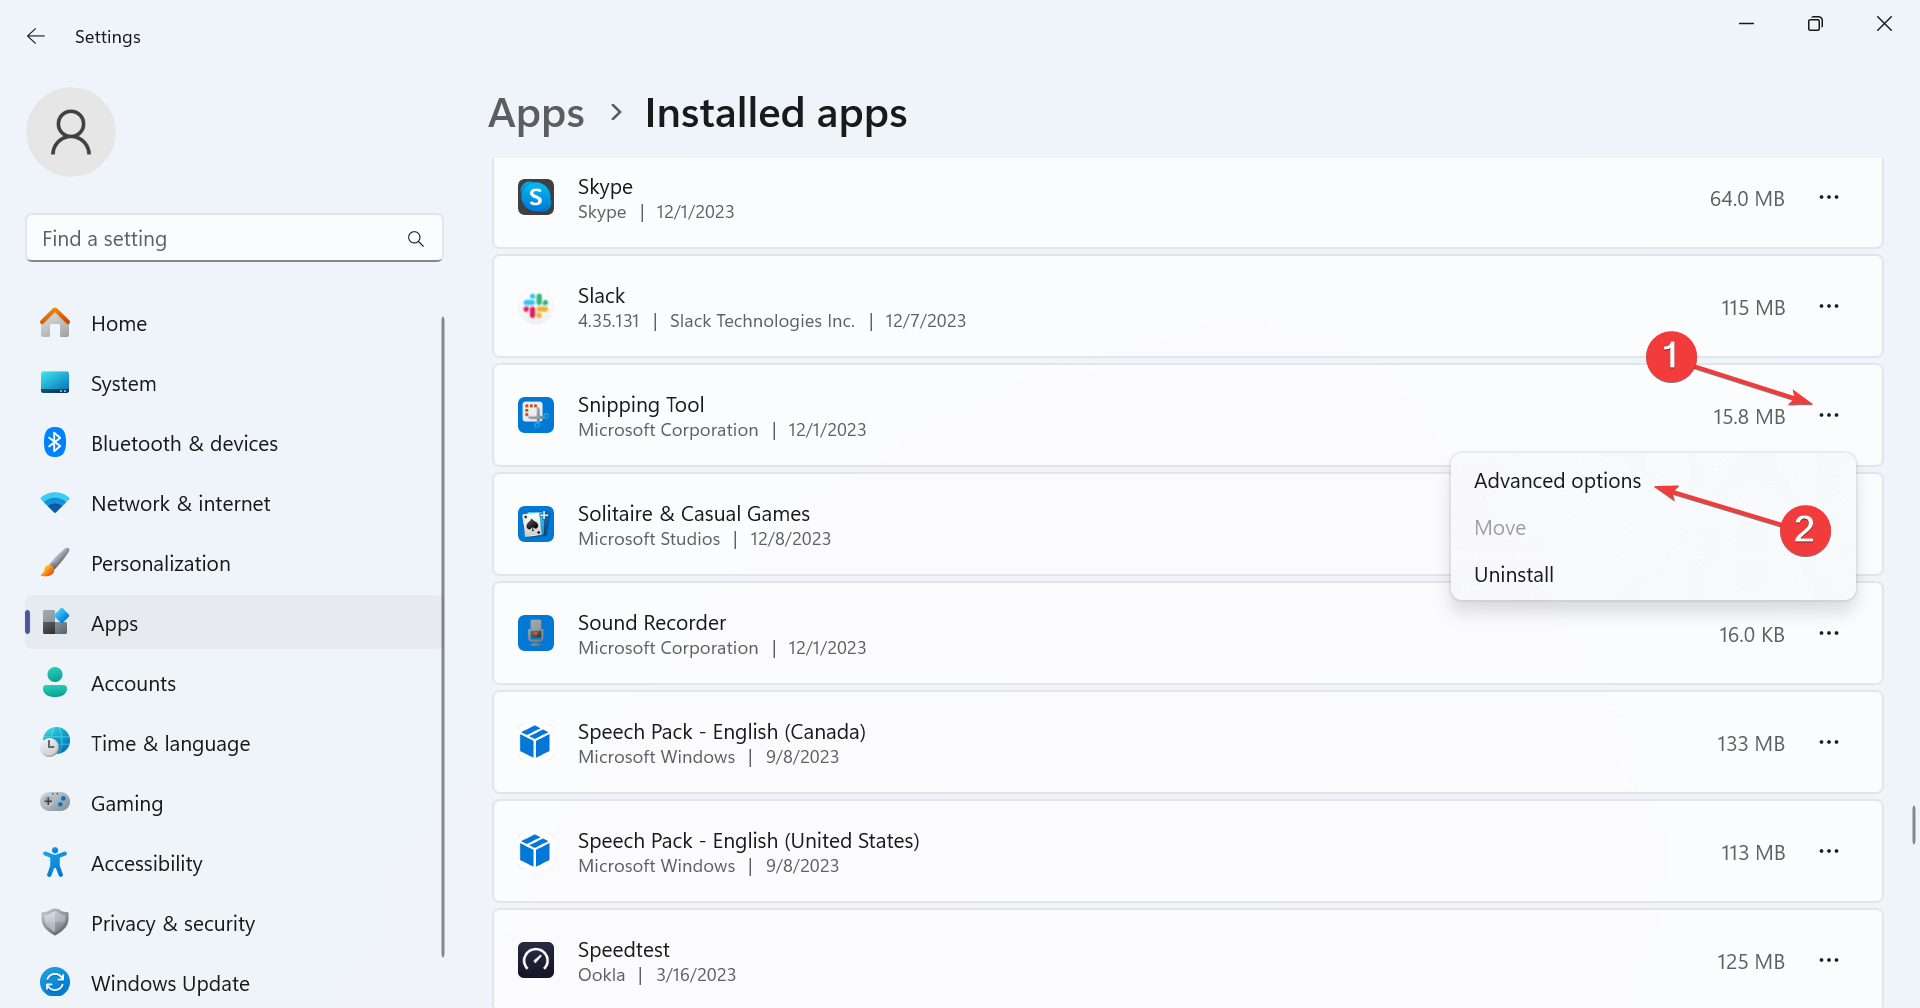
- Press Windows + I to open Settings, go to Apps from the navigation pane, and then click on Installed apps.
- Click the ellipsis next to Snipping Tool, and select Advanced options from the flyout menu.
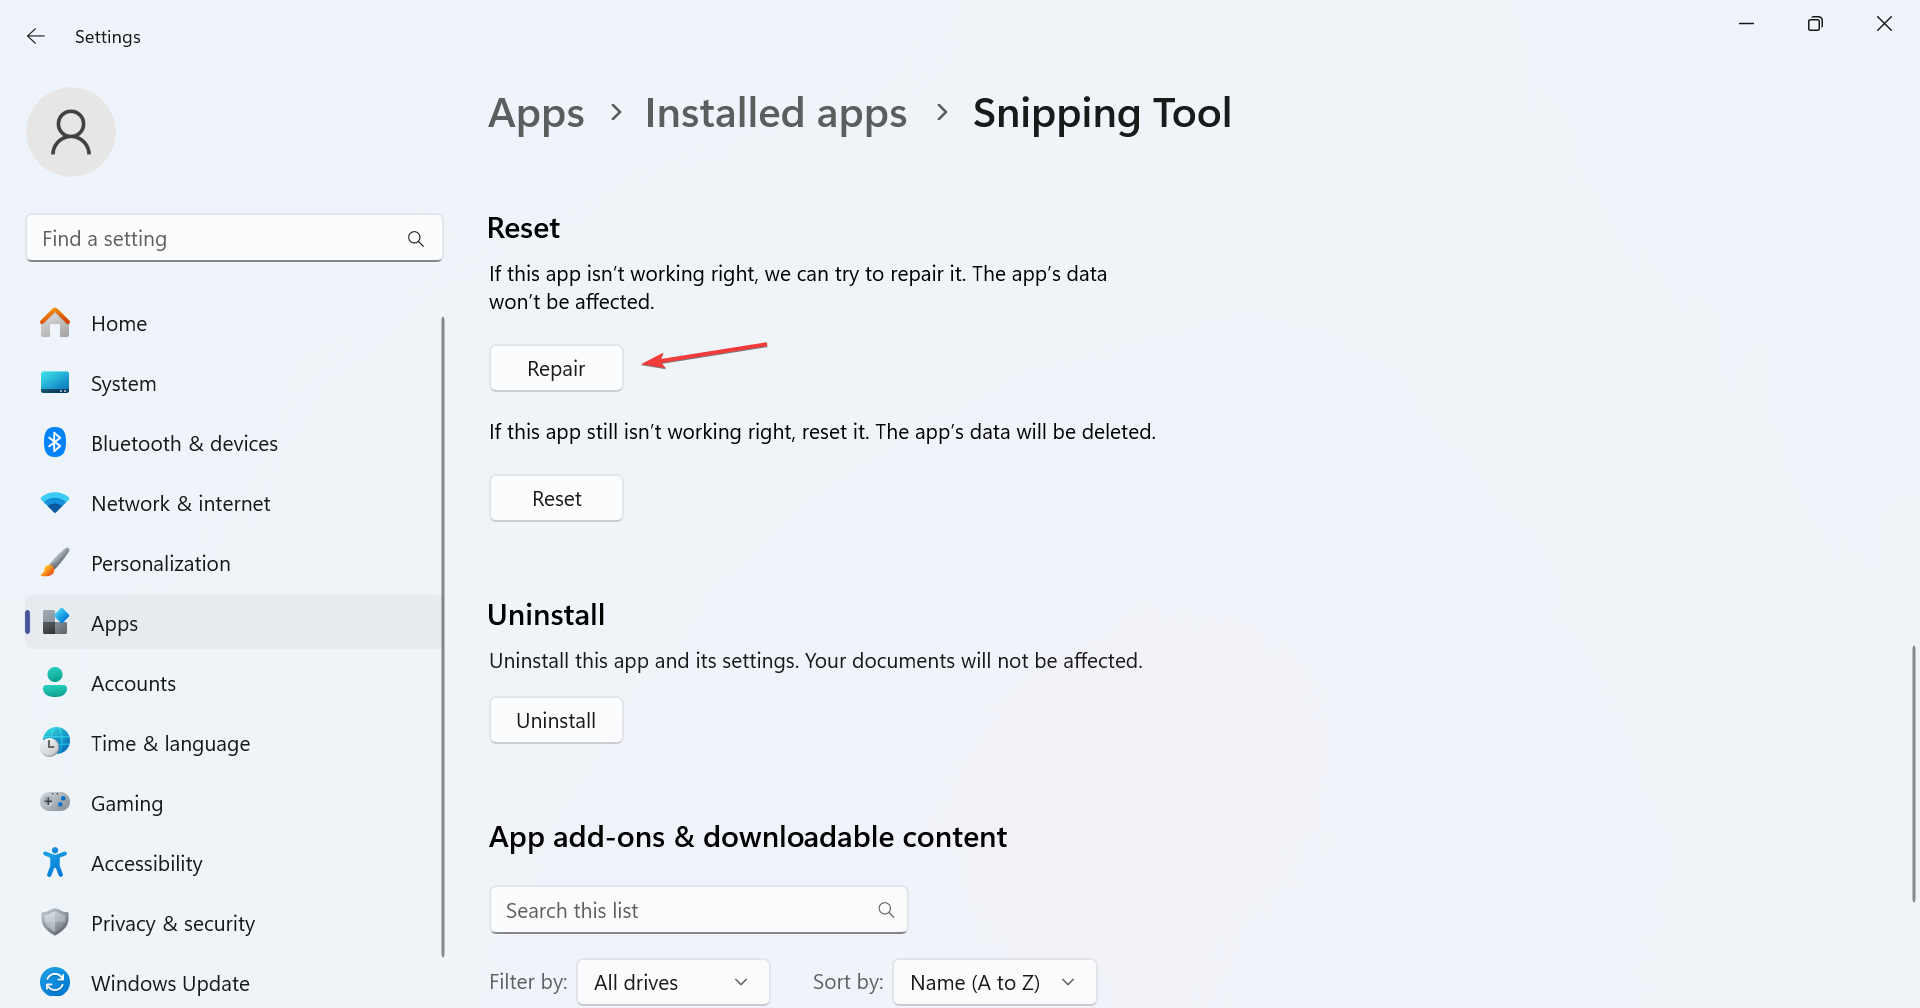
- Scroll down, click the Repair button, and once done, check for improvements.
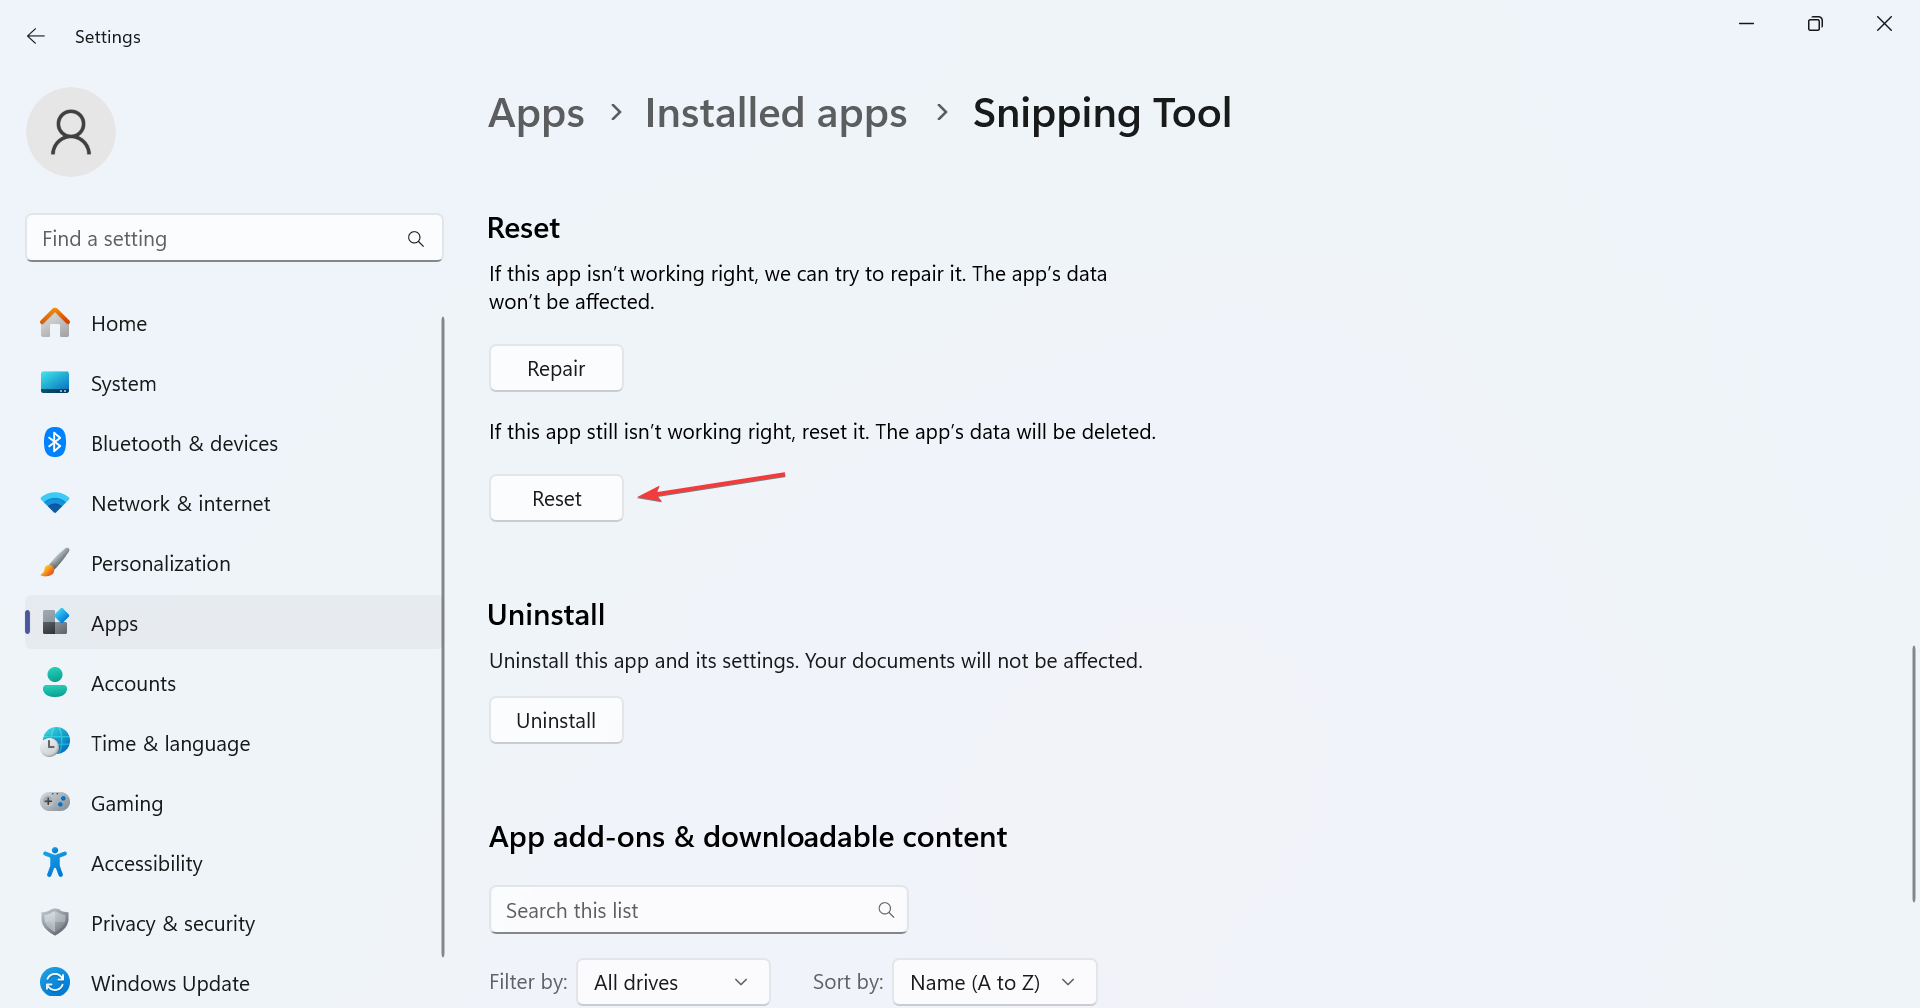
- If the error persists, click on Reset.
- Again, click Reset in the confirmation prompt.
Repairing or resetting the app often fixes issues with it. With the latter, you basically reinstall the app and set the configured settings to default, which might be the reason behind the Snipping Tool Recording stopped error. This also helps when Snipping Tool is too slow.
3. Switch to high-performance GPU
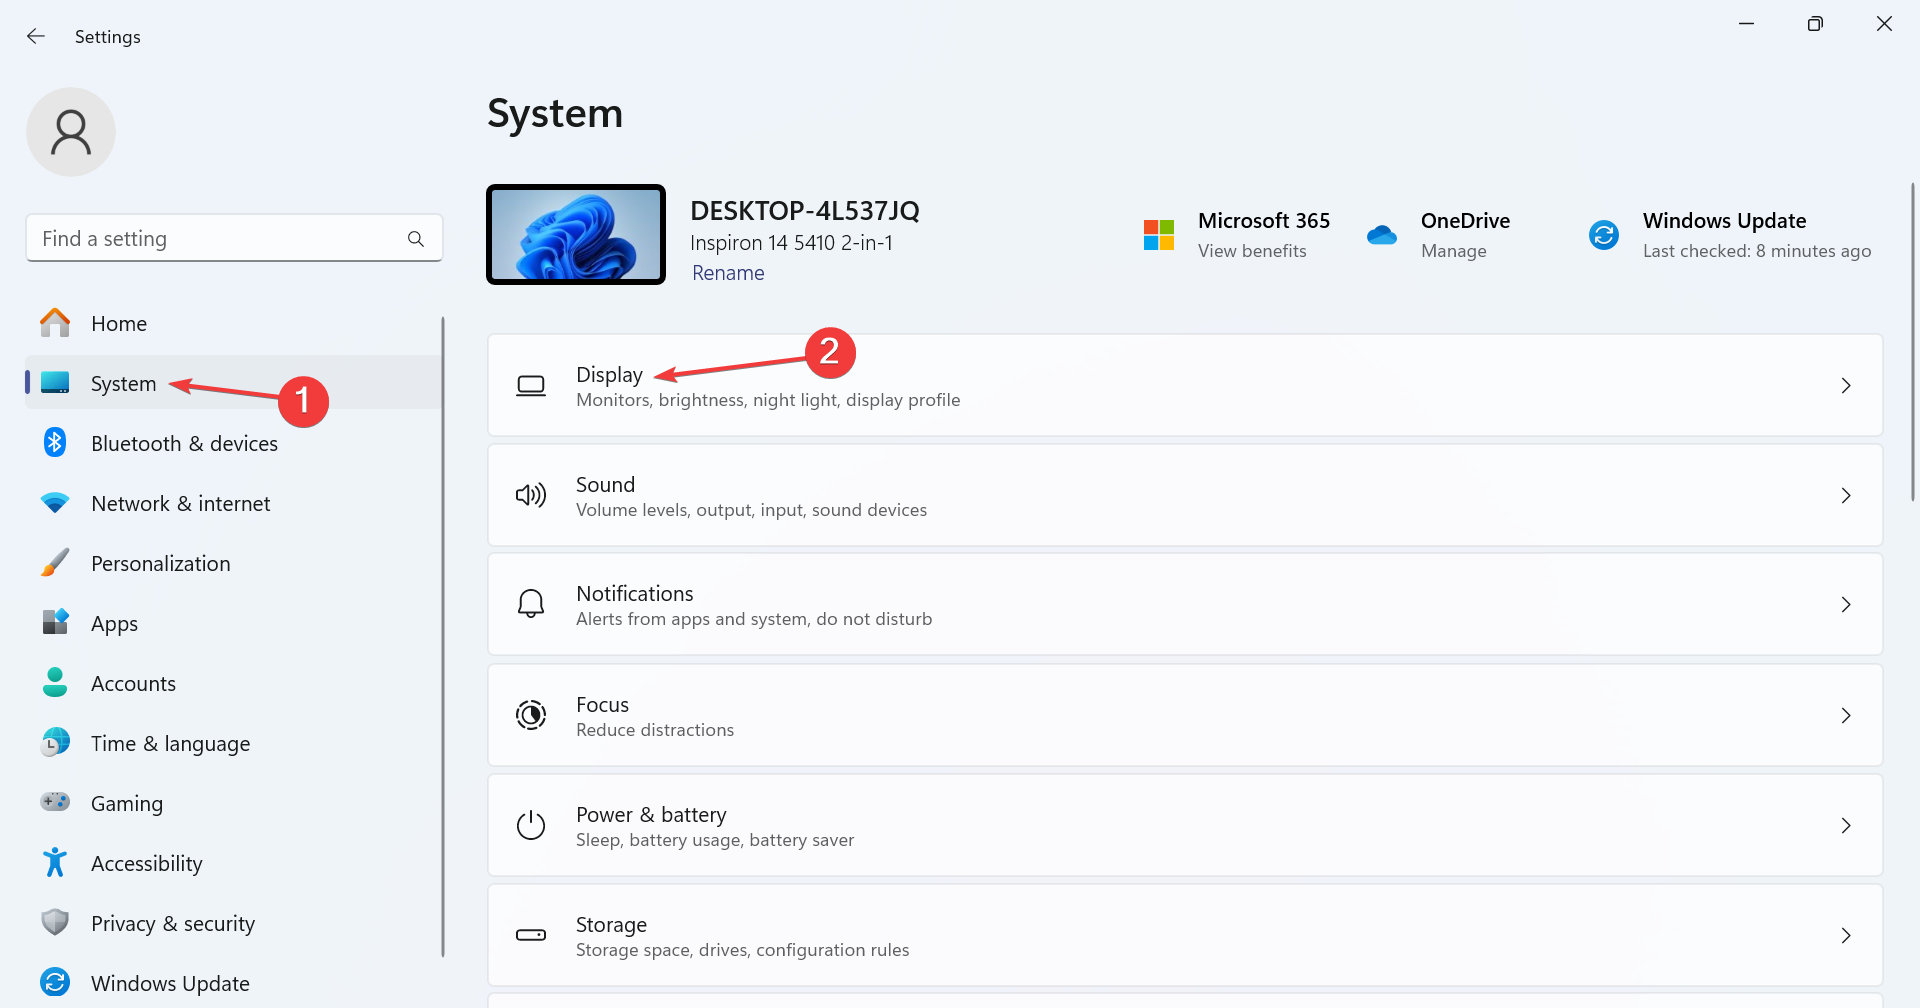
- Press Windows + I to open Settings, go to System from the left pane, and then click on Display.
- Scroll down to the bottom and click on Graphics under Related settings.
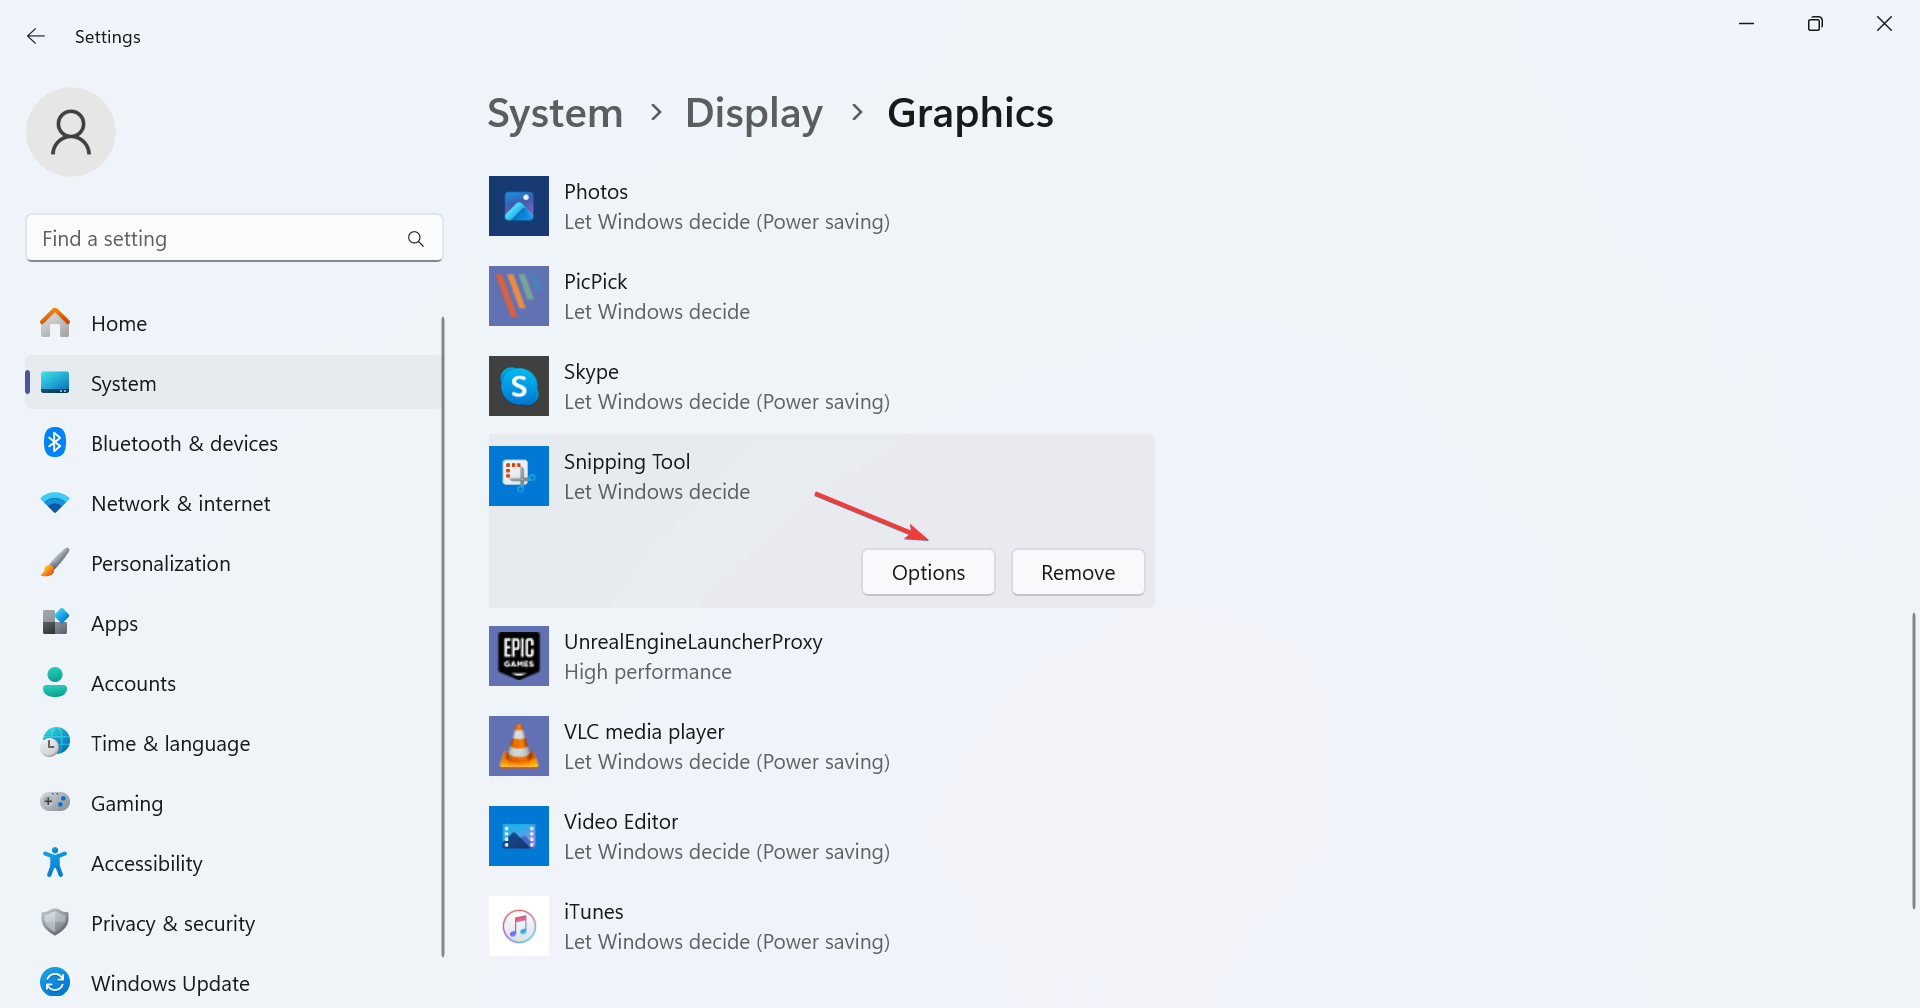
- Select Microsoft Store app from the Add an app dropdown menu, and click the Browse button.
- Select Snipping Tool from the list.
- Click the Options button under Snipping Tool.
- Select High performance and then click on Save.
- Restart the computer and check for improvements.
If you also have the Specific GPU option, try out the different graphic adapters listed under it and verify whether the Snipping Tool’s Recording stopped something happened error message goes away.
4. Disable additional graphics adapters
 NOTE
NOTE
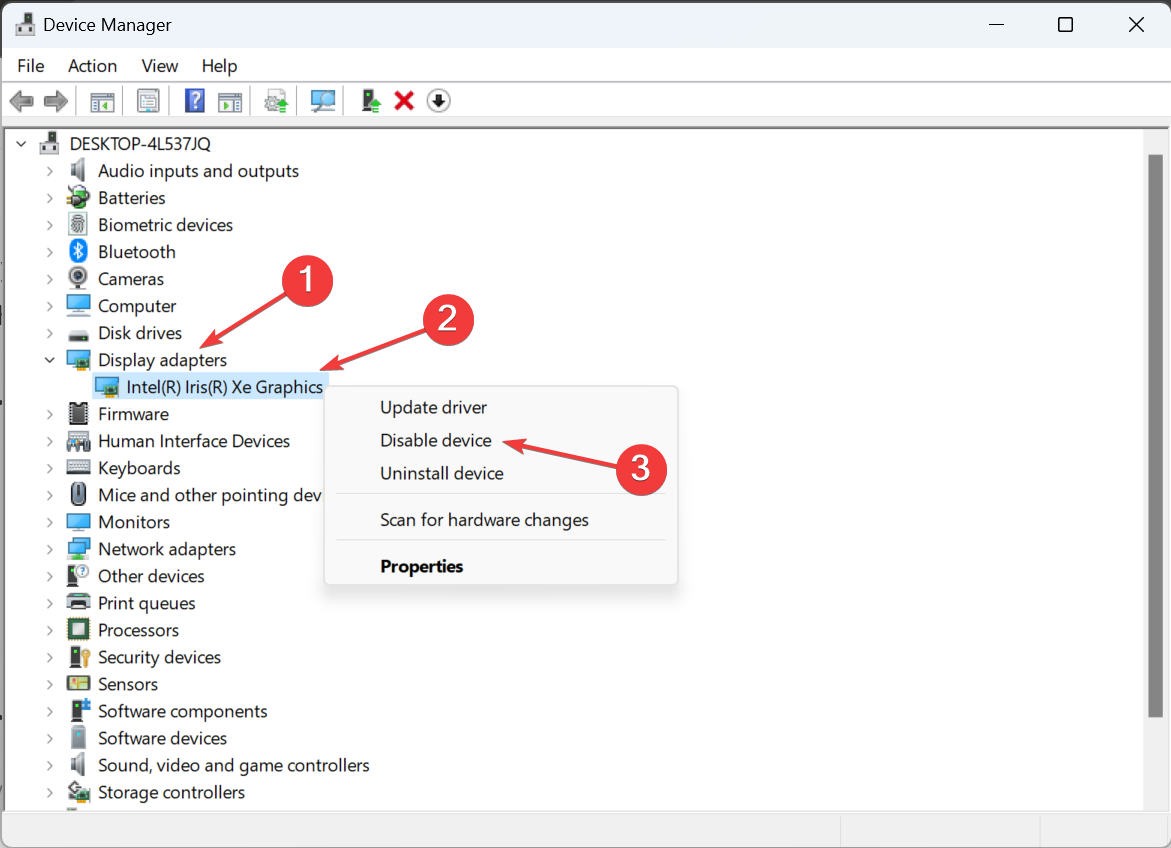
- Press Windows + X to open the Power User menu, and select Device Manager from the list of options.
- Expand the Display adapters entry, right-click on any one of the graphics adapter, and select Disable device.
- Click Yes in the confirmation prompt.
If you have multiple graphic cards available, disable each individually while running just one. For some, disabling Intel Graphics did the trick, while others got things up and running after disabling the NVIDIA adapter.
5. Change the projection mode
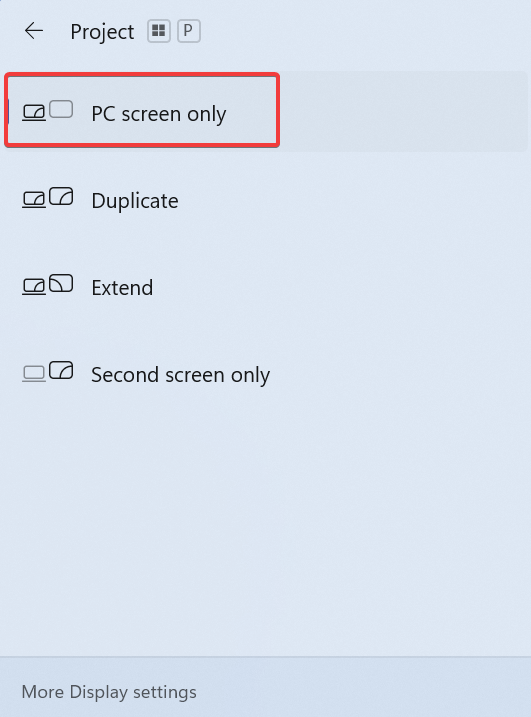
- Go to the desktop and press Windows + P.
- Select PC screen only from the listed projection modes.
- Launch Snipping Tool and try recording again.
6. Change the file save location
- Press Windows + E to open File Explorer, paste the following path in the address bar while replacing Username with the current profile name and hit Enter:
C:\Users\Username - Right-click on the Videos folder and select Properties.
- Go to the Location tab and click on Move.
- Choose another path for the directory, and click on Select Folder.
- Once done, click Apply and OK to save the changes.
For some users, the recordings were saved to the Captures folder under Videos. In this case, you should change its location instead.
7. Perform an in-place upgrade
- Go to Microsoft’s official website, select the OS edition and product language, and then download the Windows 11 ISO.
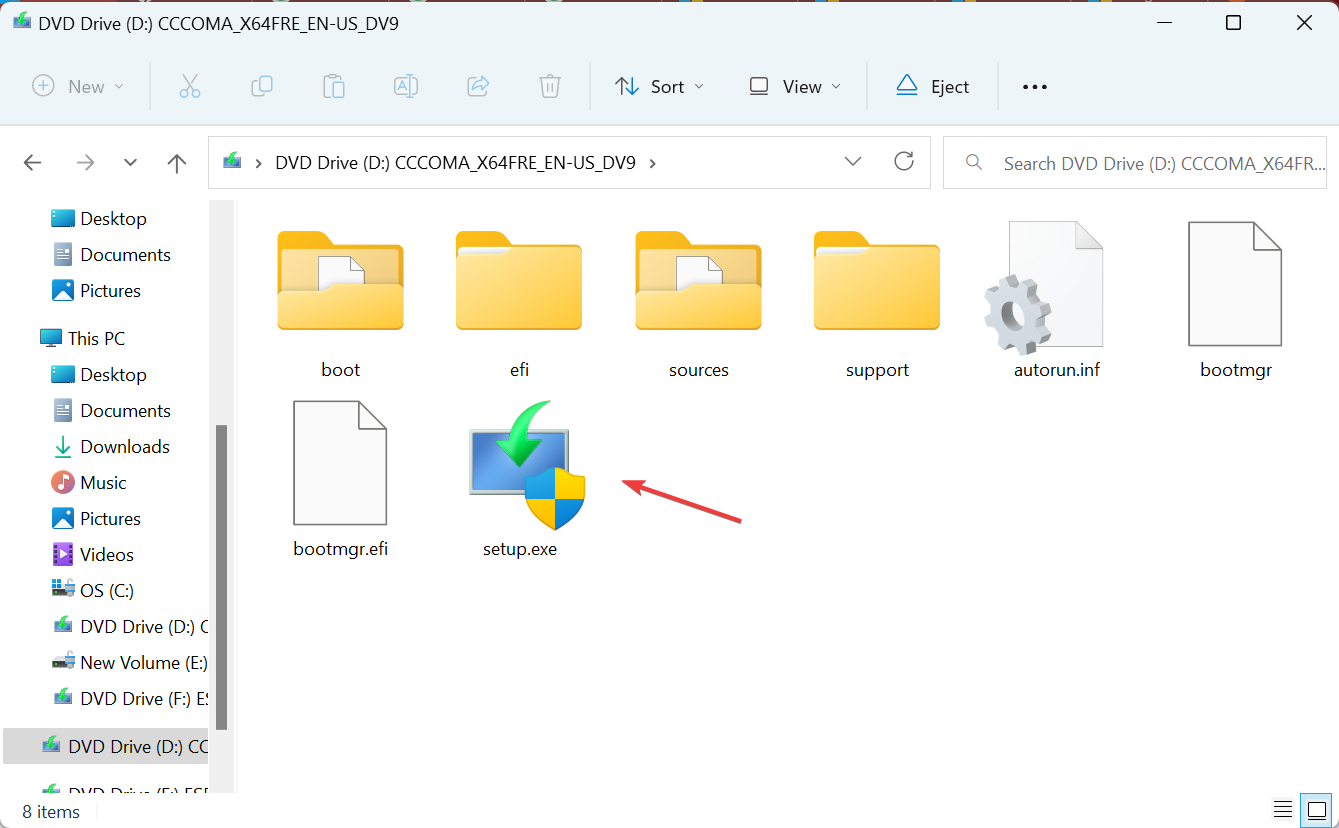
- Double-click the ISO file and click Open in the confirmation prompt.
- Run the setup.exe file.
- Click Yes in the UAC prompt.
- Click Next in the Windows 11 Setup to proceed.
- Check the license terms, and click on Accept.
- Make sure the setup says, Keep personal files and apps, and click on Install.
- Now, wait for the process to complete. It may take a few hours.
When nothing else helps, and Snipping Tool keeps freezing in video mode or throws an error, the last option is to perform a repair upgrade. This is the same as reinstalling Windows but doesn’t affect the stored files and apps.
By now, you should have fixed the Snipping Tool Recording stopped something happened error. If the problem persists, wait for Microsoft to release a patch since this is most likely a problem with the app itself.
For the time being, switch to an effective snipping tool for Windows. These are even better in most ways!
For any queries or to share what worked for you, drop a comment below.






User forum
0 messages