When I Connect to VPN, I Lose Internet - How to Fix It [Windows 11]
Fix your VPN setup and try our recommendation for a stable connection
7 min. read
Updated on
Read our disclosure page to find out how can you help Windows Report sustain the editorial team. Read more
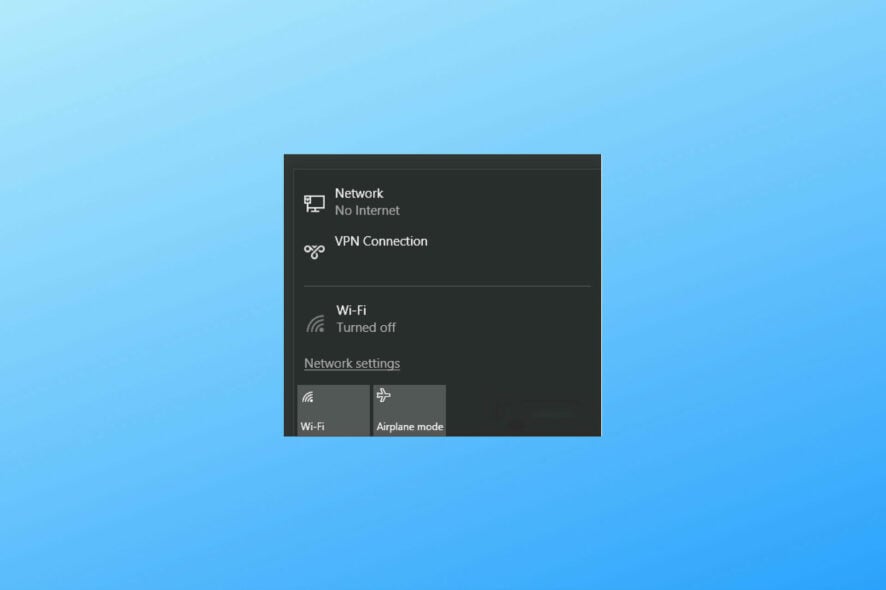
If you wonder what can you do if when you connect to the VPN you lose your Internet connection, you’re in the right place!
We found applicable fixes for all known causes of this bug/error.
Why does my Internet disconnect when I connect to VPN?
The main reasons why you lose Internet when connecting to VPN include:
- Faulty DNS settings, incompatible with your VPN client
- Outdated or corrupt VPN software
- Connecting to a server that has problems or is down
- Security software like firewall or antivirus blocking VPN
In the following guide, we will show you what you can do to fix these issues. So if when you connect to VPN you lose Internet in Windows 11 or in Windows 10, make sure to try the upcoming solutions.
What can I do if the Internet disconnects when connected to a VPN?
1. Check your Internet
First, let’s see if there are any issues that are caused by your network, and not your VPN. ❗Disconnect from your VPN and follow the steps below:
1.1. Check Network and Internet status
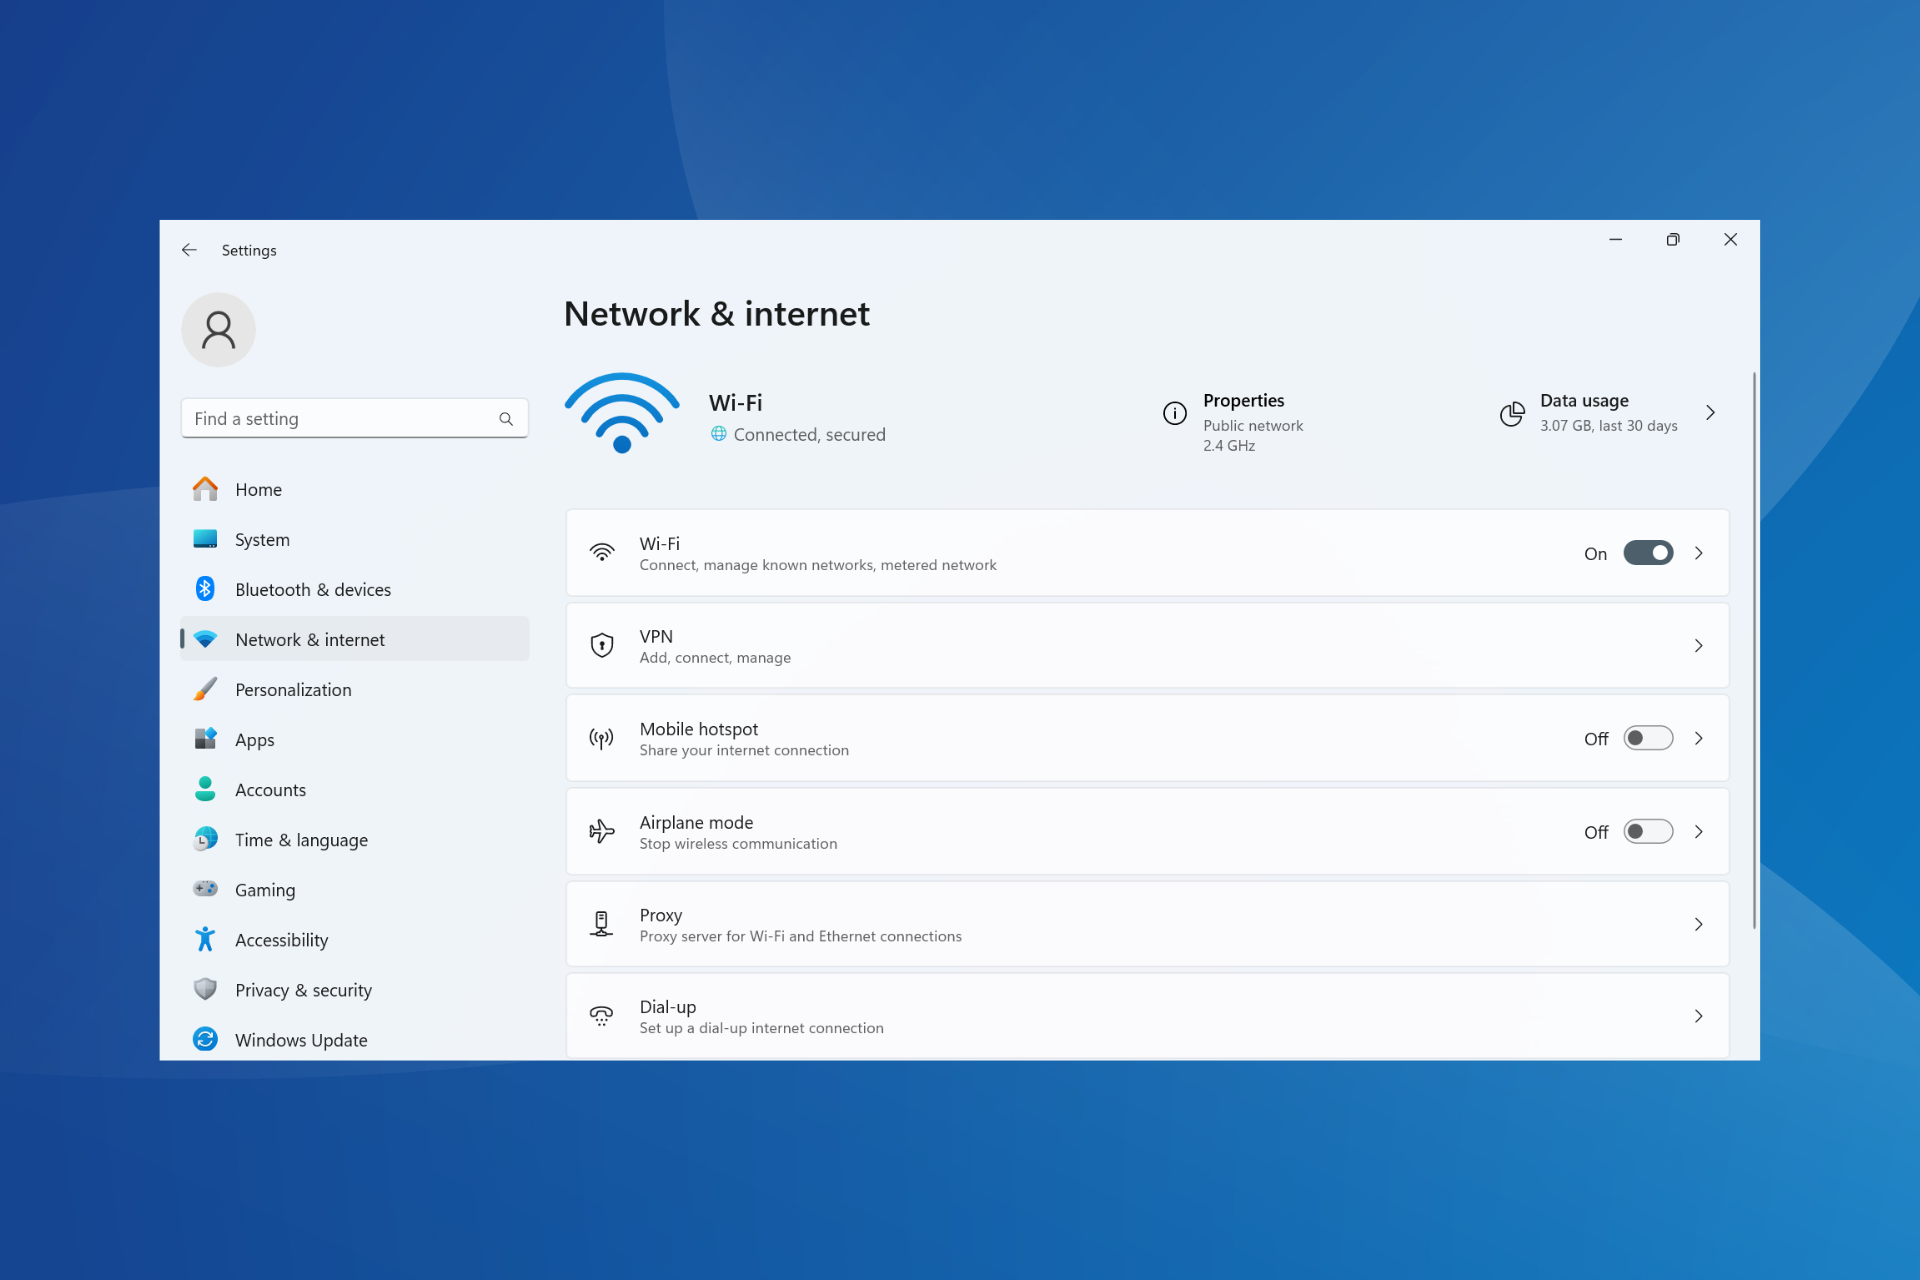
- Go to Start and then select Settings.
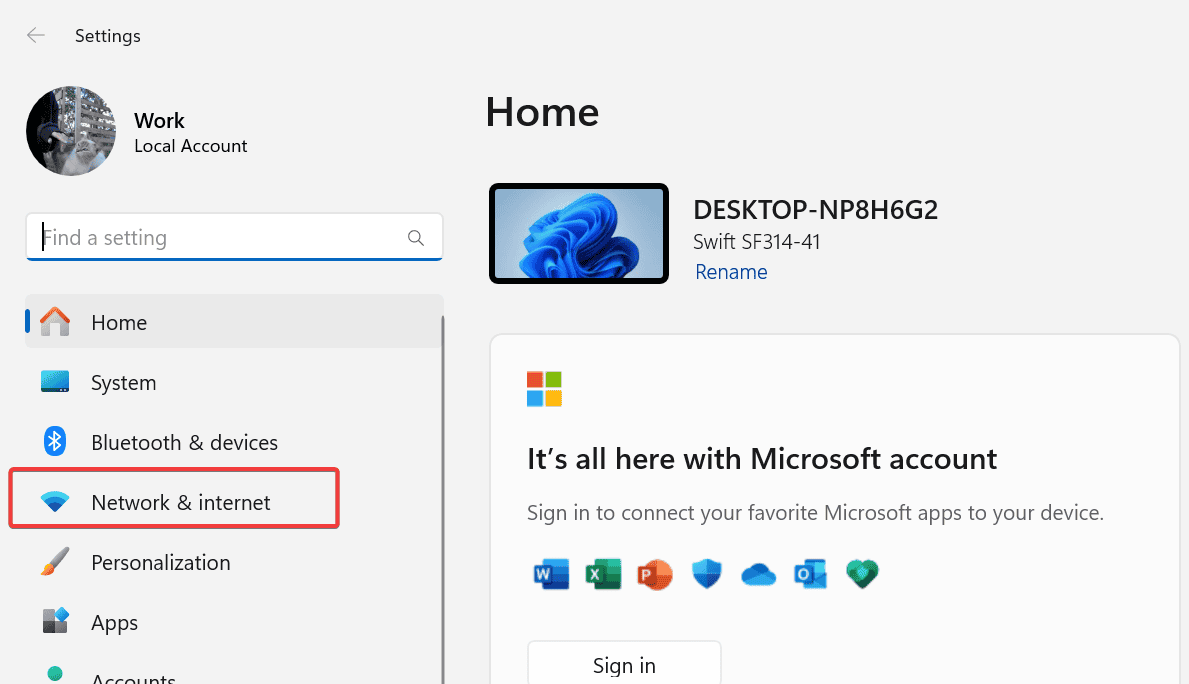
- Open Network and Internet.
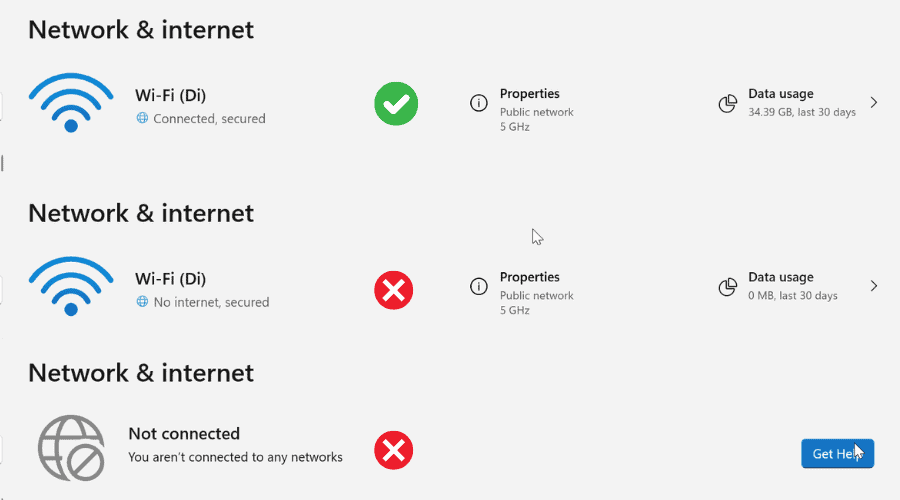
- You’ll see the Network status up in the main menu. If it’s says “Connected, secured”, your connection is fine. But if it says “Not connected” or “No internet”, there is an issue and you should troubleshoot it:
1.2. Run the network troubleshooter
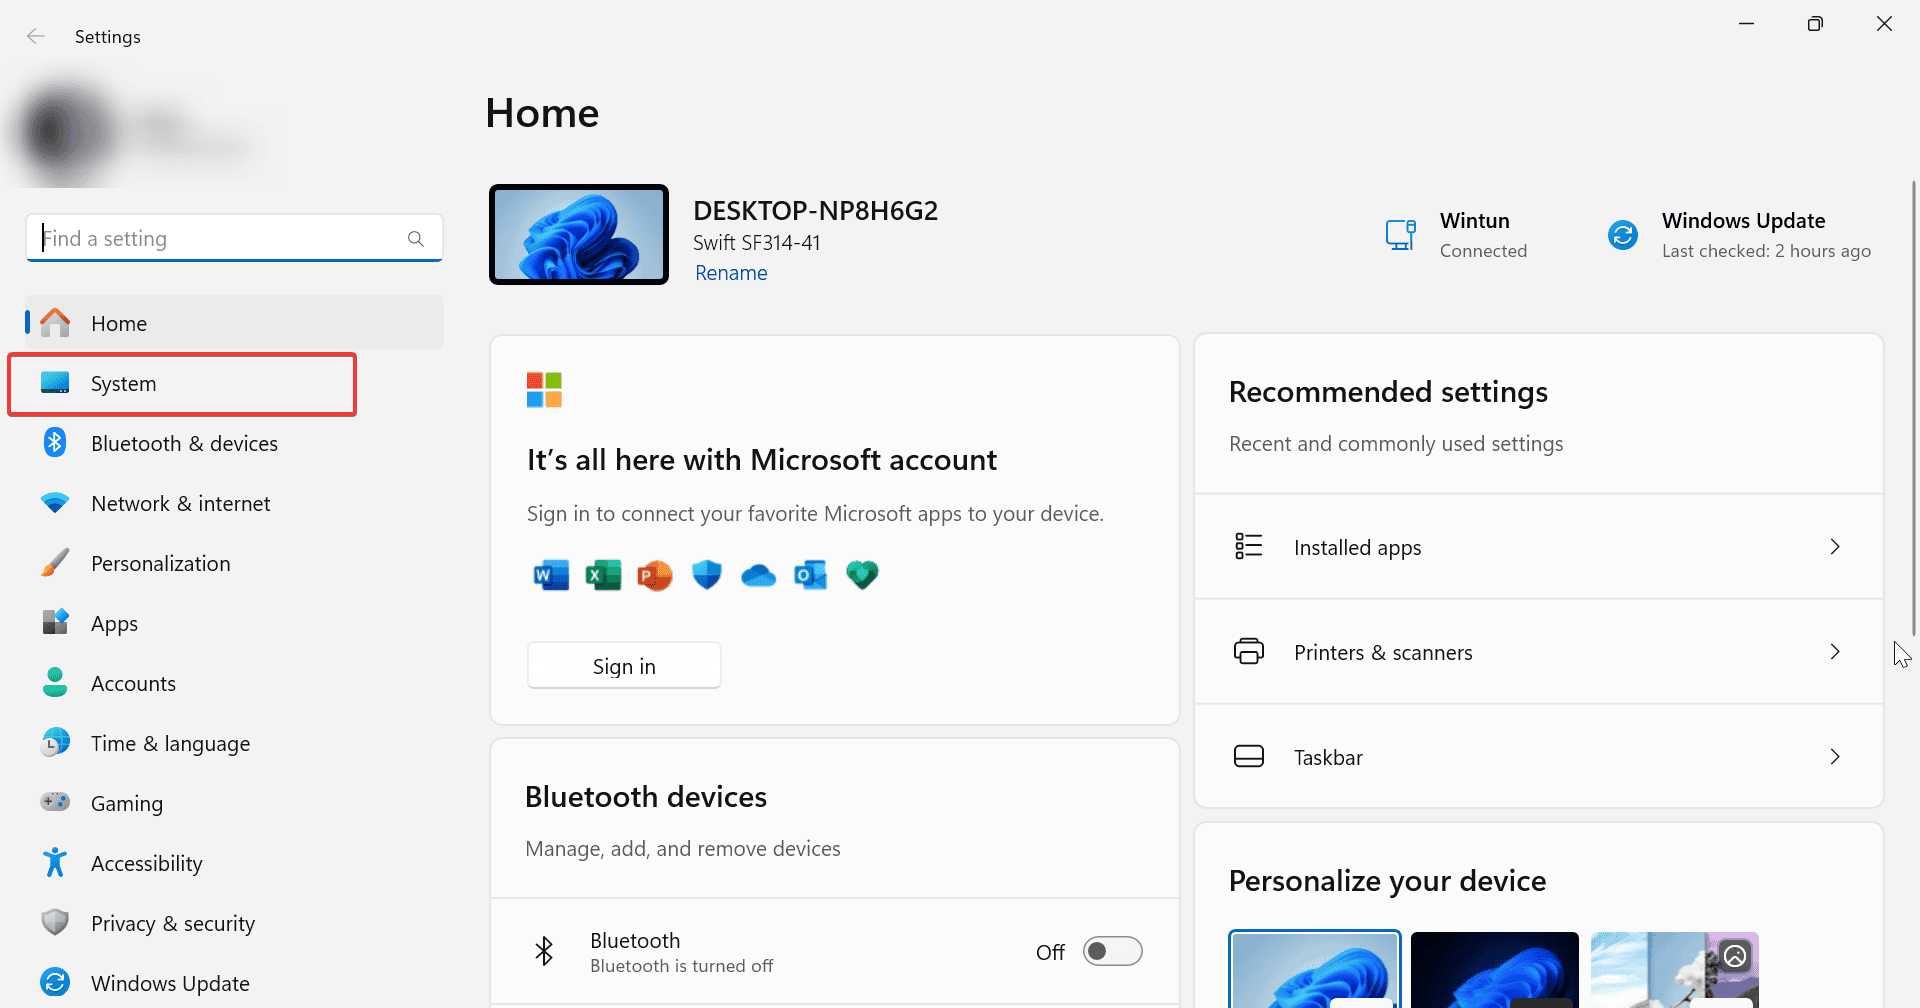
- Open the Start menu and select Settings.
- Click on System in the left sidebar.
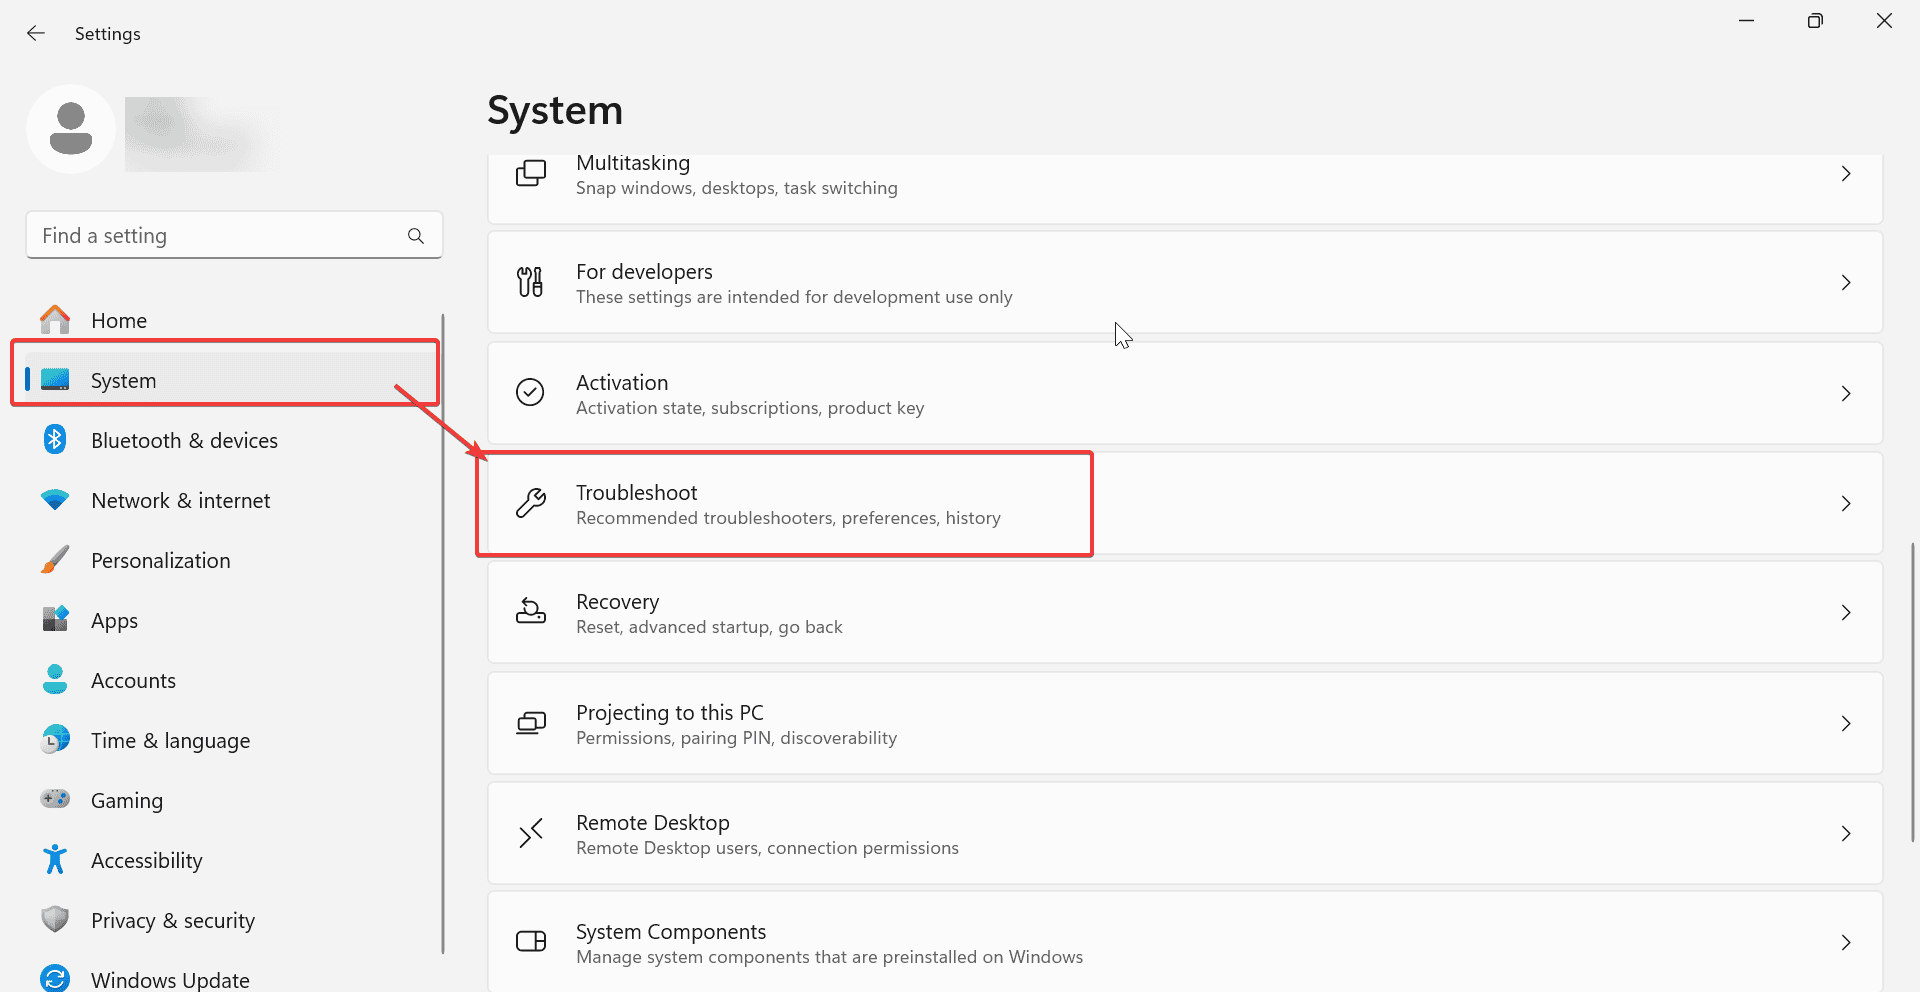
- Select Troubleshoot from the list of options.
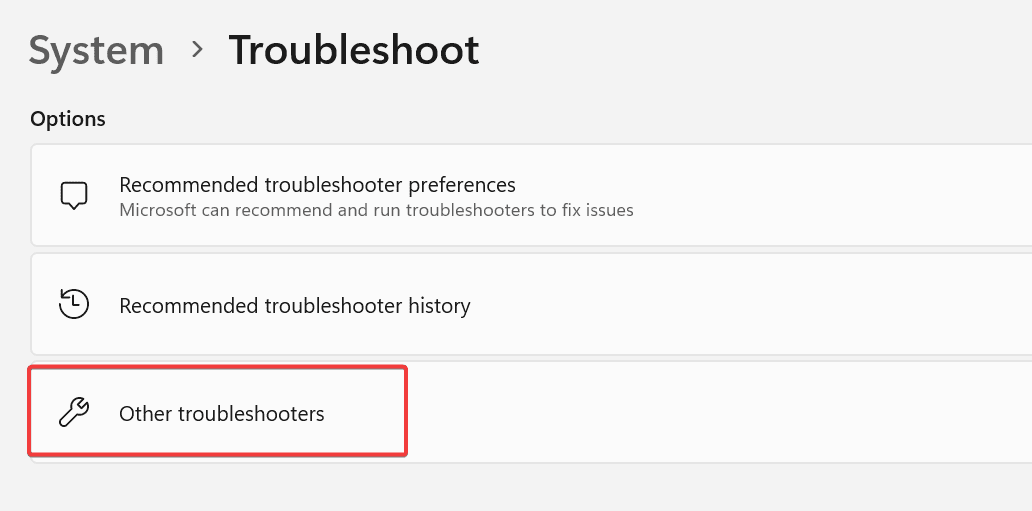
- Click on Other troubleshooters.
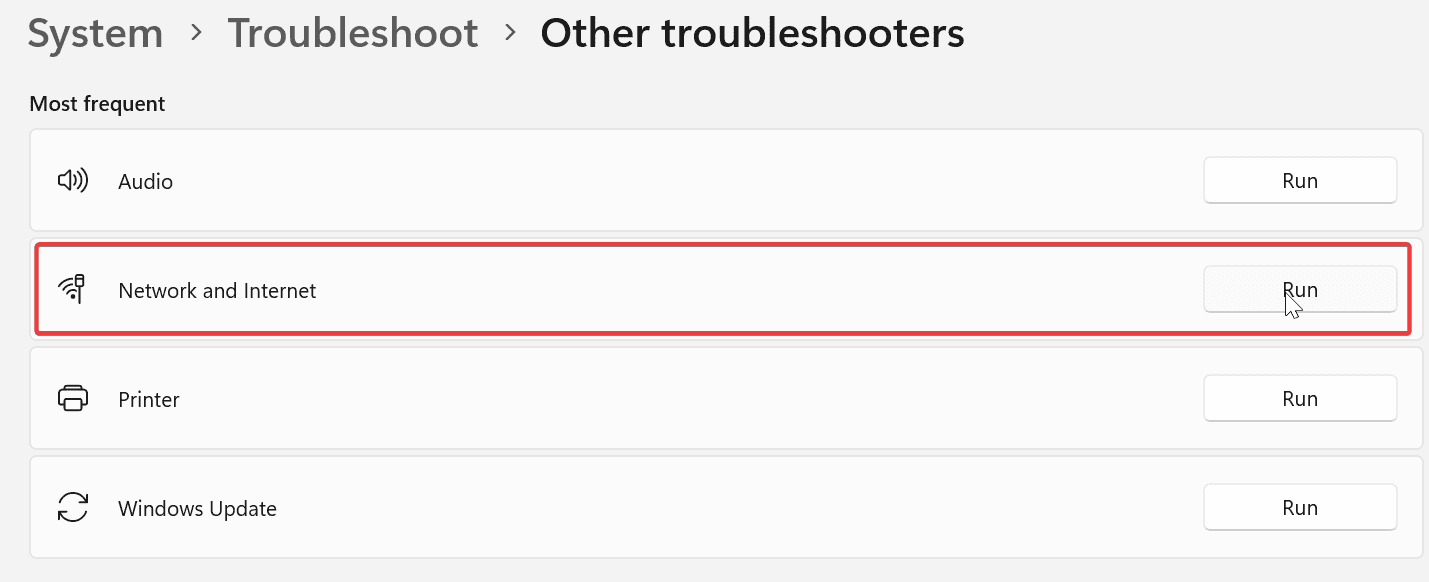
- Find and click the Run button next to Network and Internet to start the troubleshooter.
If you’re still having issues, run a speed test and finally contact your ISP. But if your internet looks like it’s up and running, only ruined by VPN, keep reading:
2. Connect to a different server location

Select a different VPN server location and connect to it. If you can access the Internet now, , there may be a temporary issue with the server location you originally selected.
3. Change your VPN protocol

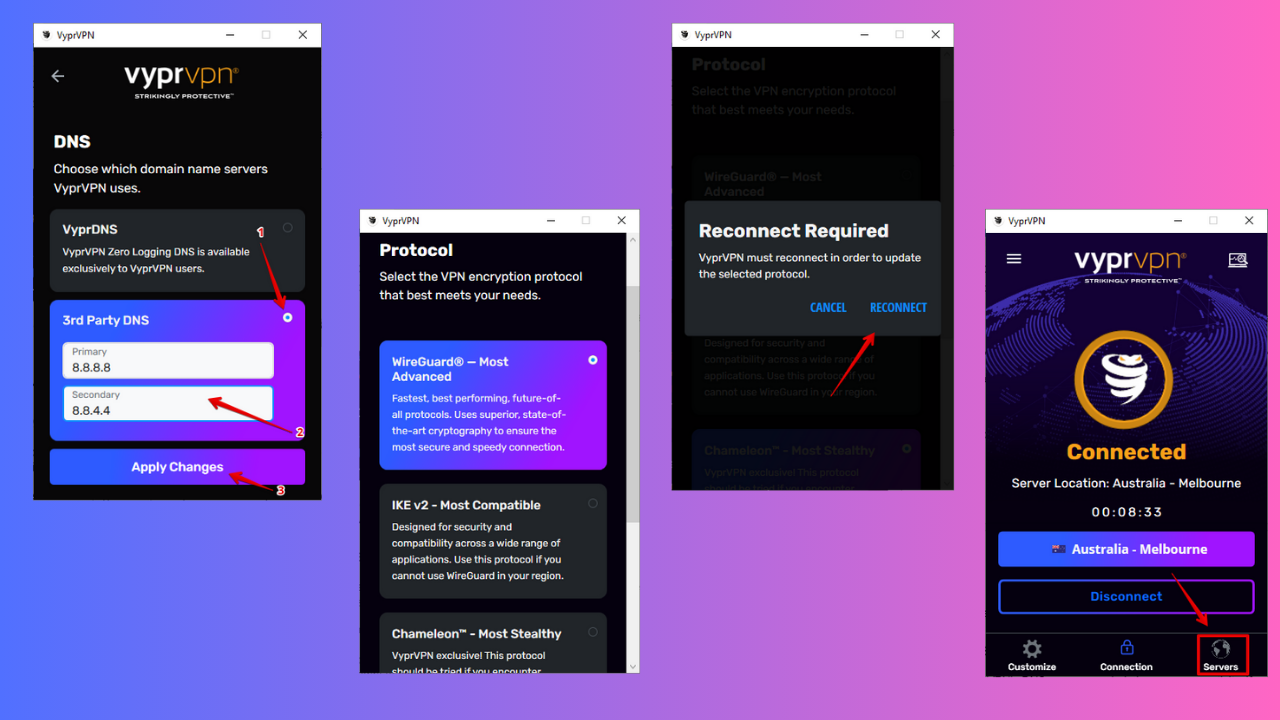
Open your VPN’s options or settings and select the Protocol from the list and pick a different one.
VPN protocols are the methods by which your device connects to a VPN server. Some protocols are blocked in different countries or by certain Internet Service Providers.
This may be the reason why when you connect to the VPN you lose your Internet connection. For optimal performance, choose the protocols below in the following order:
- OpenVPN TCP
- L2TP
- PPTP
4. Reinstall your VPN
You can uninstall the app, find the latest version install it, and connect again.
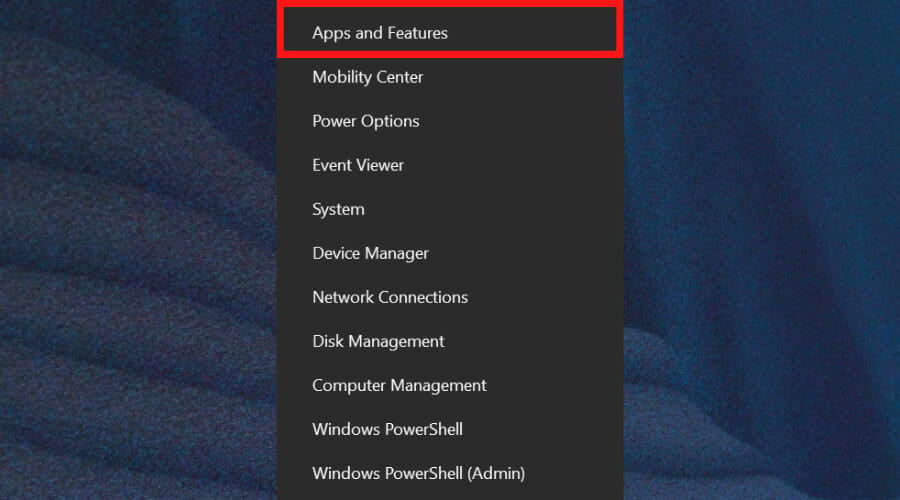
- Right-click Start and select Apps and Features
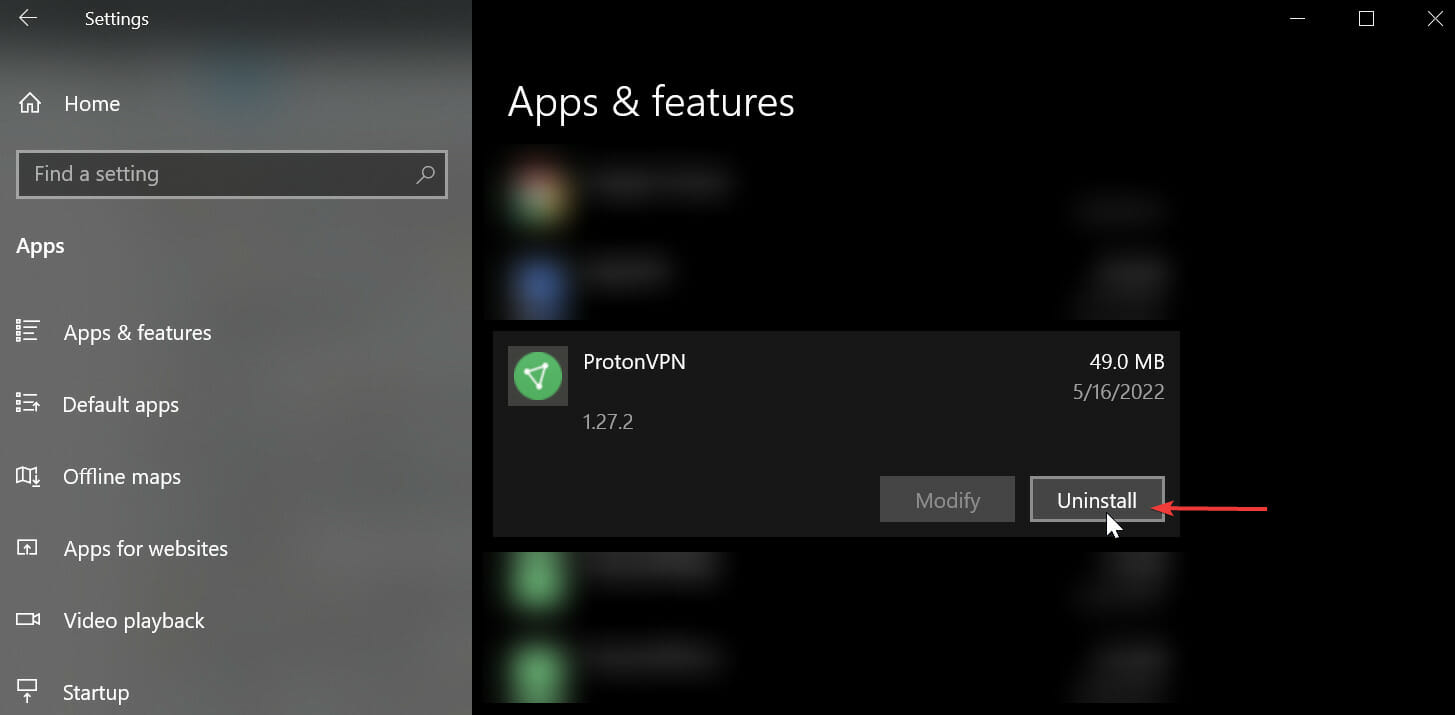
- Find your VPN from the list of programs and select Uninstall
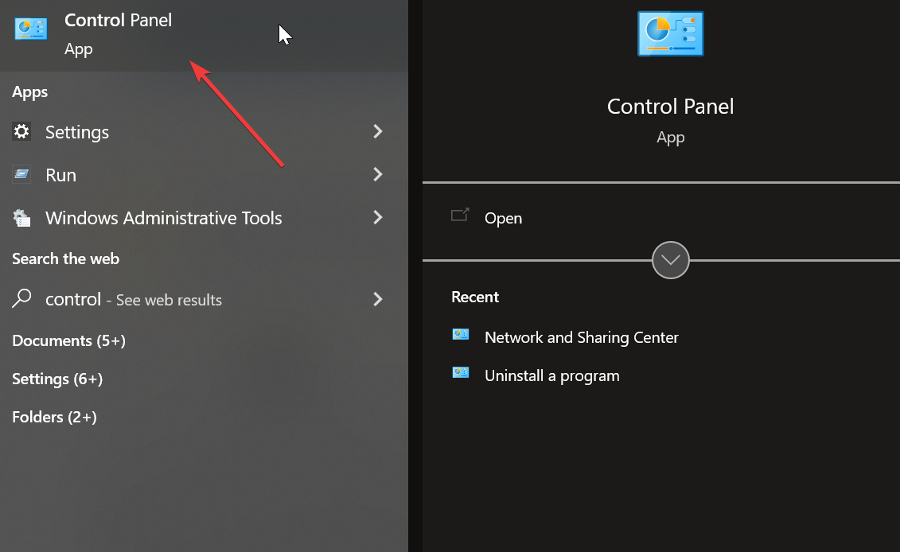
- Type control panel in the taskbar and open Control Panel
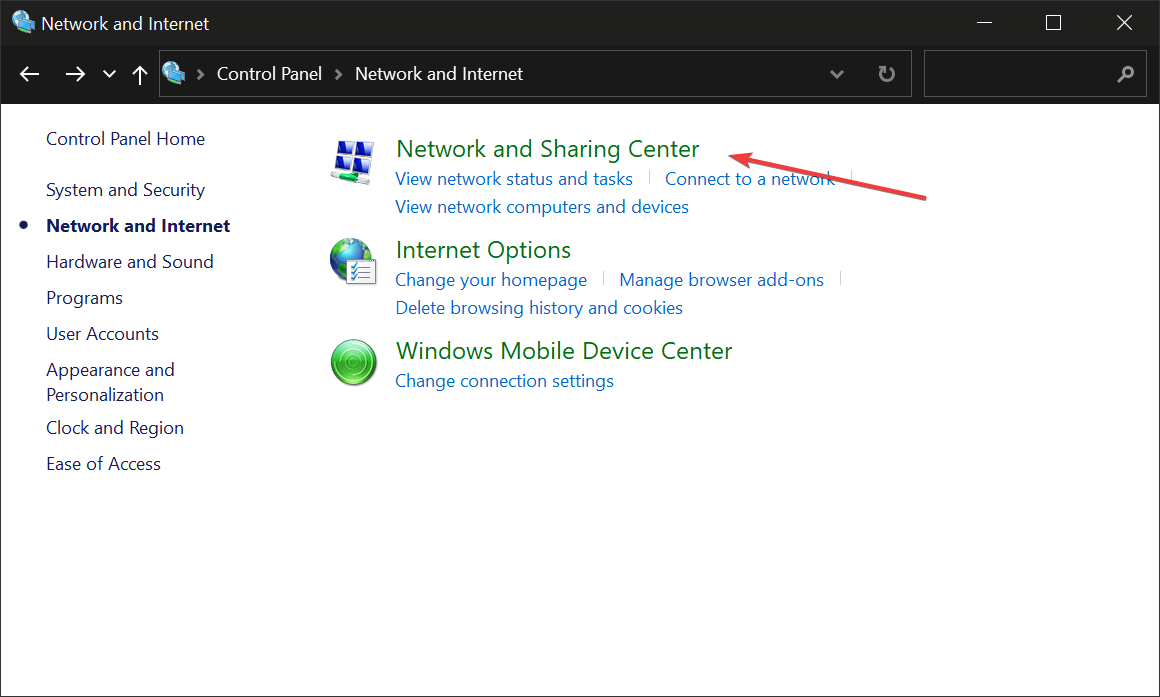
- Go to Network and Internet
- Open the Network and Sharing Center
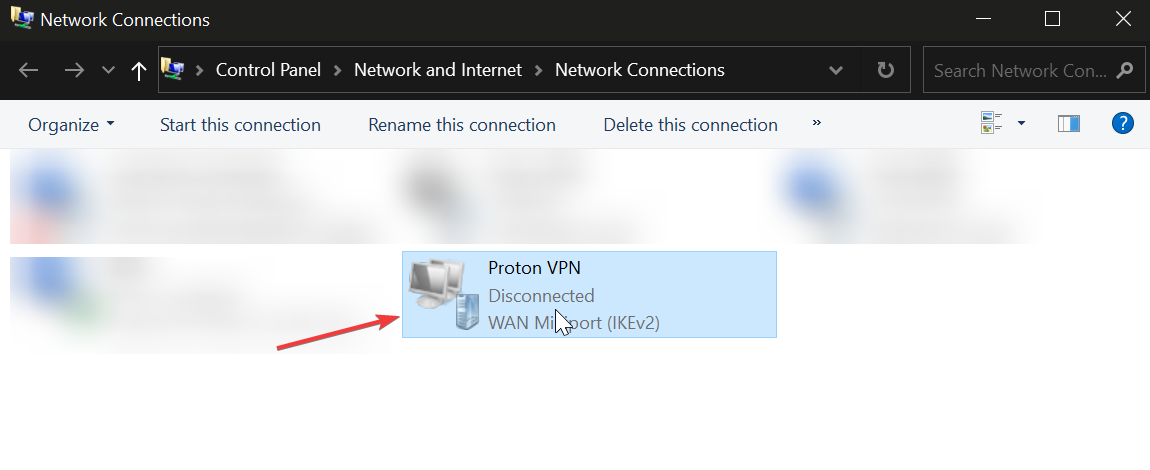
- Under Network Connections, right-click on the WAN Mini port labeled with your VPN’s name
- Select Delete.
 NOTE
NOTE
5. Check for incorrect date and time settings
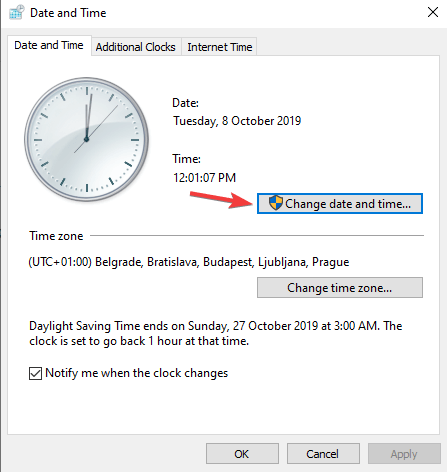
- Double-click the Date and Time display on the taskbar
- Click Change date and time settings
- In the Date and Time tab, click Change date and time….
- In the Date and Time Settings dialog box, update your time to the current date and time, then click OK
- If you need to change the time zone, click Change time zone… , select your current time zone in the drop-down list, then click OK
- Restart your VPN and connect to a server location
- If you cannot connect to a server location after restarting your VPN, re-install the VPN. You do not need to uninstall the app first, just run the installation program again
6. Install the latest version of your VPN
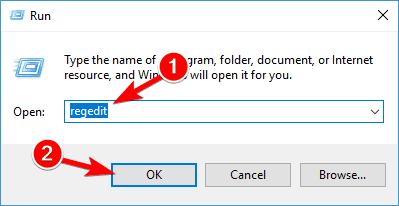
- Right-click Start and select Run
- Type regedit and press Enter
- You will now see the User Account Control dialog box. Click Yes
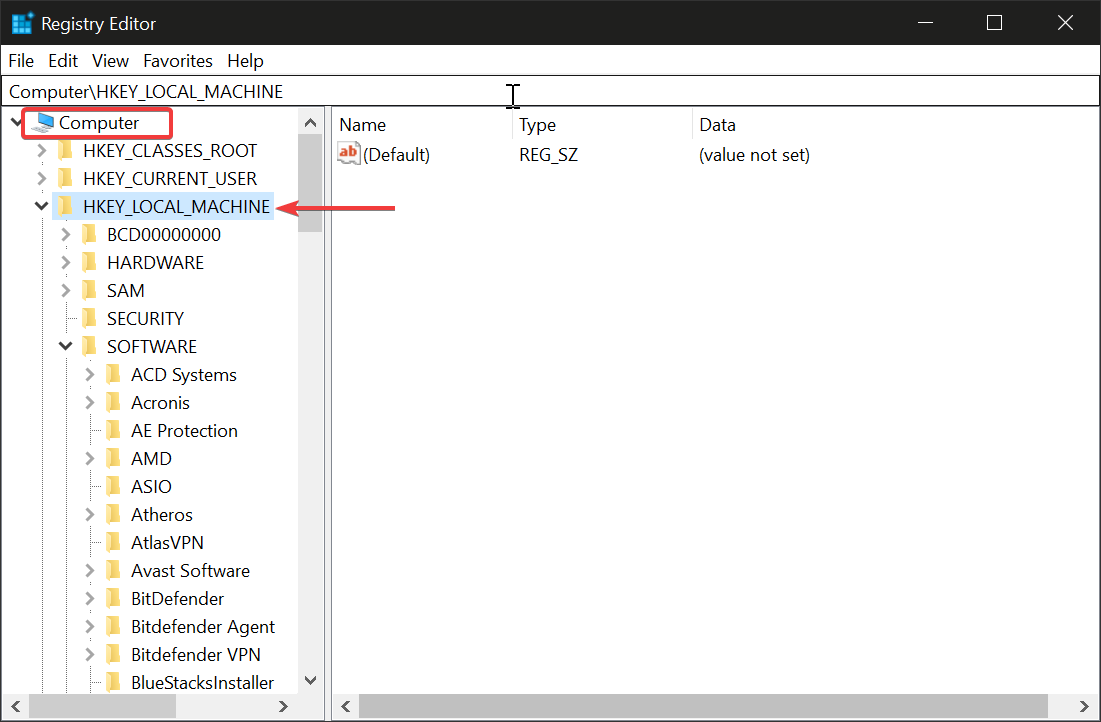
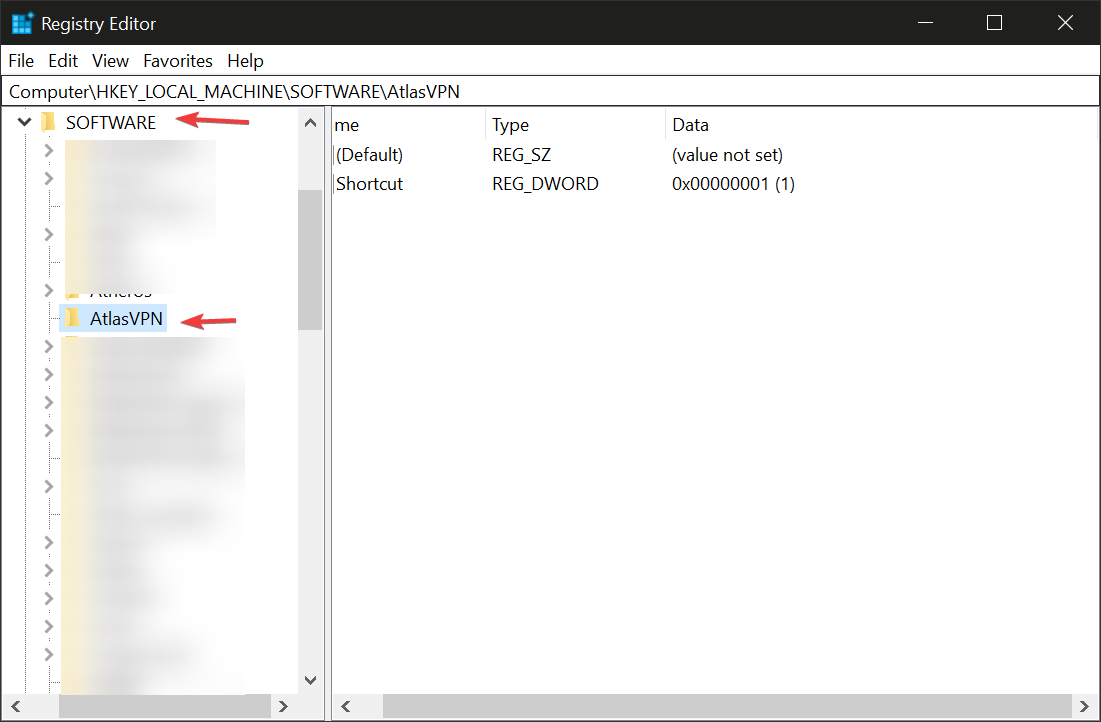
- In the Registry Editor, under Computer, double-click on HKEY_LOCAL_MACHINE.
- Under HKEY_LOCAL_MACHINE, double-click on SOFTWARE and then [your]VPN
- If you cannot find [your]VPN directly beneath SOFTWARE, go to SOFTWARE > Classes> [your]VPN
- Right-click on [your]VPN and then click Delete. After deletion, you should no longer see your VPN under Wow6432Node
If you can’t edit your Windows 10’s registry, read this handy guide and find the quickest solutions to the issue.
If you see that the VPN is still listed as an available VPN connection after uninstalling:
- Type Control Panel in the taskbar to open Control Panel
- Go to Network and Internet and click on Network and Sharing Center
- On your Network Connections window, right-click on the WAN Miniport labeled [your]VPN
- Click Delete
7. Change your DNS server configuration
7.1. Open Network Connections settings
- Right-click Start and select Run
- Type ncpa.cpl and click OK
- In Network connections window, find your usual connection, either LAN or Wireless network connection.
- Right click the connection and select Properties
7.2. Set the DNS server addresses
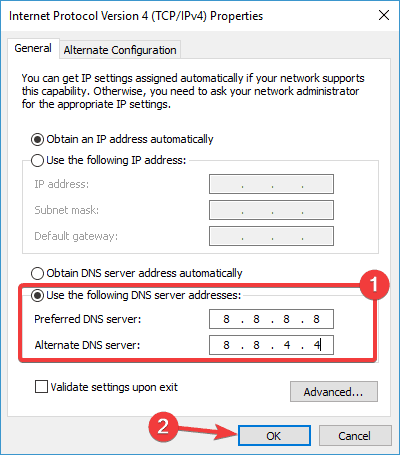
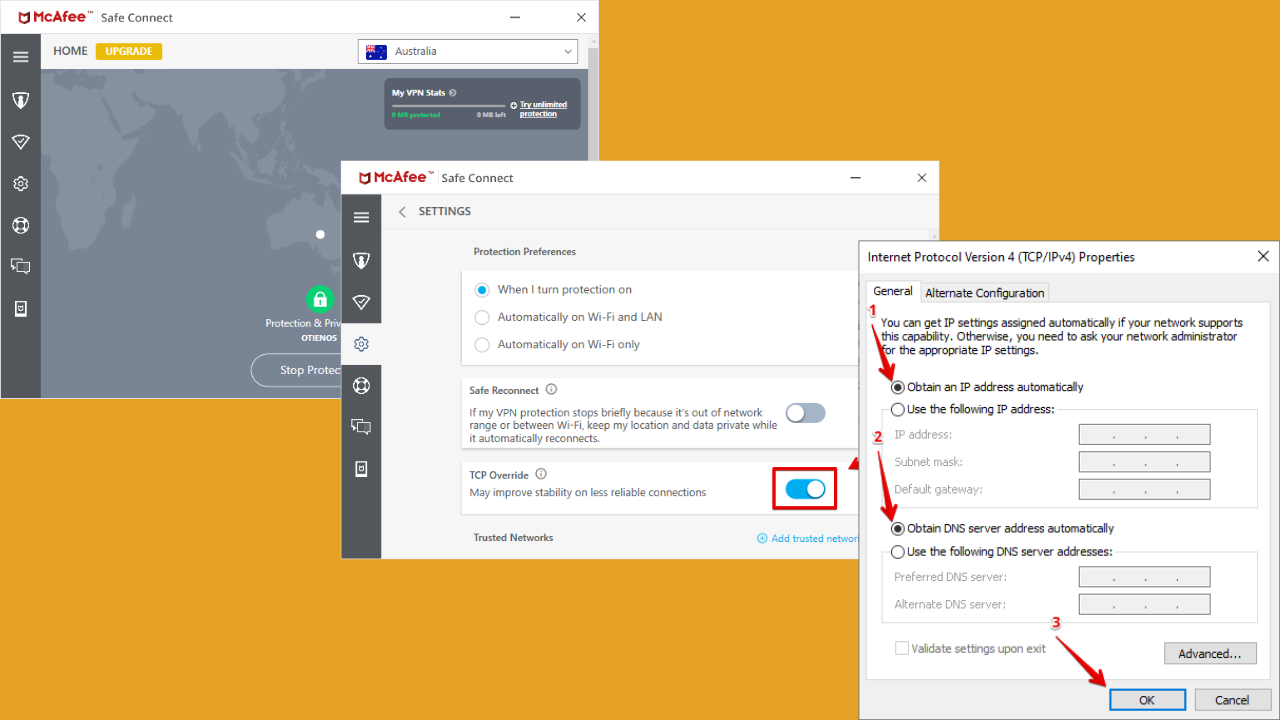
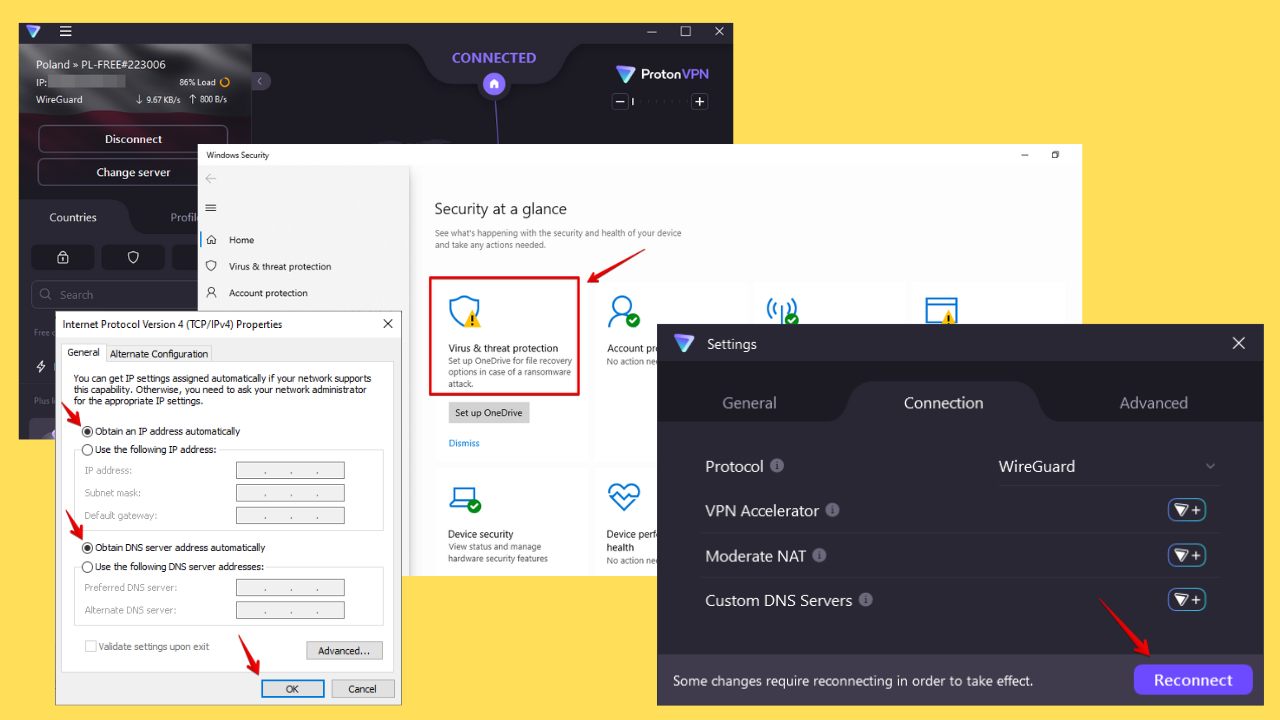
- Double click Internet Protocol Version 4 (IPv4) or just Internet Protocol
- Select Use the following DNS server addresses
- Type these Google DNS server addresses: Preferred DNS server 8.8.8.8 and Alternate DNS server 8.8.4.4
- If Google DNS is blocked, try the following: Neustar DNS Advantage (154.70.1 and 156.154.71.1) enter and press OK; Level3 DNS (4.2.2.1 and 4.2.2.2) enter and press OK. Once you’re done, set your VPN’s DNS settings, and flush old DNS entries as described in the next solution.
DNS server is not responding in Windows 10? Take a look at this guide and fix the issue in no time.
8. Adjust your proxy settings
If you’re having trouble connecting to the Internet, it’s possible that it has been set to use a proxy server. This could interfere with your VPN.
To disable proxy in Internet Explorer:
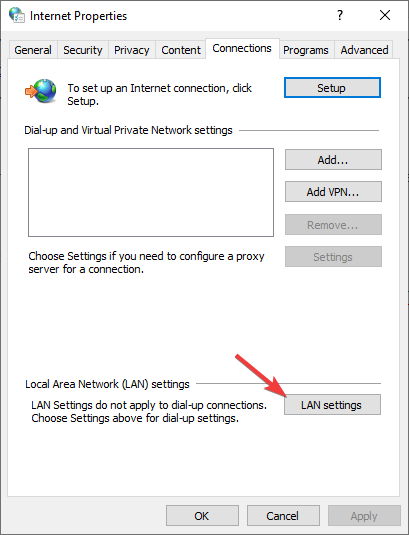
- From the Tools or gear menu, select Internet options.
- In the Connections tab, click LAN settings.
- Uncheck all of the displayed options except automatically detect settings.
- Click OK
- Close your browser and then open it again.
9. Change your VPN
If your VPN still kills your internet, even after trying to troubleshoot, switch to a better one.
Opt for a premium option – with VPNs, you get what you pay for. If you don’t invest in a quality service, you risk poor connections, data issues, or no connection at all.
Considering this, we recommend ExpressVPN. Our tests revealed it’s one of the best options for Windows 11: speed, performance, lots of servers in 100+ countries, and great customer support.
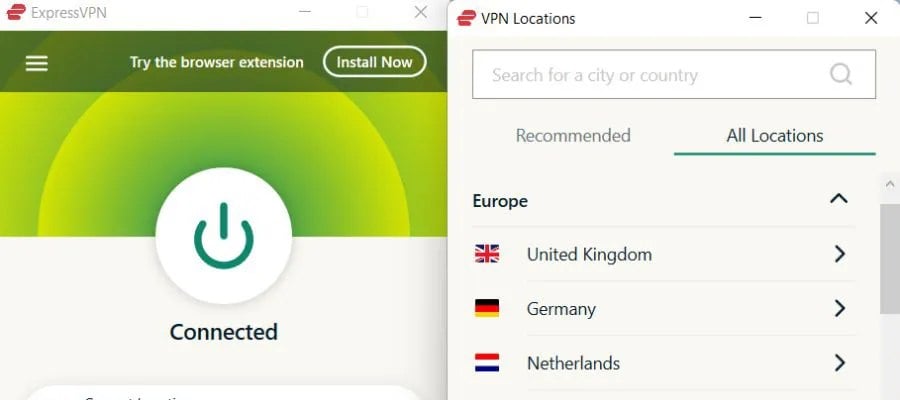

ExpressVPN
Upgrade to ExpressVPN for fast, secure browsing, global content access, and 24/7 customer support.Why do I lose internet when I disconnect from VPN?
It’s either a configuration problem or your connection is very slow. Make sure your settings match your Wi-Fi and VPN setup.
Also, if you are concerned about privacy, use a VPN with a killswitch option.This feature will block all traffic data even if you disconnect.
This means that the risk of getting any type of data leaked or stolen is very small even when you don’t use a VPN connection.
Wrapping up
These have been our suggestions on what you can do when connecting to VPN disconnects the Internet. Let us know which one works best for you.
If you have any more questions or suggestions, please leave them in the comments below.





User forum
2 messages