How to install drivers without EXE files
3 min. read
Updated on
Read our disclosure page to find out how can you help Windows Report sustain the editorial team. Read more
Key notes
- If you’re wondering how to install drivers without EXE files, you can install them with their INF files.
- Note that third-party driver software always comes in handy for updating drivers.
- Even more, you can install drivers without EXE files by using File Explorer.
- Feel free to utilize the Command Prompt to manually install drivers in Windows 10.

Most drivers you download from company websites have setup.exe installers. However, not all driver packages come with EXE installer files.
If a driver package doesn’t have an EXE installer, you’ll need to install it with its INF (setup information) file. This is how you can install drivers without EXE files.
How to install drivers that lack setup.exe installers?
1. Install drivers with driver updater software
You can easily install drivers with driver updater software. A driver updater utility scan will show you devices on your PC that have outdated drivers.
Then you can automatically download and install the drivers for your PC at the click of a few buttons.
Moreover, using this specialized tool will correctly update old drivers, without causing other system issues due to driver incompatibility.
This being said, give a try with this driver expert to improve your system functionality using the latest driver devices from the official database with multiple drivers.
2. Manually update the driver with Device Manager
- First, bring up the Win + X menu by right-clicking the Start button.
- Select the Device Manager shortcut.
- Next, expand a category that includes the device you need to update the driver for.
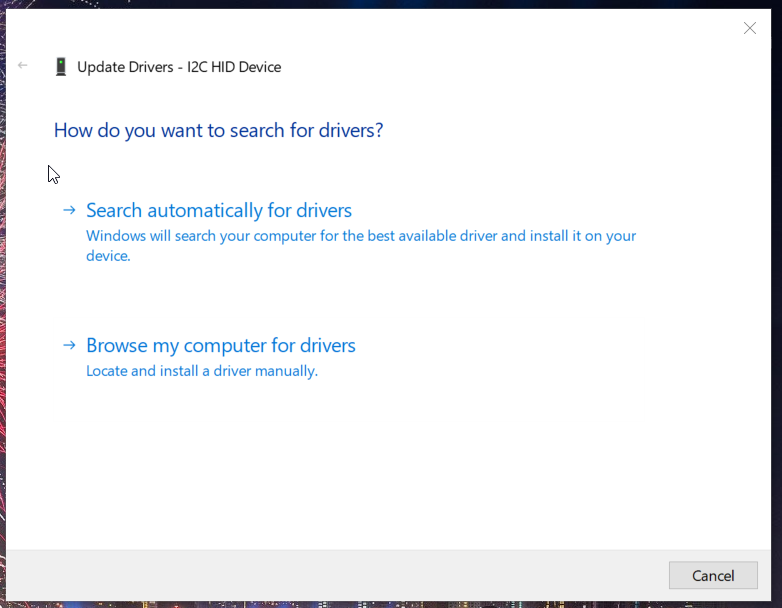
- Right-click the device you need to install the driver for and select Update driver.
- Then select the Browse my computer for drivers option.
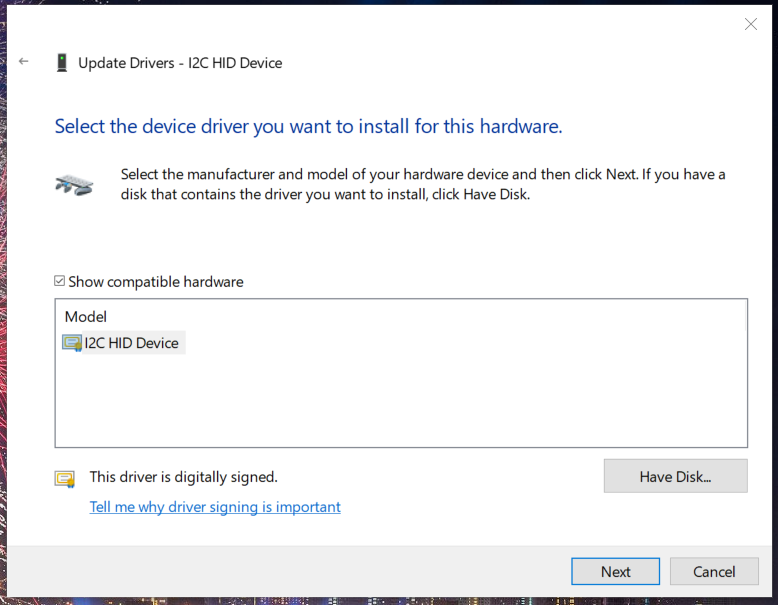
- Click the Let me pick from a list of available drivers on my computer option.
- Press the Have Disk button.
- Then click Browse, and select the folder that includes the driver INF file.
- Select the INF file to install a driver with, and click the OK button.
- Thereafter, you can follow further on-screen guidelines for installing the selected driver package.
3. Select the Install context menu option
- First, open File Explorer’s window.
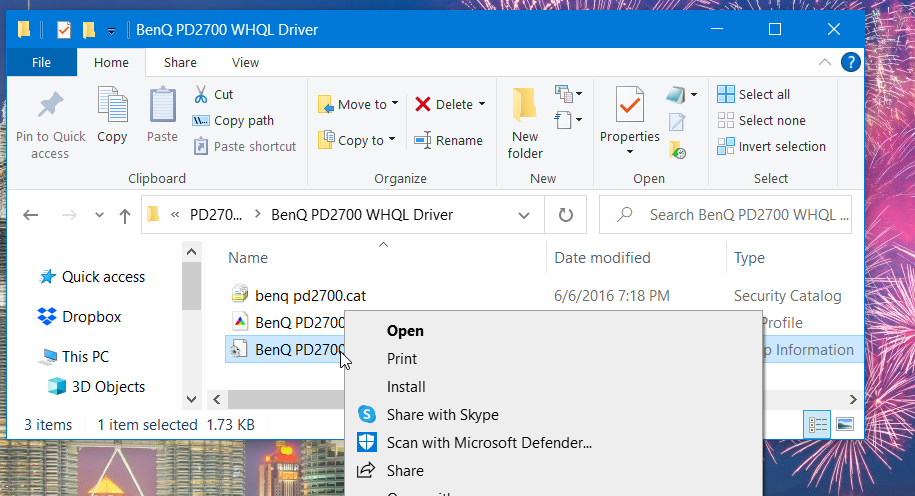
- Next, open the folder that includes your driver package.
- Right-click the INF file for the driver and select the Install option.
- Select the Yes option on UAC (User Account Control) confirmation prompts.
 NOTE
NOTE
4. Install drivers with Command Prompt
- To open a Windows search tool, press the Windows key + S hotkey.
- Type the keyword cmd in the search tool.
- Right-click Command Prompt within the search results and select its Run as administrator option.
- Next enter this command:
pnputil.exe -a <driver folder path\file name.inf> - Press the Enter key to install the driver. Thereafter, Command Prompt should display a message saying Driver package added successfully.
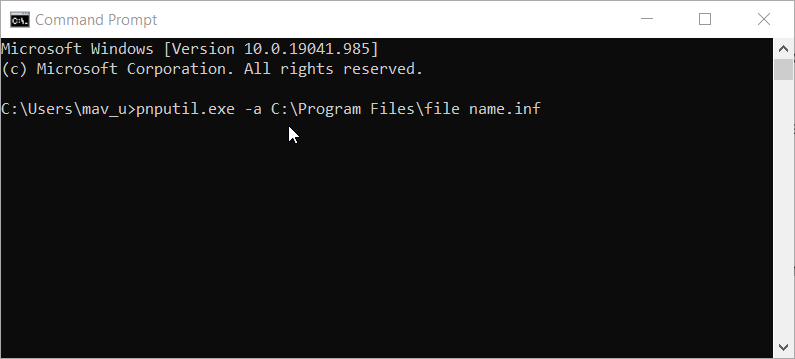
You’ll need to replace the above command with the full folder path of the driver file. For example, if the driver file was in C:\Program Files, the command would be:
pnputil.exe -a C:\Program Files\file name.inf
So, you don’t need to install drivers with setup.exe files. If you can’t find a setup.exe file for a downloaded driver, install it with one of the methods above instead.
Moreover, don’t forget that you need to back up your drivers from time to time. Use the best driver backup software for Windows 10 to make that happen.
Comment in the section below and let us know which of our suggestions worked best for your intention to install drivers without EXE files.



User forum
0 messages