How to Access or Remove a GPT Protective Partition Without Losing Data
If you cannot access GPT protective partition, check disk sector size
Key notes
- To prevent this issue from appearing, keep your drivers and firmware up to date.
- You can fix this problem with a specialized third-party tool and convert the disk to MBR.

Many reported a GPT protective partition on their PC that prevents users from getting to their files. This can be a big problem and today we’ll show you how to access GPT protective partition without losing data.
Even though this sounds like a serious issue, it’s important to mention that your files are still there, and there’s a way to recover them without having to remove anything.
What causes GPT protective partition?
- Missing AHCI drivers, or outdated firmware can cause this issue.
- The sector size on your drive doesn’t match the interface.
How do I recover data from a GPT protective partition?
Before we start fixing the issue, be sure to perform these checks:
- If you’re using a hard disk dock, keep its firmware up to date, especially on Sabrent models.
1. Update the Intel Rapid Storage Technology Control Panel
- Navigate to the Rapid Storage Technology download page.
- Click on Download SetupRST.exe.

- Once the file is downloaded, run it.
- Follow the instructions on the screen to install it.
Keep in mind that this solution applies only to devices that use this software, and this is usually Dell or Alienware PCs. If you’re using an AMD CPU, a few users suggested that installing the AMD AHCI driver worked for them, so consider that as well.
2. Convert partition from GPT to MBR
- You need to use partition management software, such as AOMEI Partition Assistant.
- Select your disk and click on Convert to MBR.

- Click OK to confirm.

- Click on Apply and on OK.
- After the conversion is completed, you should see your disk again without having to remove the GPT protective partition.
3. Back up the drive and recreate it
 NOTE
NOTE
Use Disk Management
- Press the Windows key + X and select Disk Management.
- Next, delete all partitions on the GPT protected partition by right-clicking them and choosing Delete partition or Delete volume.

- Right-click the GPT protected disk and choose Convert to MBR.
- If this option isn’t available, right-click it and choose Initialize disk and then select MBR.

Use diskpart
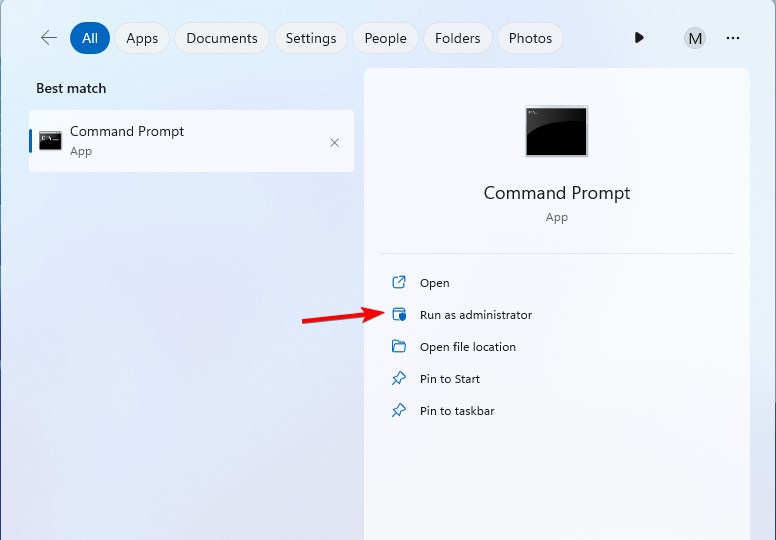
- Press the Windows key + S and type cmd. Select Run as administrator.
- Run this command:
diskpart
- Enter the following command:
list disk
- Locate your GPT disk and memorize its number. This is a crucial step since we’ll delete all files from that disk, so double-check the disk number.
- Now select the disk, but be sure to use the correct number, we used 0 as an example, with:
select disk 0
- Next, run
clean
- Lastly, run
convert mbr
How to convert GPT protective partition to MBR?
- You can use the Disk Management software to delete the disk and create it again.
- Using the command line tool and diskpart command you can achieve the same results.
- Use third-party solutions as mentioned in Solution 2 to convert the partition without file loss.
As you can see, it’s possible to access the GPT protective partition without losing data, but it requires using third-party tools.
Since this process requires you to convert your drive, you might have to convert MBR to GPT using the MBR2GPT tool.
Many have reported that they can’t convert disk to GPT, but we have a guide that details how to convert MBR to GPT disk, so be sure to check it out for step-by-step instructions.
What method did you use to fix this problem? If we haven’t included it, feel free to share it with us.
Read our disclosure page to find out how can you help Windows Report sustain the editorial team. Read more


Improve this guide


User forum
0 messages