How to Add a Network Adapter in Hyper V
Apply our detailed procedure right away
3 min. read
Updated on
Read our disclosure page to find out how can you help Windows Report sustain the editorial team. Read more
Key notes
- In the guide below, you will find out how to add or remove network adapters from your Hyper V.
- In doing so, you can use both the Hyper V Manager or PowerShell.
- The easiest way to add a network adapter to your VM is via PowerShell, by running a dedicated command.
If you are a system admin and work with Microsoft Hyper-V virtual machine, you may want to know how to add a network adapter to a Hyper-V virtual machine.
The latest version of Windows Hyper-2016 added the functionality that allows you to add or remove virtual network adapters to/from running virtual machines.
If you are new to the Windows Hyper-V virtual machine world, there are a lot of things to learn. However, knowing how to add a network adapter to the Virtual machine is an essential part of running the VMs successfully.
In this article, we show you how to add a network adapter to Windows 10 Hyper-V virtual machines. There are two ways to achieve this, and we have listed both the methods in this article.
How do I add a network adapter in Hyper-V?
1. Add a Virtual Network Adapter from Hyper-V Manager
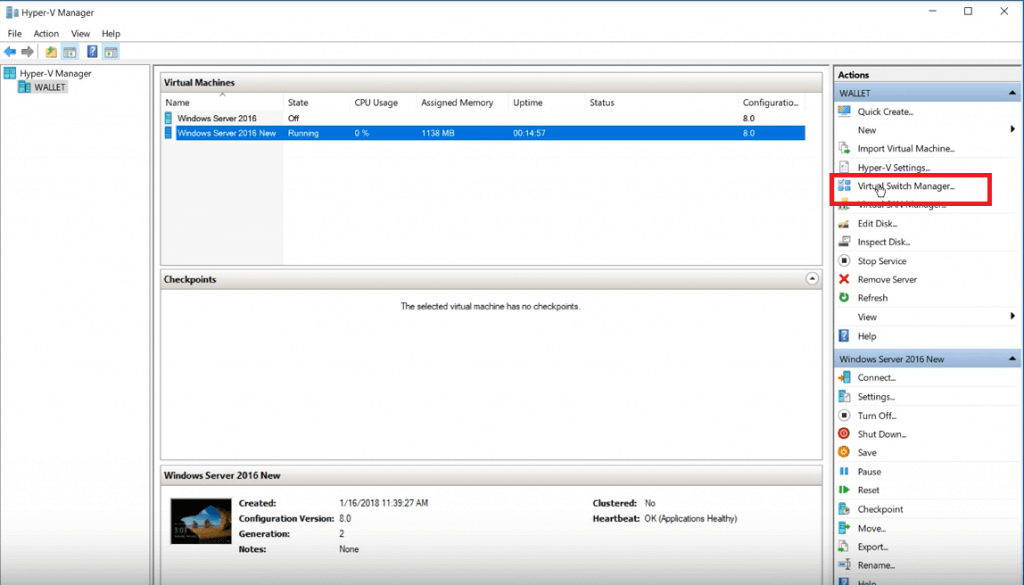
- Launch Hyper-V Manager on your Windows machine.
- First, you need to make sure that you have a network adapter added to your Virtual Switch manager.
- To do this, click on the Virtual Switch Manager from the right pane in Hyper V-Manager.
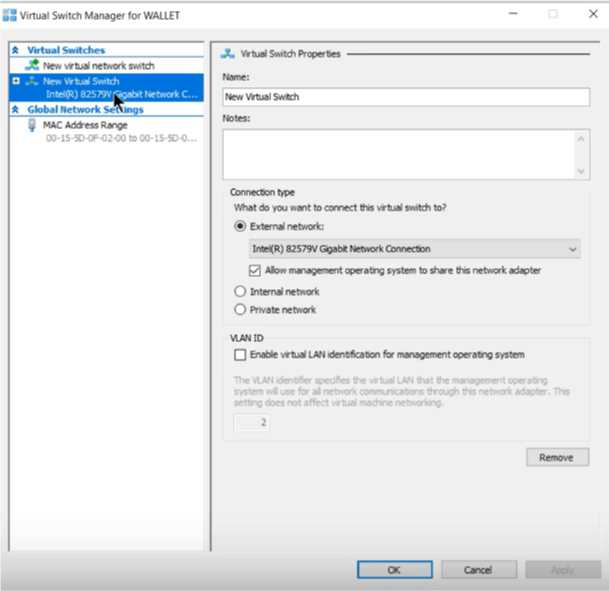
- In the new window, from the left pane check if you have Virtual Network Card. You should see something like the New Virtual Switch.
- Click Cancel.
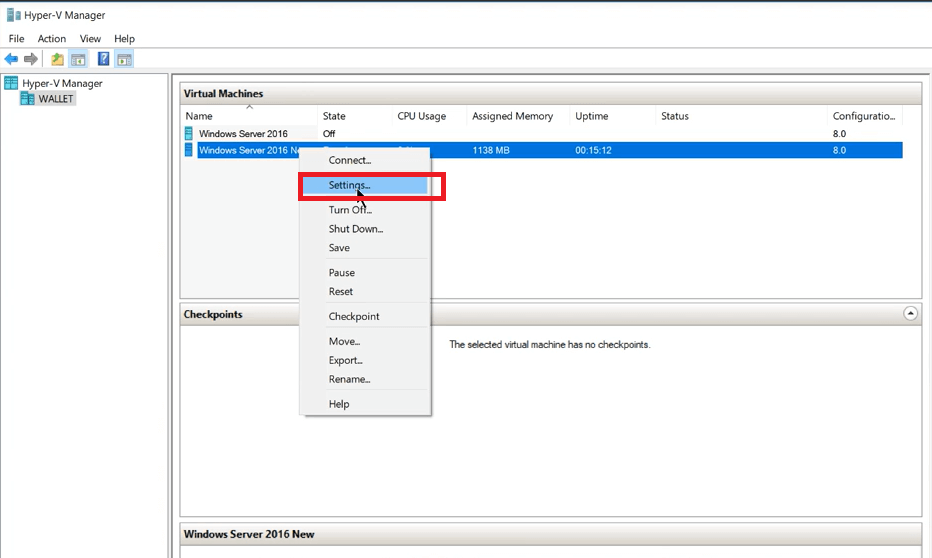
- In the Hyper V-Manager, right-click on the Virtual Machine and select Settings.
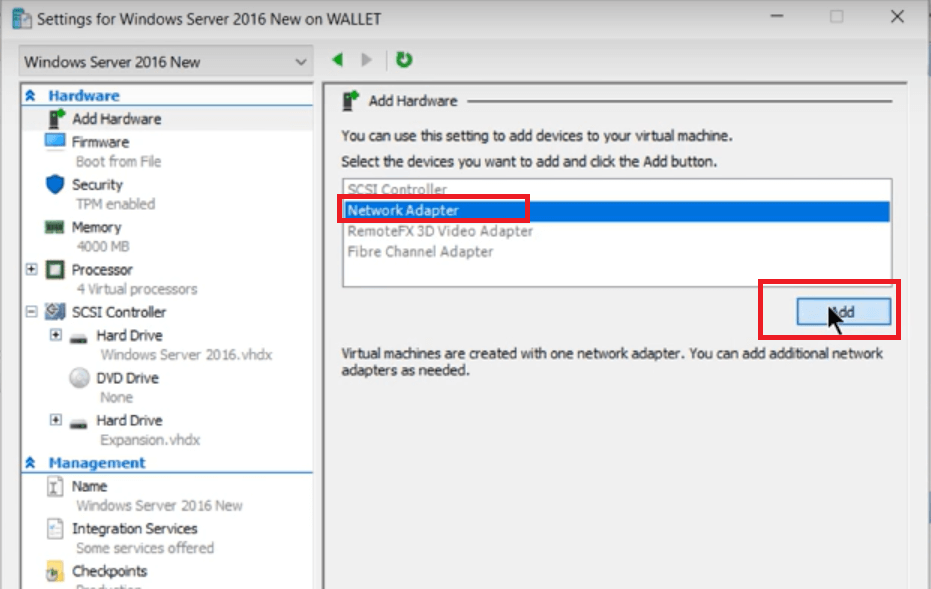
- Under the “Add Hardware” section, select Network Adapter.
- Click the Add button.
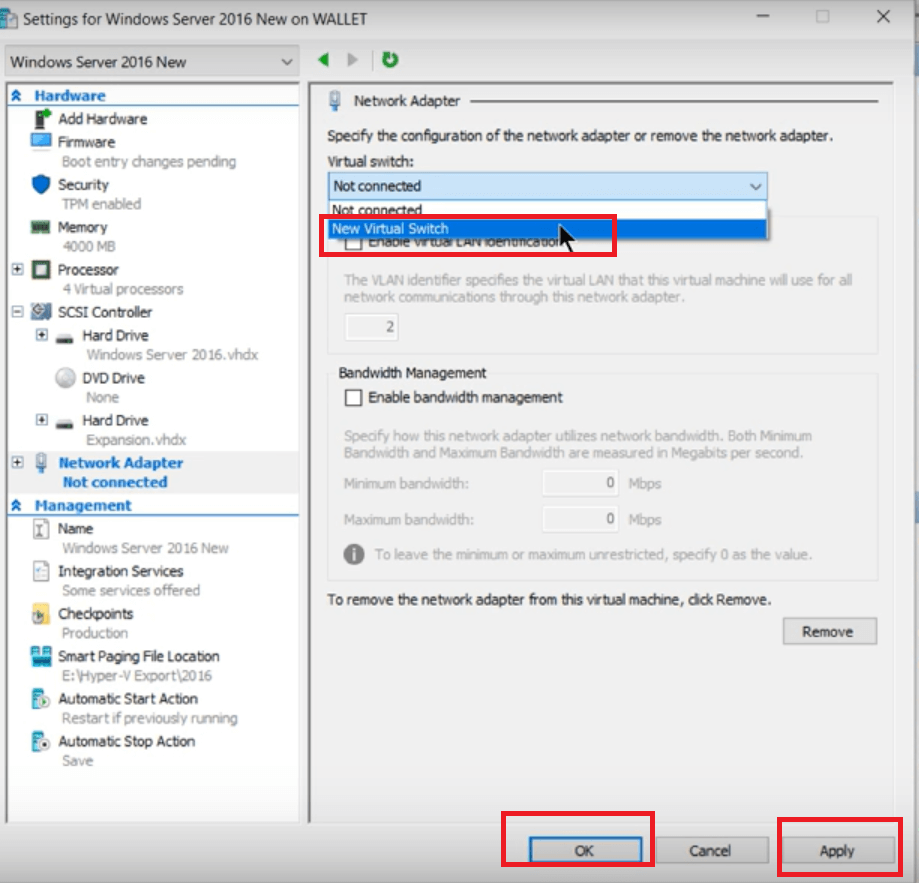
- It will show you the Network Adapter window.
- Under “Virtual Switch“, click the drop-down menu and select “New Virtual Switch“.
- Click on Apply to save the changes. Click OK.
- If you have multiple Virtual Machine, you can add the same new virtual switch to other virtual machines as well.
- The Hyper-V is capable of sharing network resources with multiple VMs as long as you are running a Cat 5/6 cable on a Gigabit switch to reduce latency.
2. Add network adapter to Windows 10 Hyper-V using PowerShell
- If you don’t want to use the Hyper-V Manager or prefer your PowerShell do the talking, you can use PowerShell to add a network adapter to Windows 10 Hyper-V virtual machine.
- Right-click on Start and select Windows PowerShell (admin).
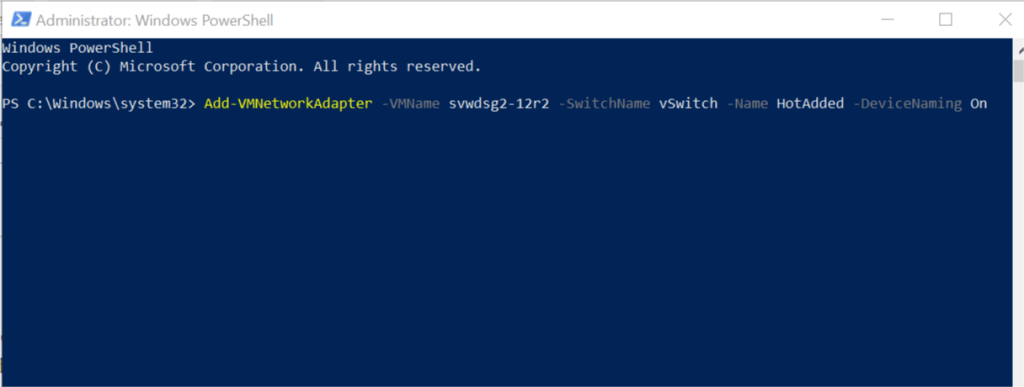
- In the PowerShell terminal, type the following command and hit enter.
Add-VMNetworkAdapter -VMName svwdsg2-12r2 -SwitchName vSwitch -Name HotAdded -DeviceNaming On - Wait for the command to execute and that’s it. You have successfully added a virtual network adapter in Hyper-V.
- The above command should work on configuration version 6.2 and above.
How can I remove my Hyper V adapter?
In case you want to remove the virtual network adapter, you can use the following PowerShell command:Remove-VMNetworkAdapter -VMName svwdsg2-12r2 -Name HotAdded
The above command will remove all the network adapters that match the name unless you specify the name of the adapter to be removed.
To overcome this problem, you can either use filters or use the Hyper-V Manager to remove the adapter:
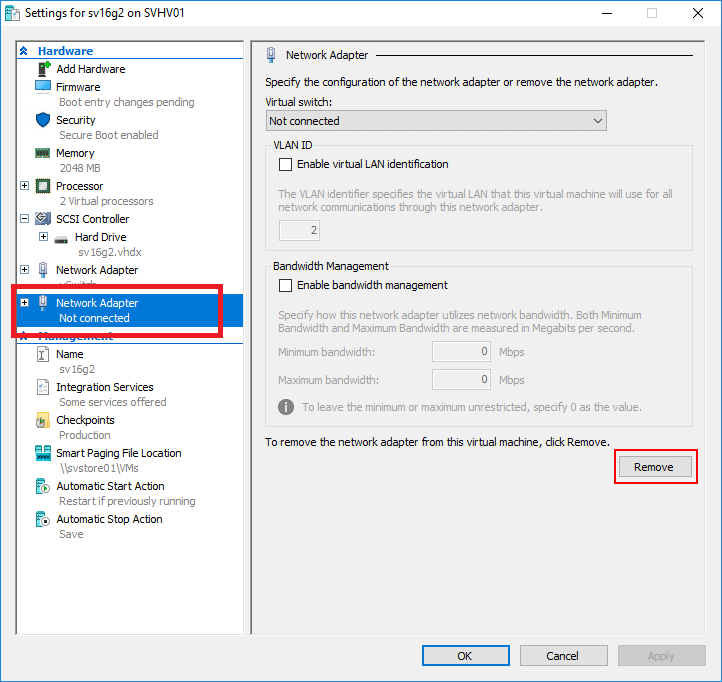
- In the Hyper-V Manager, right-click on your virtual machine and select Settings.
- From the left pane, click on Network Adapter and then click the Remove button.
- Click Apply to save the changes.
We hope you managed to add a network adapter in Hyper V using our guide. Also, once have it up and running, find out how to setup USB passthrough in Hyper-V, a critical functionality that’s not present by default.
Let us know how it went in the comments section below.



User forum
0 messages