How to Fix AnyDesk ID Not Showing in Windows 11?
Outdated AnyDesk software can be the reason
4 min. read
Updated on
Read our disclosure page to find out how can you help Windows Report sustain the editorial team. Read more
If your AnyDesk ID isn’t showing, you’ll have trouble establishing a remote connection. Let’s see why this happens and how to fix it:
What causes the AnyDesk ID not showing error on Windows 11?
There could be various reasons for the AnyDesk ID not appearing; Here are some of the most commons ones:
- Outdated AnyDesk software – An outdated version of AnyDesk software can become incompatible; therefore, the ID won’t show. Check for updates or the latest version of the software.
- AnyDesk incorrectly installed – If the software is not installed correctly or some configuration files are missing, you might face this issue.
- Antivirus interference – Sometimes, security software can interfere, hampering the software’s functionality, hence the issue.
- Misconfigured network settings – If the network settings on your computer are misconfigured, then you might not be able to use AnyDesk or see the ID.
How can I fix the AnyDesk ID not showing error on Windows 11?
 NOTE
NOTE
1. Check for Updates
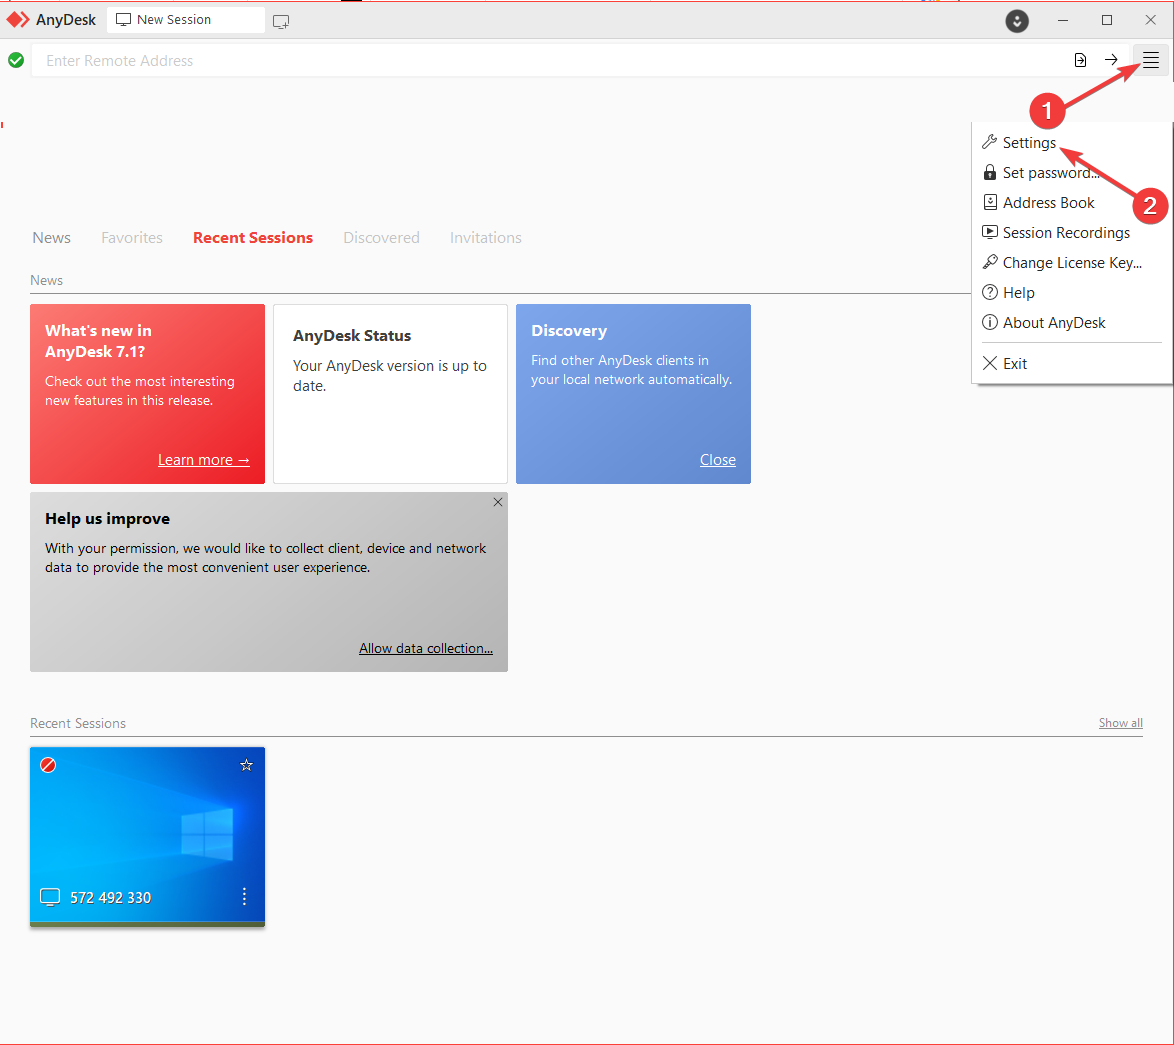
- Launch AnyDesk on your computer.
- Click the four horizontal lines and select Settings.
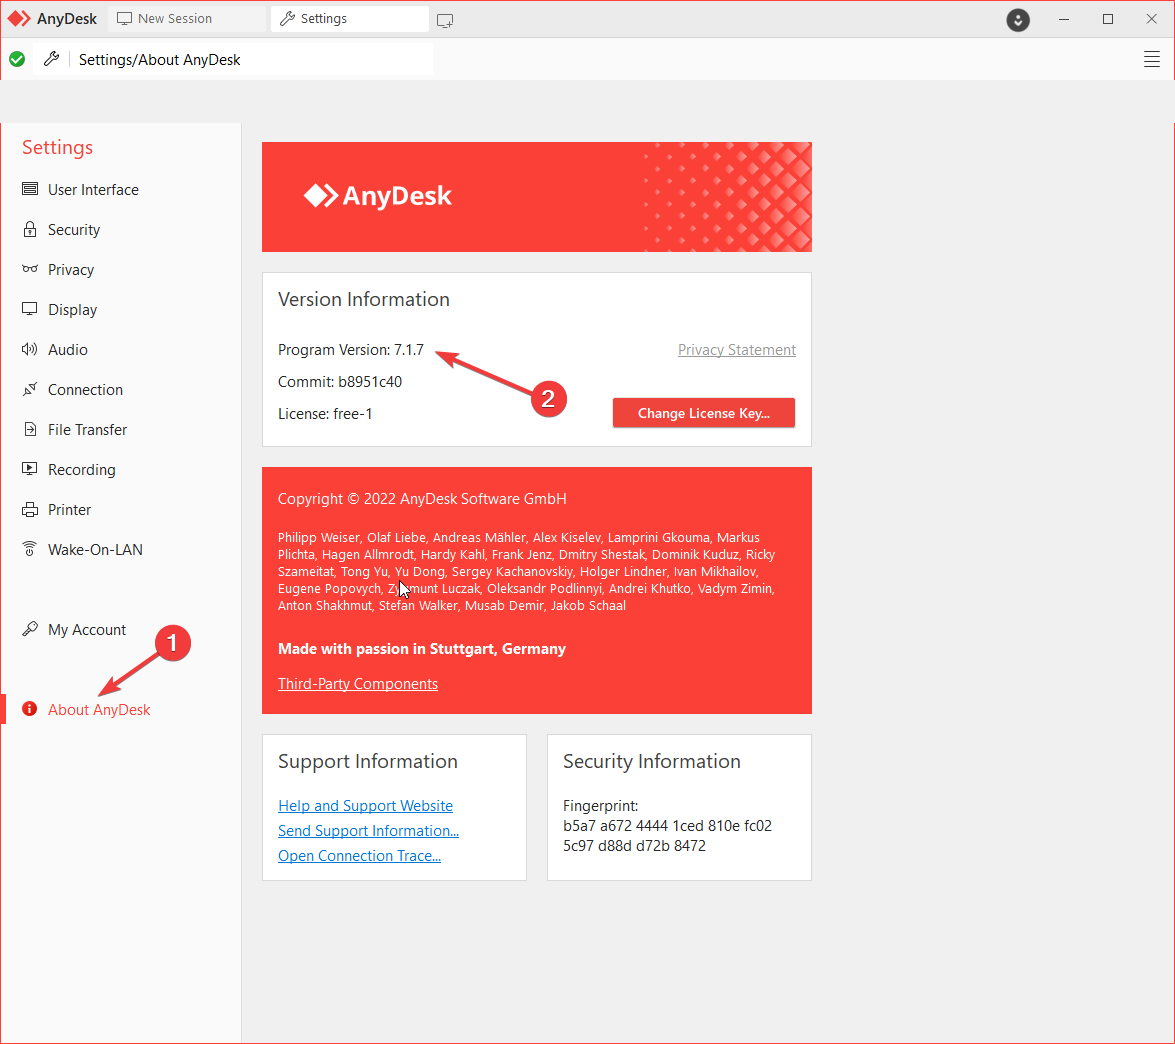
- Go to About AnyDesk and check the version to ensure you have the latest.
- From the left pane, select Security.
- Scroll through the options and go to Updates in the right pane.
- The Enable Auto-Update -Main Channel option should be selected to keep the app updated.
2. Get ID from Main Menu
- Launch AnyDesk.
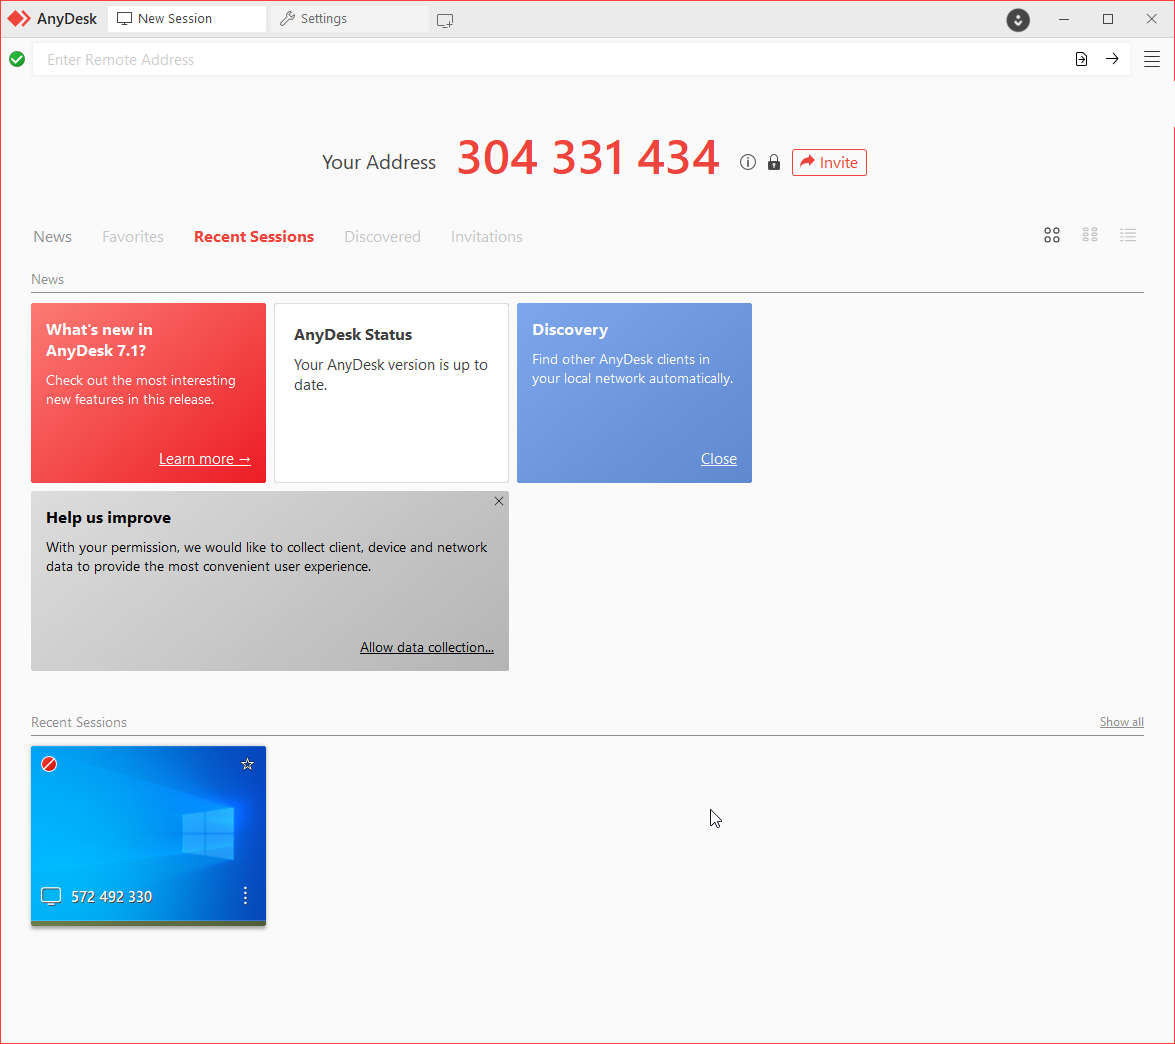
- Locate and click on the New Session from the top bar on the software.
- Check This Desk space, and you can see your ID.
3. Use the Services
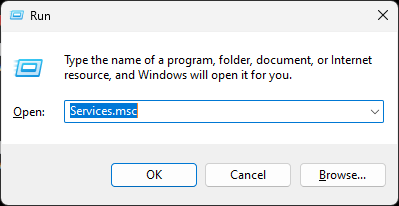
- Press Windows + R to open the Run console.
- Type services.msc and press Enter to open Services.
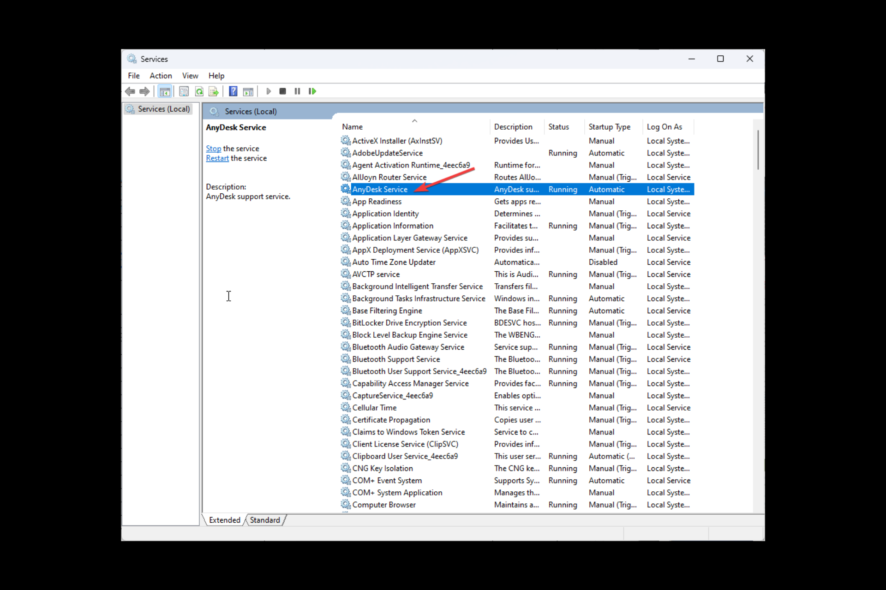
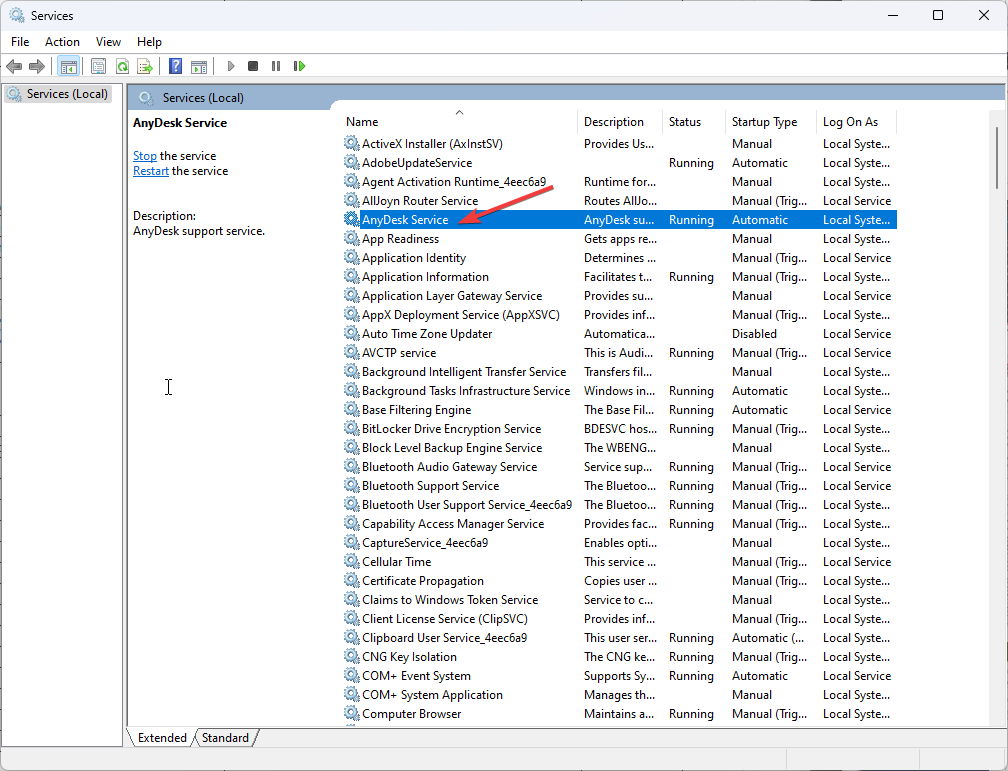
- Locate AnyDesk and double-click it to open Properties.
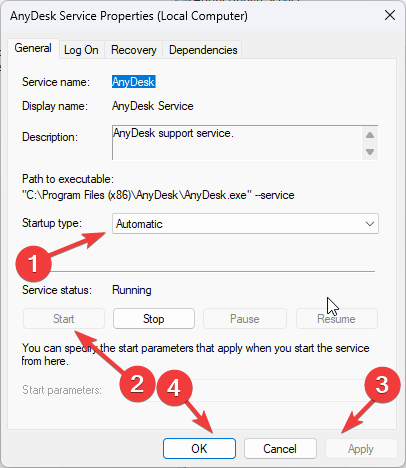
- Select Automatic for Startup Type, and click the Start button under Service status.
- Click Apply and OK to complete the process.
- Restart your computer to let the changes take effect.
4. Check network settings
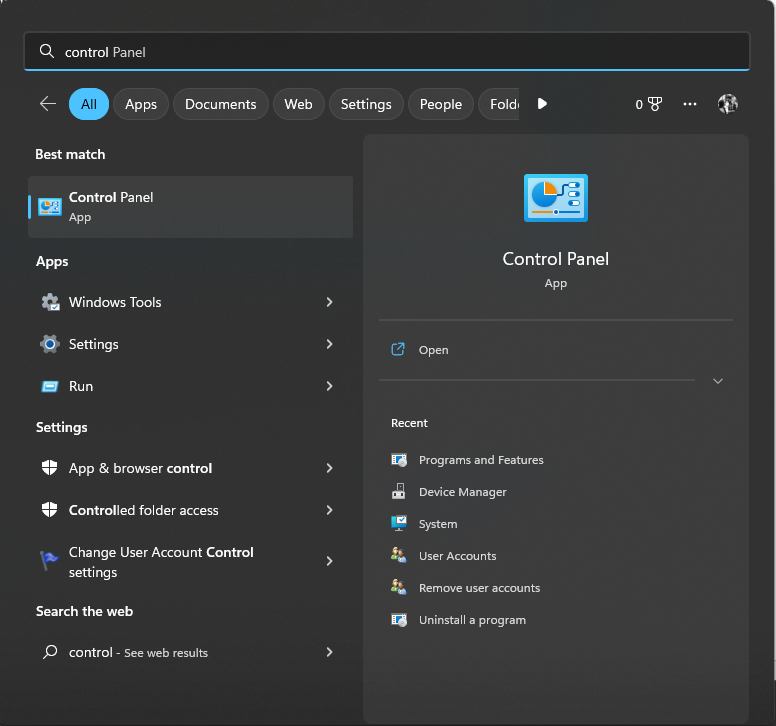
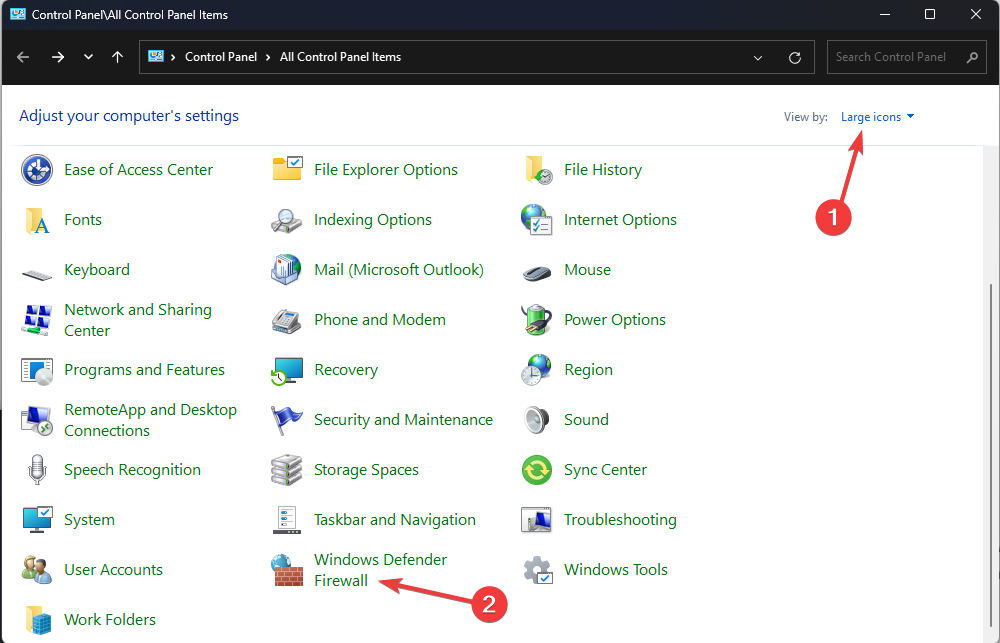
- Press the Windows key, type Control Panel, and click Open.
- Select View by as Large icons, and click Windows Defender Firewall.
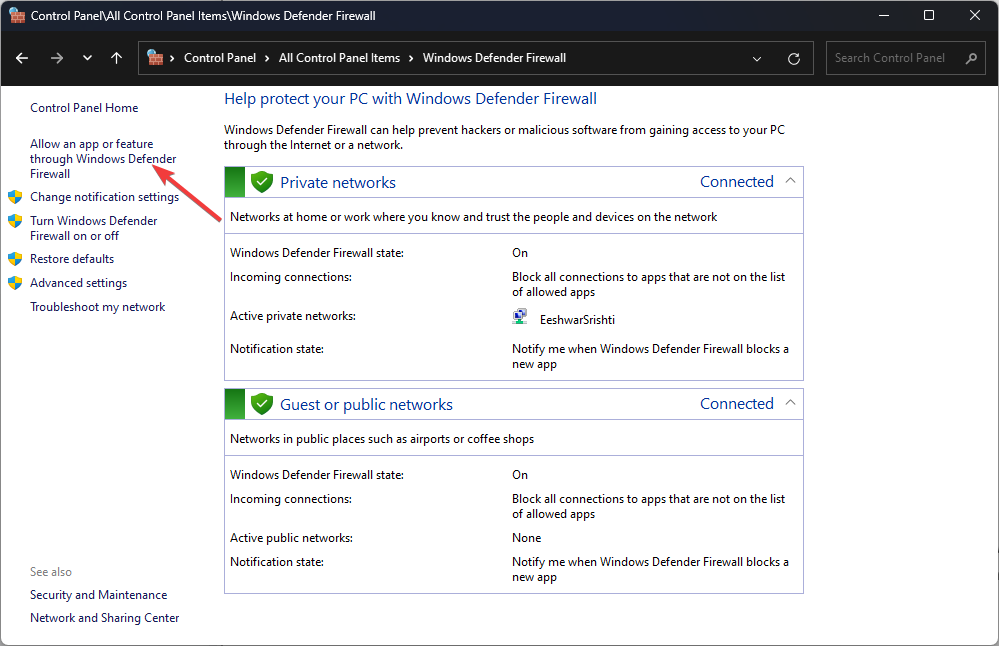
- Select Allow an app or feature through Windows Defender Firewall from the left pane.
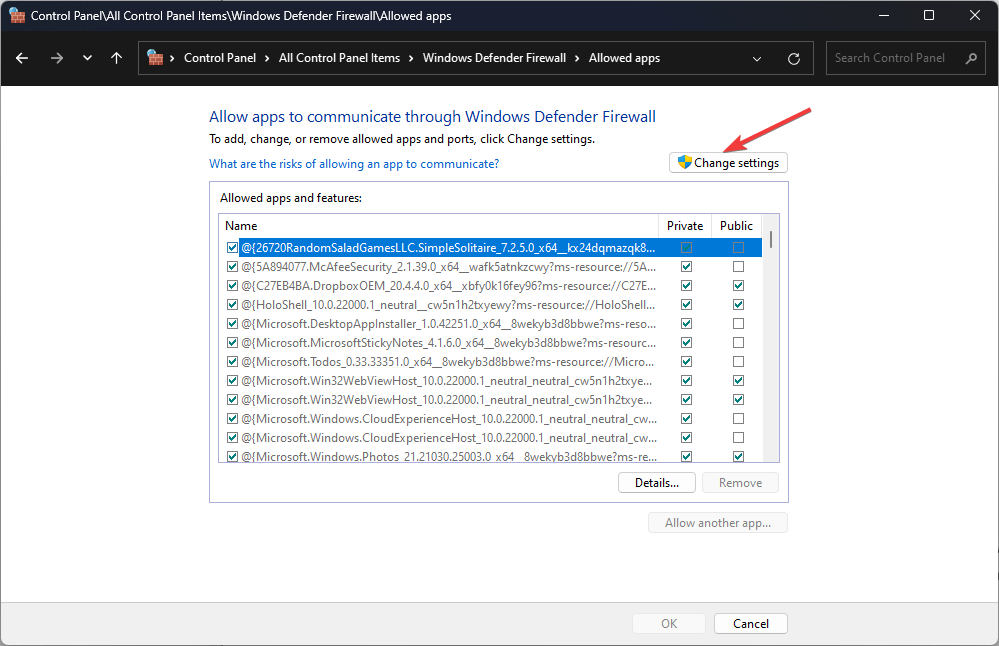
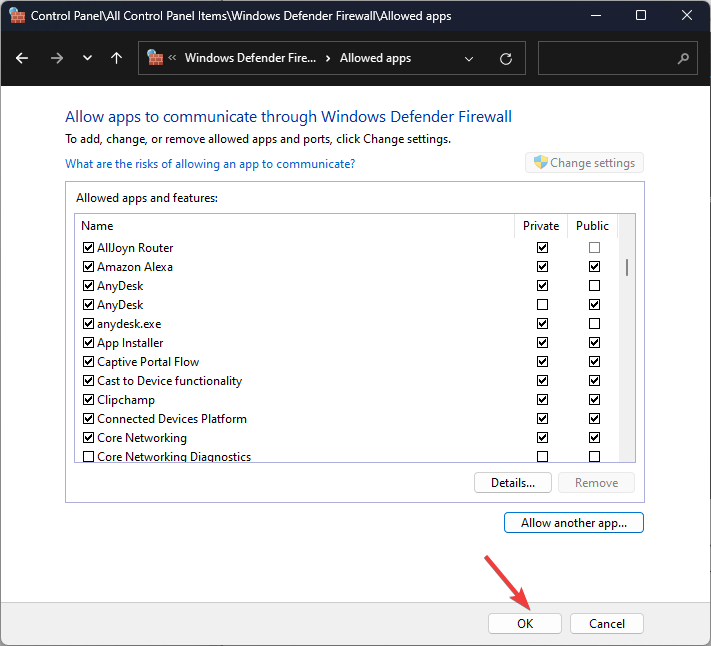
- Scroll through the Allowed apps and features list to check if it has AnyDesk. If it doesn’t, then click Change Settings.
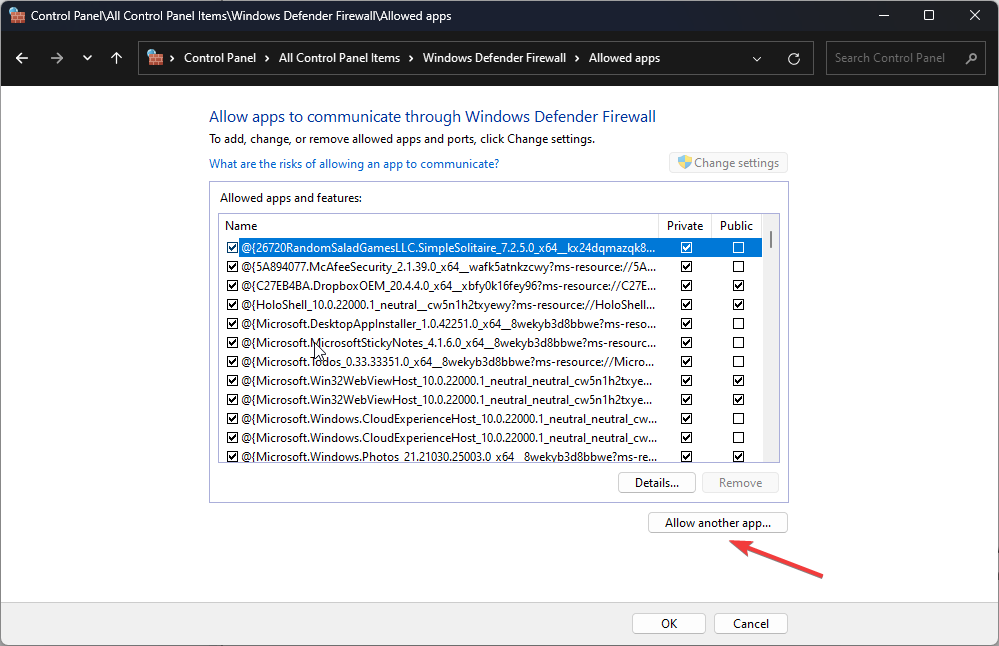
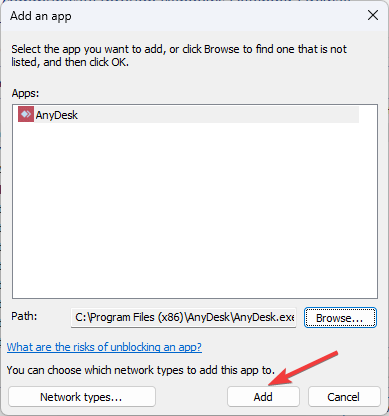
- Now, click Allow another app button.
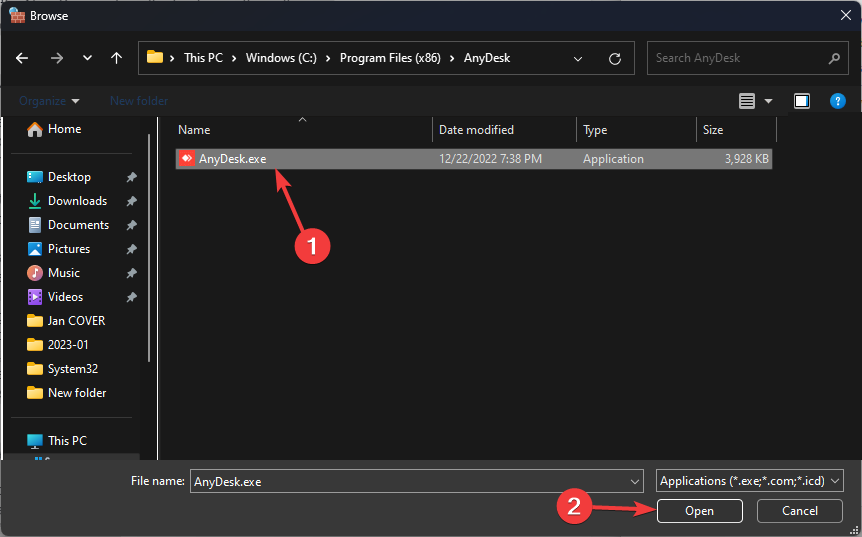
- On the next window, click the Browse button.
- Browse to the app’s location and click Open.
- Once the app is selected, click Add.
- On the Allowed apps window, click OK to confirm the changes.
5. Reinstall AnyDesk
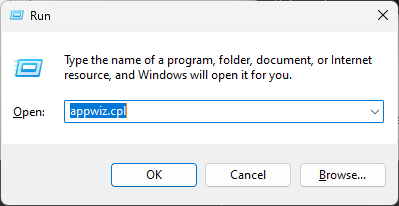
- Press Windows + R to open the Run window.
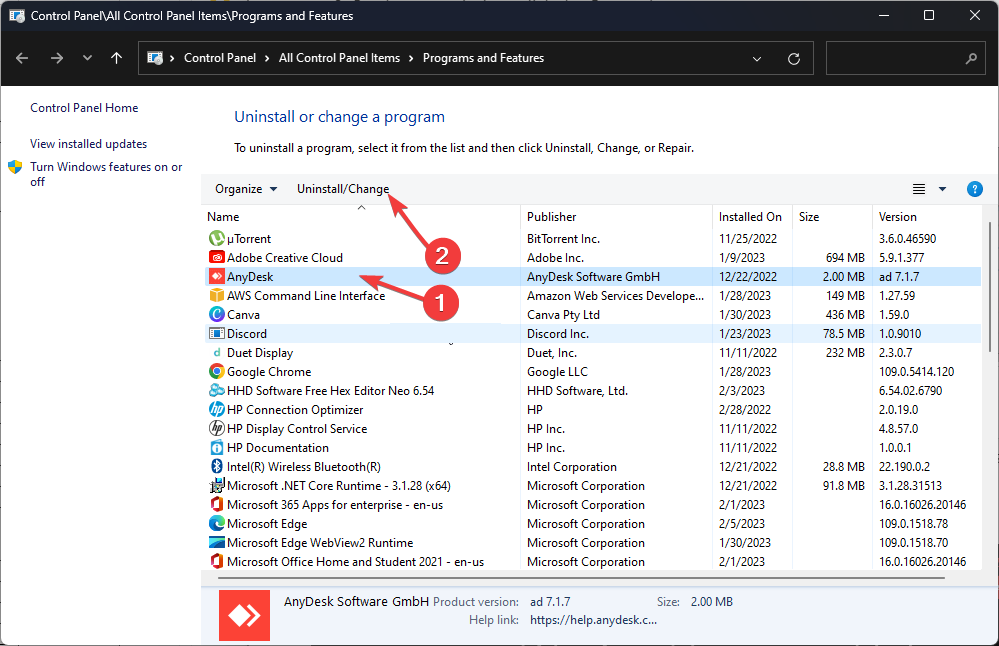
- Type appwiz.cpl and hit Enter to open Programs and Features.
- From the list of installed programs, select AnyDesk, and click Uninstall.
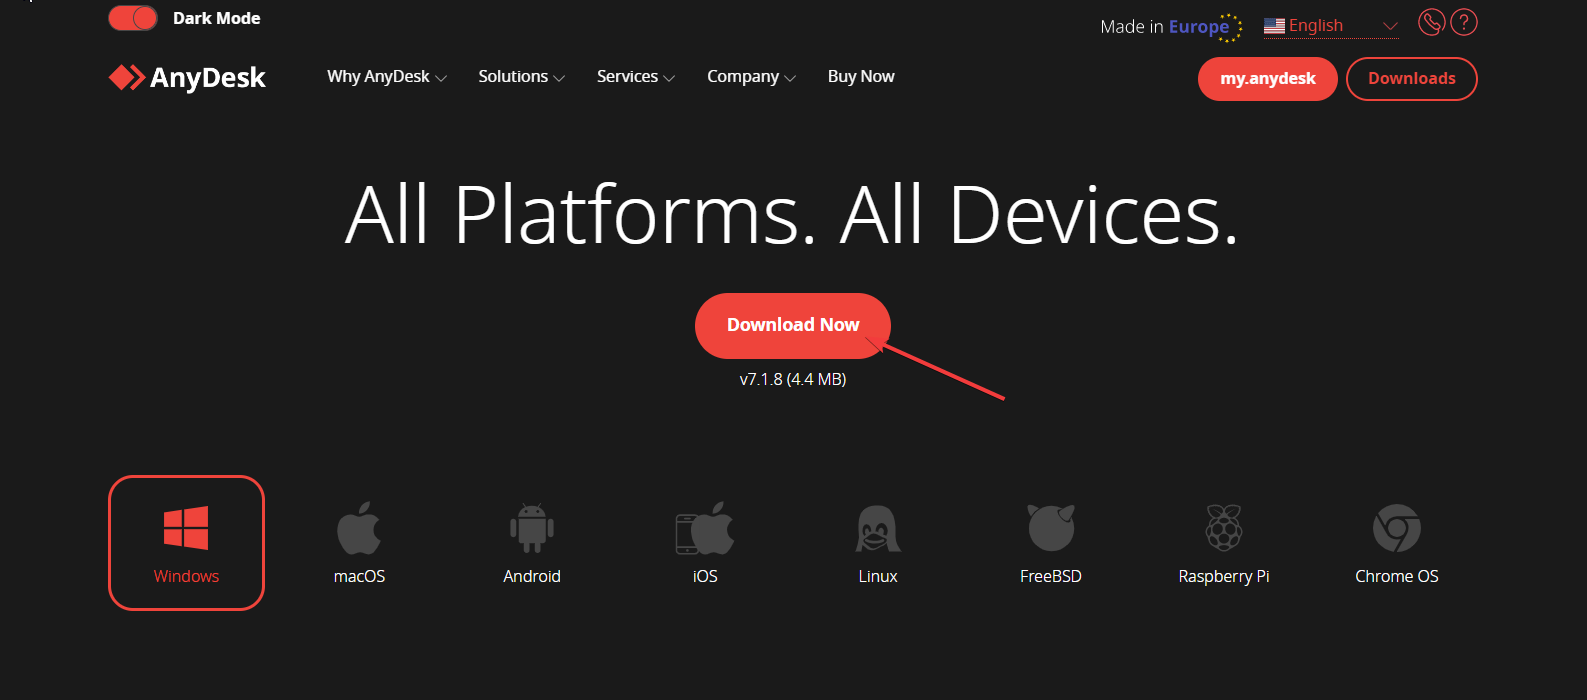
- Now go to AnyDesk’s official website.
- Download the latest version, run the installer, and follow the onscreen instructions to fix the issue.
6. Try connecting using the AnyDesk address
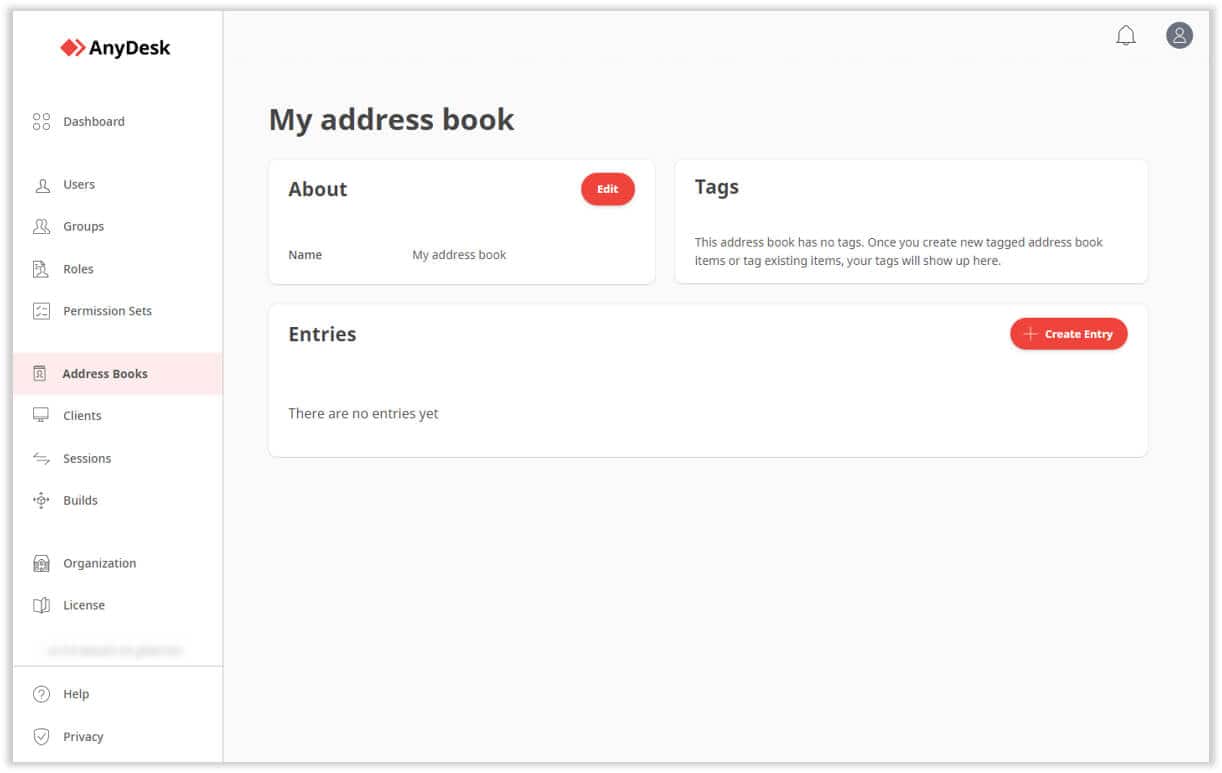
- Log in to your my.AnyDesk II account.
- Navigate to the Address Books section.
- In the Personal tab, open My Address Book to view your saved addresses.
- This will show your custom AnyDesk address, which you can use for remote connections.
If you’ve set up a custom AnyDesk address, use it if your ID isn’t showing. This won’t solve the underlying issue, but it’s a good backup for securing a remote connection.
7. Contact Support

If nothing worked for you and you are stuck with the issue, then it is advised to contact AnyDesk support. Explain to them the whole scenario and steps taken to fix the case; this will help them better understand the situation and help you.
So, these are the methods you can follow to fix AnyDesk ID not showing on Windows 11. If you have questions or concerns about the issue, feel free to reach out in the comments section below.






User forum
0 messages