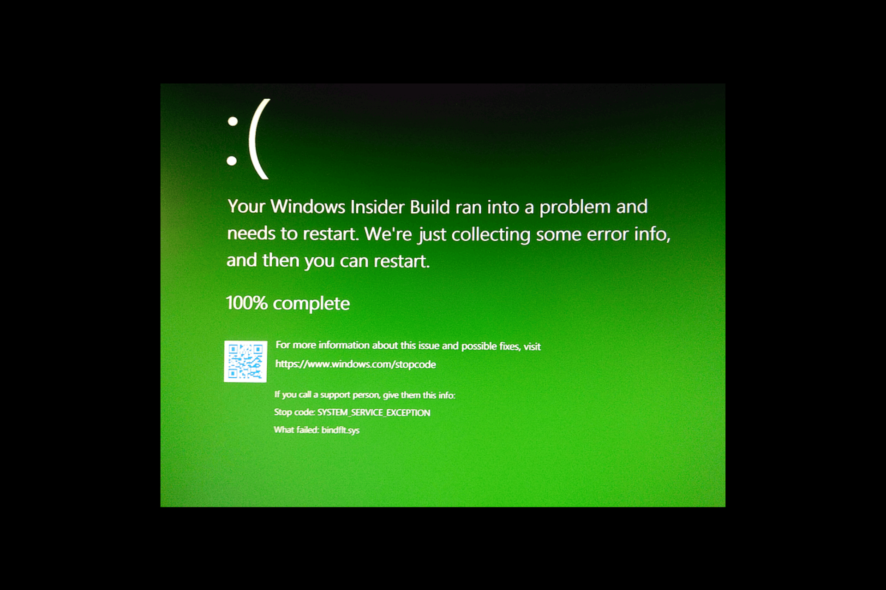
Bindflt.sys Blue Screen: How to Fix It in 5 Steps
Explore the expert tested methods to fix this error
4 min. read
Updated on
Read our disclosure page to find out how can you help Windows Report sustain the editorial team. Read more
Key notes
- The bindflt.sys BSoD error occurs due to outdated or incompatible drivers, driver conflicts, or malware infection.
- To fix it, you can run SFC and DISM scans, update drivers and your Windows, or run a malware scan.

Experiencing the dreaded bindflt.sys Blue Screen of Death (BSoD) error can be frustrating and disruptive to your computer usage. The error is associated with the bindflt.sys driver.
Bindflt is a Windows Bind Filter driver service that binds file system namespaces to different locations and hides remapping from the users. If it fails to start, you can see an error logged in Event Viewer.
In this guide, we will walk you through a set of steps to help you fix this blue screen error right after discussing the causes of the issue.
What causes the bindflt.sys Blue Screen of Death error?
There could be various reasons for this blue screen error; some of the common ones are mentioned here:
- Incompatible drivers – If the bindflt.sys driver or other related drivers are outdated or incompatible with your computer; it could trigger to BSoD error. Try updating your drivers on your PC.
- Driver interference – Conflicts between different drivers on your machine can create instability, thereby triggering the Blue Screen of Death error.
- Faulty hardware – A malfunctioning or incompatible hardware component, such as a network card or USB device, can lead to this error. Check the hardware component to be sure.
- Malware infection – Malicious software can corrupt or modify system files, including drivers, leading to BSoD errors. Run a deep scan using an antivirus tool.
- System file corruption – Corruption of critical system files, including the driver file, can result from software conflicts, improper shutdowns, or disk errors. Run an SFC scan to repair the system files.
Now you know the causes of the BSoD error; let us dive into the troubleshooting methods.
How can I fix the bindflt.sys Blue Screen of Death error?
Before engaging in advanced troubleshooting steps, you should consider performing the following checks:
- Try restarting your computer.
- Make sure your Windows is up to date.
- Check the hardware components to ensure everything is in place.
If you have been through the tweaks, move to the detailed methods to find the solutions.
1. Run SFC and DISM scans
- Press the Windows key, type cmd and click Run as administrator.
- Type the following command to repair system files and press Enter:
SFC /scannow - Once the scan is executed, copy & paste the following command to repair Windows OS image files and hit Enter:
DISM /Online /Cleanup-Image /RestoreHealth - Wait for the command to be completed, Windows will connect to the Update server to repair the Windows OS image. Type the following command and hit Enter:
sc config bindflt start= demand - Restart your computer to save the changes.
In addition, there is another efficient method in case the steps didn’t solve the issue and you still get BSoD errors.
Hence, you may try a cutting-edge system repair solution to diagnose your PC and troubleshoot every issue in a beat.
2. Modify the Start value for bindflt
- Press Windows + R to open the Run box.
- Type regedit and click OK to open the Registry Editor.
- Navigate to this path:
Computer\HKLM\SYSTEM\CurrentControlSet\Services\bindflt - Locate Start and double-click it.
- Change the Value data to 3 to make it Manual (Demand).
- Reboot your computer to let the changes take effect.
3. Disable features from the Turn Windows features on or off
- Press the Windows key, type control panel and click Open.
- Select Category as View by and click Programs.
- Under Programs and Features, click Turn Windows features on or off.
- Remove the checkmark next to Windows Sandbox, then click OK.
- Now click Restart now to save the changes on your computer.
- Open the Turn Windows features on or off again, and remove the checkmark next to Hyper V.
- Click OK and the changes will be made.
- Now, click Restart now to save the changes on your computer.
4. Disable the Windows Security app temporarily
- Press the Windows key, type windows security, and click Open.
- Click Virus & threat protection and click Manage Settings.
- Under Real-time protection, toggle off the switch to disable antivirus temporarily.
Windows Security will be active once you restart your computer.
5. Run a disk check
- Press Windows +E to open the File Explorer window.
- Go to This PC, then right-click the System Drive and select Properties.
- Switch to the Tools tab, select Error checking and click Check.
- Click Scan drive.
The tool will scan for the bad sectors on your computer. If they are detected, remember that Windows can’t fix them. You need to use a third-party tool or perform a clean installation of Windows to fix it.
Please feel free to give us any information, tips, and your experience with the subject in the comments section below.


User forum
0 messages