How to Fix Blink Camera Error 1011: Step by Step
Blink error 1011 also comes with the code NSURLErrorDomain
3 min. read
Updated on
Read our disclosure page to find out how can you help Windows Report sustain the editorial team. Read more

Getting a The operation couldn’t be completed. (NSURLErrorDomain error – 1011) when using Blink Intelligent Home Security? You’re not alone!
While Blink is a well-known and resilient security device for your property, it is prone to errors. This particular one is usually caused by VPN interference, out o range WiFI or nework bugs.
How do I fix error 1011 on the Blink?
1. Change your Wi-Fi network
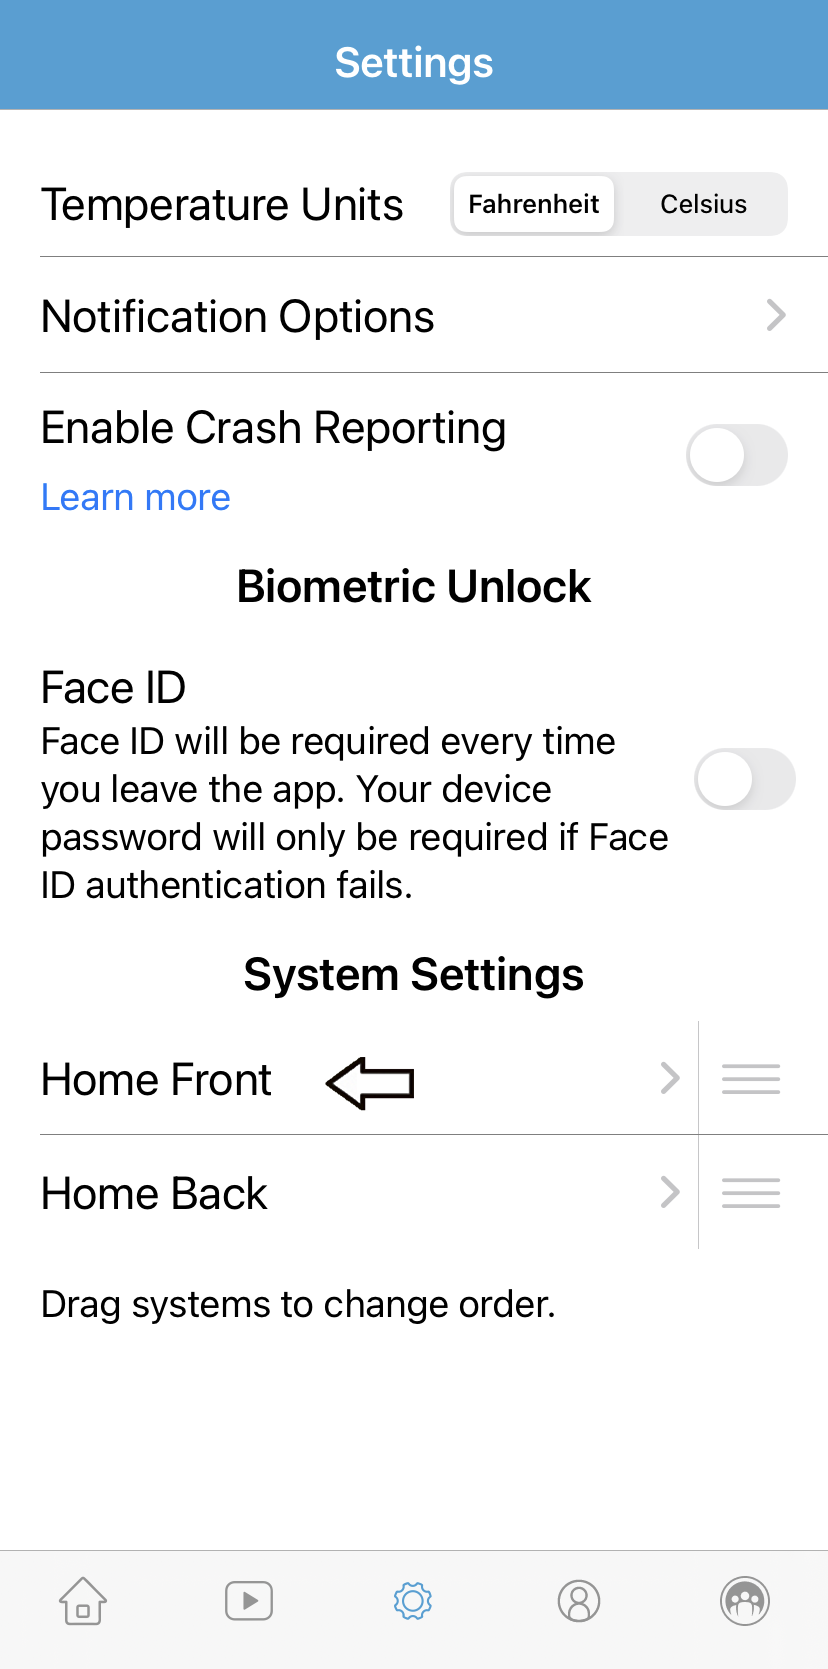
- Launch the Blink app and tap on the gear icon (Settings) at the bottom of the screen.
- Next tap, under System Settings, tap on your camera device.
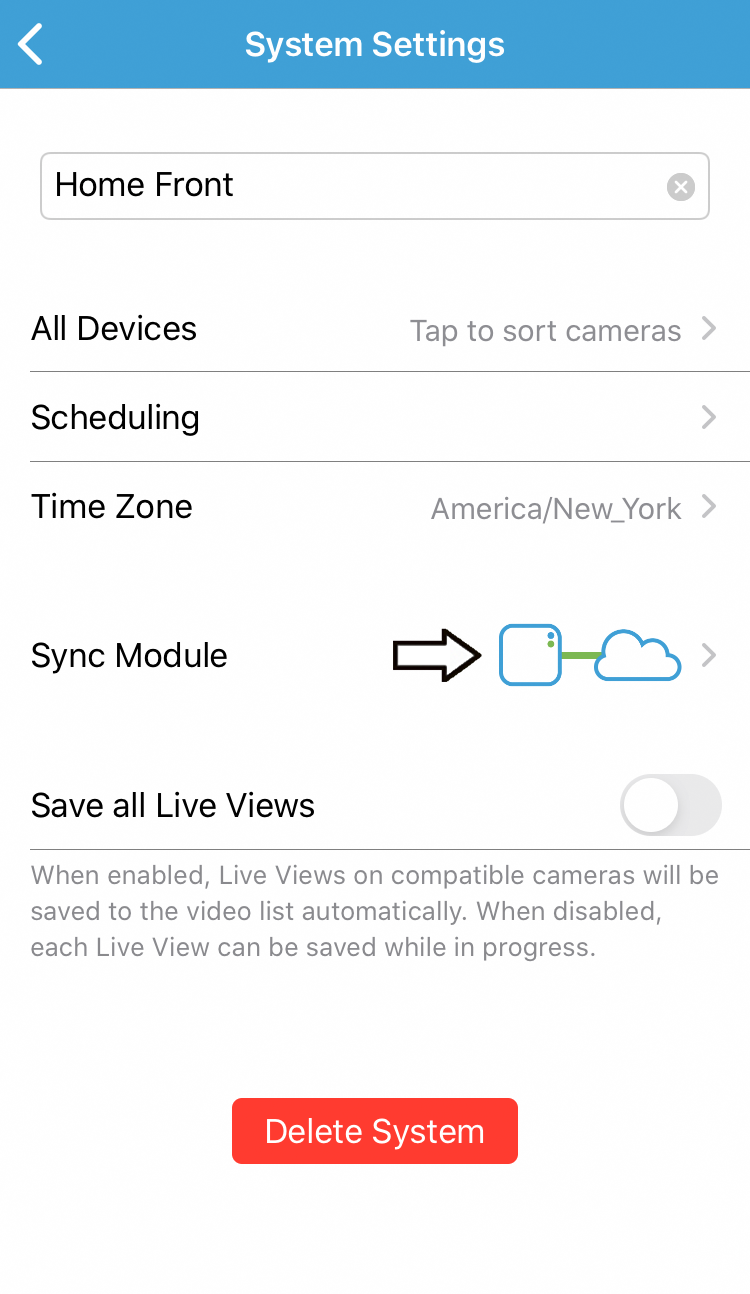
- On the System Settings screen, tap on Sync Module to open the status screen.
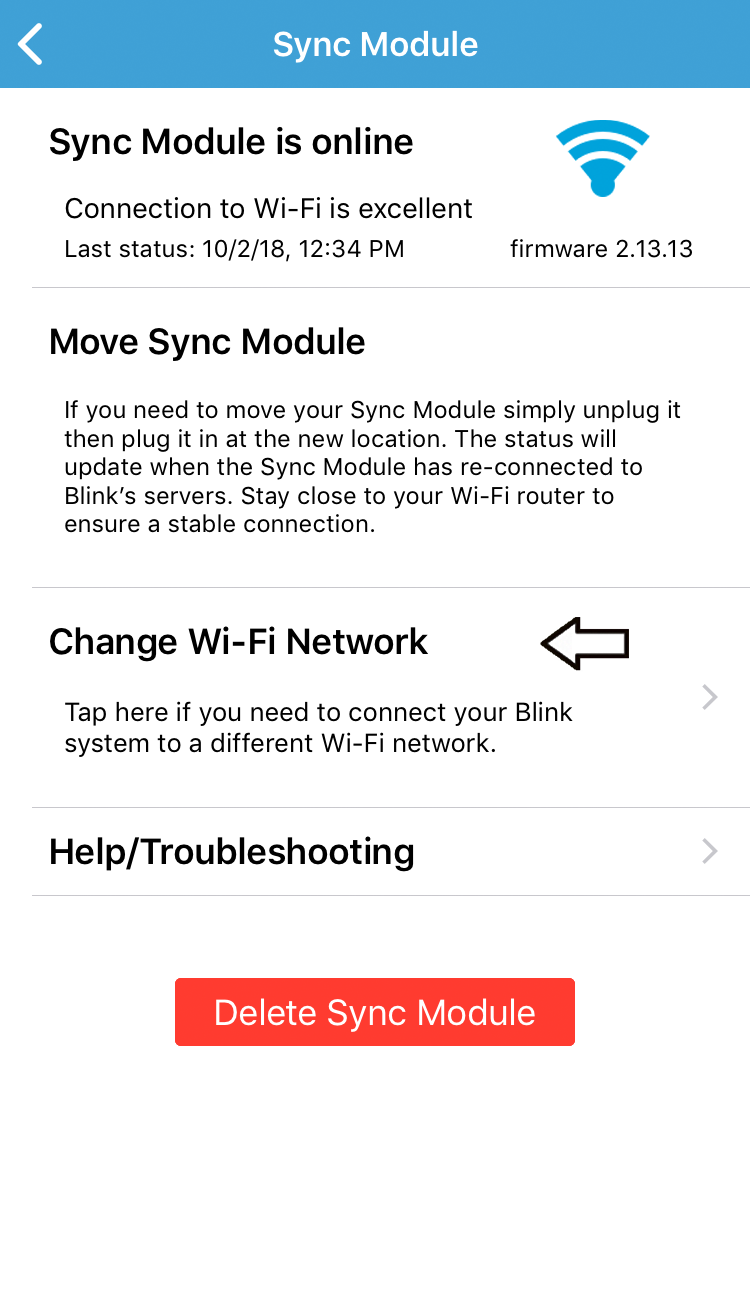
- Now, on the Sync Module page, click on Change Wi-Fi Network.
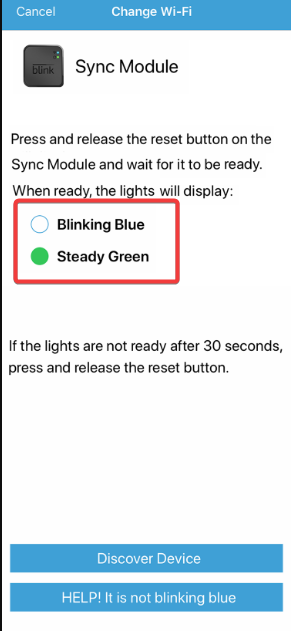
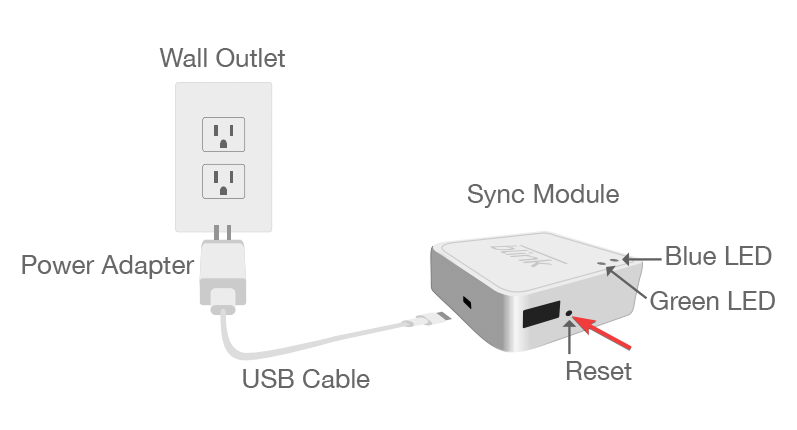
- Next, you must follow the on-screen instructions that ask you to press the Reset button on your Blink device, a small hole (on the side of the Sync Module) using a thin object.
- On successful reset, the blue LED should blink and the green LED should be solid on your Blink device.
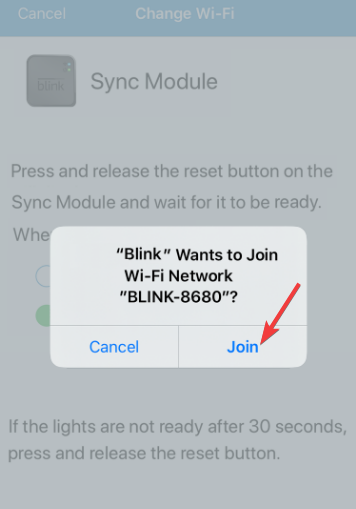
- Now, press the Discover Device button and you will be prompted to join the Sync Module Wi-Fi network. Tap on Join.
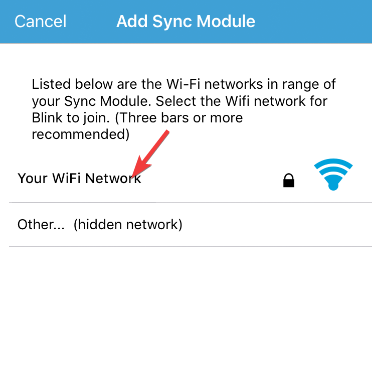
- Next, pick your Wi-Fi network from the options provided under Add Sync Module.
- You will then receive a success message saying Sync Module added! Tap on Done.
You have now successfully changed the Wi-Fi network for your Blink security device.
2. Disable the VPN
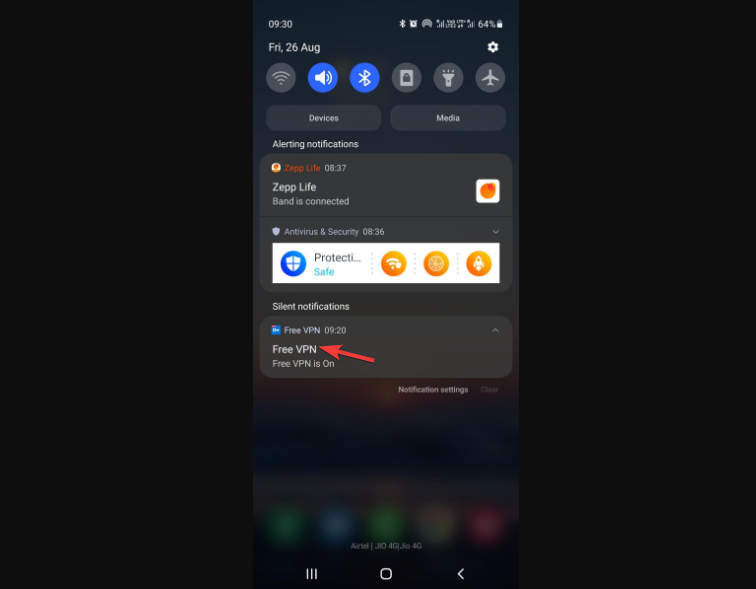
- On your Android phone, swipe down from the top of the screen to open the notification panel.
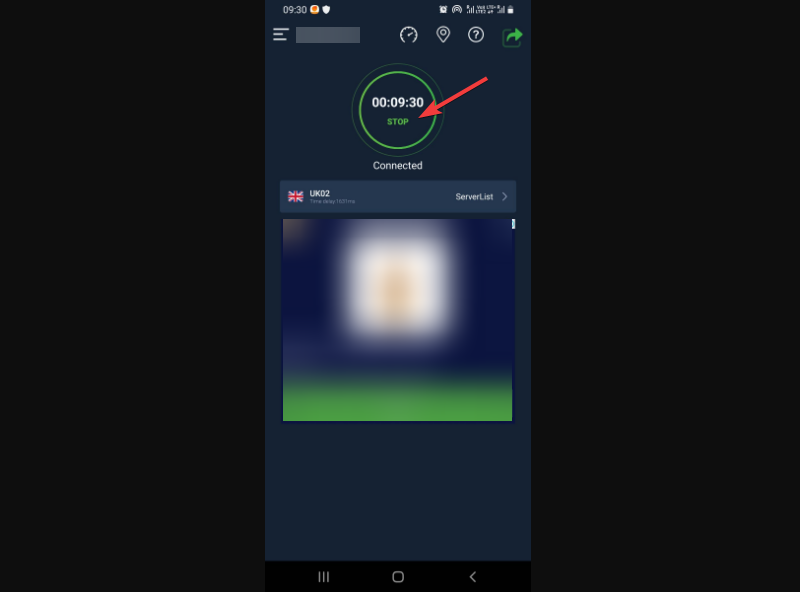
- Tap on the active VPN.
- This will open the VPN app. Here, click on Stop.
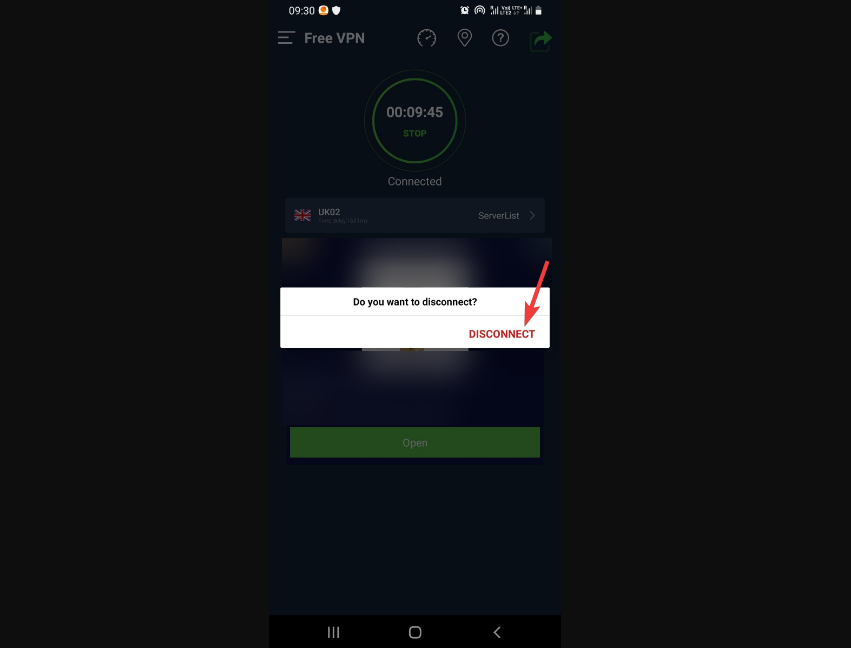
- Now, press Disconnect to confirm the action.
Once done, force close the Blink app and turn it on again. Now, you should not encounter Blink error 1011, and the smart security system should function normally.
3. Reset/Reinstall the Blink application
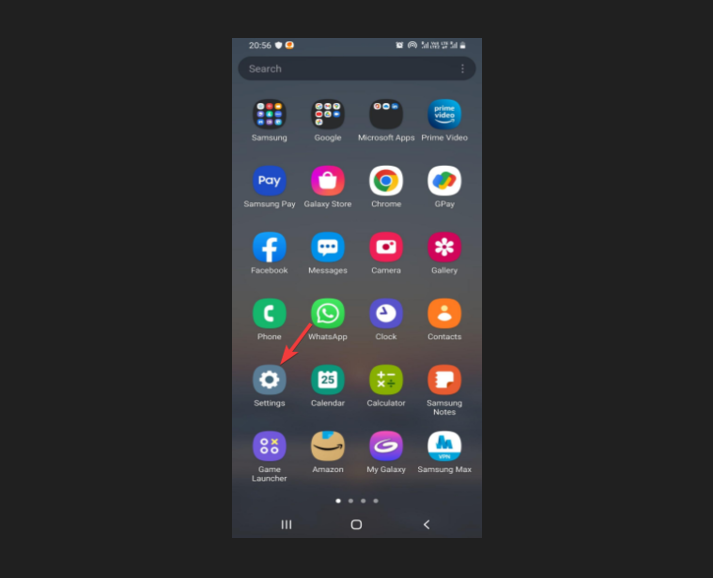
- Go to your Android phone Settings.
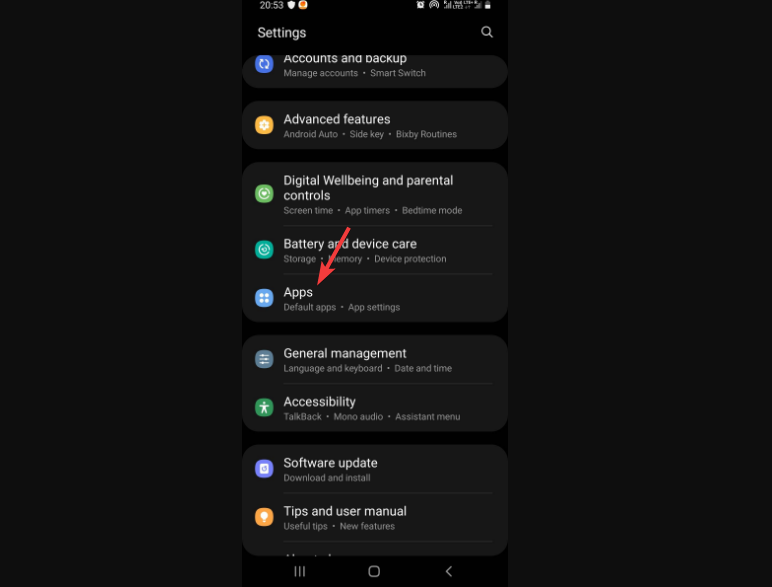
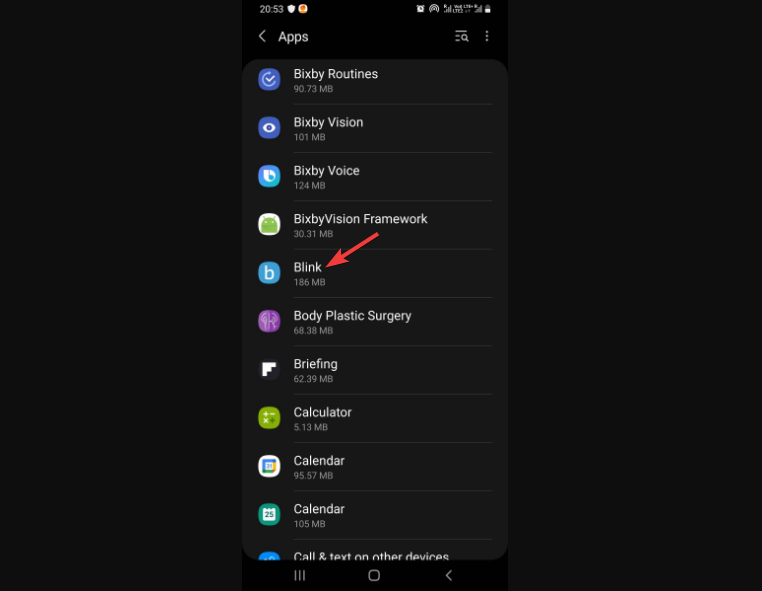
- Tap on Apps.
- Then look for Blink and tap on it.
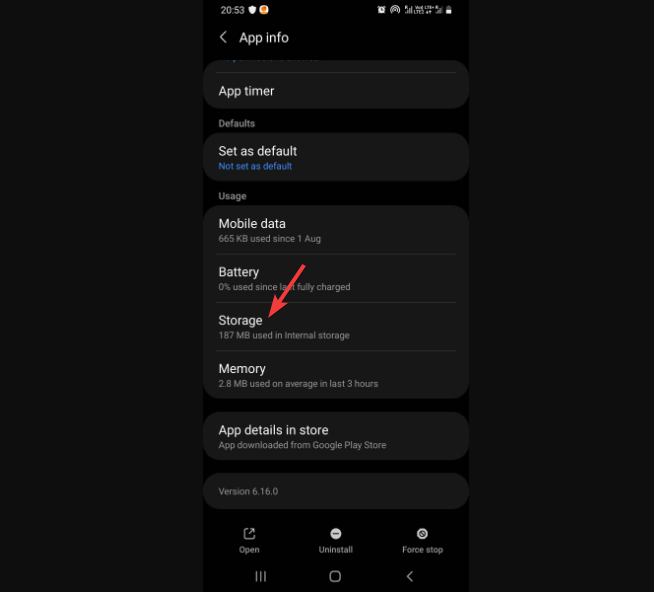
- Next, under App info, tap on Storage.
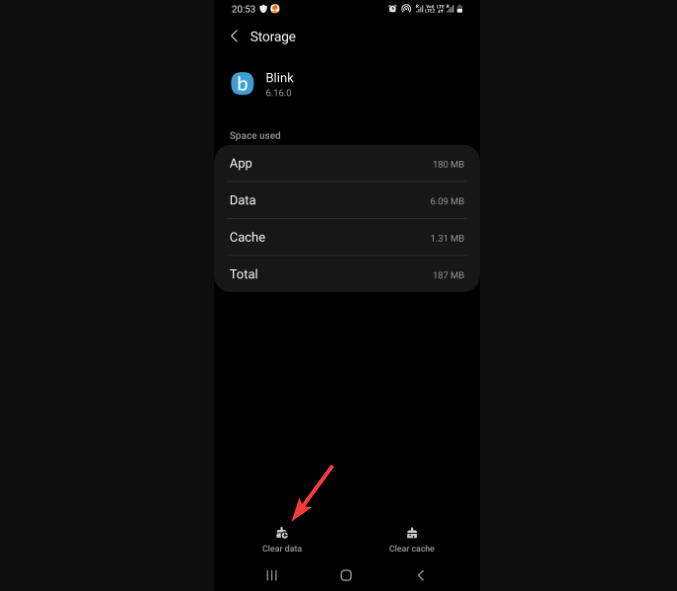
- On the Storage page, tap on Clear data at the bottom.
- Press OK to confirm the action.
Now that you have successfully reset the Blink app, the error message 1011 should not appear again.
 NOTE
NOTE
Alternatively, you can contact the Blink technical support team for further assistance, and they should readily help you to fix the issue. But if you encounter Blink’s unknown Tulsa error, you can refer to our detailed troubleshooting guide for further help.
But, if you are looking for other best video surveillance software for Windows 10/11, you can refer to our detailed post for more information.



User forum
0 messages