Solved: Can't Install Marathi Language Pack
First, check if your Windows license supports multiple language pack
5 min. read
Published on
Read our disclosure page to find out how can you help Windows Report sustain the editorial team. Read more
Key notes
- If you can't install the Marathi language pack, try manually installing it, then restart your PC.
- To learn more about the process, keep reading!
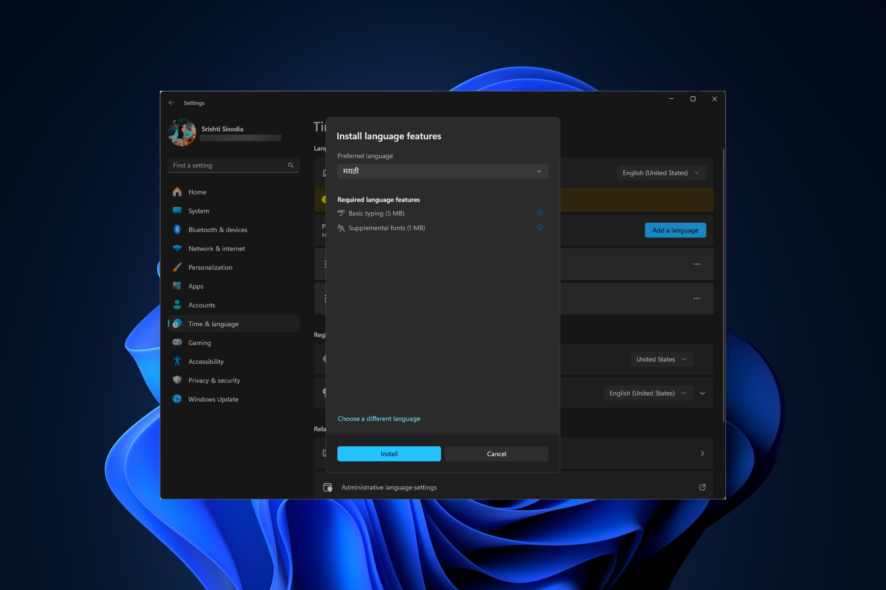
If you can’t install the Marathi language pack on your Windows computer, then this guide will offer you WR-tested solutions to fix it.
How do I manually download language packs on Windows 10 & 11?
You can manually download language packs on Windows 11 and 10 using the Settings app, or you can visit the Microsoft website if you know the Windows OS version and search for the one that is compatible with it.
How do I force install the Marathi language pack on Windows 11?
Before proceeding with any steps to fix the can’t install Marathi language pack error, go through the following preliminary checks:
- Ensure your Windows OS is updated to the latest version and you are logged in using the account with administrative privileges.
- Restart your computer and verify if you have a stable internet connection.
- Check whether your Windows supports multiple display languages.
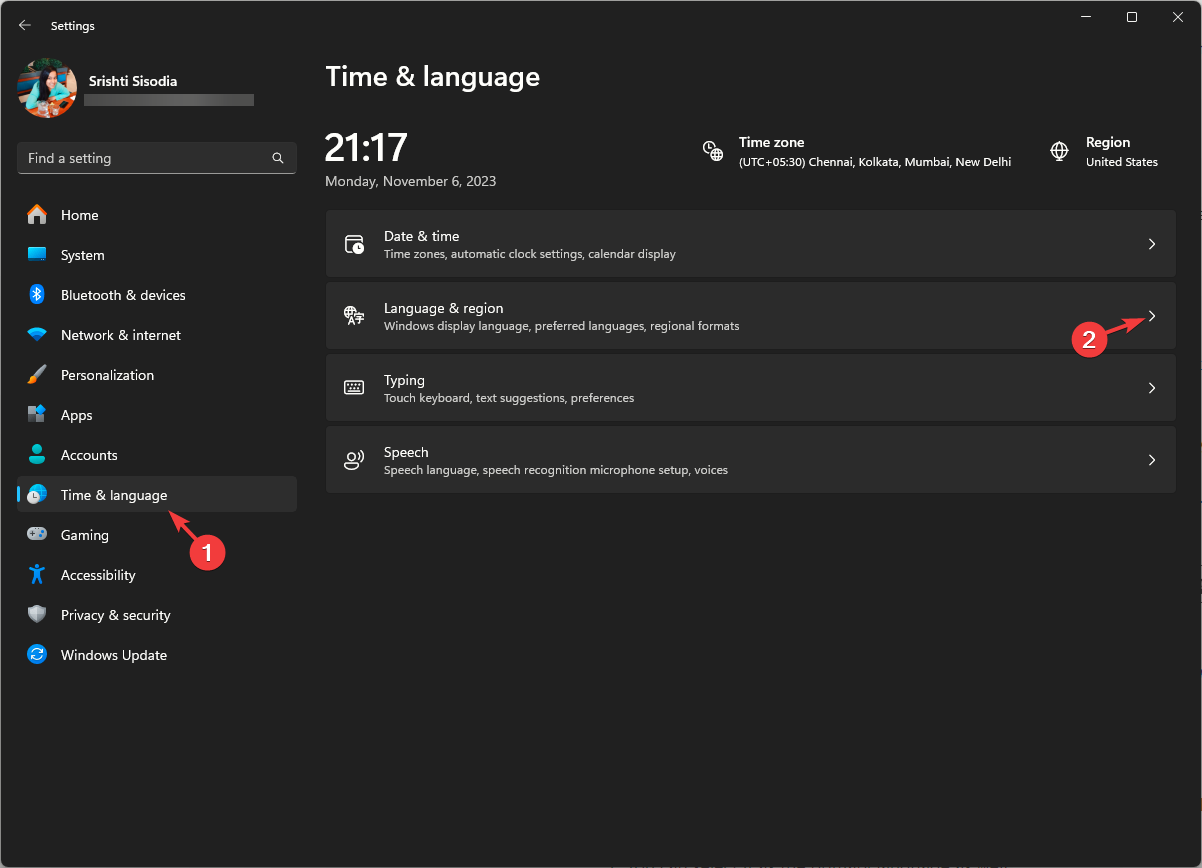
- Press Windows + I to open the Settings app.
- Select Time & lanugage from the left pane, then click Language & region.
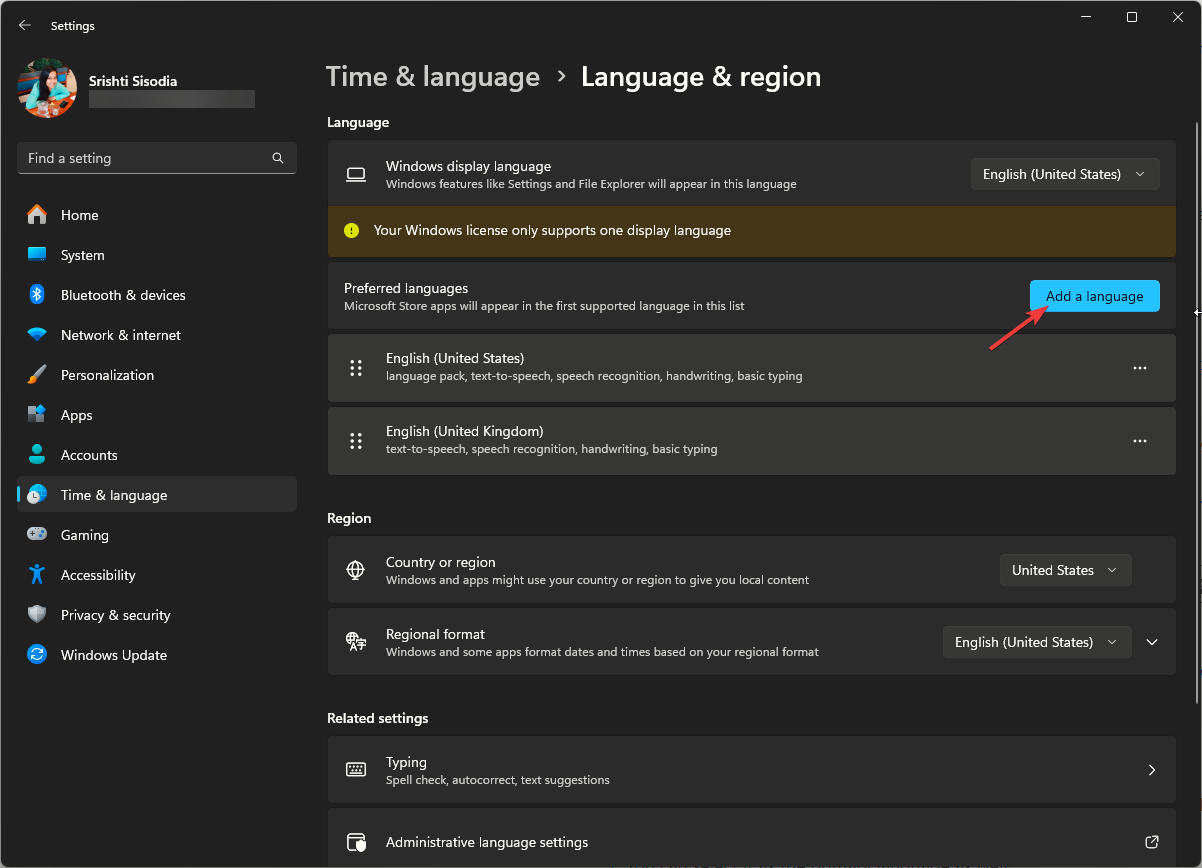
- Locate Preferred languages and click the Add a language button.
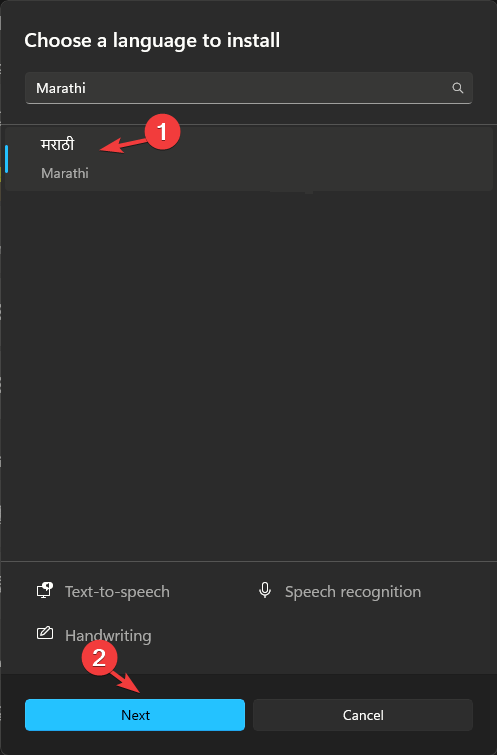
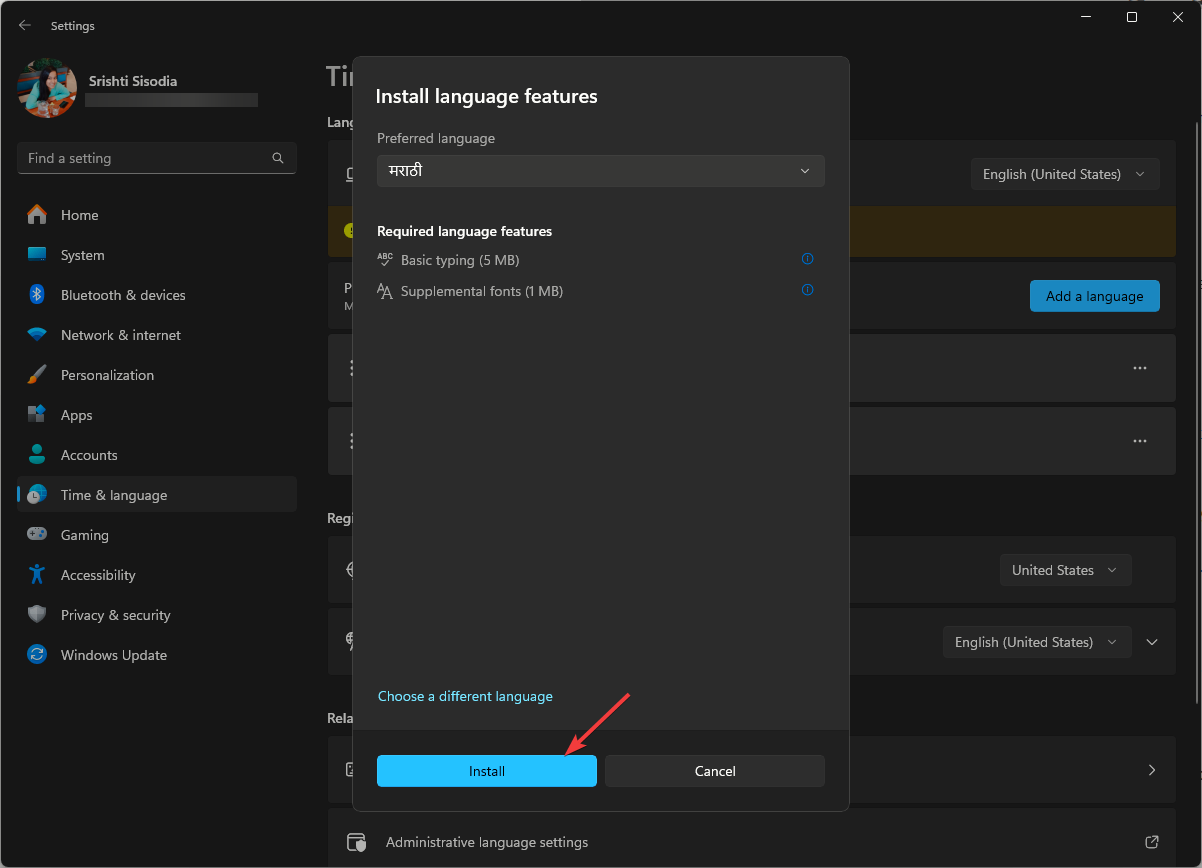
- Search for Marathi, then click Next.
- Click Install.
- Once the language is installed, you will have the Language pack, Basic typing, Handwriting, and Text-to-speech features installed.
- You can select it as the primary language as well.
In case the language pack is not installed or stuck at downloading, the reason could be corrupted system files or an outdated version of Windows; read this guide to learn more.
However, if you have a single language edition of Windows installed, that means your Windows OS only supports a single display language.
So, if you install a language, you can use it for Basic typing, Handwriting, and Text-to-speech but not as display language. For that, you need to upgrade it to a different Windows Home or Pro version.
How can I use multiple display languages on Windows 11 single edition?
 NOTE
NOTE
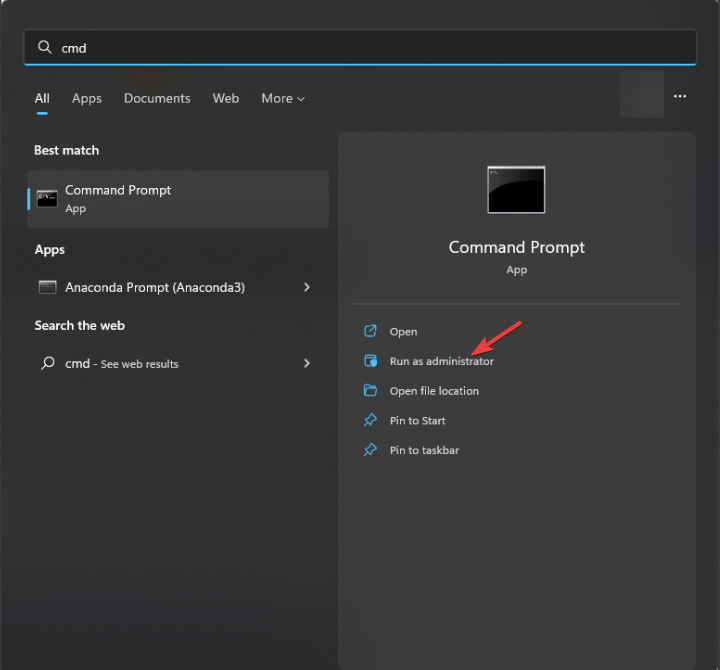
- Once you have installed the preferred language using the abovementioned steps, press the Windows key, type cmd, and click Run as administrator.
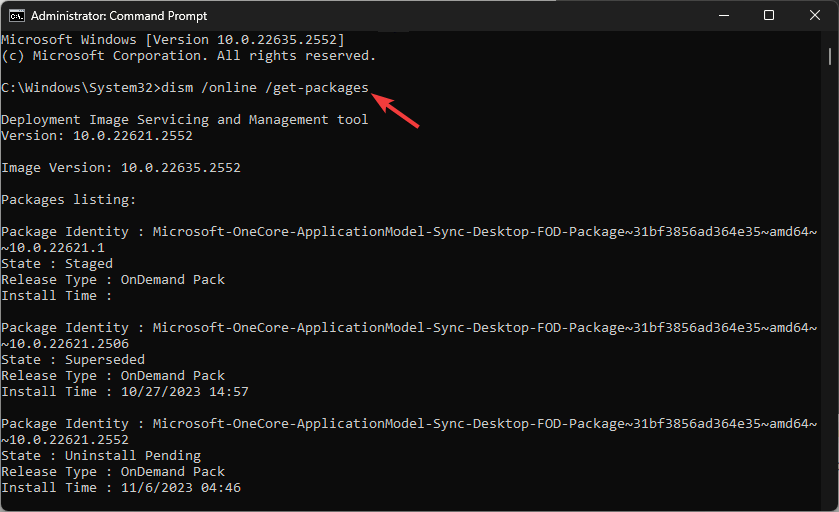
- Type the following command and hit Enter:
dism /online /get-packages - Now locate the entries starting with Microsoft-Windows-Client-LanguagePack-Package and ensure the state is mentioned as Installed.
- Check what language it is by checking the Package Identity.
If you can’t find the language pack listed, you need to download the language file manually. To do that, follow these steps:
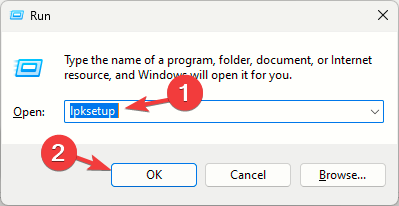
- Press Windows + R to open the Run box.
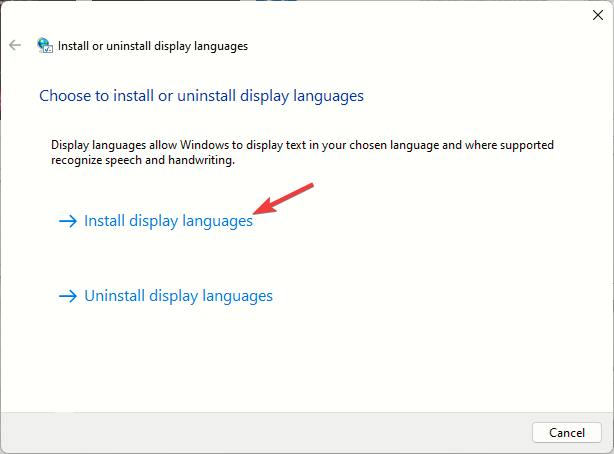
- Type lpksetup and click OK to open the Install or uninstall display languages wizard.
- Click Install display languages.
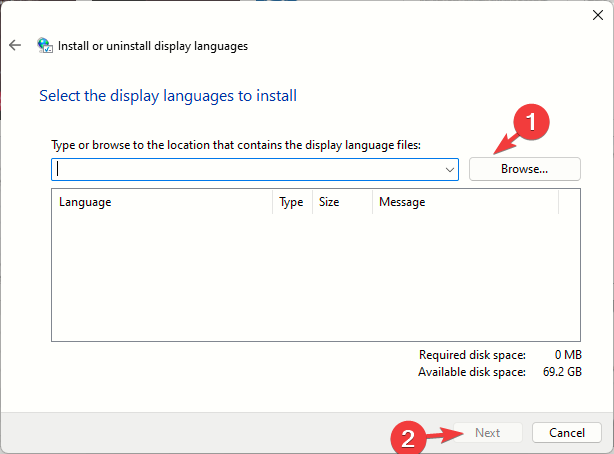
- Click Browse, select the Language pack you downloaded, and click Next.
- Follow the onscreen instructions to complete.
Once the process is complete, follow these steps to add it to the registry entries:
- Now press Windows + R to open the Run box.
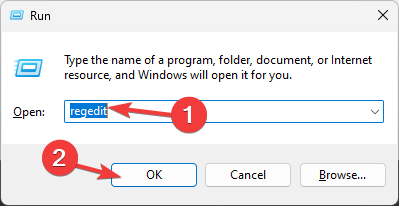
- Type regedit and click OK to open the Registry Editor. Click Yes on the UAC prompt.
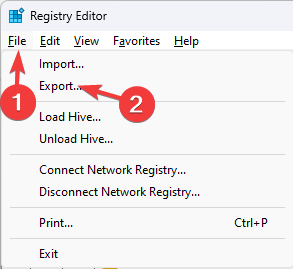
- Go to File, click Export, and save the .reg file to an accessible location.
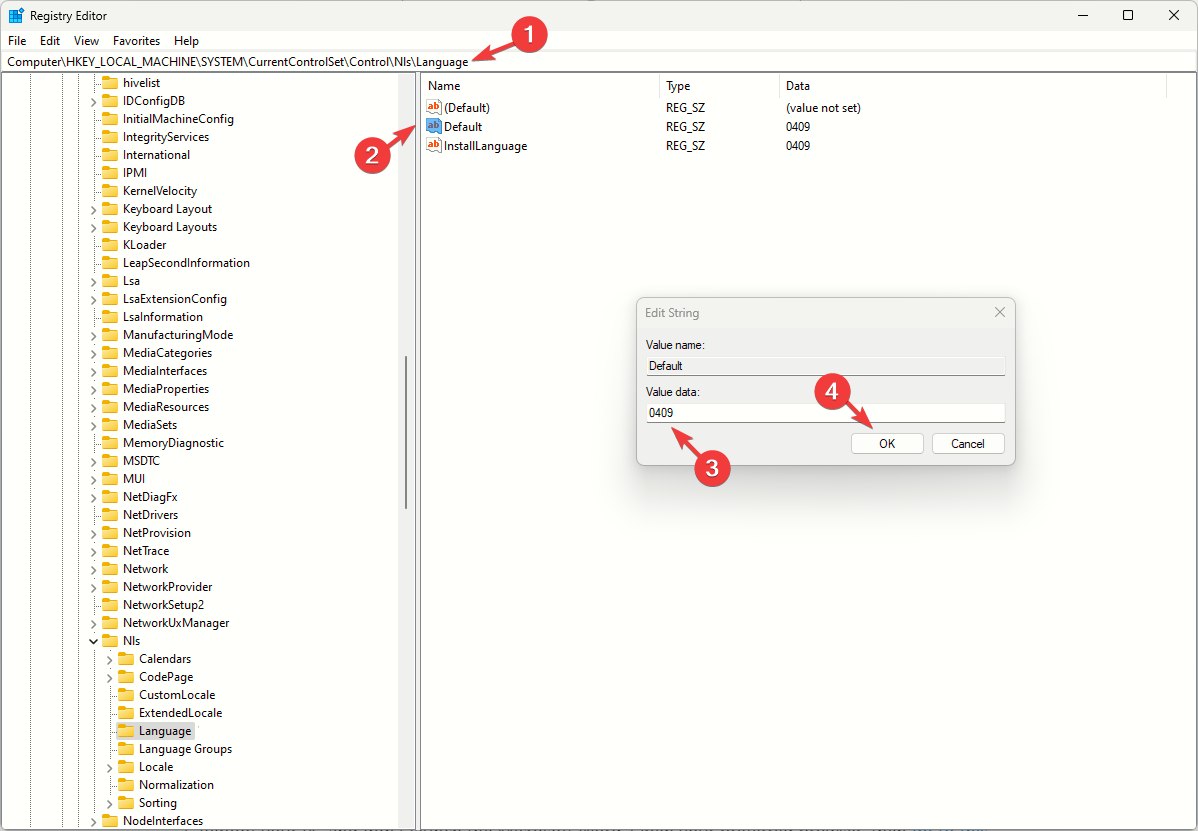
- Navigate to this path:
Computer\HKEY_LOCAL_MACHINE\SYSTEM\CurrentControlSet\Control\Nls\Language - Double-click default and change the Value data to the language pack you want to use from the Language ID list. For En-US, it is 0x0409, and for Marathi, it is 0x004E. So the Value data should be 004E, and click OK.
- Next, if you want to change the Installed Language, locate the Installed Language DWORD, then change the Value data for the entry.
- Restart your computer to let the changes take effect.
You can use these steps to add any language as a display language, and if you have selected Hindi and want to get Hindi typing software, read this guide.
How can I change the language pack for Microsoft Word?
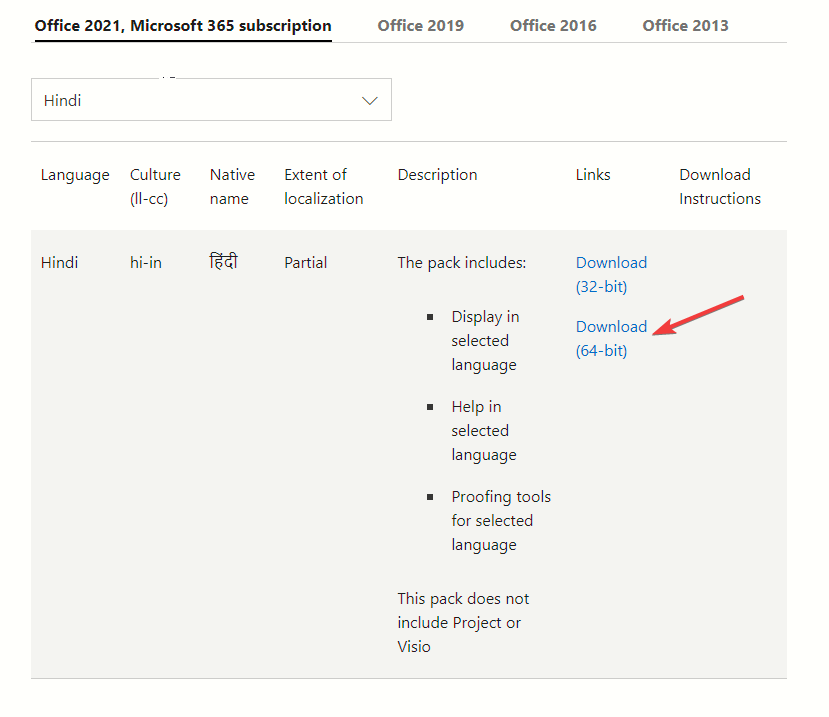
- Reboot your PC, and don’t launch Microsoft Word. Open your preferred browser, then go to the Microsoft Language Accessory page.
- From the Which Language do you need drop-down list, select the preferred language; you will get the Download link for the same.
- Click on the link to initiate the download, and double-click it to start the installation.
- Click Yes on the UAC prompt.
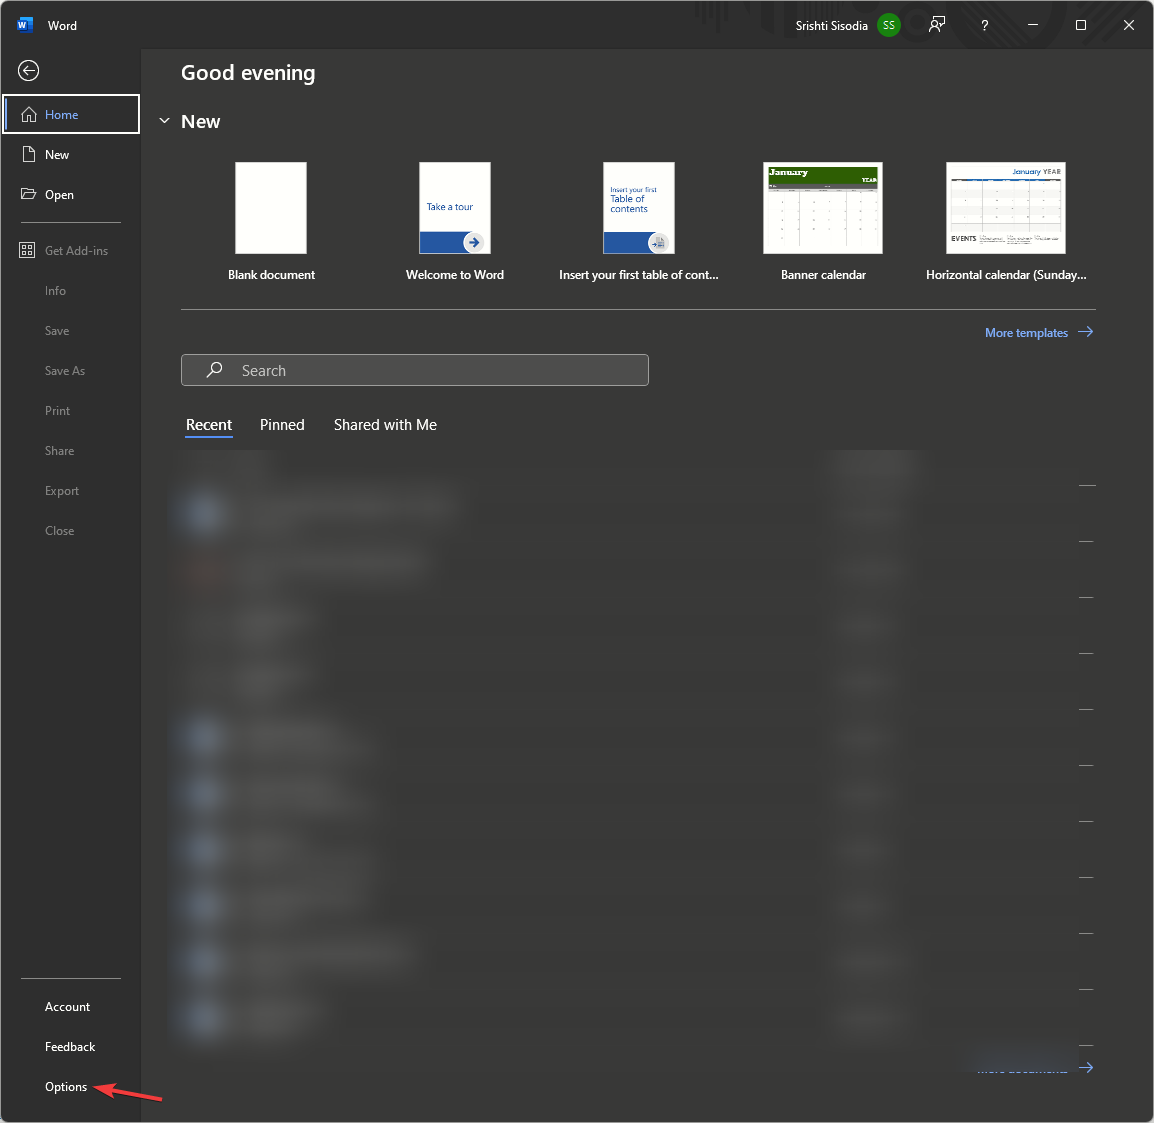
- Launch Microsoft Word and go to File.
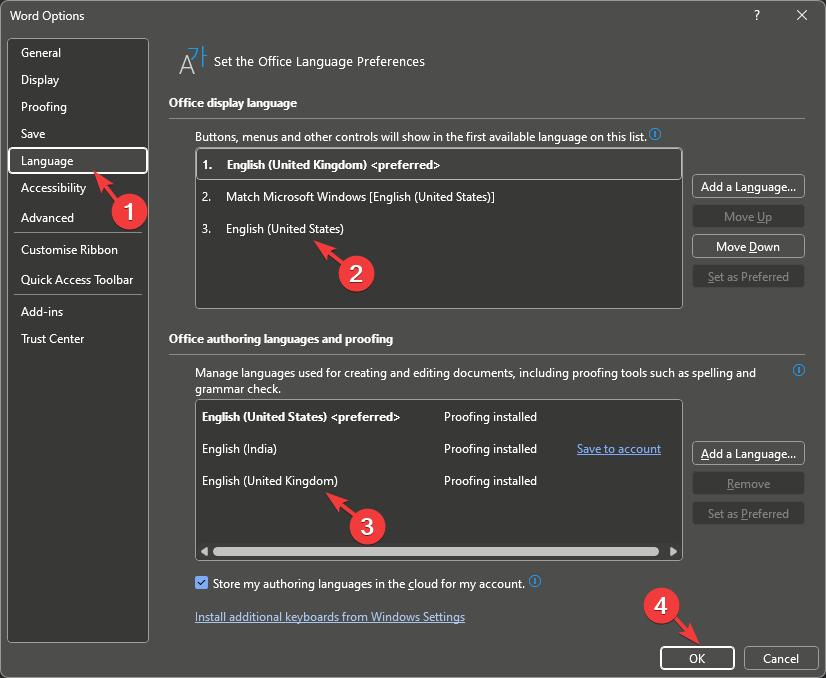
- Click Options to open Word Options.
- Under Office display language, select the display language you want to use.
- Also, under Office authoring languages and proofing, select the language you want to use for authoring your document.
- Click OK.
- Restart the app to let the changes take effect.
Can I download & install the Marathi language pack on Windows 10?
Yes, you can download and install the Marathi language pack on Windows 10 using the similar steps mentioned in the guide.
If you want to learn the steps to uninstall a language pack on Windows 10, you can check out this guide to learn the easy steps.
Remember, you must have a reliable internet connection and an updated Windows version to avoid conflicts while making system changes.
In case you don’t want to use the workaround but are looking for a way to add the keyboard layout for additional languages, read this guide.
If you have any questions or suggestions about the subject, feel free to mention them in the comments section below. We will be happy to help!
User forum
0 messages