Fix: Cannot Change Temporary Internet Files Cache Size
Tweak the registry or perform a system restore
Key notes
- The smaller the temporary internet files' cache size, the snappier the internet browser will perform.
- Several users have reported that they cannot change the temporary internet files' cache size on their PCs.
- You can try deleting the temporary internet files folder inside the drive where you have installed your OS.
We spend most of our time on the internet, and there are multiple user queries on how they can speed up their internet. Well, Internet Explorer cannot be set to clear the cache automatically, but you can change the size of the cache.
Changing the cache size or making it smaller will make the browser speedier. However, some users have reported that they cannot change the temporary internet file cache size. If you are among such users, then in this guide, we will share some solutions with you that will help you resolve the problem.
How to change the temporary internet files cache size?
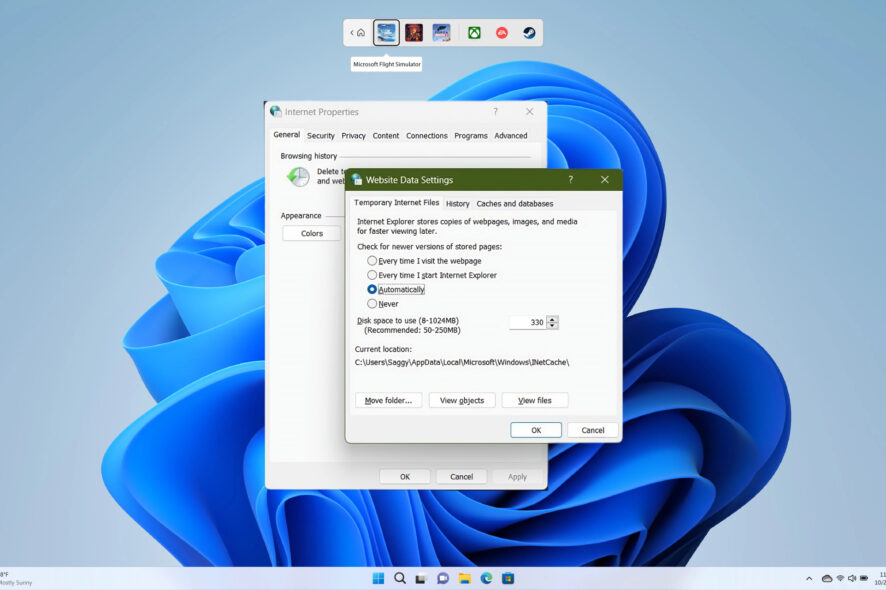
Before you get ahead with the solutions that will help you with cannot to change the temporary internet file cache size issue, let us first take a look at the conventional way of changing the temporary internet file size.
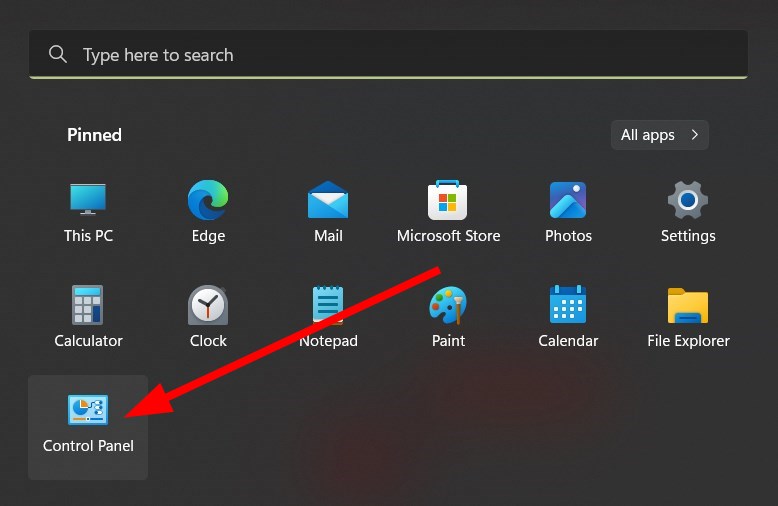
- Press the Win key to open the Start menu.
- Open Control Panel.
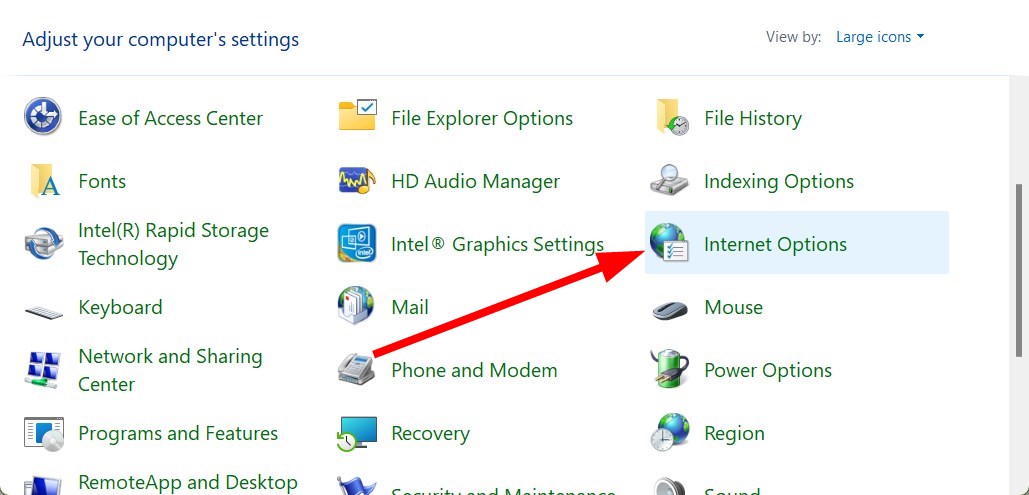
- Select Internet Options.
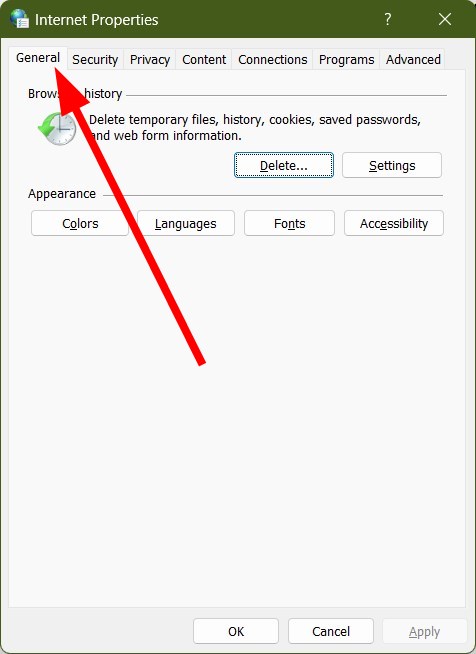
- Click on the General tab.
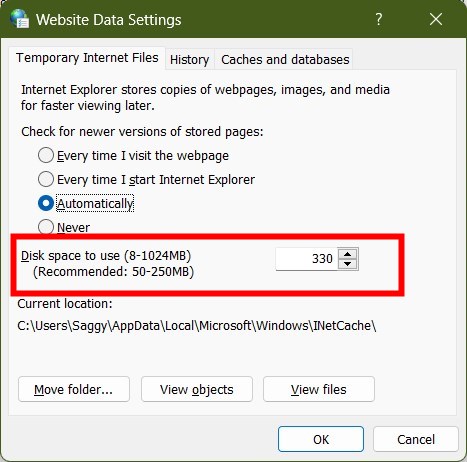
- Under the Browsing History section, select Settings.
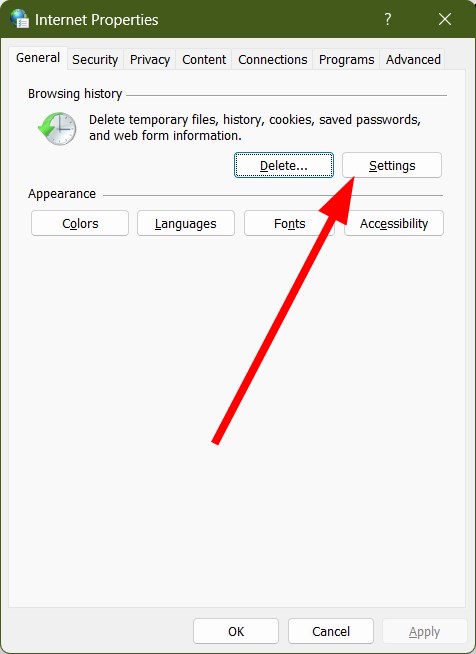
- Enter the value in the Disk Space setting.
- Click the OK button.
- Restart your PC for the changes to take effect.
This is the usual way of increasing the temporary internet cache file size. However, if you are not able to set the cache file size or the slider is missing, which has been reported by multiple users. You can go ahead with the advanced troubleshooting solutions mentioned below.
What to do if I cannot change the temporary internet files’ cache size?
1. Tweak the Registry
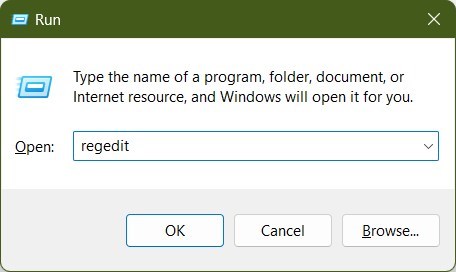
- Press the Win + R keys to open the Run dialogue.
- Type regedit and press Enter.
- Navigate to the below-mentioned path.
HKEY_CURRENT_USER\Software\Microsoft\Windows\CurrentVersion\Internet Settings\5.0\Cache\Content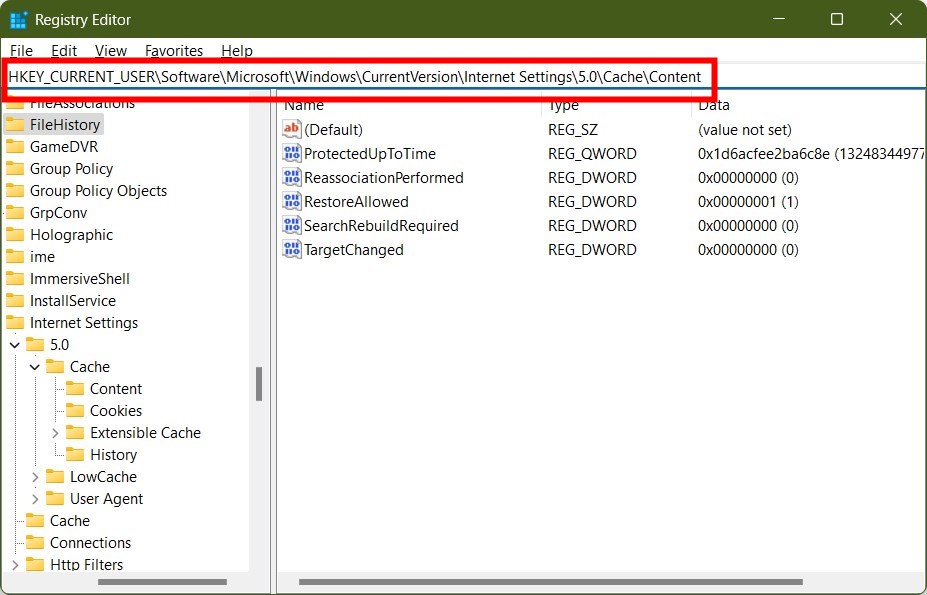
- Double-click on the CacheLimit value.
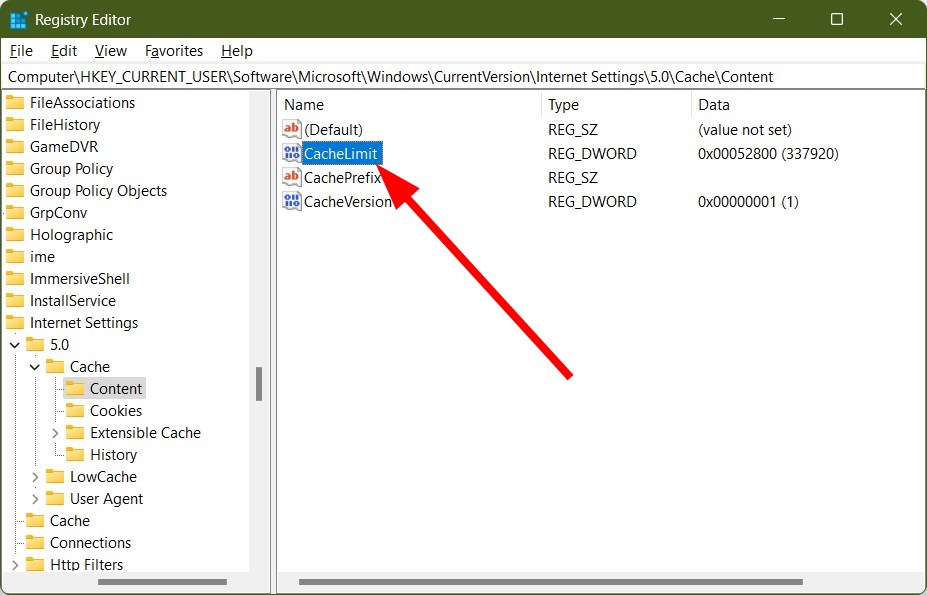
- Change Base to Decimal.
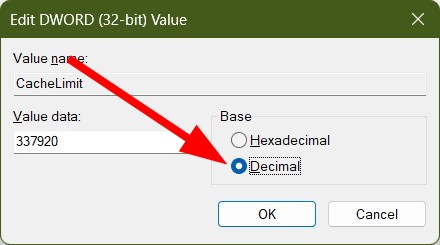
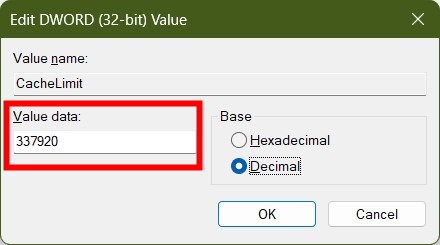
- In the Value field, enter the size you want to have for the temporary internet files cache.
- Press OK.
- Navigate to the below path.
HKEY_CURRENT_USER\Software\Microsoft\Windows\CurrentVersion\Internet Settings\Cache\Content - Double-click on the CacheLimit value.
- Change the Base to Decimal.
- Change the value to your preferred size.
Note that tweaking the registry files wrongly could take things south and even brick your PC. So, it is recommended that you create a backup of the registry before fiddling with it.
You can also check out our guide that will help you with some quick ways to fix the corrupt registry in your Windows 10 PC. In case you forgot to take a registry backup, we would suggest you check out our guide that will help you to restore the registry without any backup.
2. Delete the temporary internet files folder
- Log out of your account.
- Sign in as an admin to your Windows PC. (Make sure to log in as an admin as you won’t be able to delete the Temporary Internet Files folder if you log in as yourself.)
- Open the File Explorer.
- Navigate to the below path.
%SystemDrive%\Users\%Username%\AppData\Local\Microsoft\Windows\Temporary Internet Files\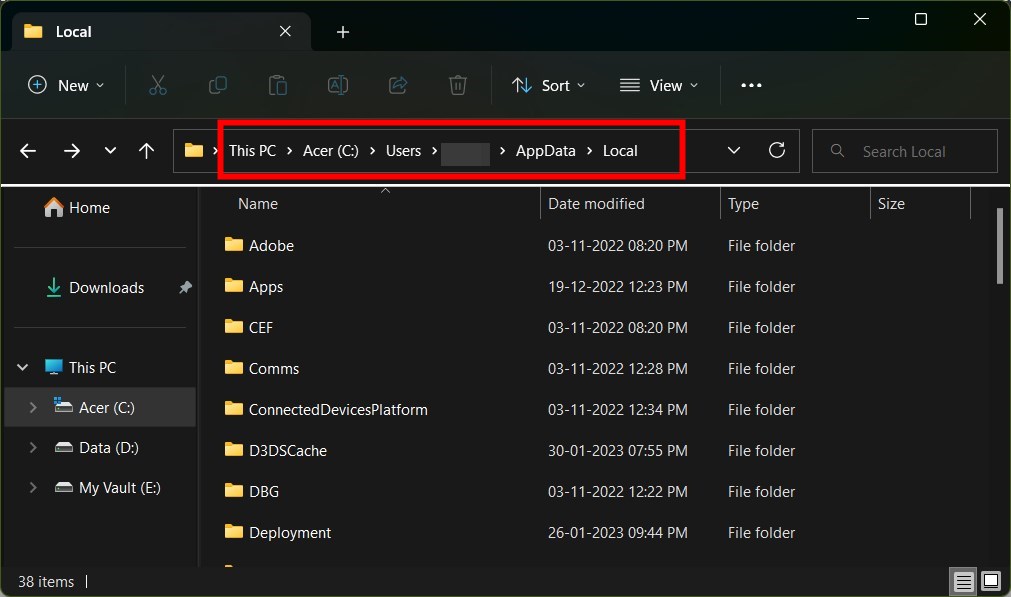
- Open the Temporary Internet Files.
- Delete all the files inside the folder.
- Restart your PC and check if you can change the temporary internet files’ cache size or not.
The reason why you cannot change the temporary internet files cache size might be that the Temporary Internet Files folder is corrupt.
In such a case, to fix this issue, you need to delete all the temporary internet files inside the folder and then check if this lets you change the cache size.
3. Perform a System Restore
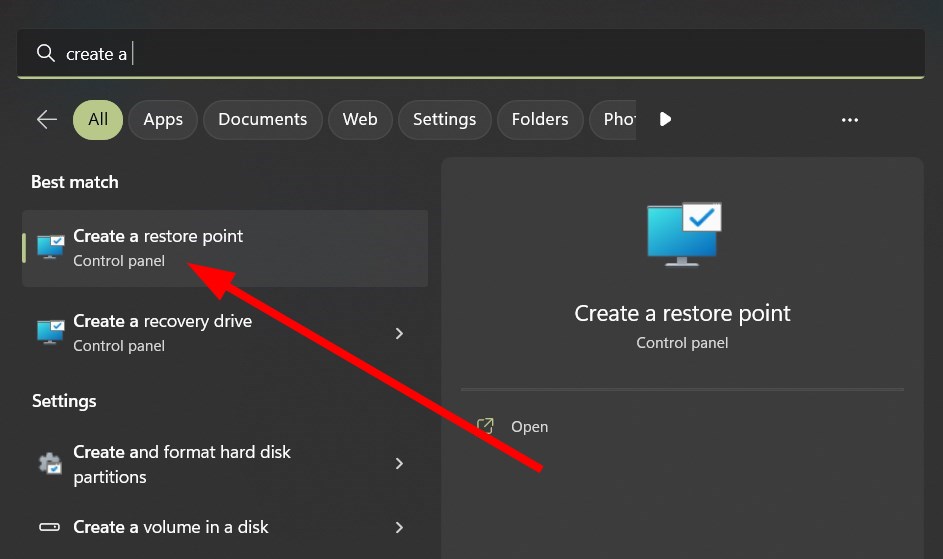
- Press the Win key to open the Start menu.
- Type create a restore point and open the appropriate option.
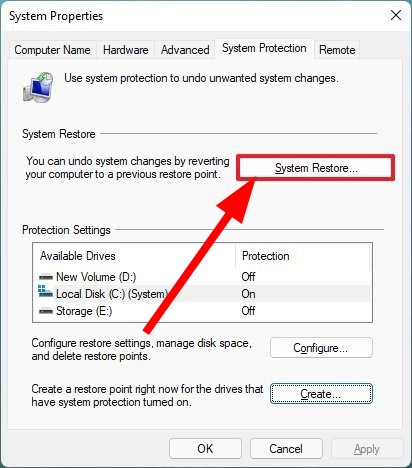
- Select the drive where you have installed Windows OS.
- Hit the System Restore button.
- Click Next.
- Select the restore point.
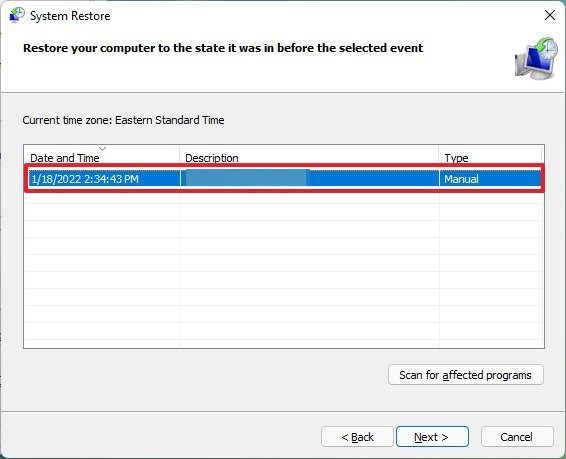
- Hit the Next button.
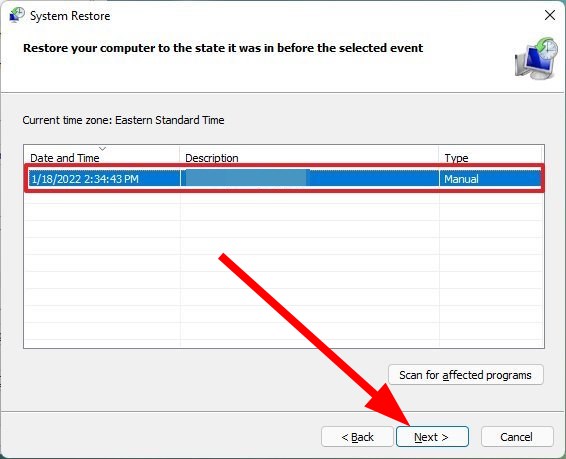
- Click Finish.
- Your PC will begin performing the system restore and bring it back your PC to a state where everything was working normally.
Do note that system restore process will work only if you have created a system restore point on your PC. If you do not know how to create a restore point, then you should refer to our guide, which will help you with that.
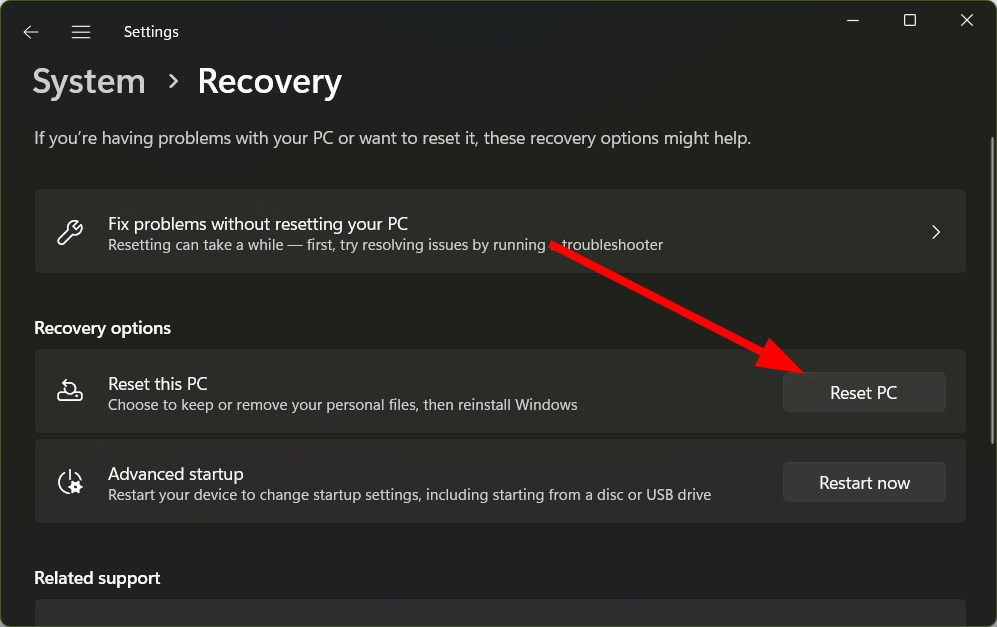
4. Reset your PC
- Press the Win + I keys to open the Settings menu.
- Click on Recovery on the right side.

- Under Recover options, select Reset this PC.
- Click on Keep my files option. Choosing this option makes sure that none of your personal files are replaced.
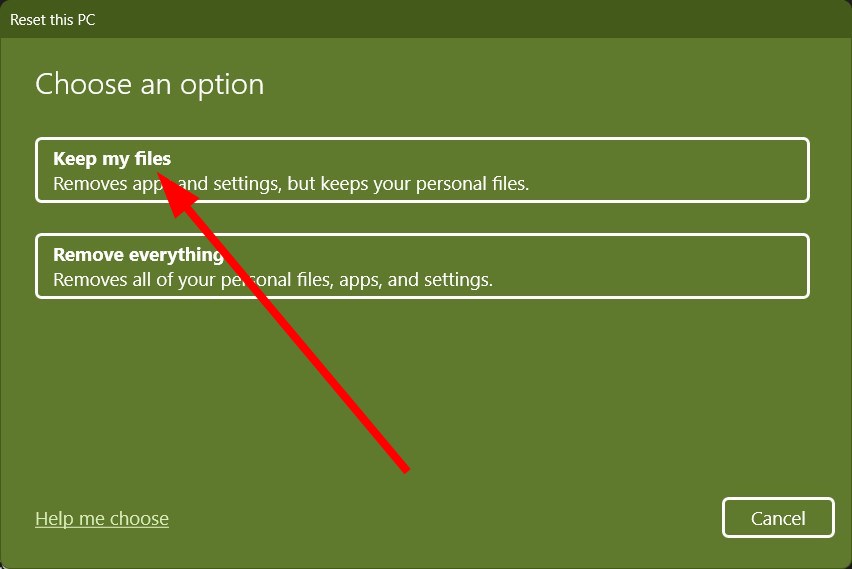
- The reset process will begin.
Chances are some of the system files are missing from your PC, or the installation was problematic. In this case, we would suggest you reset your PC, as this would bring your PC back to a fresh state.
Do note that reset your PC only when none of the above solutions helped you resolve the cannot change temporary internet files cache size problem.
That is it from us in this guide. We have a guide to help you quickly clear the cache files on your Windows 11 PC.
You can also check out our guide that lists some solutions to fix the temporary files not deleting automatically using Disk Cleanup.
Feel free to let us know in the comments below which one of the above solutions helped you fix the cannot change temporary internet files cache size problem.
Read our disclosure page to find out how can you help Windows Report sustain the editorial team. Read more


Improve this guide


User forum
0 messages