How to Change Windows Live Mail Language on your Windows PC
The Live Mail language is the same as the one of your Windows OS
Key notes
- By default, the language in Live Mail is the same one as your Windows system.
- However, you may override that setting and select a different language if you want.

Depending on the language package installed on your Windows computer, Microsoft apps like Windows Live Mail tend to set the system language as the default language.
Since Windows Live Mail comes bundled with Windows Essentials, we need to change the language preference for Windows Essentials.
If you want to change the language settings of your Windows Live Mail client, you can do it by following the steps in this article.
How can I change the Windows Live Mail language?
- Press Windows key + R to open Run.
- In the Run box type the following and click OK:
langselector.exe - This will open the language settings for Windows Essentials.

- On the Windows Essential language setting window click the drop-down menu.
- Locate and choose your desired language from the list, then click OK to save the changes.
- Restart your computer to apply the changes.
- After the restart, open the Windows Live Mail client and check if the language is changed to your preferred option.
Changing the language preference for Windows Live Essentials will only affect the Windows Live app such as the Windows Live Mail client. However, if you want to change the language of your system completely, then you need to have a multi-language Windows license.
Most of the Windows license that comes pre-installed with the computer are single-language license. The user must upgrade or purchase a multi-language license separately to be able to use the system in different languages.
How can I change the Live Mail language without upgrading the Windows license?
- Click on Start and select Settings.
- Go to Time and Language and from the left pane, open the Language tab.
- Under Preferred languages click on the Add a preferred language button.

- On the Choose a language to install window, search for your preferred language and click Next.
- Click on Install. Windows will now download and install the selected language pack.
- Once the language pack is installed open the Language section again.
- Under Preferred languages, click on Choose an input method to always use as default.
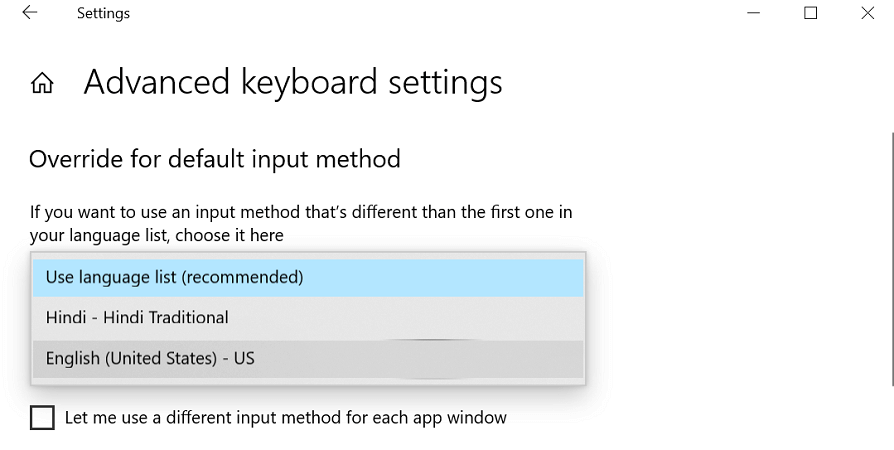
- Under Override for default input method click the drop-down menu and select the newly installed language.
- To change the input language again, repeat steps 6 and 7.
If you’re having trouble opening the Setting app, take a look at this article to solve the issue.
Being able to change the Windows Live Mail language setting can come in handy for users who prefer to use the email client in their native language. Follow the steps in this article to successfully change the Windows Live Mail language.
If you have any other questions or suggestions, don’t hesitate to reach for the comments section below.
Read our disclosure page to find out how can you help Windows Report sustain the editorial team. Read more


Improve this guide


User forum
0 messages