Computer Started Using the Windows Installation Media [Fix]
Delete a Registry key when you encounter the issue
4 min. read
Updated on
Read our disclosure page to find out how can you help Windows Report sustain the editorial team Read more
Key notes
- If your computer has started using the Windows installation media unexpectedly, this means there is a misconfiguration in your system's boot order.
- Try to disconnect peripheral devices, and re-insert your laptop's battery to see if that fixes the issue.
- You can also format the installation media to fix this issue if need be.
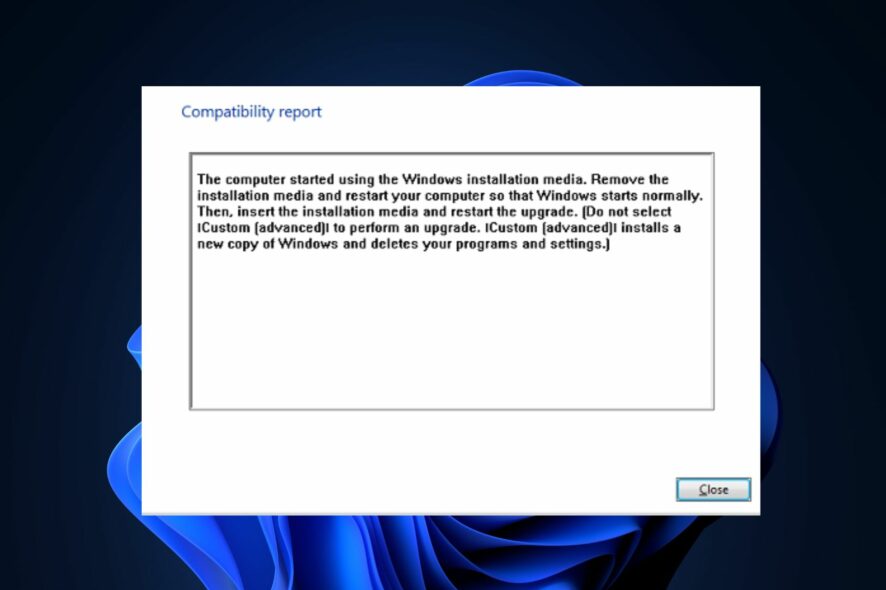
Recently, some of our readers complained of an error on their Windows PC which states that the computer started using the Windows installation media. This often occurs when you’re trying to install or reinstall the Operating system on your PC.
When you see this message, it means that the computer is attempting to boot from the Windows installation media rather than from its internal hard drive. In this article, we will take you through the causes and how to fix the error.
Why did the computer started using the Windows installation media?
From several users’ experiences, if your computer has started using the Windows installation media unexpectedly, it could be due to several reasons. Below are some of them:
- Incorrect boot order – The boot order in your computer’s BIOS or UEFI settings may be misconfigured. If the Windows installation media is set as the first boot device, the computer will attempt to boot from it instead of the internal hard drive.
- Removable media connected – Your computer may be set by default to boot from removable media such as USB drives or DVDs. If any of these media are connected to your computer while starting up, the system might try to boot from them.
- Damaged or corrupt boot loader – The boot loader may be damaged or corrupted. This can happen due to various reasons, such as improper shutdowns, disk errors, or malware infections.
- Hardware or connection issues – In some cases, hardware problems or faulty connections can cause the computer to incorrectly detect or prioritize boot devices, leading to the error message.
The above are common reasons behind computer started using the Windows installation media. The next section will provide you with simplified steps on how to fix the issue.
What can I do if the computer started using the Windows installation media?
Try the following preliminary checks before using the advanced solutions provided for this error:
- Restart your computer.
- Check for hardware or connection issues.
- Disconnect all peripheral devices.
- Re-insert your Laptop’s battery – Several people who use Laptops have confirmed that this fix works for them and that is why this method is worth a shot at.
Having confirmed the above checks, the next section will take you through detailed steps on how to fix the computer that started using the Windows installation media error.
1. Delete a Registry key
- Press the Windows + R keys to open the Run command dialog. Type regedit in the dialog box and press Enter.
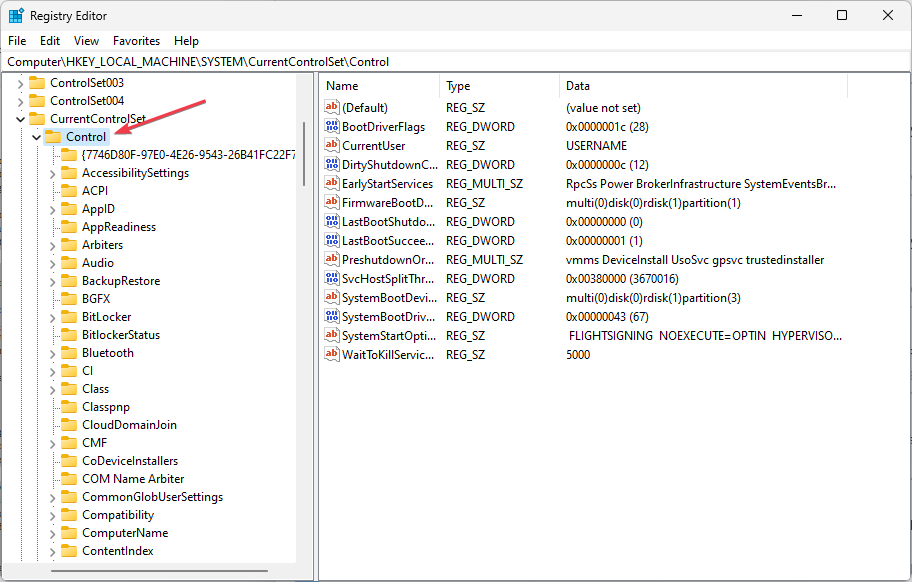
- Navigate to the following registry key:
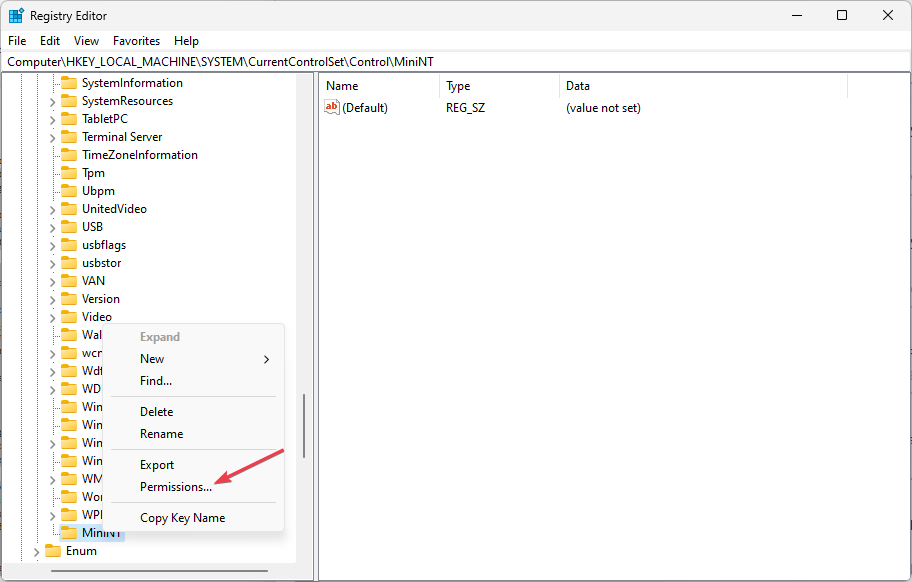
HKEY_LOCAL_MACHINE\SYSTEM\CurrentControlSet\Control - Under the Control key, right-click on the key named MiniNT, and click on Permissions.
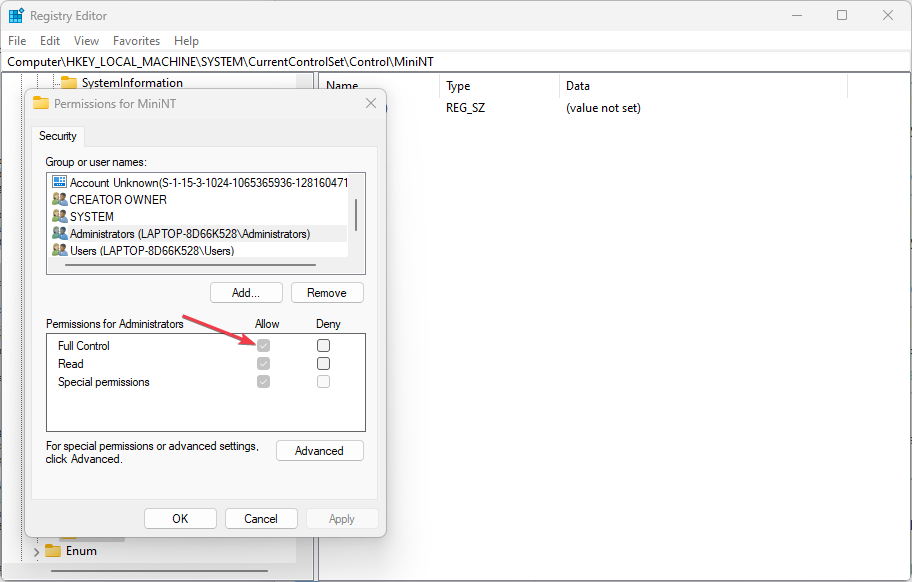
- Select your username under the Users or Groups section, check the Full Control checkbox under Permissions for…, and apply the changes you have made.
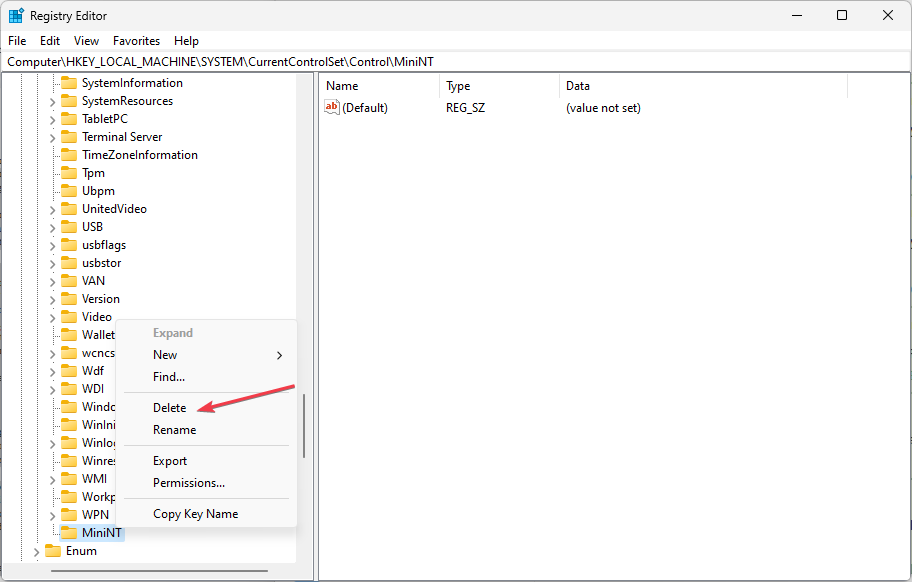
- Now, right-click on the MiniNT key and click on Delete.
- Confirm the dialog box which will appear and restart your computer to apply the changes.
- Finally, try installing Windows again.
If you’ve been getting the computer started using the Windows installation media error while trying to install Windows regularly, you can easily fix this problem by deleting the registry key.
2. Format the external drive used for installation
- Insert the installation media and boot the computer.
- Set up the language, time and date settings, etc.
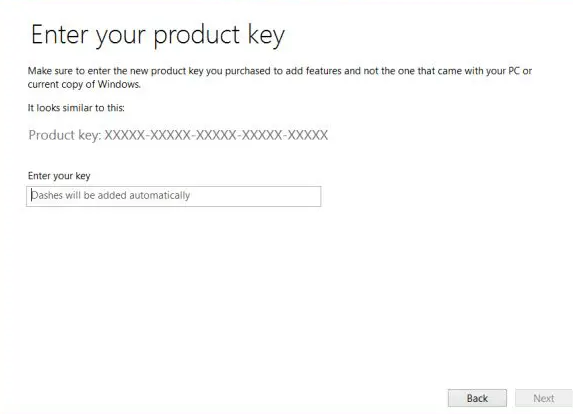
- Next, enter your Windows activation key. But, if you don’t have it, click on I don’t have a product key below.
- Follow the setup process normally until you see the Which type of installation do you want? screen.
- Then. select the Custom option to perform a Clean install.
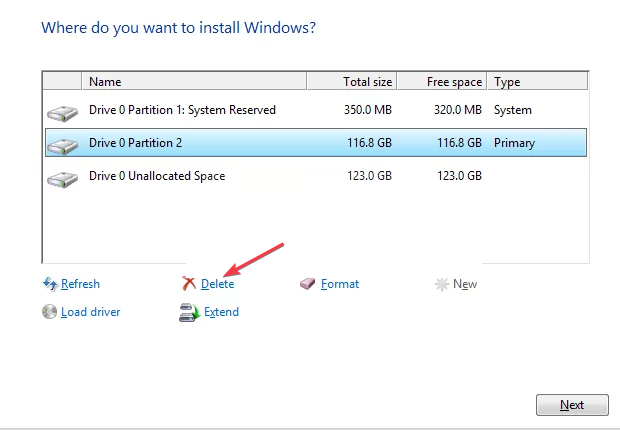
- You will now see the Where do you want to install Windows? screen with the partitions you have active.
- Choose each one with the current Operating system’ system files on it and click on Delete.
- Finally, choose the one where you want to install Windows and follow the on-screen instructions to complete the process.
This should fix the problem. However, if the issue persists after trying these methods, try to seek further assistance from a professional technician or Microsoft support.
For further assistance, check out our detailed guide on what to do if you can’t install Windows on a USB flash drive using setup.
If you have any questions or suggestions, please use the comments section below.

