How to Convert Dynamic Disk to Basic on Windows 11
The process requires deleting all data and volumes from the disk
5 min. read
Updated on
Read our disclosure page to find out how can you help Windows Report sustain the editorial team Read more
Key notes
- To convert a dynamic disk to basic Windows 11, delete all the volumes and data using Disk Management, then right-click on the drive and select Convert to Basic.
- You may also go through the process by using Command Prompt or third-party disk management tools.
If you want to convert a dynamic disk to basic in Windows 11, you should first create a backup because the process will wipe all the data from it.
Why convert dynamic disk to basic in Windows 11? According to Microsoft, dynamic disks have been deprecated from Windows and are not recommended anymore. Plus, Windows Home editions don’t support dynamic disks, so you won’t be able to access these logical drives.
They recommend using basic disk or Storage Spaces if you want to merge more disks together into larger volumes. In this article, we will show you how to convert a dynamic disk to basic on Windows 11
How do I convert a dynamic disk to a basic disk in Windows 11?
Before starting the process, you will need to perform several preparation steps:
- Back up all the important data from the dynamic disk. You may use a manual procedure and just copy the data or use a dedicated backup solution for this task.
- If the dynamic disk you want to convert contains the system, make sure you prepare a bootable Windows 11 installation USB flash drive.
- Make sure you have the disk space to make the conversion. You need at least 1 MB of unallocated space.
This procedure will also come in handy if you can’t install Windows on a dynamic disk partition.
1. Use Disk Management to convert the disk
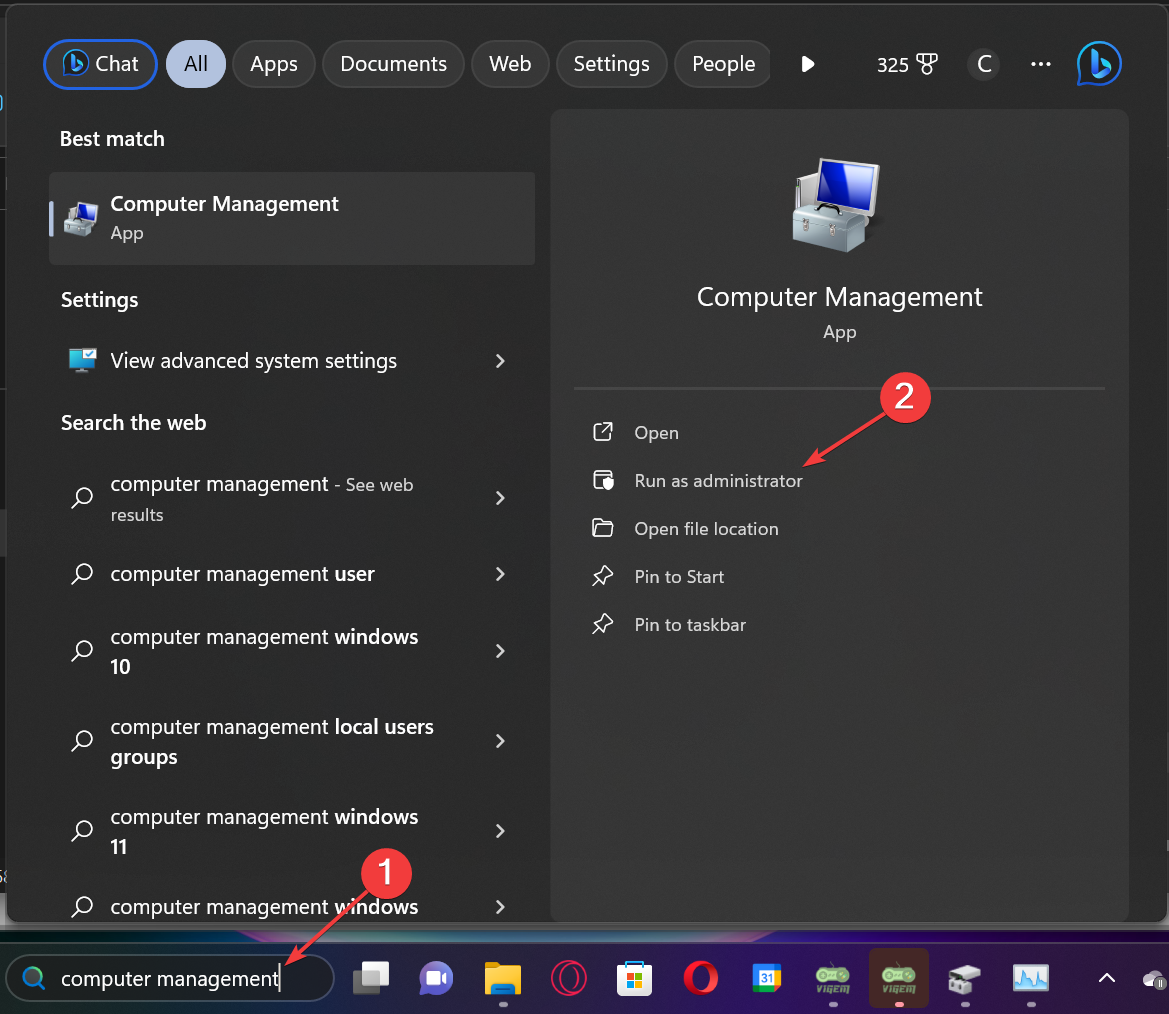
- Type computer management in the Search box and click on Run as administrator from the results.
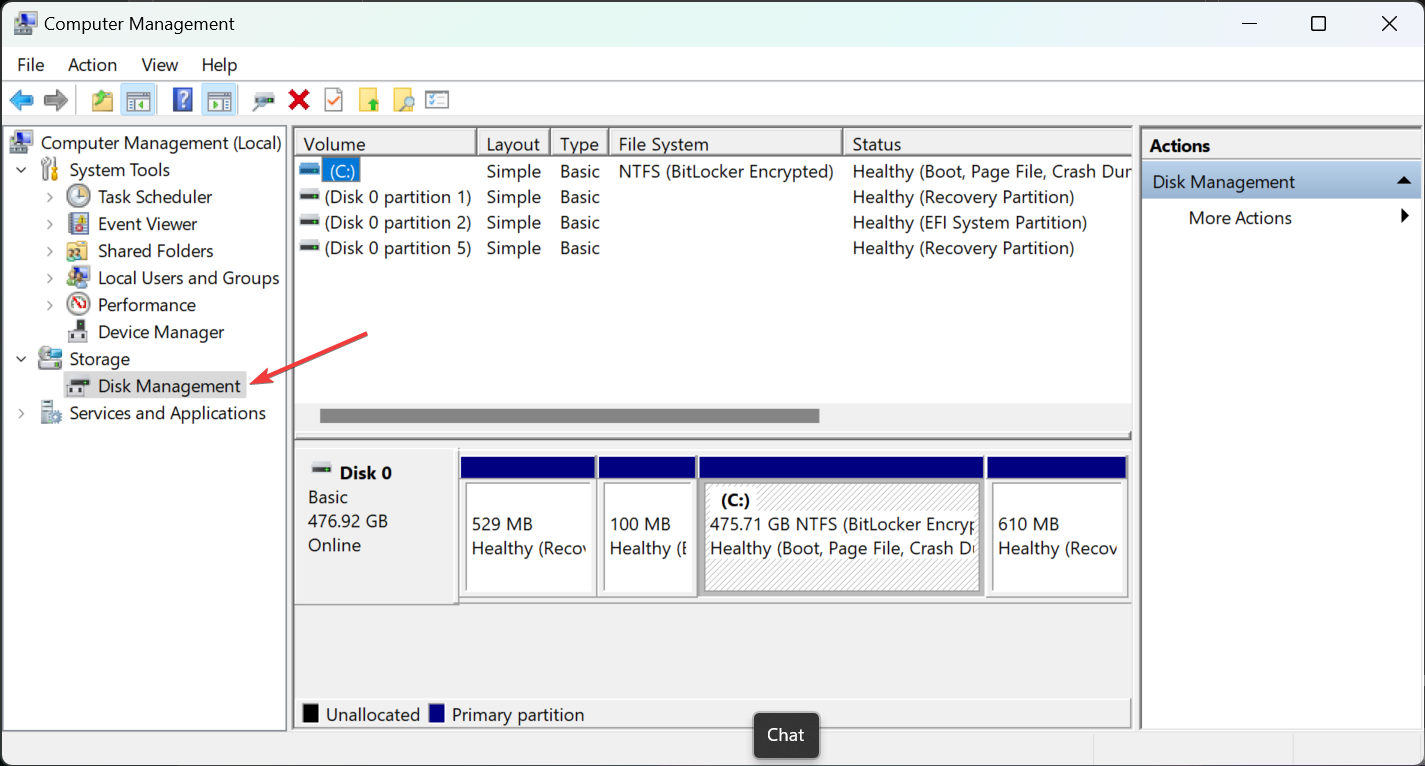
- Now, go to Storage in the left pane and click on Disk Management.
- Now, you need to delete all the volumes on the dynamic disk. Right-click on each volume and select Delete to remove the dynamic volumes.
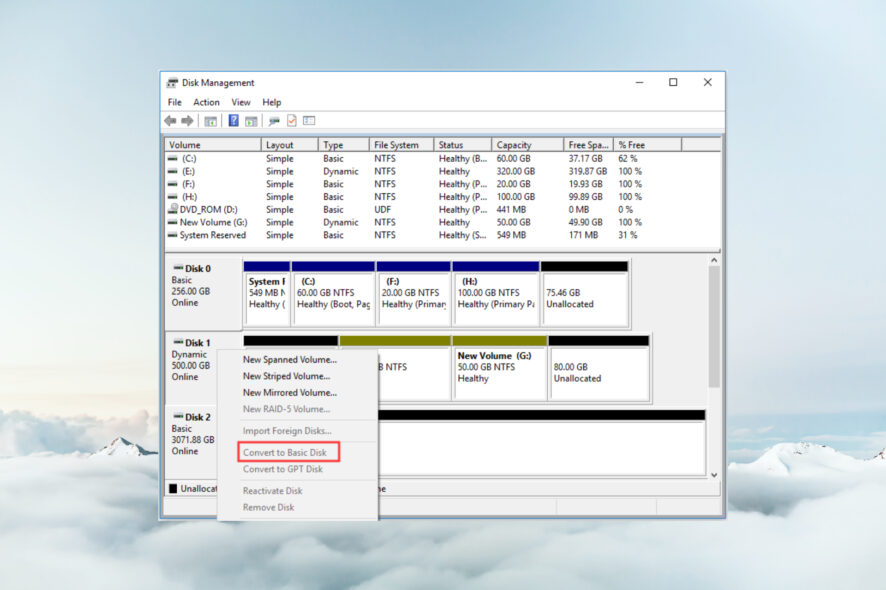
- After all the volumes are deleted from the dynamic disk, right-click on the disk and select Convert to Basic Disk. The conversion process will be fast with all the data deleted from the disk drive.
- Now, it’s recommended to format the drive and if you want to partition it again, you may do that as well, but you can’t have more than 4 partitions on a basic disk.
That’s the easiest way to convert a dynamic disk to a basic disk and it’s the solution recommended by Microsoft in this case. Deleting the dynamic disk volumes first is the way to go.
2. Convert the disk using Command Prompt
- Click the Search bar on Windows 11, type cmd, and select Run as administrator from the displayed results.
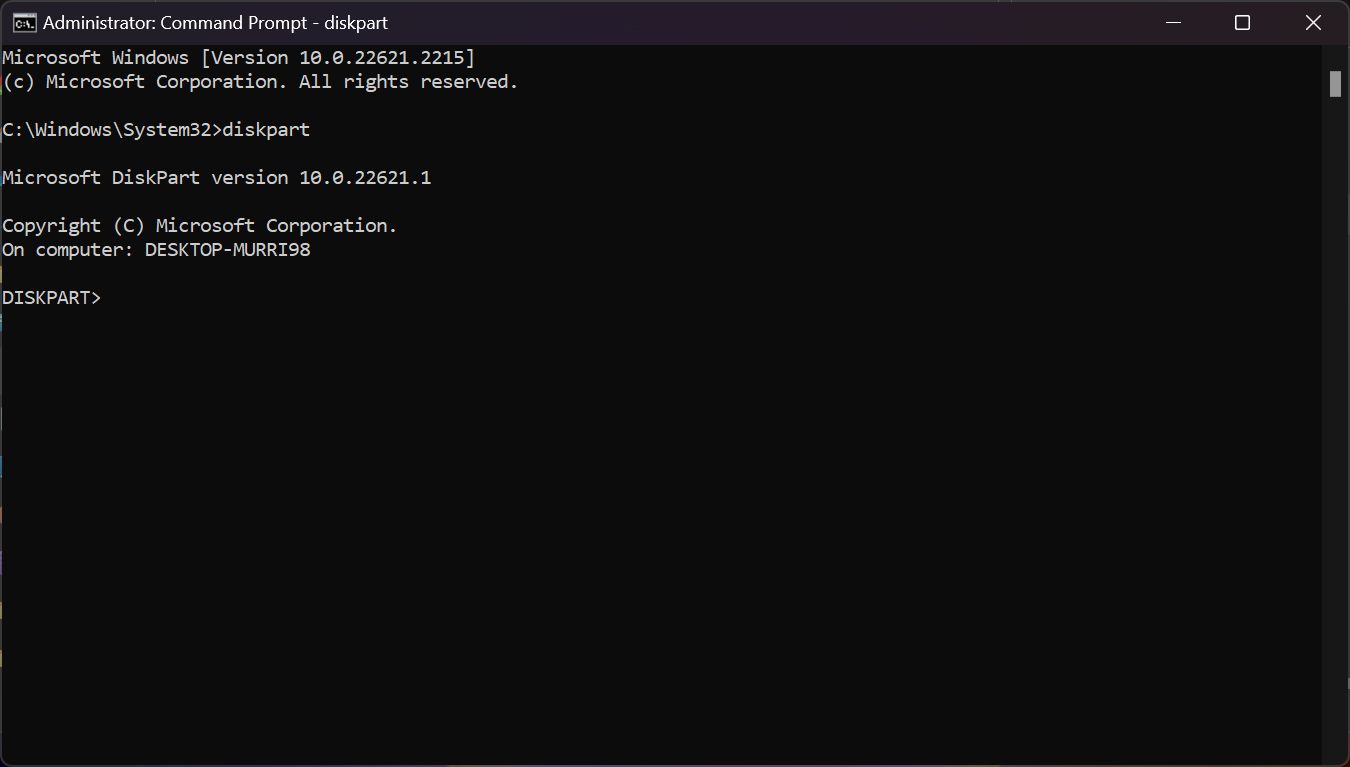
- Type diskpart and press Enter to start the app.
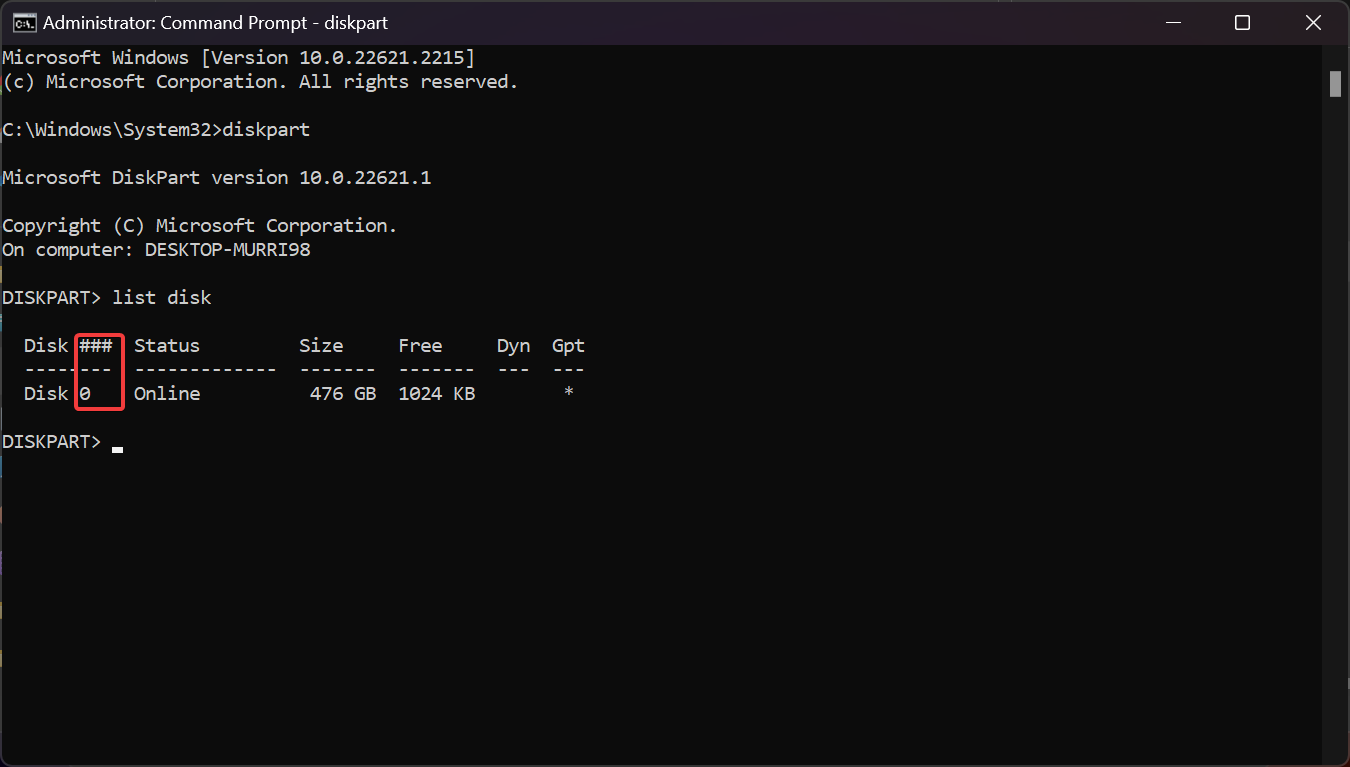
- Type the following command and note down the number of the dynamic disk you want to convert:
list disk - Now, type the following command to select the correct disk (replace <disknumber> with the actual number):
select disk <disknumber> - Type the following command and press Enter to see the volumes within the disk:
detail disk - Enter the command select volume <volumenumber> (replace <volumenumber> with the number of your actual volume), and then type the command delete volume and press Enter to delete it.
- Perform step 6 for all the volumes on the dynamic disk to make sure that it doesn’t have any volumes on it.
- Now, type the following command and press Enter to select again your dynamic disk:
select disk <disknumber> - Finally, type the following command to convert it:
convert basic
This solution is basically the same as the first but you’re using DISKPART in Command Prompt instead of Disk Management.
3. Use third-party software
As you have seen, it’s not that hard to convert a dynamic disk to a basic disk in Windows 11 by using the built-in tools from your OS.
However, you may perform the same procedure by using a third-party disk management tool. They have more features and sometimes they are even more convenient to use.
Why can’t I convert dynamic disk to basic?
There are a few errors that you may encounter during the process so let’s explain them:
- The disk is bigger than 2TB – if the Convert to Basic option is grayed out, it might be because Disk Management can’t handle MBR disks of over 2TB so you must convert them to GPT first.
- There is not enough space available on the disk(s) to complete this operation – This error appears sometimes if you don’t delete the volumes and data from the dynamic disk before converting it to basic. That is because you need to have at least 1MB of unallocated space to proceed.
- The pack name is invalid – This error occurs if the name of the computer has double-byte (DBCS) characters in it. The Chinese ideographs or Japanese kanji have double-byte code values, so if you have them, rename your computer first.
- Virtual Disk Service Error: The Disk Is Not Empty error – The error appears if you didn’t delete all the volumes and data from the dynamic disk. However, our guide on how to fix the disk is not empty error will help you in that situation.
Dynamic disk vs basic disk
Dynamic disks can be split into volumes and can have an infinite number of them. The basic disks are structured in partitions and can have a maximum of four partitions (three primary and one extended).
Dynamic disks also have some advanced features like software RAID, fault tolerance, disk spanning, and more so they are used especially by IT specialists in server environments.
By default, when you set up a disk, you are recommended to opt for a basic one, a great option for a personal computer.
That concludes our guide on how to convert a dynamic disk to basic on Windows 11. You should know that these methods also work seamlessly on Windows 10 as well.
You might also be interested in reading our guide on merging two SSDs without losing data.
If you have any other questions or suggestions, don’t hesitate to use the comments section below and let us know about them.

