Dell XPS 17 webcam not working? Here's how you can fix it
![]() 4 min. read
4 min. read
![]() Updated on
Updated on
Share this article

Improve this guide
Read our disclosure page to find out how can you help Windows Report sustain the editorial team Read more
Key notes
- When the Dell XPS 17 webcam is not working, it's likely due to a driver issue or conflicting app.
- If the problem is limited to a particular app, it could also be misconfigured settings.
- Also, you can reinstall or update the driver, amongst other fixes here.
Issues with the webcam are common, and honestly, it’s easier to fix those with an external one. When the internal webcam stops working, you have a limited number of methods at your disposal. This problem is faced on Dell XPS 17 when the webcam stops working.
The issue generally arises due to an outdated or corrupt driver, or a conflicting app affecting the webcam. In some cases, it could also be a faulty camera, which would require repair or replacement.
So, before you go ahead and purchase an external webcam, try the methods here to fix the Dell XPS 17 L702X webcam not working issue.
What do I do if Dell XPS 17 webcam is not working?
1. Some basic checks
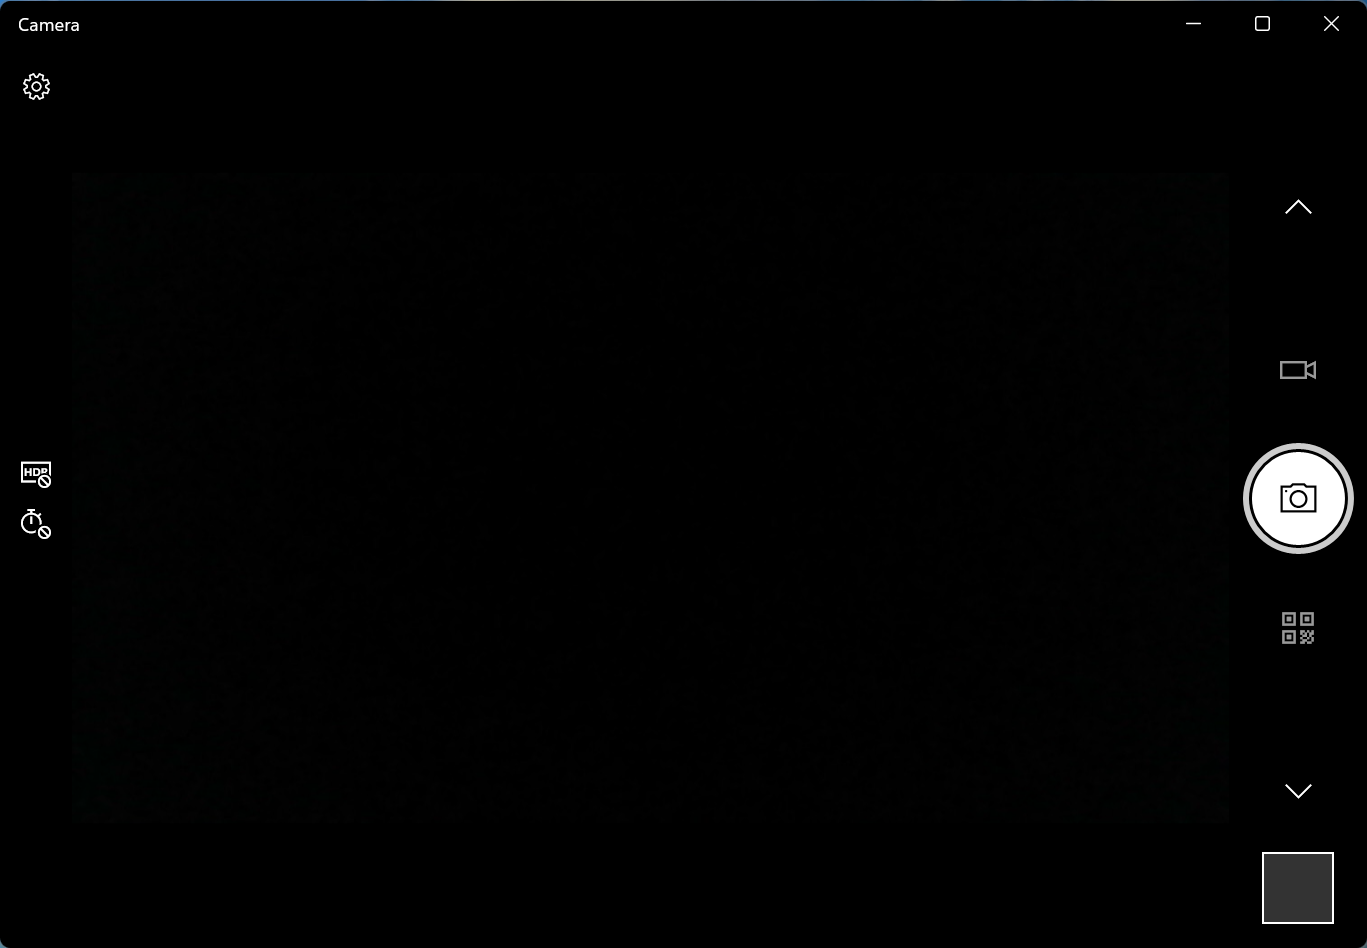
Whenever you are facing issues with the webcam, first verify if it’s limited to a single app or is system-wide. To do that, just check the camera app, and see if the webcam works fine there.
If the problem is limited to a particular one, it could have to do with misconfigured app settings, and you should go with fixes specific to that app. For instance, issues with the webcam on Zoom are common, or even sometimes Skype is unable to detect a camera.
In case the Dell XPS 17 webcam is not working on every app and the problem is system-wide, the methods listed below could help.
2. Reinstall the drivers
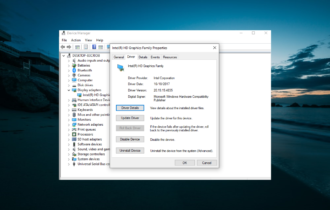
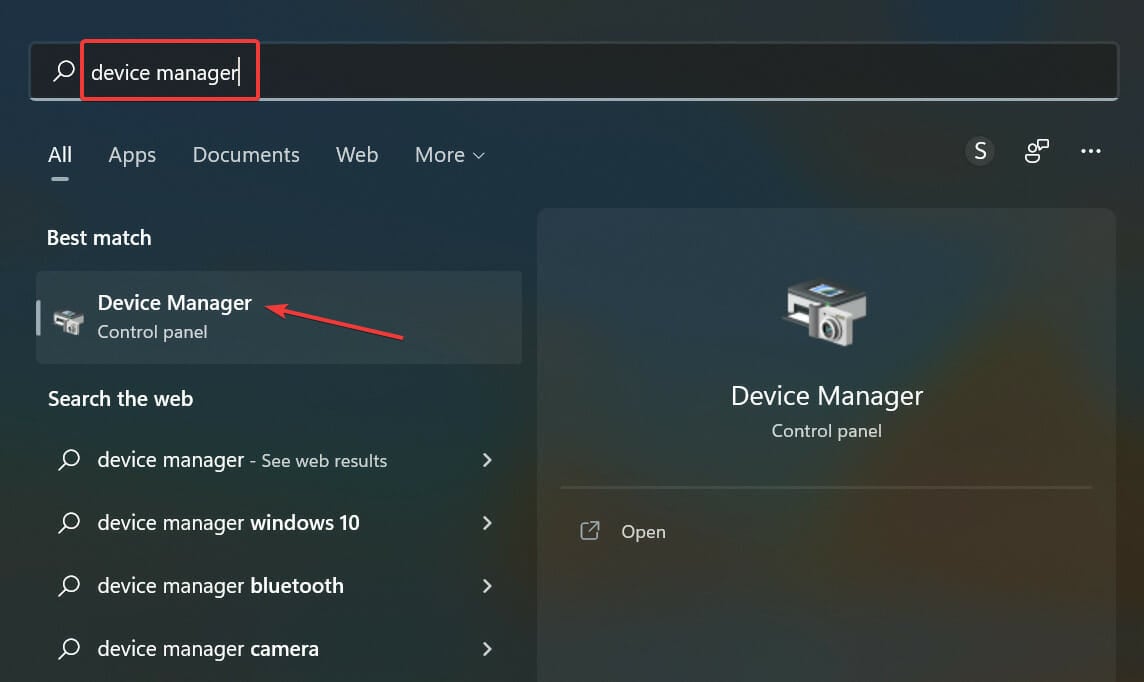
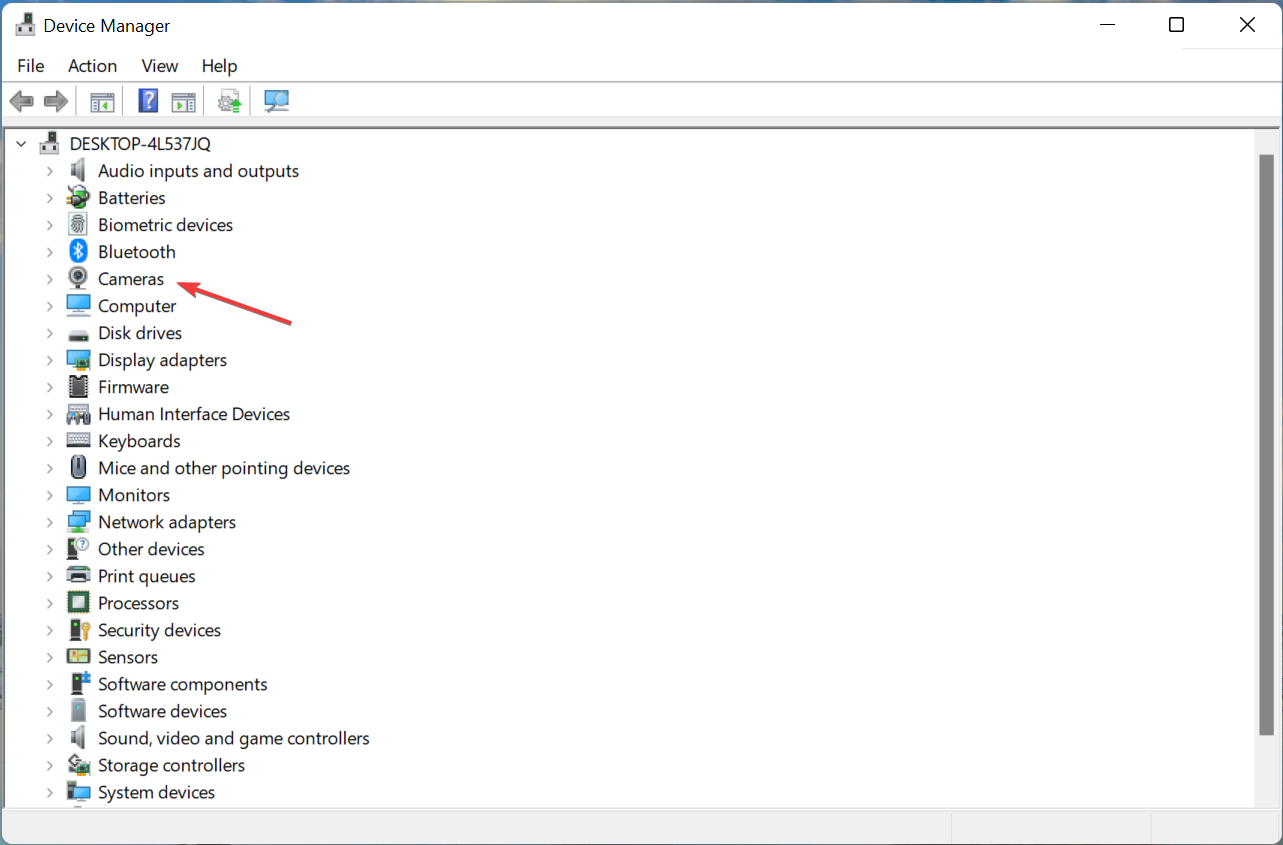
- Press Windows + S to launch the Search menu, enter Device Manager in the text field at the top, and click on the relevant search result.

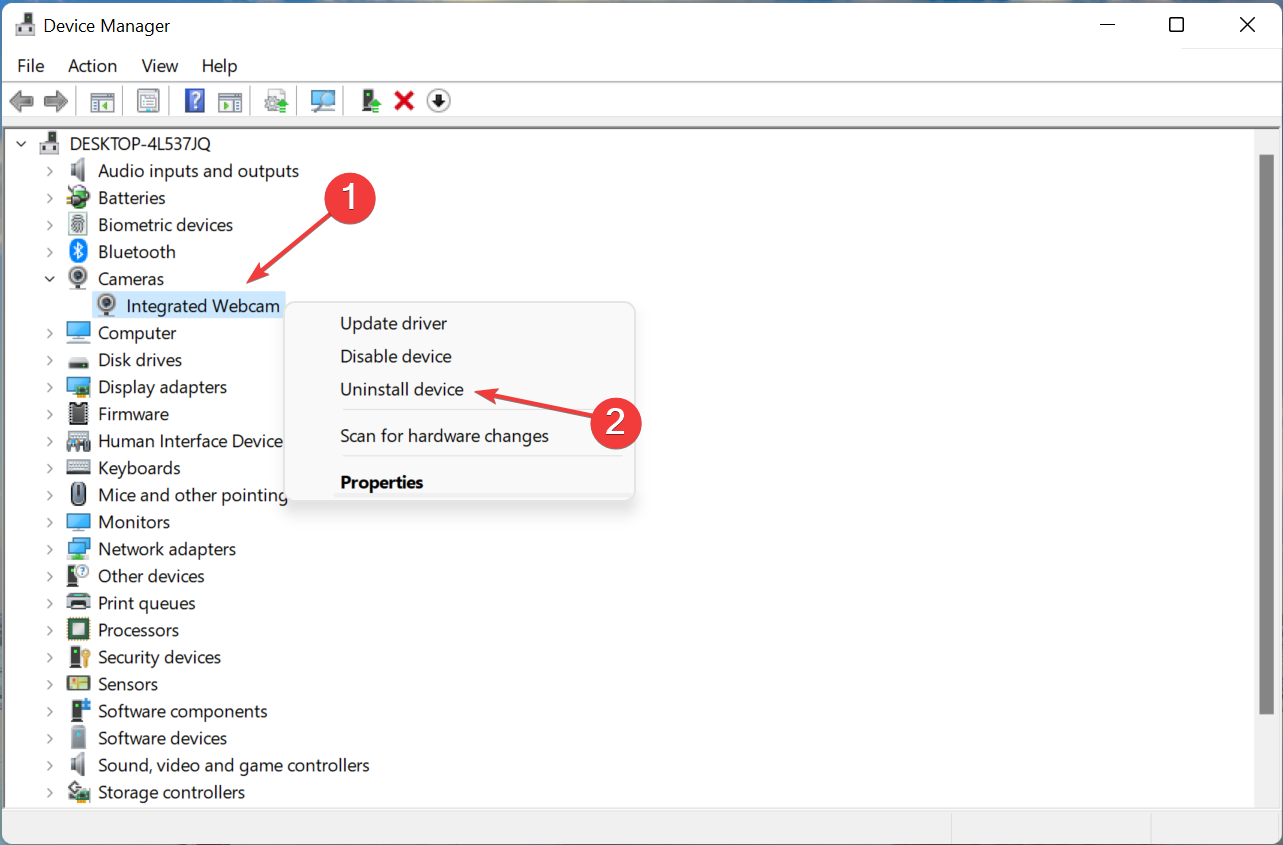
- Next, double-click on the Cameras entry here.

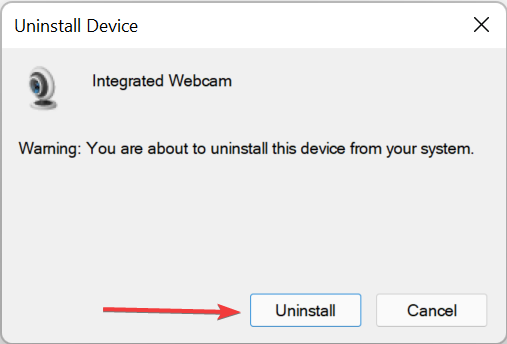
- Right-click on the problematic webcam, and select Uninstall device from the context menu.
- Click Uninstall in the confirmation prompt that pops up.

If the currently installed driver is corrupt, you will face the Dell XPS 17 camera not working issue. Simply reinstalling the driver should work here.
Also, several users reported that the webcam was listed under another entry instead of Cameras, so make sure to go through them all in the Device Manager.
3. Update the camera drivers
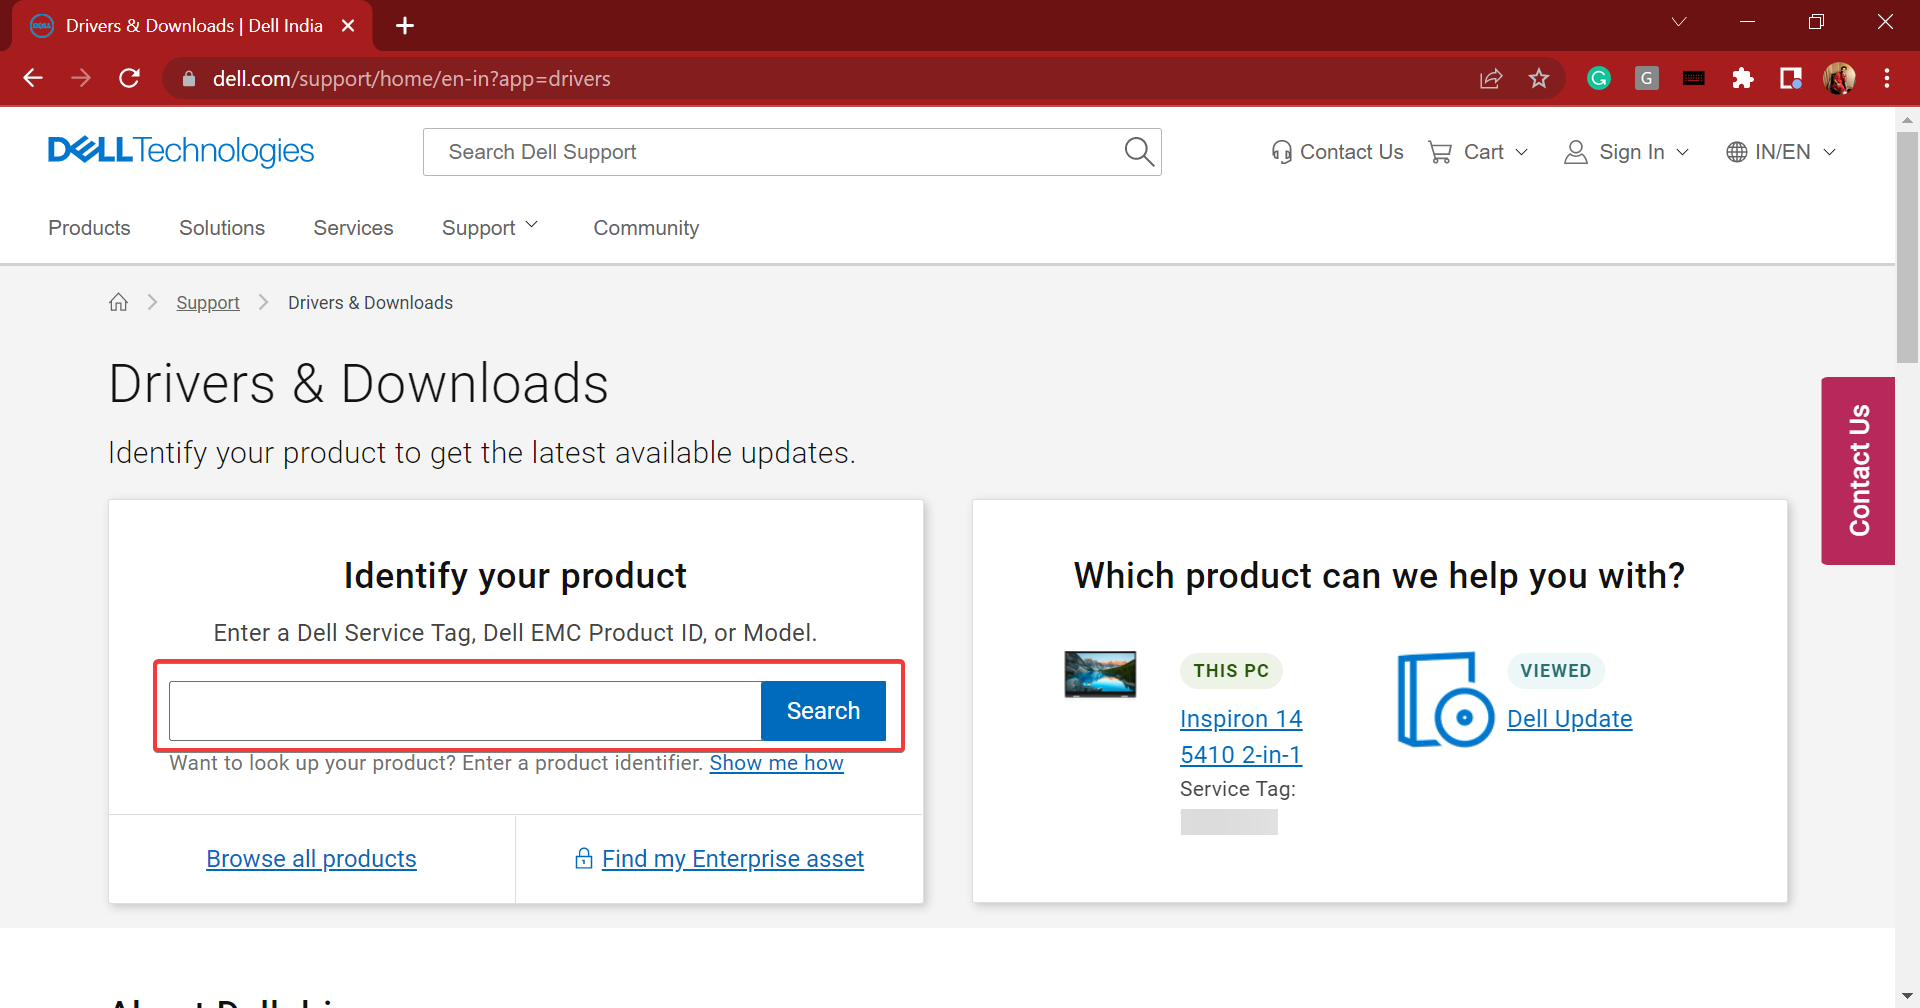
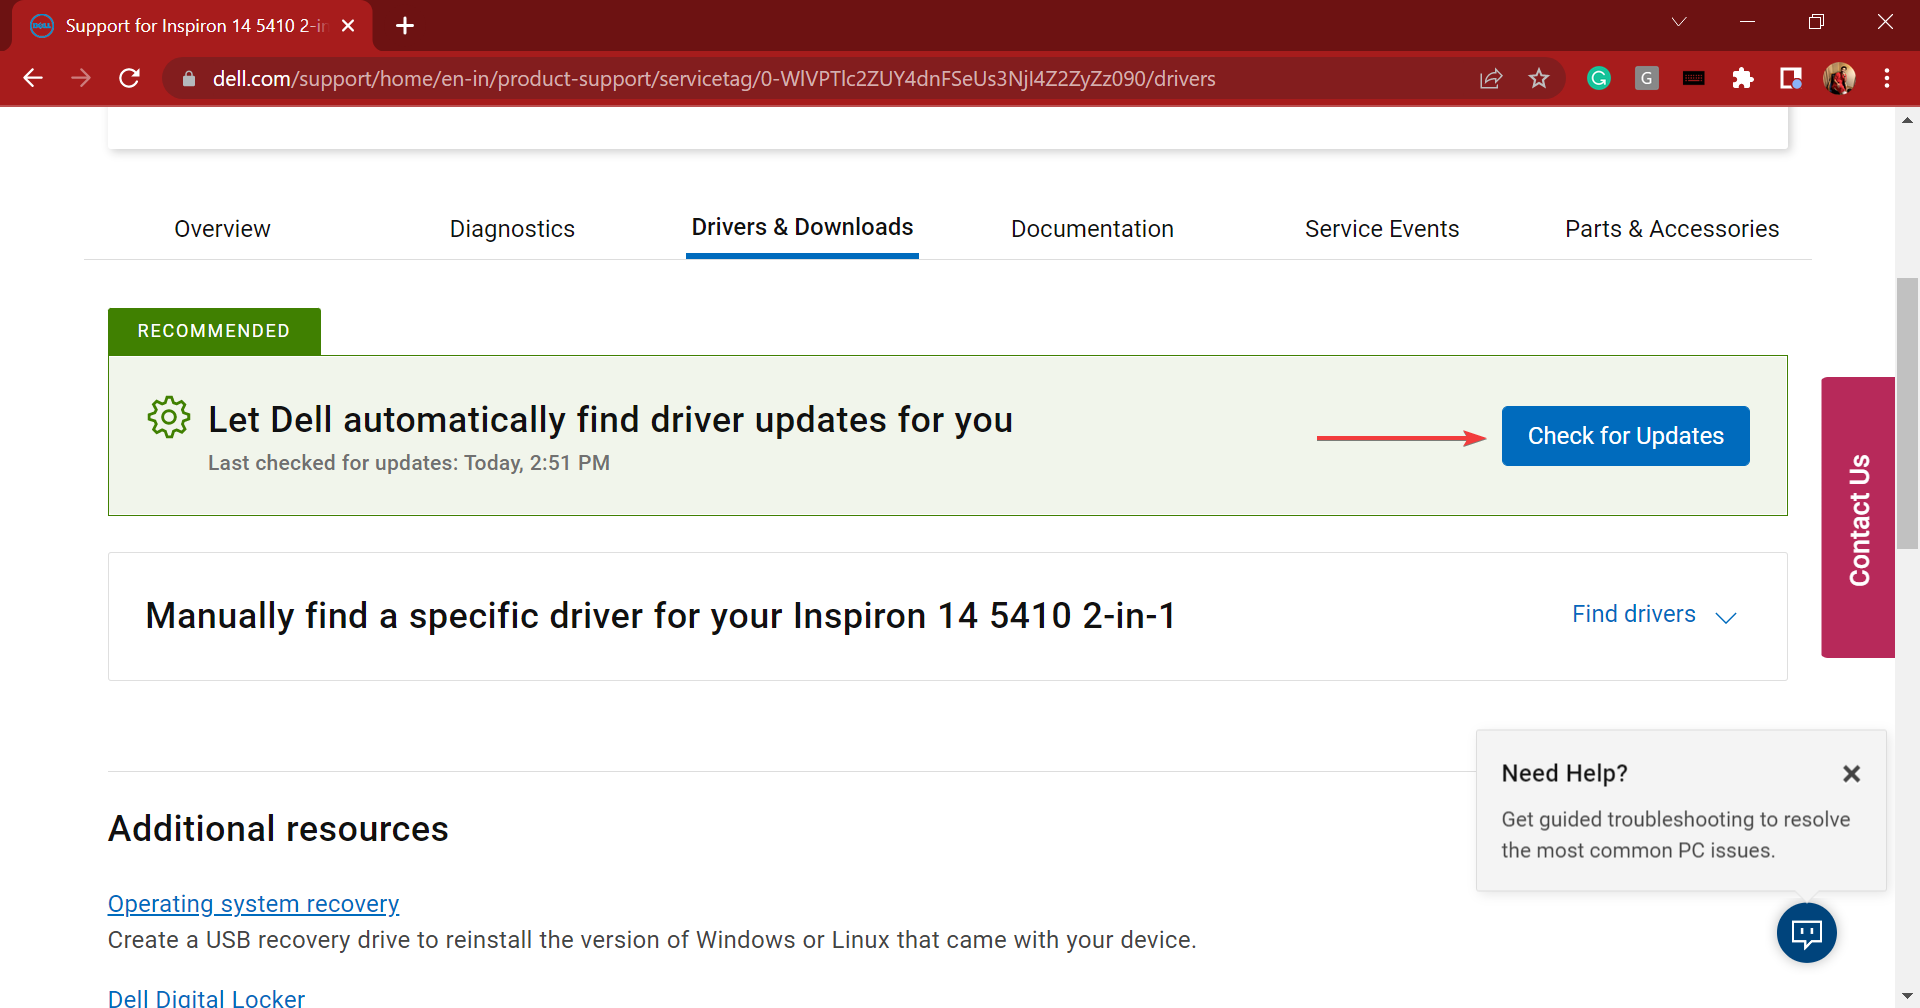
- Go to Dell’s Driver and Download page, identify your product using any of the identifiers listed here, or if you have previously searched for drivers, just click on your laptop on the right.

- Now, click on the Check for Updates button next to Let Dell automatically find driver updates for you.
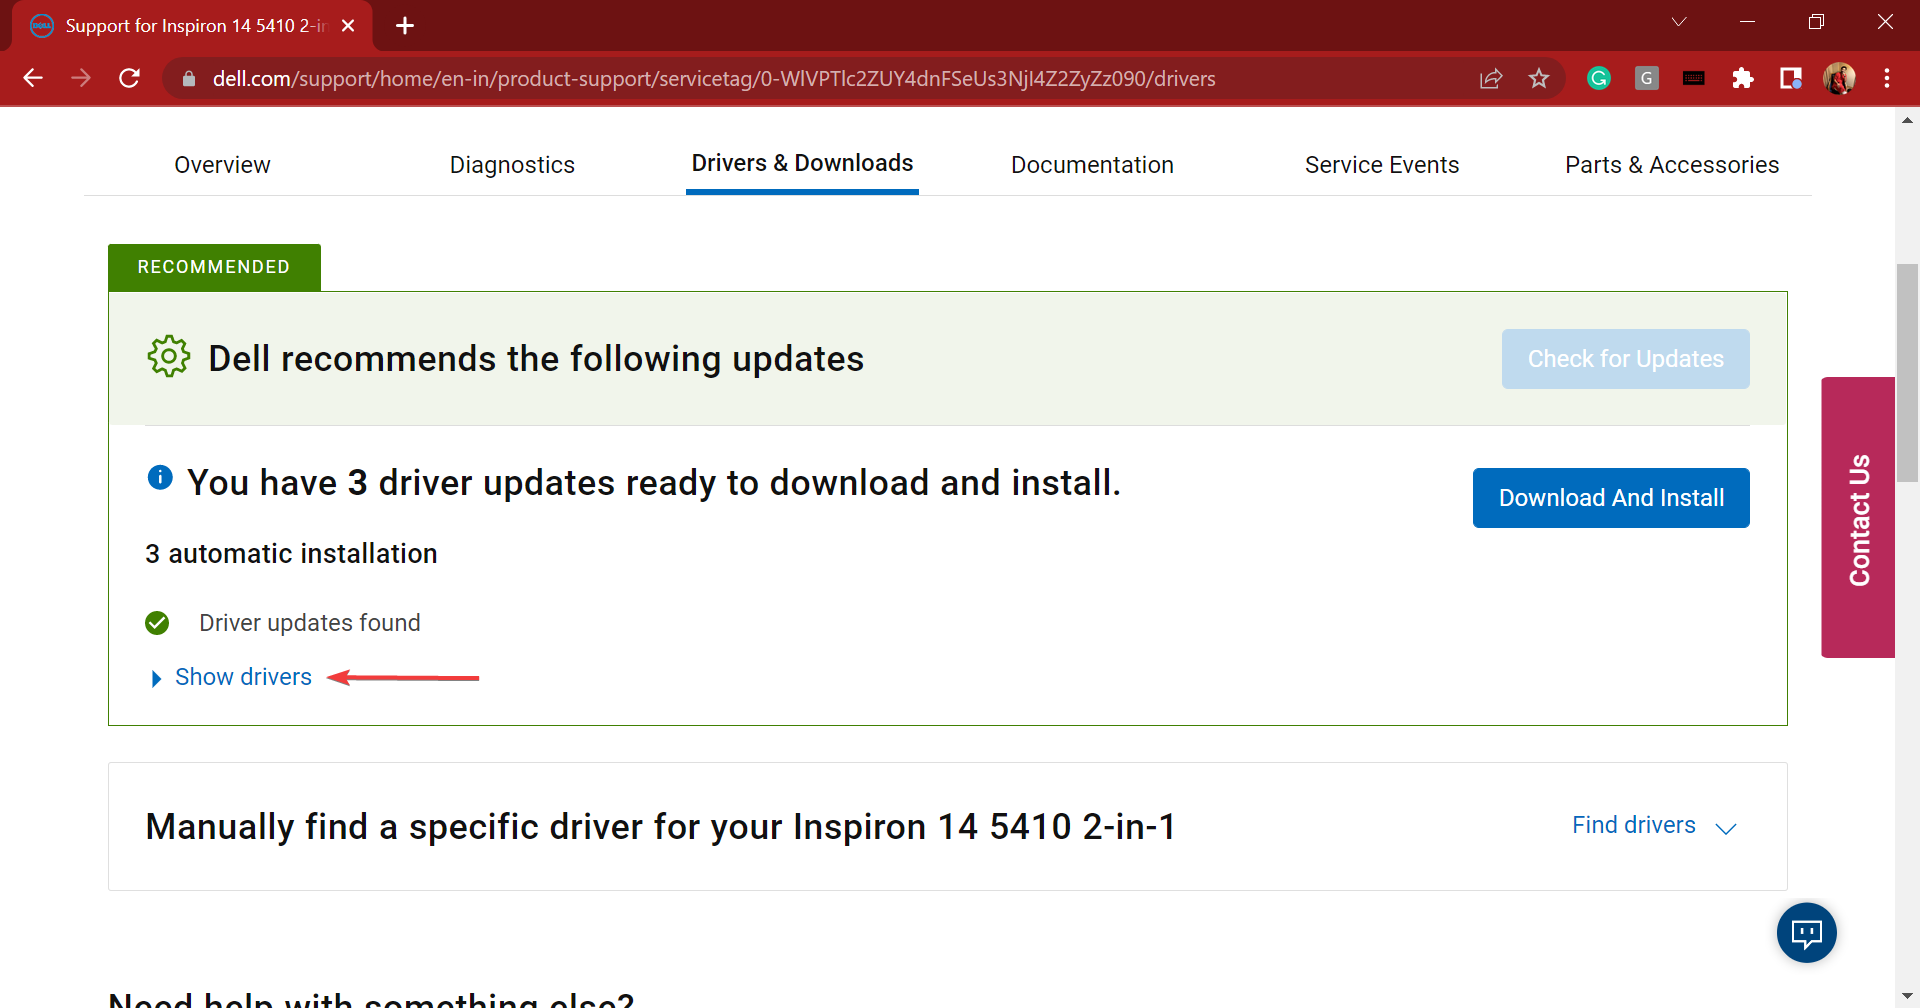
- Once the scan is complete, click on the Show drivers option.
- Next, make sure to tick the checkbox for the webcam drivers, and click on Download and Install at the top.
- After the driver is installed, restart the computer for the changes to fully come into effect.

Once the computer restarts, check if the Dell XPS 17 webcam not working issue is fixed. Drivers are a critical piece of software and these should be updated from time to time for the effective functioning of the device.
There are various ways to update a driver, and it’s recommended that you try them all when installing the latest version.
Or, you could use a reliable third-party app to take care of the updates. We recommend Outbyte Driver Updater, a dedicated tool that will automatically install the latest version, when available, for all the drivers on the system.
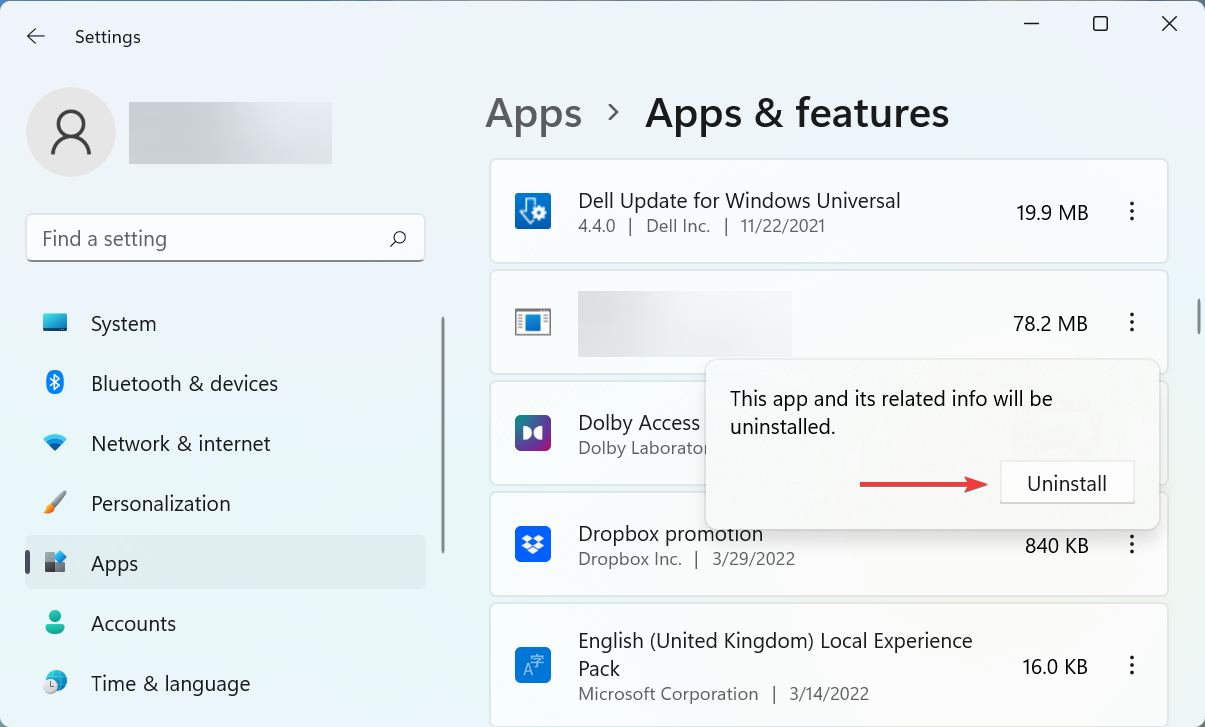
4. Uninstall conflicting applications
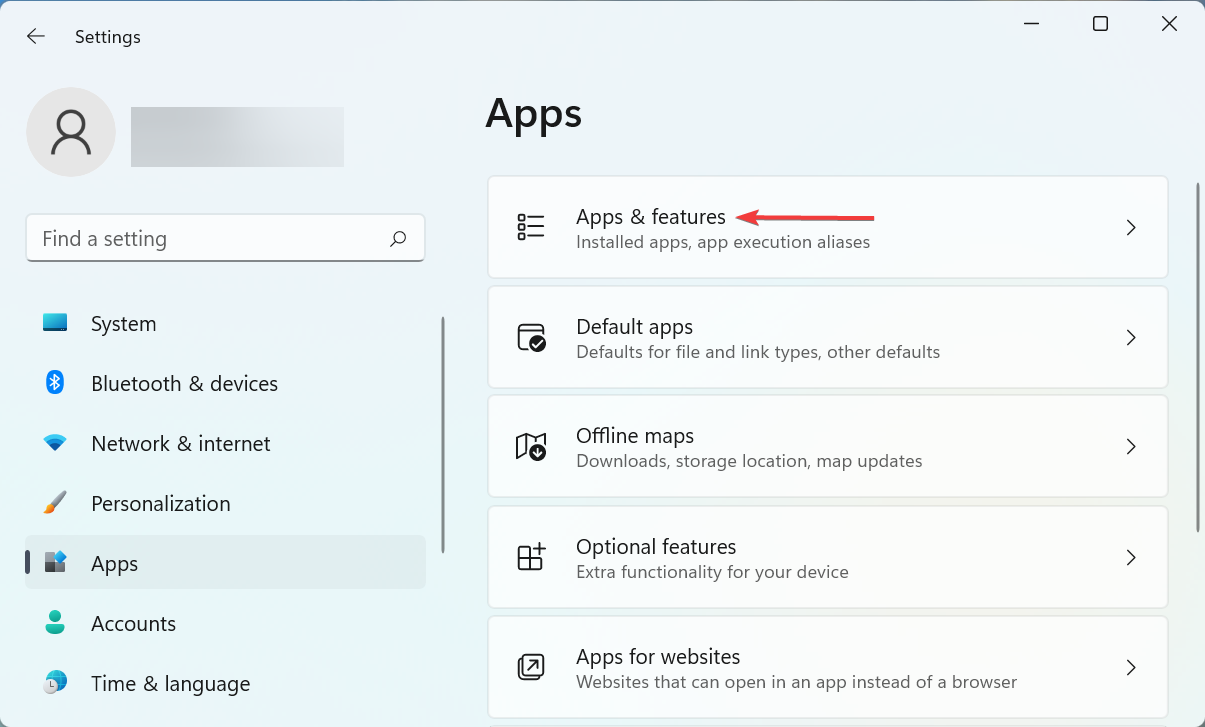
- Press Windows + I to launch Settings, and select the Apps tab from the navigation pane on the left.

- Next, click on Apps & features on the right.
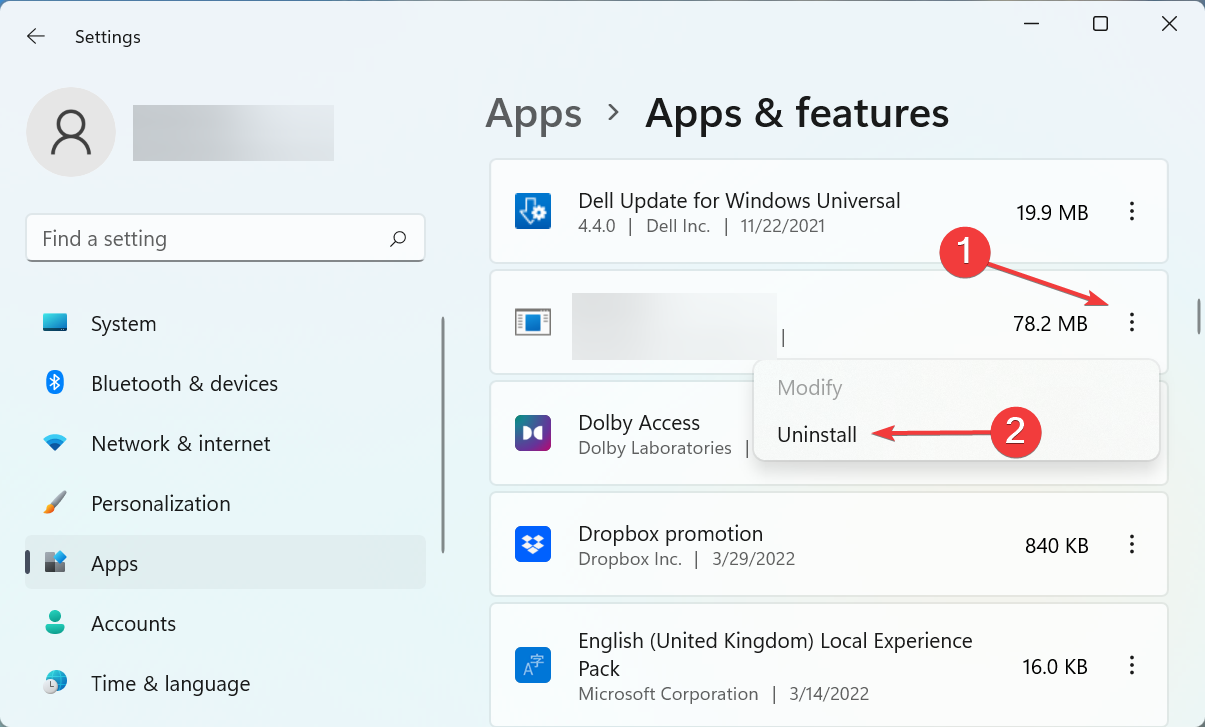
- Locate the conflicting app, click on the ellipsis next to it, and select Uninstall from the context menu.
- Again, click on Uninstall in that prompt that pops up.
- Once done, restart the computer for the changes to fully come into effect.

In some cases, a third-party app or even an antivirus can cause the webcam to stop working. Here, all you have to do is identify and remove the conflicting app. But the real challenge is to find the app which is actually causing the trouble.
For that, just make a list of apps that were installed or updated around the same time you first encountered the error, remove them one at a time while restarting the computer after each, and verify if the Dell XPS 17 webcam starts working.
Once it starts working, the app removed last was causing the error. Just keep it uninstalled for a while and check the web or the manufacturer’s website for a resolution.
The methods listed here should have helped get the webcam up and running on your Dell XPS 17 laptop. In case the problem persists, you can perform a system restore.
Also, check some general troubleshooting methods if the webcam is not working on any other device.
If you have any queries or know of a fix that’s not been listed here, please drop a comment in the section below.