Disk Has Been Surprise Removed [Event ID 157 Fix]
6 min. read
Updated on
Read our disclosure page to find out how can you help Windows Report sustain the editorial team Read more
Key notes
- The Disk has been surprise removed error occurs when something disrupts the system's communication with the disk.
- This error disables the user from using the designated virtual drive and renders the system unusable.
- One of our recommendations includes running a CHKDSK scan. Do not hesitate to apply the steps detailed below.
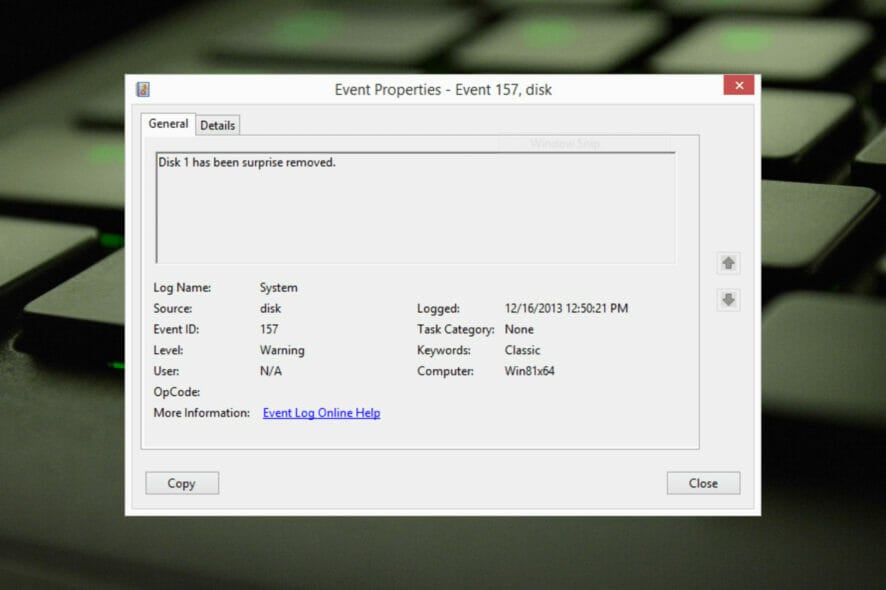
The disk has been surprise removed is an error in the system event log on Windows devices. It’s an unusual issue on the virtual disk that all XBOX Live PC and Microsoft PC installations depend upon.
Usually, this issue occurs when something disrupts the system’s communication with a disk.
The Event ID 157 disk has been surprise removed in Event Viewer disables the user from using the designated virtual drive to install the games. This virtual drive won’t be visible in File Explorer like other drives.
You could also encounter the Disk has been surprise removed VMWare issue. And the solutions below will fix the problem but you will have to do the changes directly in the emulated OS from VMWare.
As it’s an issue of concern, it should be fixed right away. In this guide, we will be looking at some troubleshooting methods that will surely help you.
What does the Disk has been surprise removed mean?
The PNP manager does something called enumerations. An enumeration could be understood as a request sent to the drive that controls a bus, such as PCI.
These take an inventory of the devices on the bus and report back a list of all. Enumerations like these occur for several reasons.
When an enumeration request is received, the bus drivers will reach the bus for all devices. It will then issue commands to the existing devices as looking for new ones.
When these commands fail on an existing unit, the driver will mark the device as missing. Then it won’t be reported back to the PNP in the inventory.
Once the PNP determines the device isn’t available in the checklist, a surprise removal request will be sent to the bus driver to remove the device object.
As the CLASSPNP driver controls the device tag and receives a request for the disks, it sees the surprise removal request and logs an event if the disk is non-removable.
As a result, the disk would disappear from the system with no indication, and the message Disk has been surprise removed will appear.
How do I fix the Disk has been surprise removed error?
1. Update Storage Spaces Controller Driver
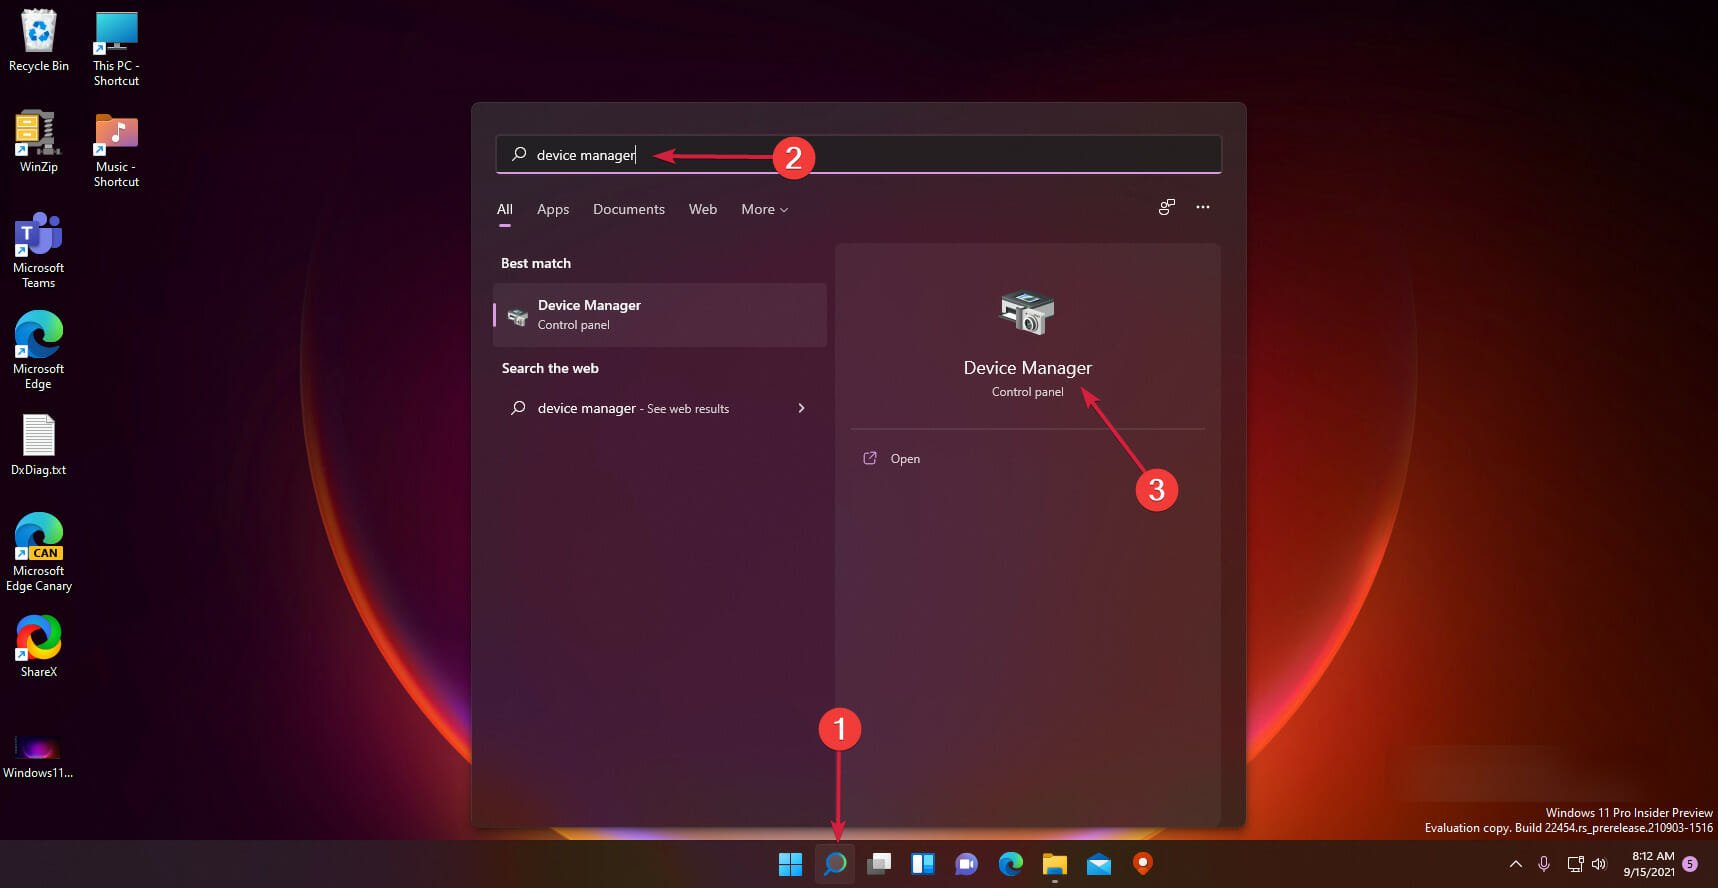
- Click on Start, type device manager, and select the app from the results.
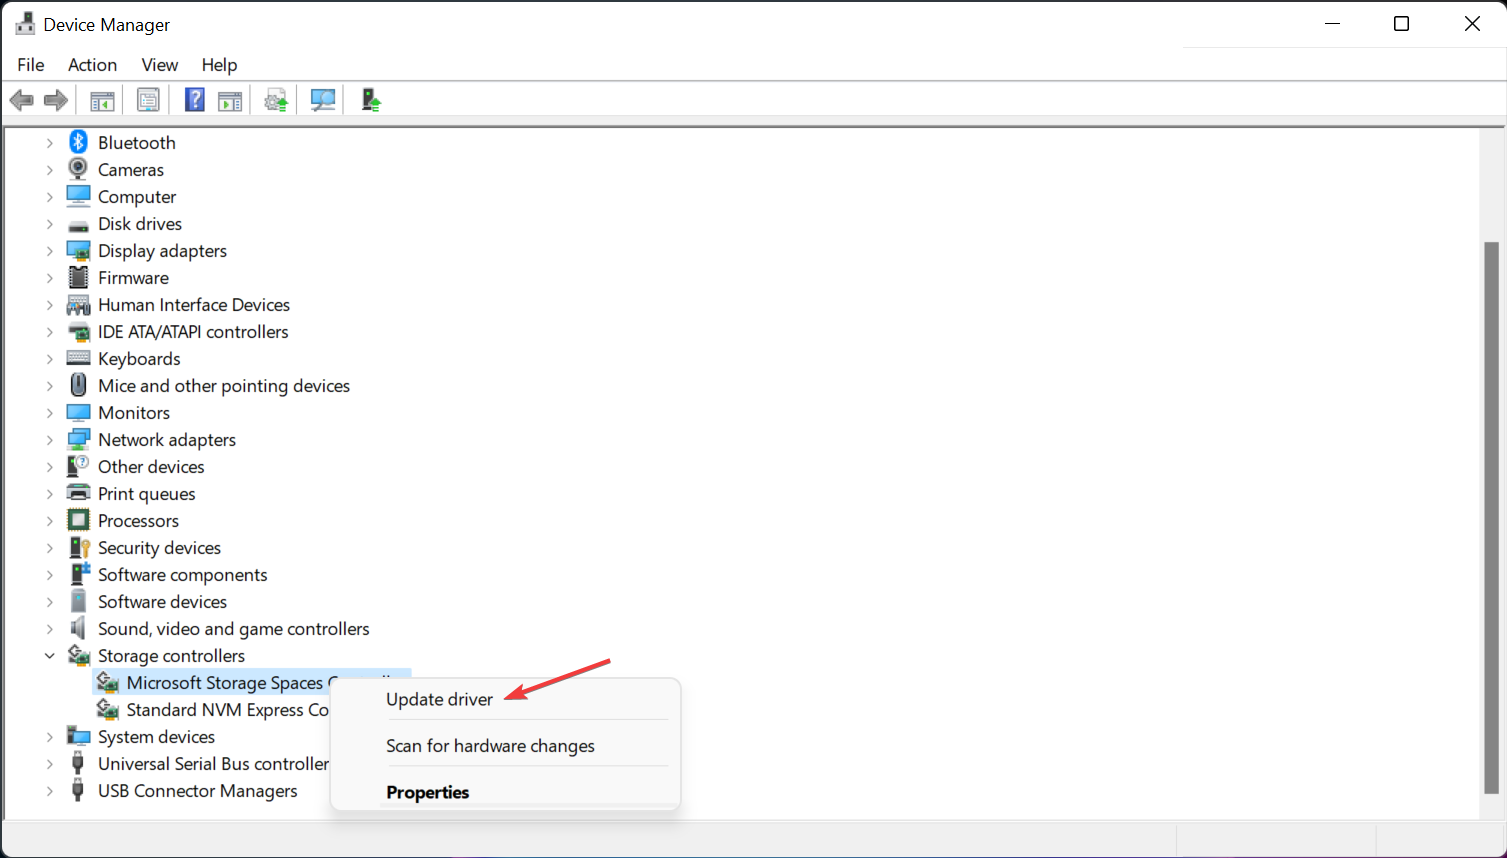
- Expand the Storage Controllers section.
- Right-click on Microsoft Storage Spaces Controller and choose Update driver.
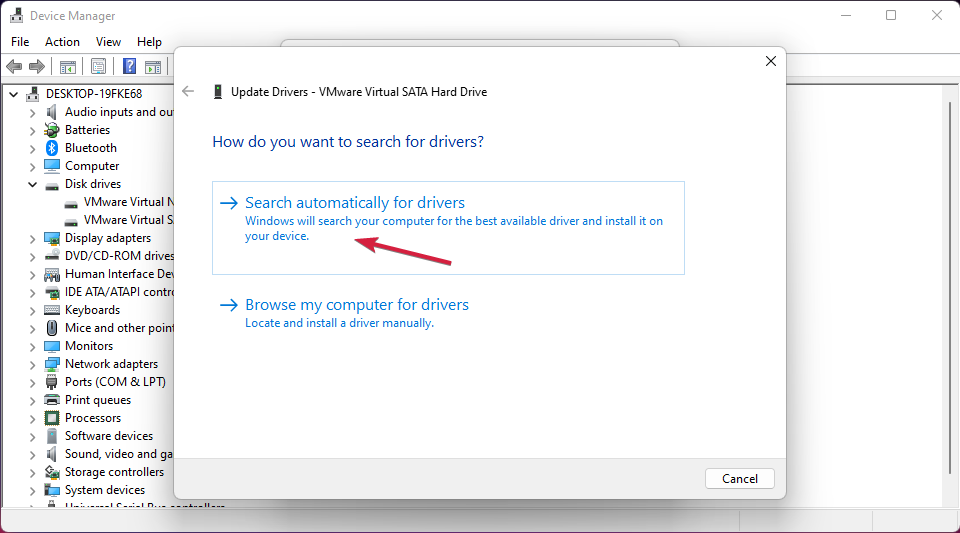
- In the next popup screen that appears, click on Search automatically for drivers.
- Once done, Windows will now automatically search and install any driver updates on your device.
The storage controllers are in charge of your storage drive ports, i.e., the SATA ports. If your storage controller drivers are out of date or corrupted, you may encounter the Event ID Disk has been surprise removed Xbox issue.
The majority of device driver issues on Windows are caused by missing, corrupted, or out-of-date drivers. This is just one of many reasons why you should maintain your device drivers up to date.
A computer cannot handle video cards, XBox controllers, sound cards, or other hardware; they must be managed by a driver. You can update drivers manually if you are completely familiar with the drivers your PC requires.
The ideal option is a driver updater program like Outbyte Driver Updater, which not only replaces but also backs up broken drivers.
The error will be resolved once you have downloaded and installed the most recent drivers. You will also notice an improvement in the performance of your device, and The disk has been surprise removed error will be eradicated.
2. Run a CHKDSK scan
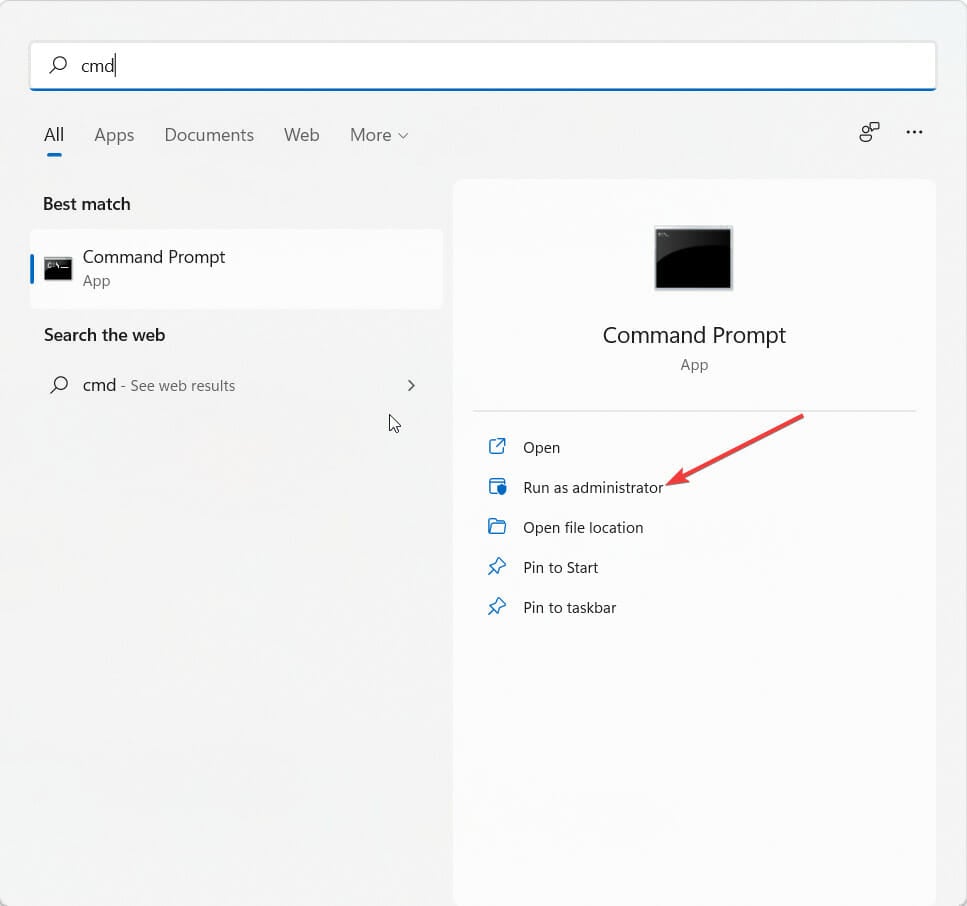
- Click on Start and search for cmd, then click on Run as Administrator.
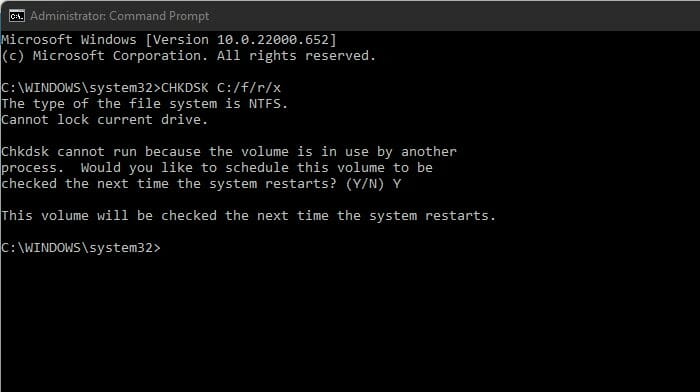
- Type the following command and press Enter.
CHKDSK C:/f/r/x - The command won’t start running as your device’s root drive is already in use. Instead, it will ask you to begin scanning when you restart your PC.
- Type Y, press Enter, then reboot Windows and wait for the procedure to complete.
This issue can also occur if any hard drive parts are corrupted and running a CHKDSK can help fix this issue. CHKDSK is an inbuilt Windows Utility that scans and repairs system disk errors.
Several users complain about the fact that CHKDSK sometimes gets stuck in Windows. Rest assured that our guide shows you what to do in case that happens.
3. Tweak the Registry
 NOTE
NOTE
- Click Windows key + R to open the Run dialog box.
- Type regedit and hit Enter.
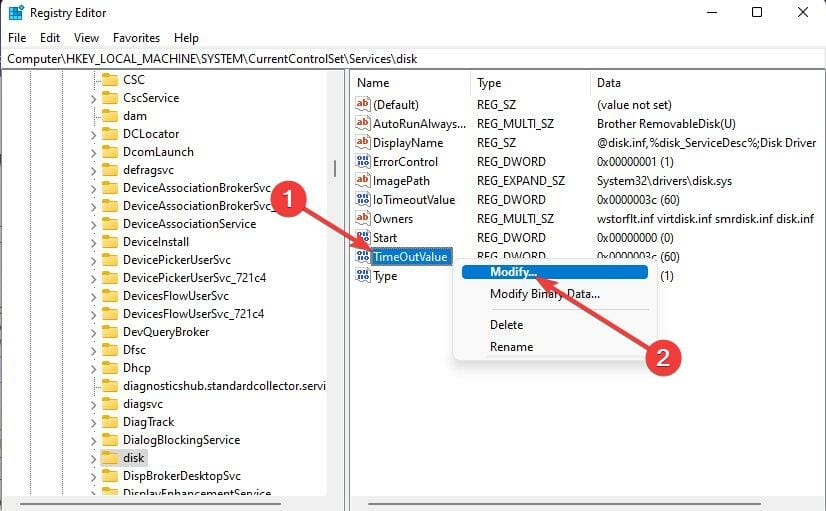
- Once the Registry Editor opens, navigate to the following path:
Computer\HKEY_LOCAL_MACHINE\SYSTEM\CurrentControlSet\Services\disk - Right-click on TimeOutValue in the right pane and select Modify.
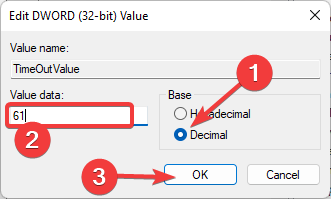
- Set Base to Decimal.
- You will now see the default value in the Value data as 60, so set it to 61 instead.
- Once done, click on OK to save the changes and close the Registry Editor.
- Restart your device and check if the issue is fixed.
4. Clean boot your PC
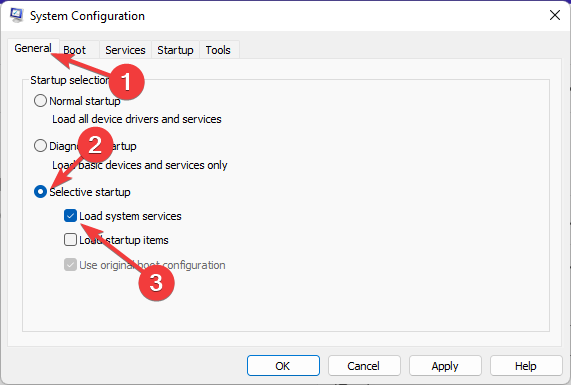
- Click on Start, search for system configuration and open it from the search results.
- Navigate to the General tab, check the Selective Startup and Load System Services options under it.
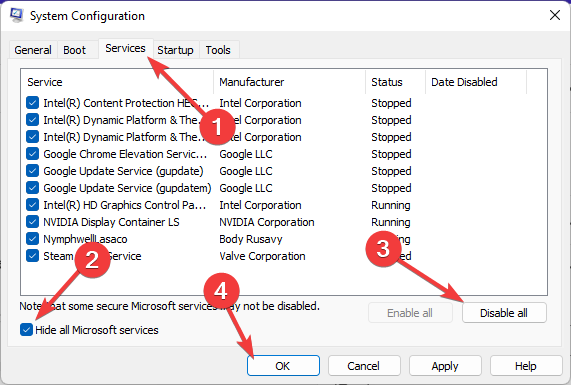
- Now navigate to the Services tab and check the option Hide all Microsoft services.
- Now click on Disable all at the bottom right corner and click on OK to save the changes.
Windows will start with a minimum set of required drivers and programs by performing a clean boot. It will ensure if a third party or background program is causing an error.
The disk has been surprise removed Windows may also arise when a drive is damaged or when a user unplugs a disk while the system is running. To correct this, you will need to verify the health of the disk subsystem.
Well, that’s all from our side on how to fix the Disk has been surprise removed and we hope that our solutions helped you solve this issue.
If the troubleshooting methods didn’t solve this error, try reinstalling Windows. But this should be only a last resort.
If you still have any issues, feel free to drop a comment below. We’re eager to hear from you.



User forum
0 messages