Disney Plus Black/Blue/Green Screen Errors: 5 Easy Fixes
Get Disney Plus Working in no time
5 min. read
Updated on
Read our disclosure page to find out how can you help Windows Report sustain the editorial team. Read more
Key notes
- A black screen on Disney Plus has become a common occurrence, with users worldwide reporting it, though most manage to solve it in practically no time.
- In most cases, it was misconfigured network settings or a server outage to blame for the problem.
- To fix things, check the network properties, change the DNS server, and ensure that Bandwidth Saver is not enabled, amongst other solutions.
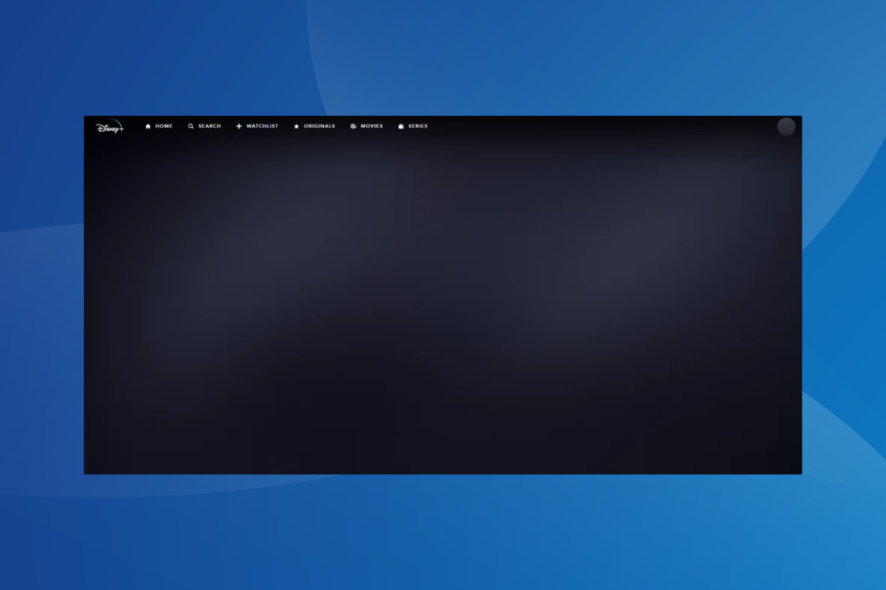
Disney Plus, a popular streaming service, works like a charm until the screen gets stuck with a solid black, blue, or green color. Here, when a user logs in, it’s just a plain black screen without any titles or options listed.
But fret not! We have identified all the underlying causes and the solutions for each, which will be presented in the following sections. So keep reading to find out how to get things up and running when Disney Plus has a black screen.
Why am I getting a black screen on Disney Plus?
Here are a few reasons you are encountering the issue:
- Server outage: In most cases, it’s an outage at Disney’s end that causes the problem. But if the issue persists or others are not experiencing it, it might be something else to blame.
- Using a VPN: A reliable VPN, though quite helpful in a lot of ways, can affect the connection parameters and lead to a black screen on Disney Plus.
- Issues with the connection settings: Oftentimes, an incorrect DNS server or misconfigured connection settings can trigger the issue.
- Corrupt browsing data: The browser cache and cookies, after getting accumulated over time, can become corrupt and trigger a range of problems accessing specific websites.
How can I fix Disney Plus black/blue/green screen?
Before we try the slightly complex solutions, here are a few quick tricks that will come in handy:
- Restart the computer and the modem/router. For the latter, unplug it from the power source and plug it back in after at least a minute.
- If you are using a VPN to establish a connection, disable it, and verify whether the problem is resolved.
- Make sure that Disney Plus is not down. To check, use Downdetector. In case others, too, are experiencing the problem, it’s likely a server outage, and things should be resolved within a few hours.
If none of these work, the solutions listed next surely will.
1. Disable Hardware Acceleration
 NOTE
NOTE
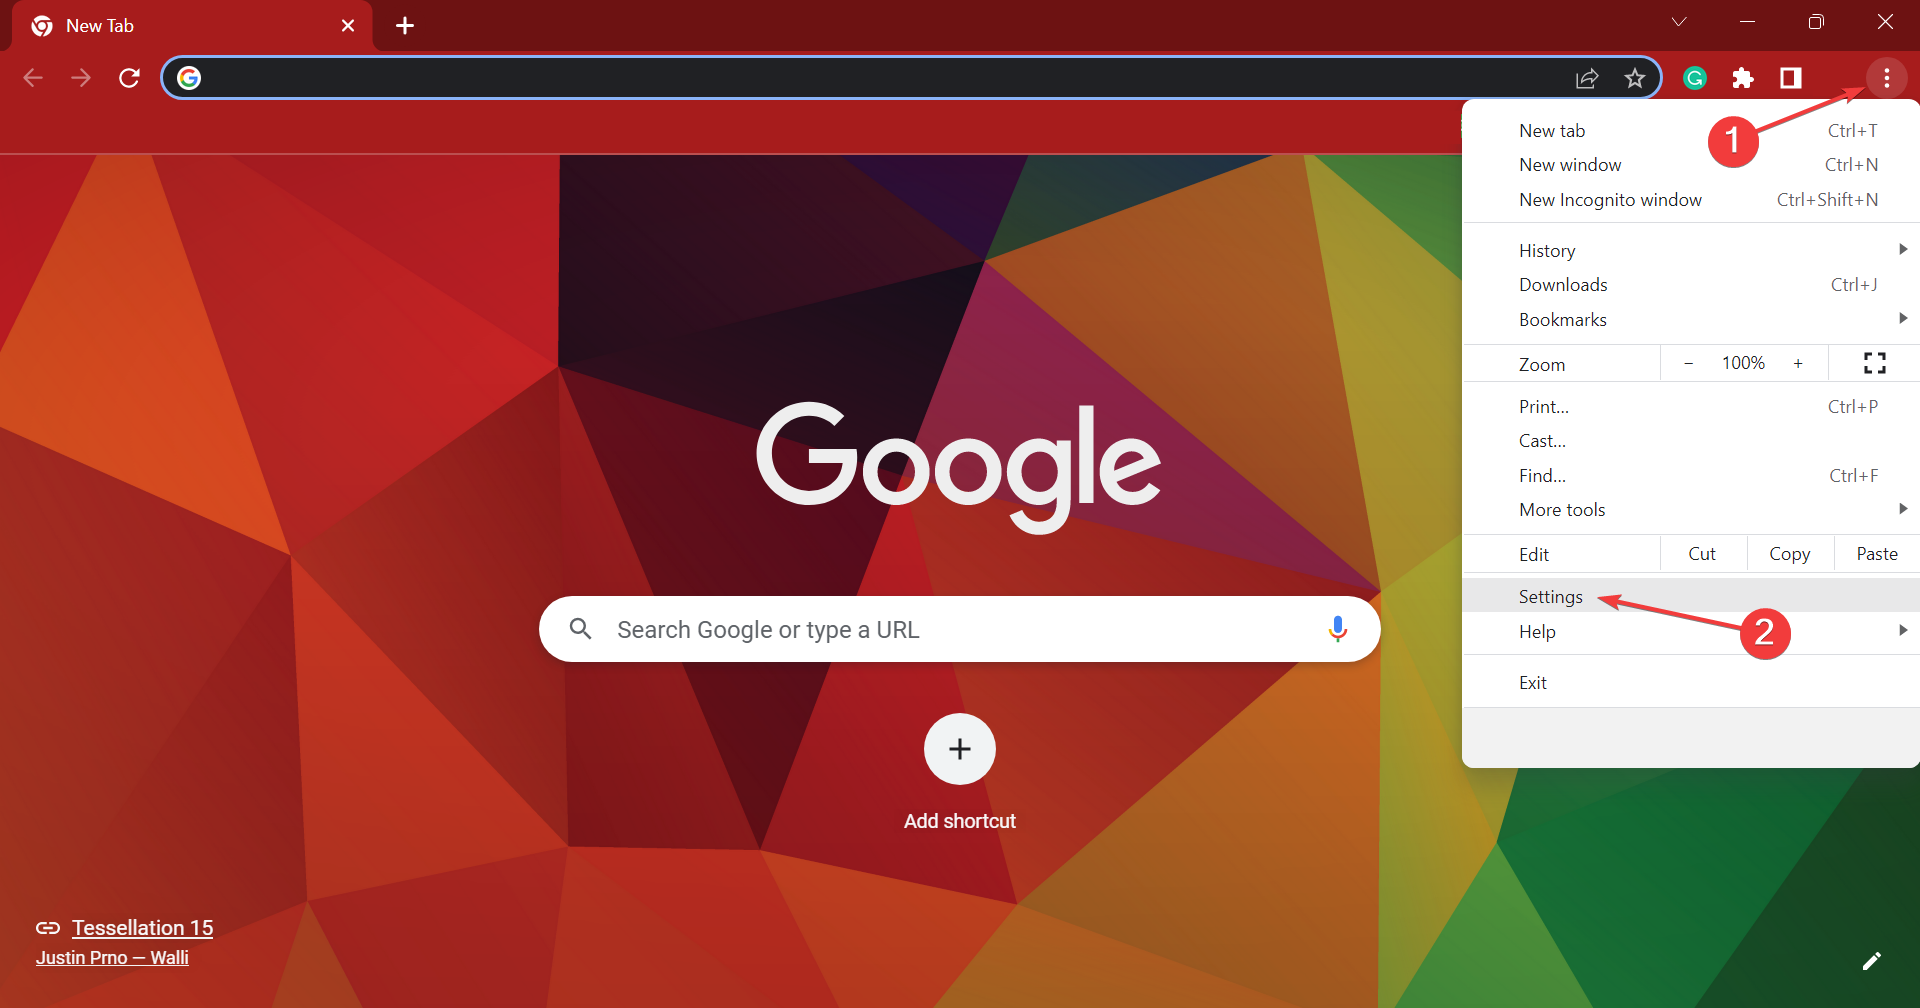
- Launch the browser, click on the ellipsis near the top-right, and choose Settings.
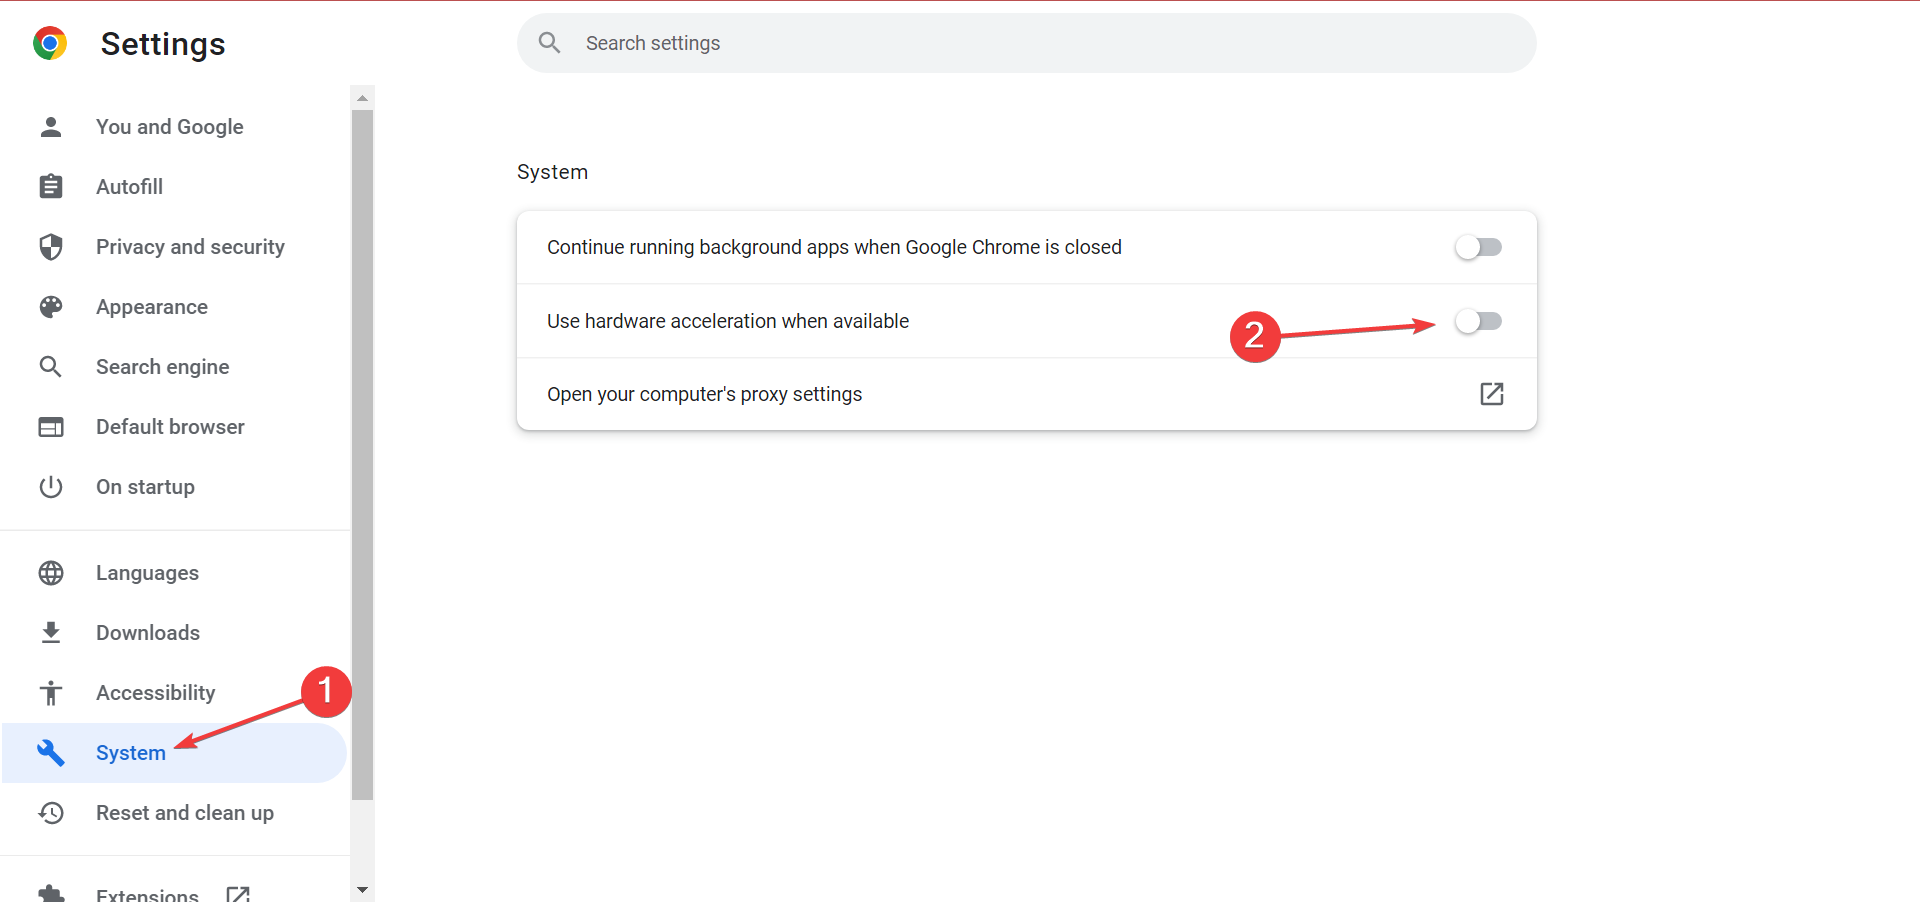
- Now, navigate to the System tab from the left, and disable the toggle for Use hardware acceleration when available.
Once done, relaunch the browser and verify if the Disney Plus black screen still remains. In that case, head to the next solution.
2. Disable Bandwidth Saver on the device
Certain devices come with a Bandwidth Saver option to help minimize data usage, but it often proves counterproductive and messes up the experience. Disabling it did the trick for many users.
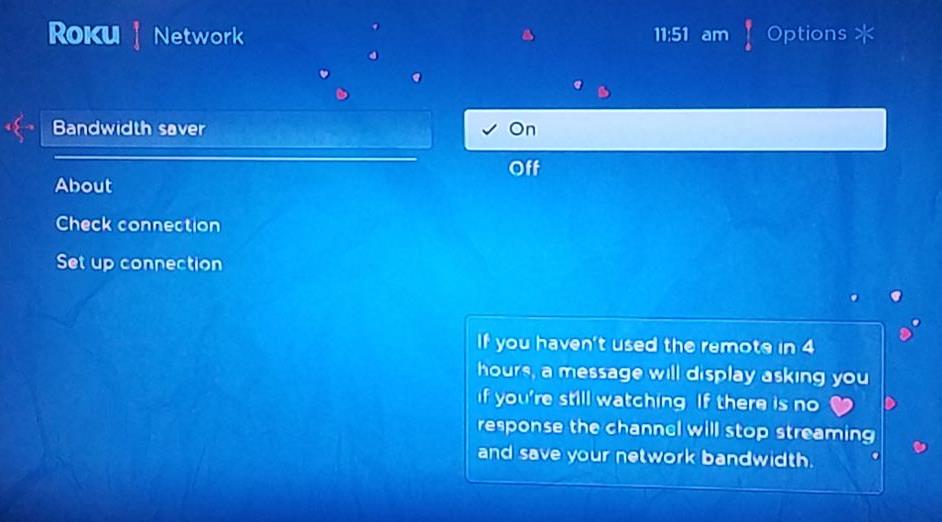
As pointed out by one of our readers, Roku TV users can easily fix things by disabling the Bandwidth Saver feature in the Network settings. Here’s how:
- Press the Home button on the remote, choose Settings, and then Network.
- In the sub-menu that appears, choose Bandwidth saver and turn it off.
That’s it! Once done, your Roku TV (or even another smart TV with the feature) should not display a black screen on Disney Plus anymore.
3. Change the DNS server
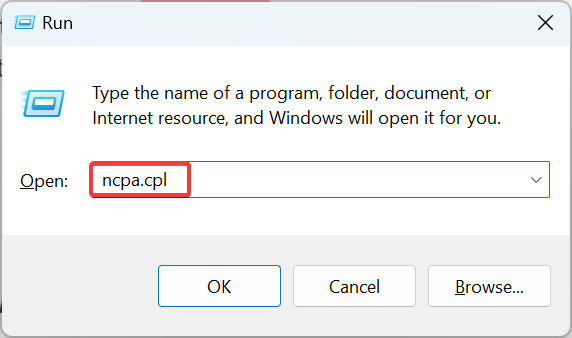
- Press Windows + R to open Run, type ncpa.cpl in the text field, and hit Enter.
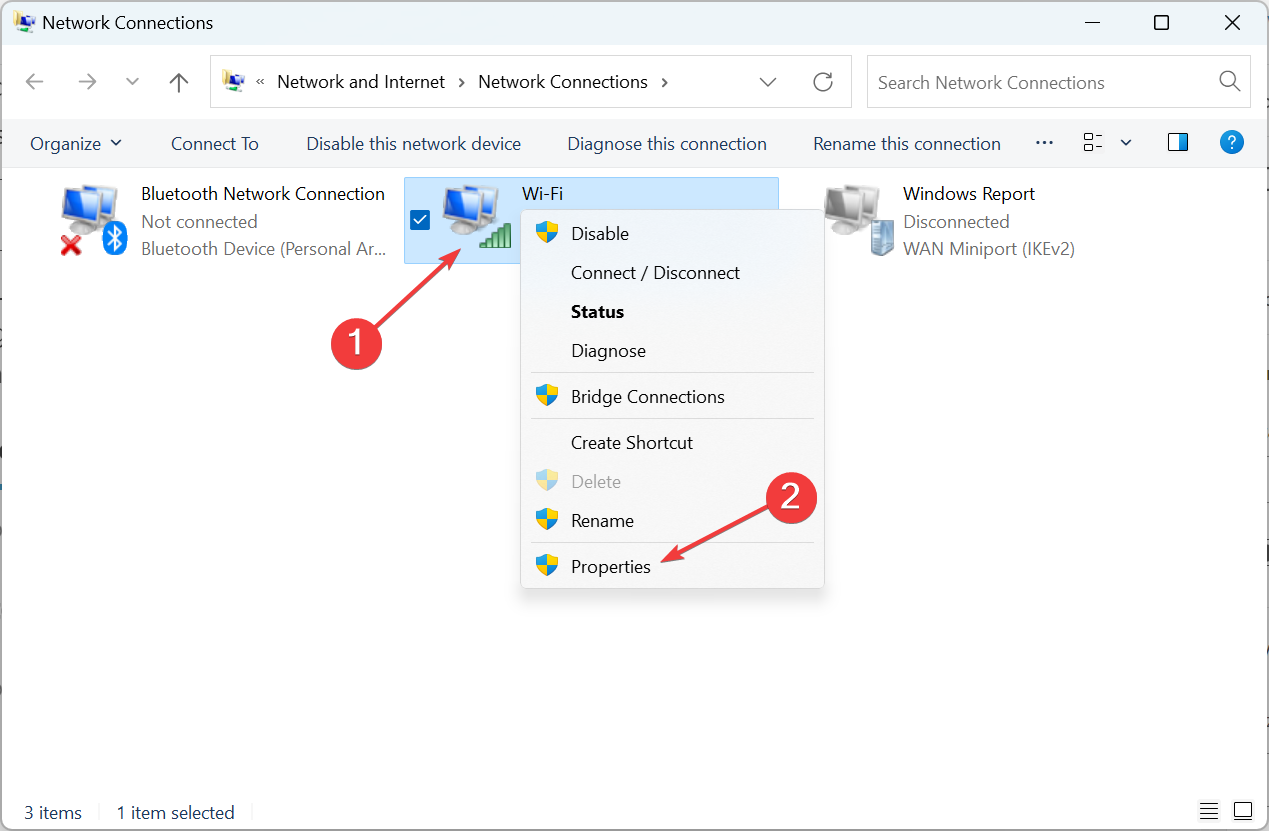
- Now, right-click on the active network adapter, and choose Properties.
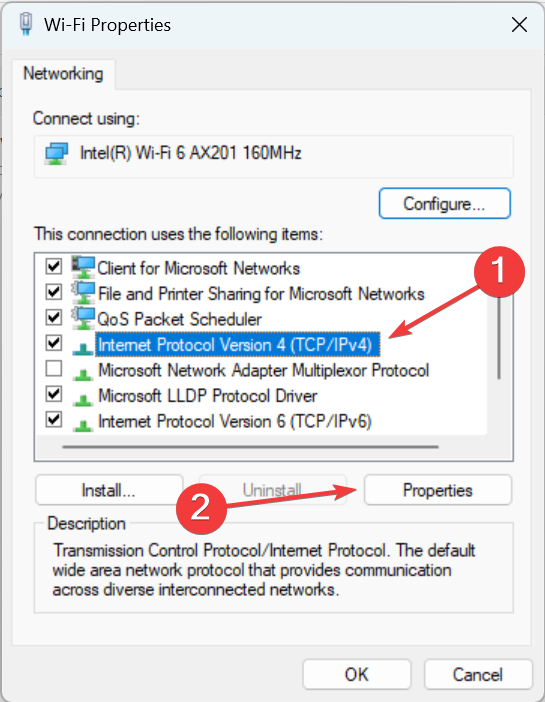
- Next, select Internet Protocol Version 4 (TCP/IPv4) and click on Properties.
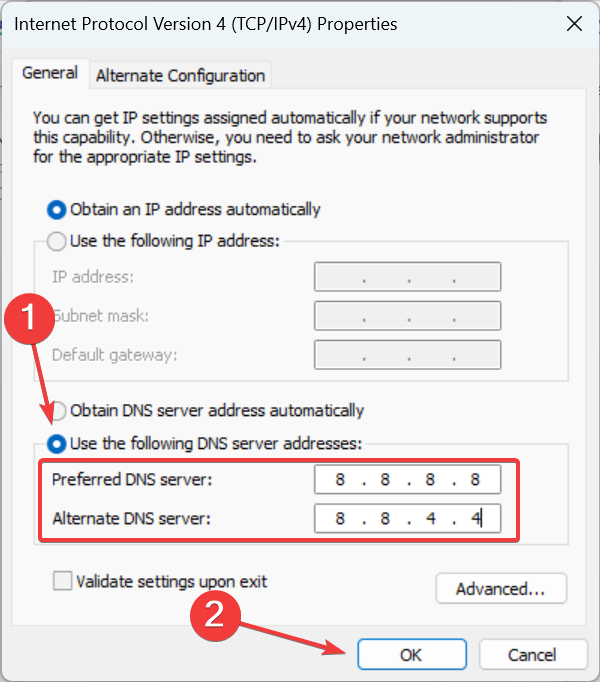
- Select the Use the following DNS server addresses option, enter the following in the two fields, and click OK to save the changes:
- Again, click OK on the previous Window for the changes to apply and restart the computer.
You can also change the DNS server on a TV. Though the steps are different, those can be found on the manufacturer’s official website.
4. Clear browsing data
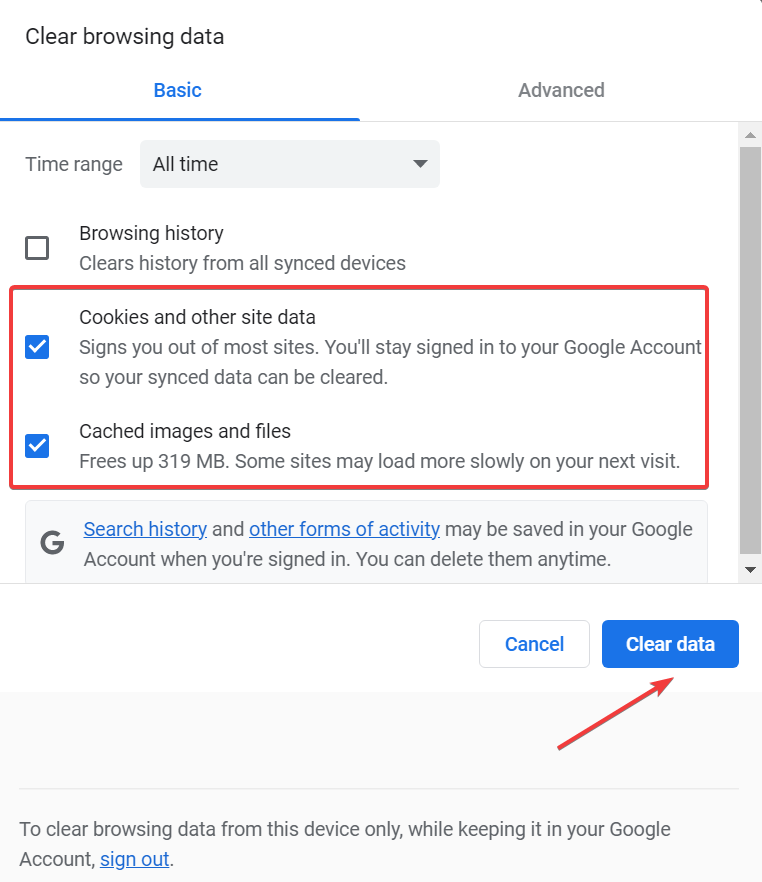
- Launch your browser and press Ctrl + Shift + Del (shortcut works on Chrome, Edge, and Opera but not Firefox) to open the Clear browsing data tab.
- Select the Cookies and other site data and Cached images and files option, and then click on the Clear data button. Just make sure All time is selected from the Time range dropdown menu.
Once the data is all wiped out, relaunch the browser, and verify whether the Disney Plus black screen problem is resolved. Because if not, there’s only one viable option left.
5. Switch to another browser
In case the problem persists, or you are encountering it while streaming Disney Plus content via a third-party application, it could be the browser to blame.
Several users reported the issue with Google Chrome, but as soon as they switched to Opera, things started to work fine because it has a built-in adblocker and a free VPN which makes your browsing experience faster and more secure.
That’s it! With the black, blue, and green screen problem on Disney Plus solved you can start watching your favorite shows once again.
Also, do not forget to check our simple tips to eliminate buffering on Disney Plus. And if you’re experiencing repeated crashes, our guide on troubleshooting Disney Plus crashes provides helpful steps for a smoother viewing experience.
Before you go, don’t miss our guide on what to do if Disney Plus plays only audio without video, for more solutions.
If you have any other queries or know of a solution that’s not listed here, drop a comment in the section below.


User forum
5 messages