How to Create a Shortcut to Eject USB Drives in Windows 10
Learn to safely speed up the ejection process
2 min. read
Updated on
Read our disclosure page to find out how can you help Windows Report sustain the editorial team. Read more
Key notes
- USB drives need to be carefully removed from your Windows 10 PC after you use them, to prevent any damage to them or the data that they contain.
- Usually, ejecting drives needs to be done manually: you need to first configure your PC to eject them, and only after can you remove the physical object.
- If you want to perform this action faster, you can create a shortcut to safely eject USB drives.

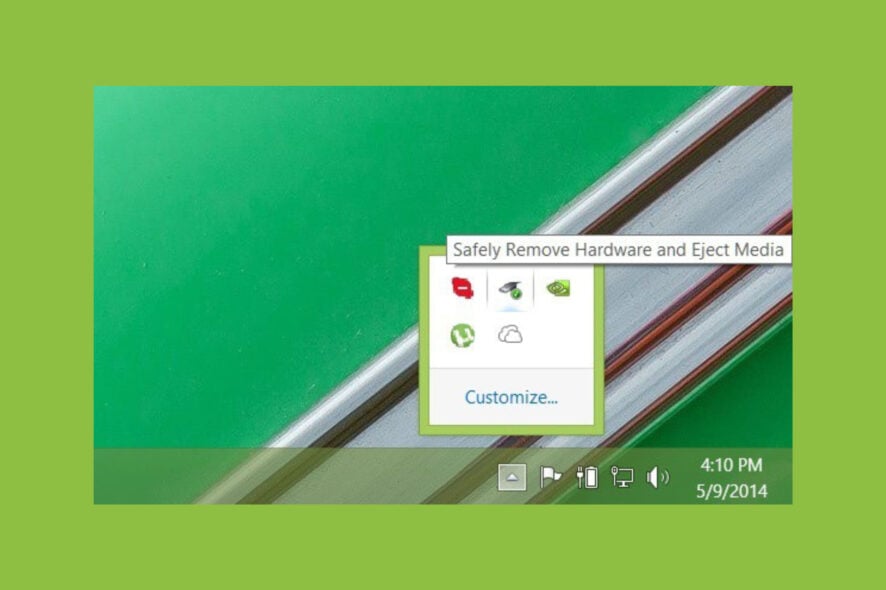
On the older versions of Windows, ejecting the USB drive from the Safely Remove Hardware shortcut was usually easy to find.
Well, since Microsoft introduced us to Windows 10, 8, and Windows 8.1 operating systems, a lot of people seem to be having problems finding this icon and using it properly.
We will show you exactly how to properly eject the USB drive in a few short steps using the guide below.
Before you eject USB drives from your PC
Making sure your folders with music, films, and other kinds of data are saved properly on your storage device (USB) is really an important thing to do before removing the USB
So, if you are trying to properly remove the USB hardware on Windows 10, and you have trouble doing so, you will see exactly how to access this feature by reading the short tutorial below.
How can I eject USB from Windows 10?
1. Create a Safely Remove Hardware shortcut
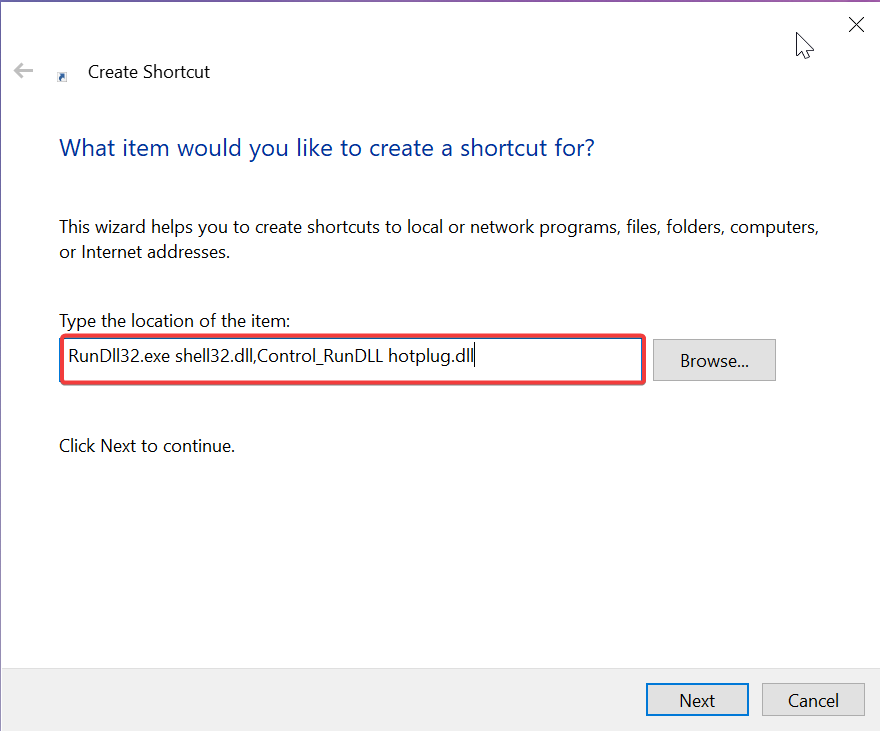
1. Right click on a free space on the desktop and select New from the tab that appears.
2. Now we need to select the Shortcut option by left clicking on it.
3. Set the location of the shortcut to be the following: RunDll32.exe shell32.dll,Control_RunDLL hotplug.dll
4. Click Next.
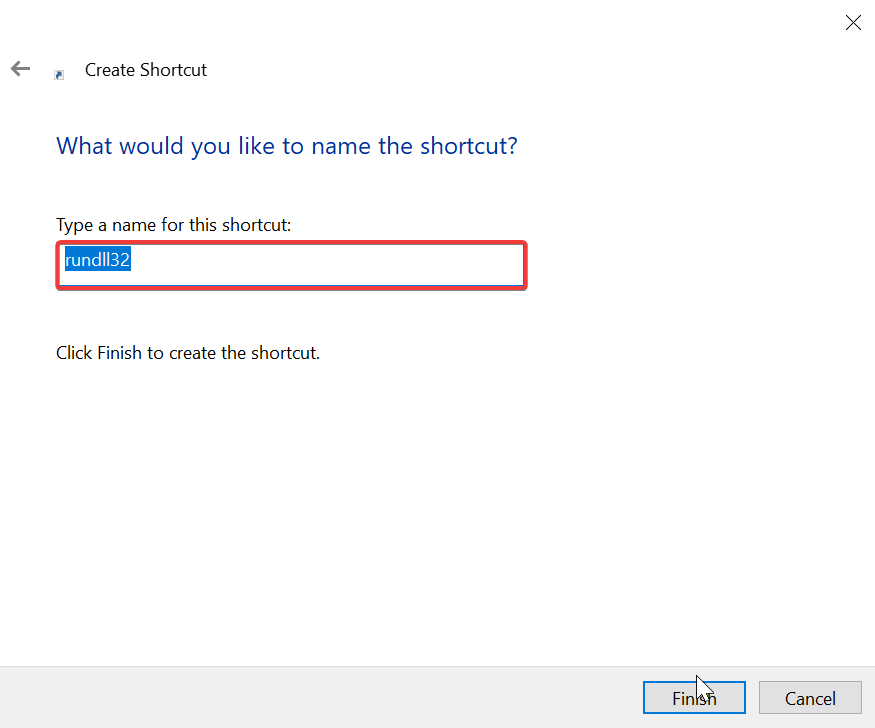
5. Name the shortcut to Remove Hardware or any other name you find more appropriate, so that you can easily recognize it.
6. Click the Finish button on the lower side of the window.
7. Now that you have the shortcut on the desktop, before you unplug the USB, you need to double click the Remove Hardware icon and select the USB you want to remove by left clicking on it.
8. Select Stop on the lower side of the Safely Remove hardware window you opened. Wait a little bit.
9. Windows will notify you with a message when it will be safe to remove the USB hardware from your computer.
In order to use a shortcut to safely eject hardware on your Windows 10, you must first create it. You can easily do so directly from your PC’s desktop.
You can manually configure the shortcut’s location and name, so that it performs the desired action: ejecting USBs.
2. Use Windows Explorer
First, make sure that your USB hardware is not running any operation (copying or syncing) and then enable the Safely Remove Hardware icon from Taskbar settings:
- To enable the Safely Remove Hardware icon > right-click on the taskbar > select Taskbar settings
- Scroll down to Notification Area > Select which icons appear on the taskbar
- Go to Windows Explorer: Safely Remove Hardware and Eject Media > turn it on.
Of course, if the Safely Remote Hardware icon is already available on your taskbar, you can quickly eject your USB hardware by selecting the icon, then select the hardware you want to remove and confirm your choice.
That is all, this is how you can safely remove your USB storage device on Windows 10. If you have any other thoughts don t hesitate to write below.


User forum
0 messages