Error Code 0xc0000001 on Windows 11: How to Restore Your PC
Removing the problematic software from Safe Mode can fix this issue

If you encounter error code 0xc0000001 on Windows 11, you won’t be able to access Windows at all.
So, what causes this issue? It could be triggered due to damaged RAM, corrupted system files, or faulty software. Luckily, there are ways to fix this issue, and this guide will show you how to do it.
How do I fix error code 0xc0000001 on Windows 11?
1. Perform a startup repair in Recovery mode
- To begin with, create a bootable media for Windows 11 and boot the PC using the media.
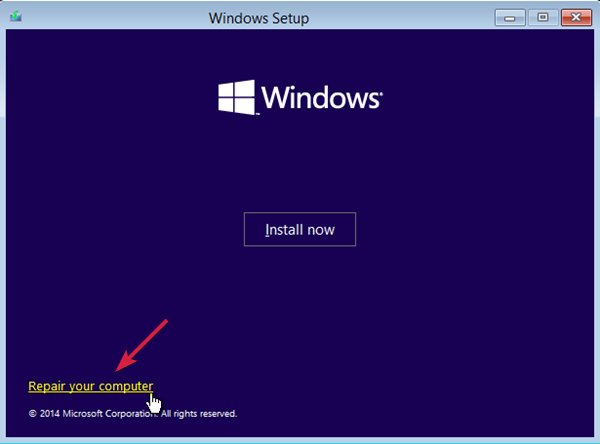
- On the next screen, click on Repair your computer.
- You will now reach the System Recovery Options screen.
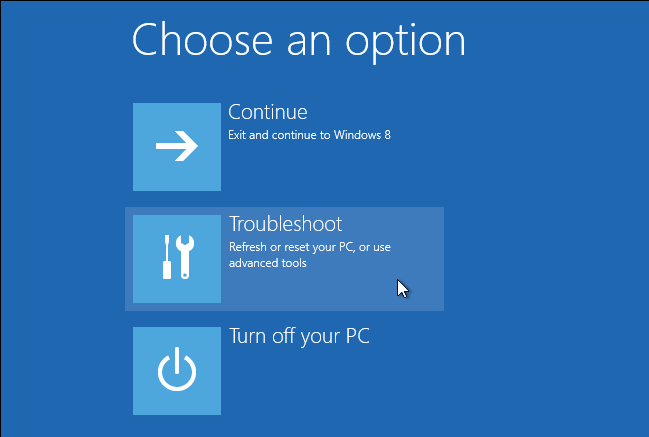
- Under Choose an option, click on Troubleshoot.
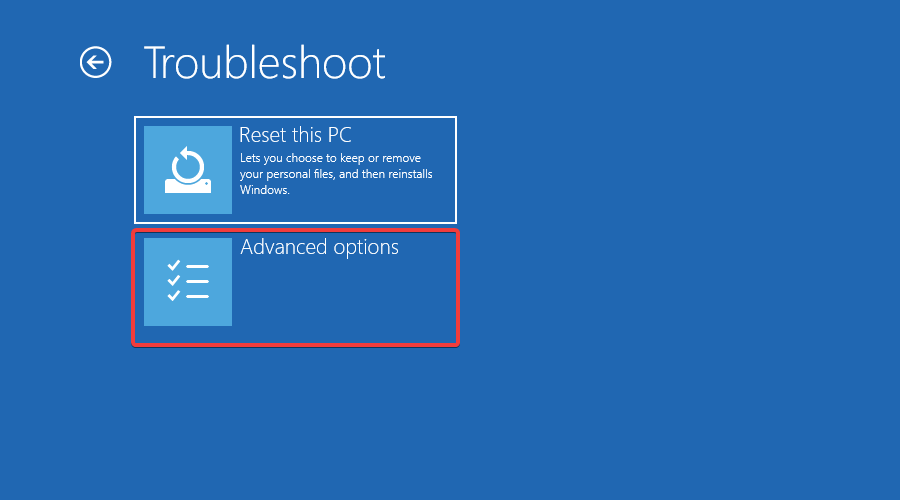
- Next, click on Advanced options.
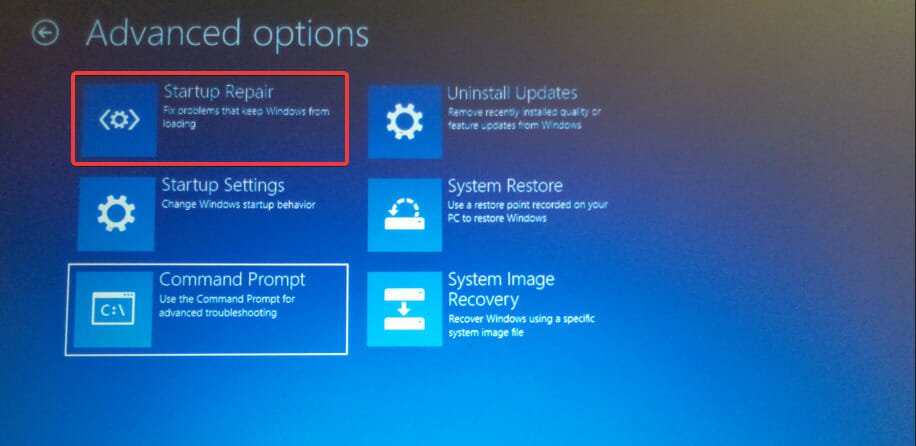
- On the next screen, click on Startup Repair.
- Here, select an account with administrator rights, enter the password and click on Continue.
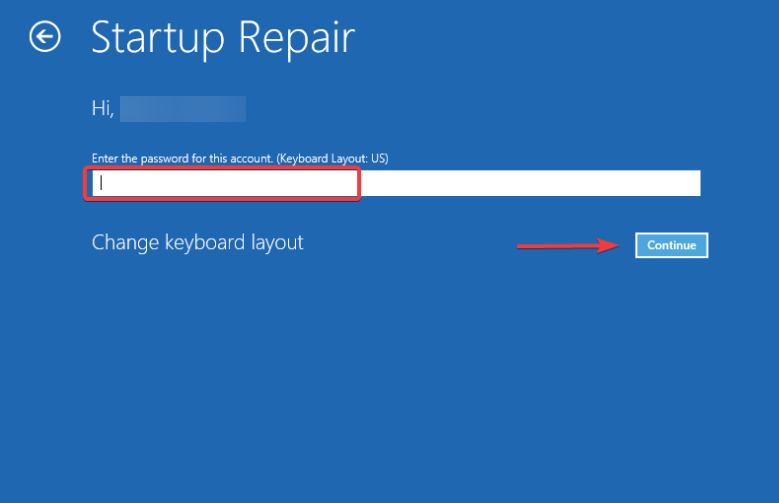
- Now, wait till the Windows Startup Repair process is over.
Once the process is over, restart your PC and it should boot normally without the blue screen error code – 0xc0000001.
2. Use Command Prompt to repair error code 0xc0000001
2.1. Rebuild BCD on Windows 11
- Create a Windows 11 bootable media and boot the PC using the media.
- Next, select Repair your computer.
- On the Choose an option screen, select Troubleshoot.
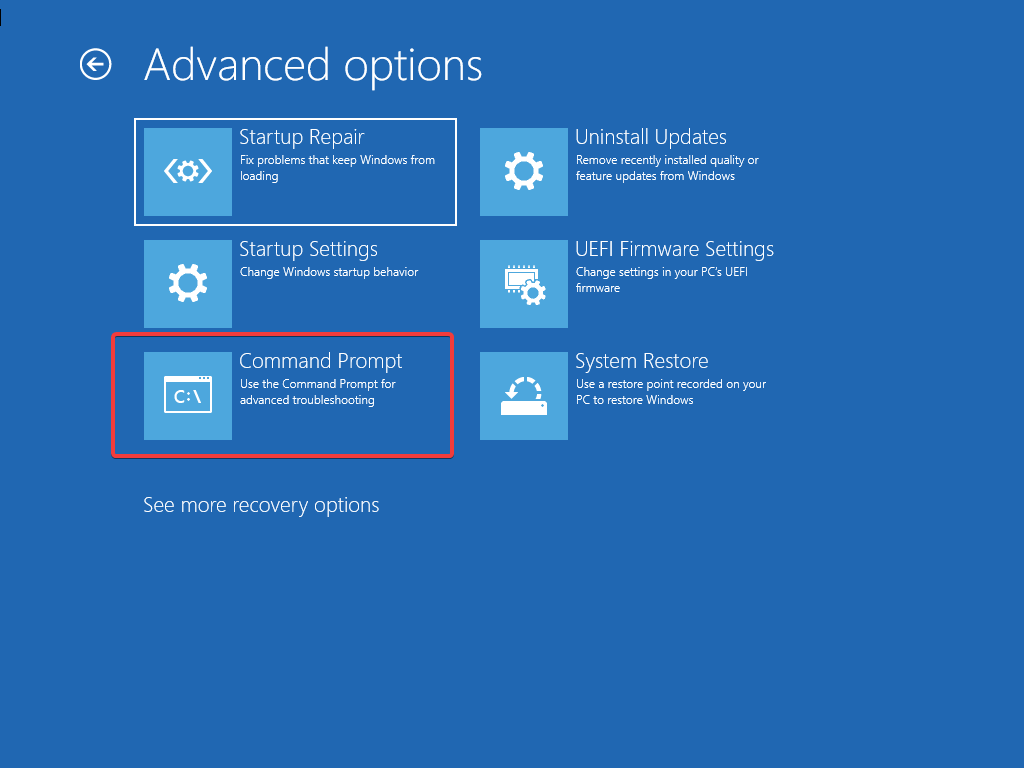
- Now, under Troubleshoot, click on Advanced options.
- On the Advanced options screen, click on Command Prompt.
- Now run the below commands one by one and hit Enter after each command:
BOOTREC /FIXMBR
BOOTREC /FIXBOOT
BOOTREC /scanos
BOOTREC /rebuildbcd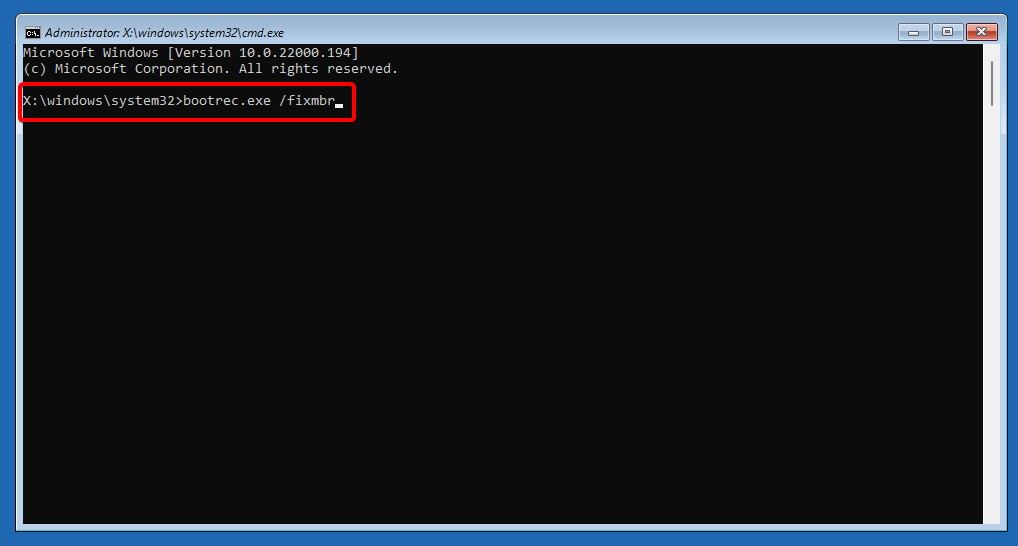
2.2. Run SFC scan and CHKDSK utility
- In the same Command Prompt window, execute the below command to run the system file checker utility and hit Enter:
sfc /scannow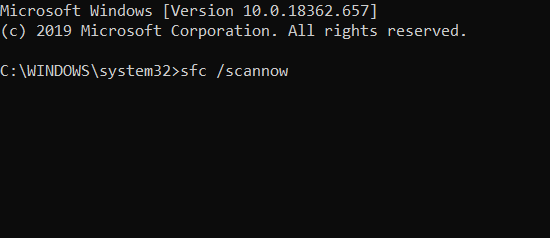
- The scan takes a while, so wait till it’s over. Once done, follow the below steps.
- Next, run the below command to check the hardware drive and press Enter (replace the C drive with the actual system drive if needed):
chkdsk C: /f /r /x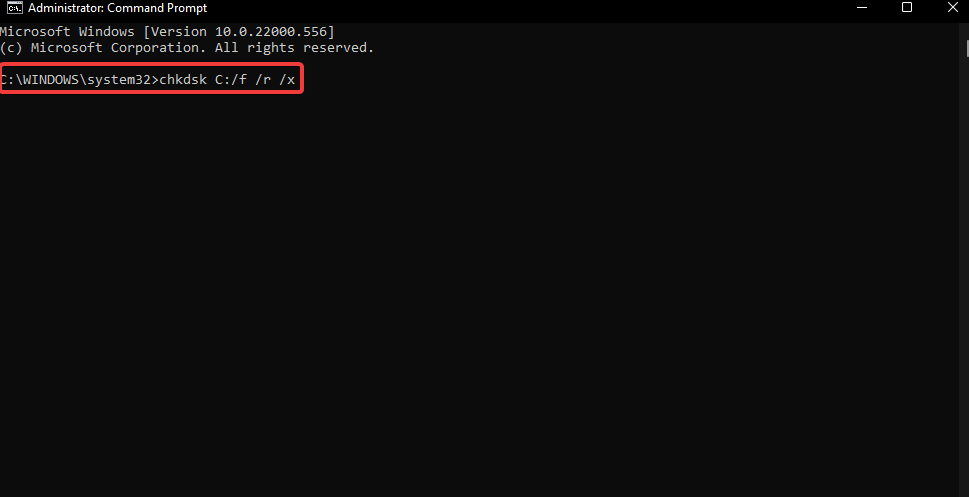
- Press Y if you are prompted for confirmation and hit Enter.
3. Remove the interfering software in Safe Mode
- You can create a Windows 11 bootable media and use it to boot your PC into Recovery mode.
- On the Choose an options screen, select Troubleshoot.
- Next, click on Advanced options.
- On the next screen, click on Startup Settings.
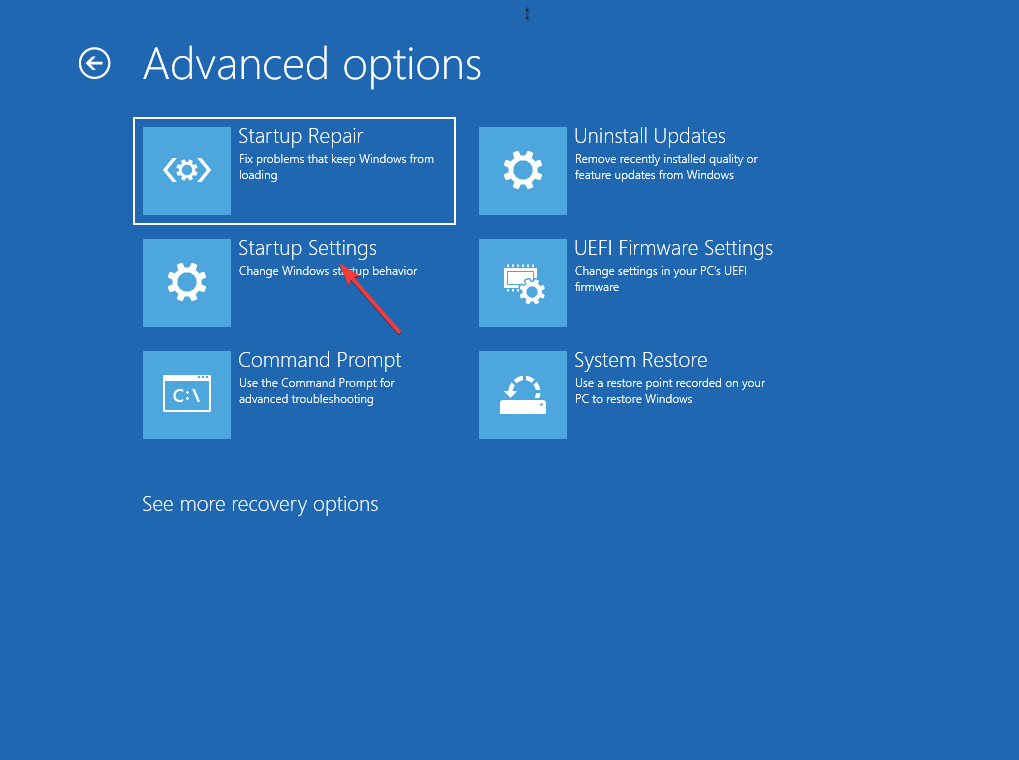
- Select F4 from the list and press the key on your keyboard to boot your PC into Safe Mode as it restarts.
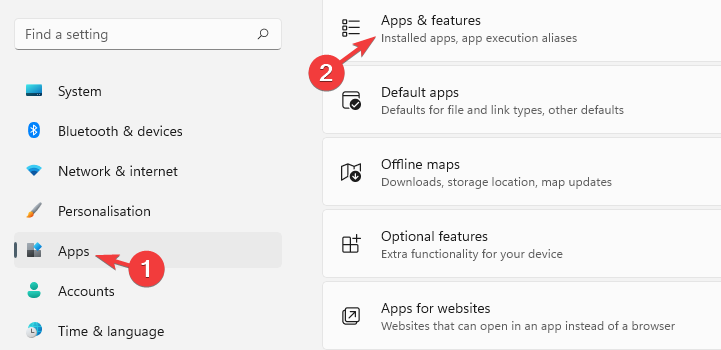
- Now, press the Win + I keys simultaneously to launch Windows Settings.
- Click on Apps on the left and select Apps & features on the right.
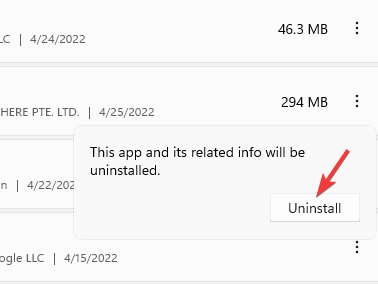
- Here, go to the Apps list and select the program that was recently installed.
- Click on the three dots next to it and select Uninstall.
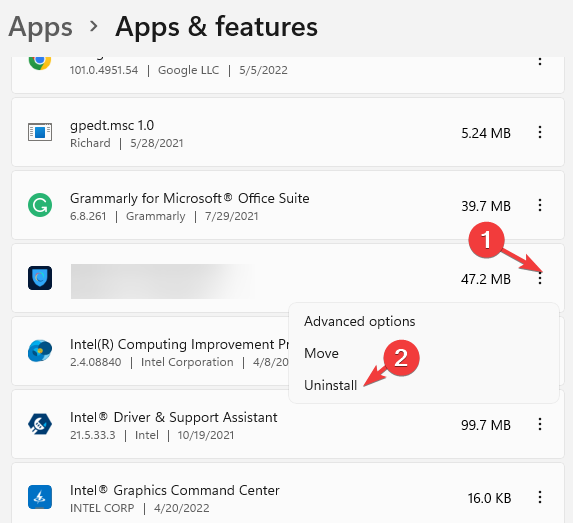
- Click on Uninstall again in the pop-up window to confirm.
Once uninstalled, close the Settings app and restart your PC. The error code 0xc0000001 Windows 11 should be fixed now.
At this point, you can also check your Windows files for errors and corruption by using a dedicated repair tool.
4. Reset your PC
- Boot your PC with the Windows 11 bootable media.
- Press the Win + I keys together to open the Settings app.
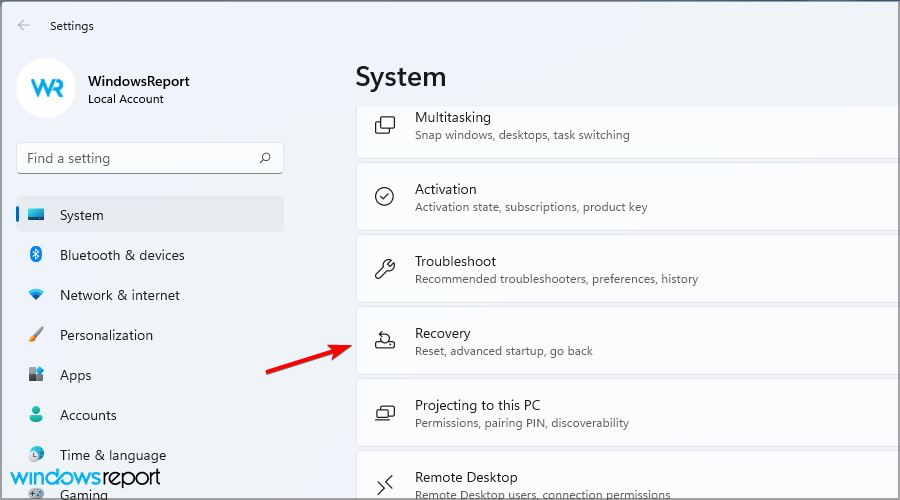
- Click on System on the left and then click on Recovery on the right.
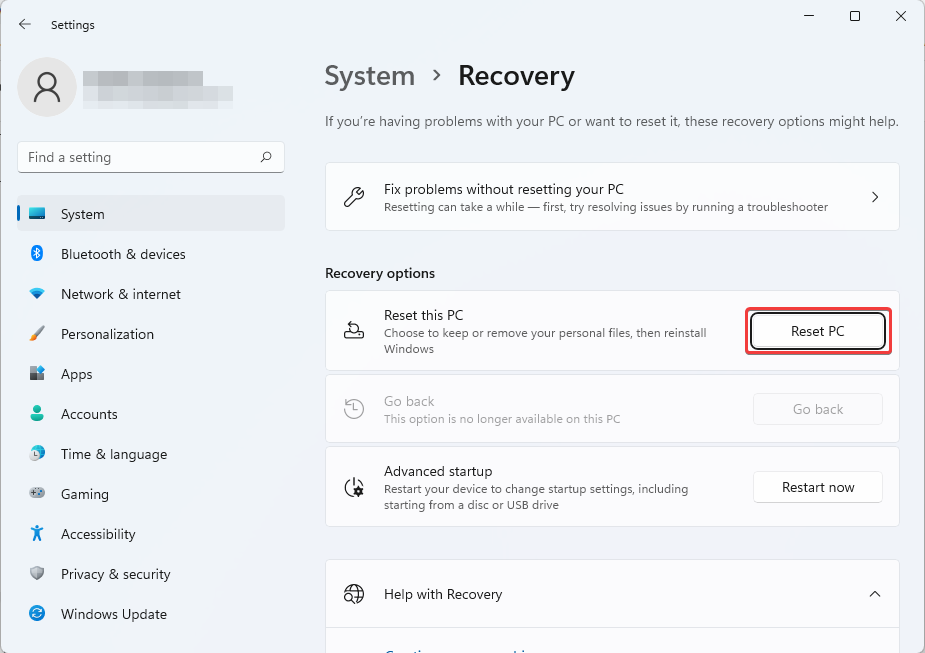
- Next, on the right side, under Recovery options, go to Reset this PC and click on Reset PC.
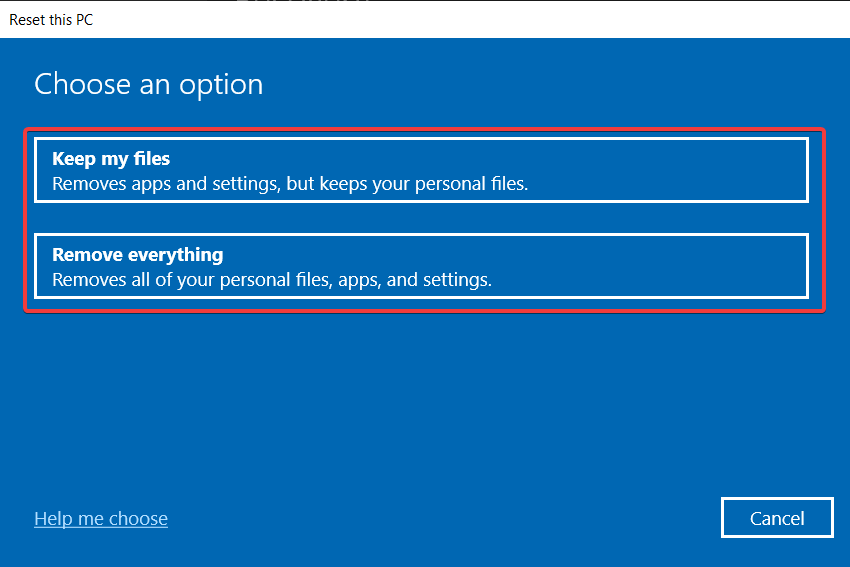
- Now, on the Reset this PC screen, select Keep my files or Remove everything.
- As you see the warnings, click Next.
- Then, click Reset again and press Continue.
Once you complete the factory reset of Windows 11, the issue should be gone, and help you if your PC is stuck in the boot loop.
Additionally, you can also try to perform a system restore to revert to a previous working state, or you can perform a custom installation of Windows 11 to fix the error code 0xc0000001.
You can also encounter the error code 0xc0000001 on Windows 10, and to fix this issue, do not hesitate to refer to our detailed guide.
We also have guides on 0xc00000ba boot error and error code 0xc0000428, so don’t miss it.
If you found this article helpful, let us know in the comments box below.
Read our disclosure page to find out how can you help Windows Report sustain the editorial team. Read more


Improve this guide


User forum
0 messages