Fix: Ethernet Keeps Disconnecting On Windows 7
Get back to enjoying your Ethernet connection in no time
Key notes
- In case the Ethernet keeps on disconnecting on Windows 7, you won’t be able to browse the web with an Ethernet cable or get the full speed from your router.
- This issue might occur because of some hardware problems, outdated network adapter drivers, or invalid network configurations.
- You can easily fix thE problem by tuning the Power management settings, as described below.
Generally, Ethernet cable connections are widely known for being secure. However, many users complain about their Ethernet disconnecting on Windows 7.
This can be a very frustrating issue, as it can disrupt your internet connection. If you are using a Dell system, you can check our guide to Ethernet not working through the Dell dock.
What causes Ethernet to disconnect on Windows 7?
There can be many reasons for your Ethernet to disconnect randomly. It could be due to driver issues or hardware problems. Let’s take a look at each of these possibilities one by one.
- Overload on the network – Multiple devices connected to the same network utilize a significant amount of bandwidth that affects Ethernet connection.
- Faulty hardware – In case you have a faulty Ethernet card, it could be causing the issue.
- The cable may be the culprit – The loose or damaged cable between your computer and the router can cause an intermittent connection.
- Network Adapter drivers – Outdated network adapter drivers might cause Ethernet disconnecting issues on Windows 7.
- Configuration settings – Invalid configuration settings can also be the reason for your Ethernet to disconnect on Windows 7 because they can disrupt the connection.
Now that you are well aware of nuisances that result in the disconnection of the Ethernet on Windows 7 let’s move on to the possible solutions that can help you fix this issue once and for all.
How do I keep Ethernet from disconnecting on Windows 7?
Before moving on to the detailed solutions, we suggest you check the basics to resolve the problem. Try these workarounds:
- Check your cable connection and make sure that it is not loose and properly plugged in. Also, check if the cable is damaged or not. If yes, then replace it.
- Restart your router and system and see if the issue gets resolved. Here’s what to do if the router won’t connect to the internet.
If you have tried out all the above-mentioned preliminary checks, yet the issue persists, move on to the detailed solutions given below.
1. Run Troubleshooter on Network Adapter Settings
- Type Troubleshooting in the search bar and click on it to open up the application.
- Now, click on the View all option, present inside the left panel.

- Scroll down and click on Network Adapter.
- In the Network Adapter window, click on Advanced.

- Check the box next to Apply repairs automatically, then click on Next.
- Then, the troubleshooter will initiate. It might take a few minutes to run, and you will receive a comprehensive report in the end.
Running the troubleshooter on network adapter settings is likely to resolve the issue of the Ethernet getting disconnected at random intervals. In case you are still experiencing the said issue, try out further solutions given below.
2. Tune the Power management settings for the network adapter
- Type device in the Search bar, and click on Device Manager to open it.
- Inside the Device Manager window, double-click on Network adapters to expand it.
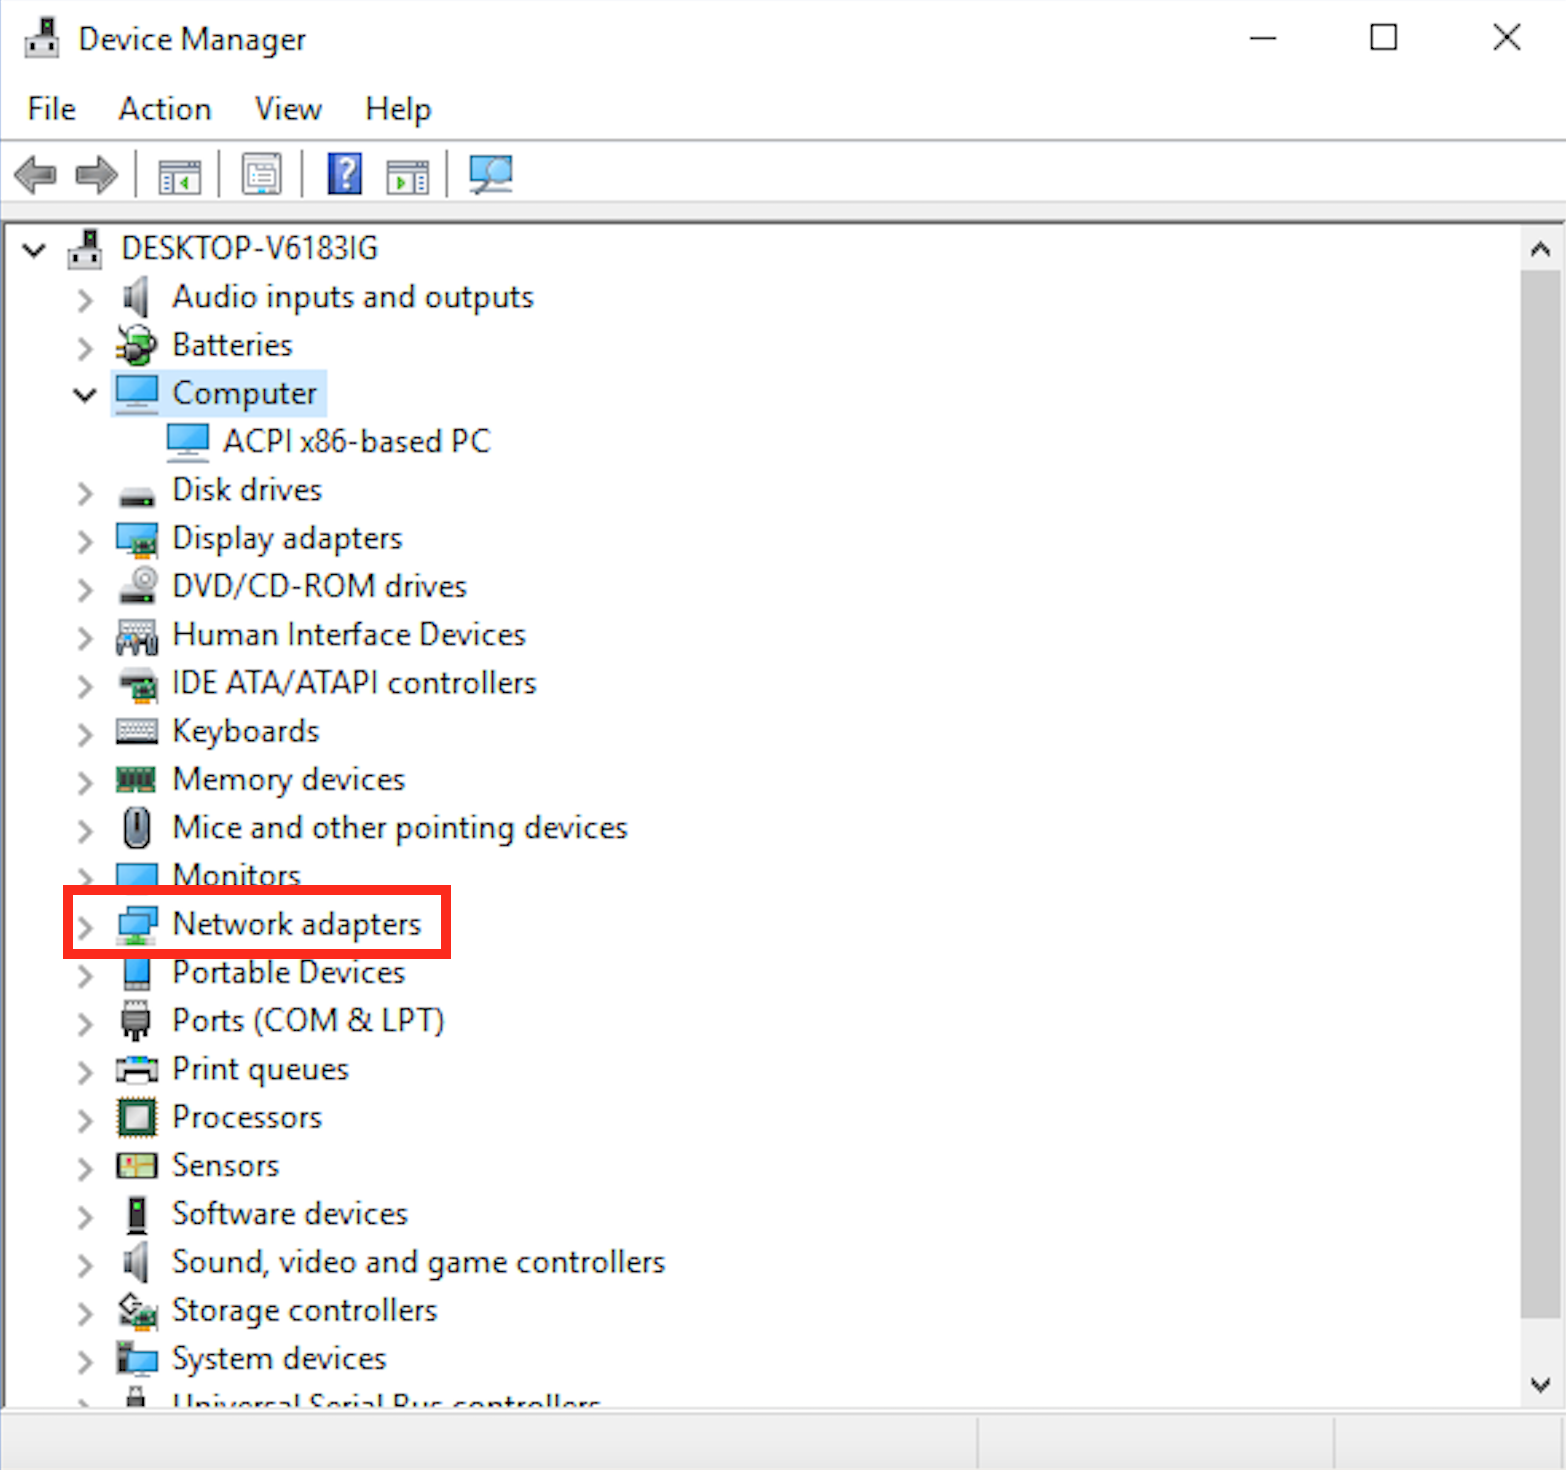
- Then select your respective Ethernet option from the list. If you can’t locate your Ethernet adapter here, check our guide on how to fix the Ethernet adapter that is not showing in Device Manager.
- A popup window will open up. Enter the Power Management tab within the popup window.
- Within the Power Management tab, uncheck the box present beside Allow the computer to turn off this device to save power.
- Lastly, click on OK to save the changes that you just made.
At times users have specific power-saving options enabled, which cause the Ethernet to get disconnected randomly.
In this case, altering those power-saving settings for the Ethernet adapter will for sure resolve this issue. If you can’t seem to spot the Power management tab, you can check our guide to fix the Device Manager missing Power management tab.
3. Don’t use a Proxy server
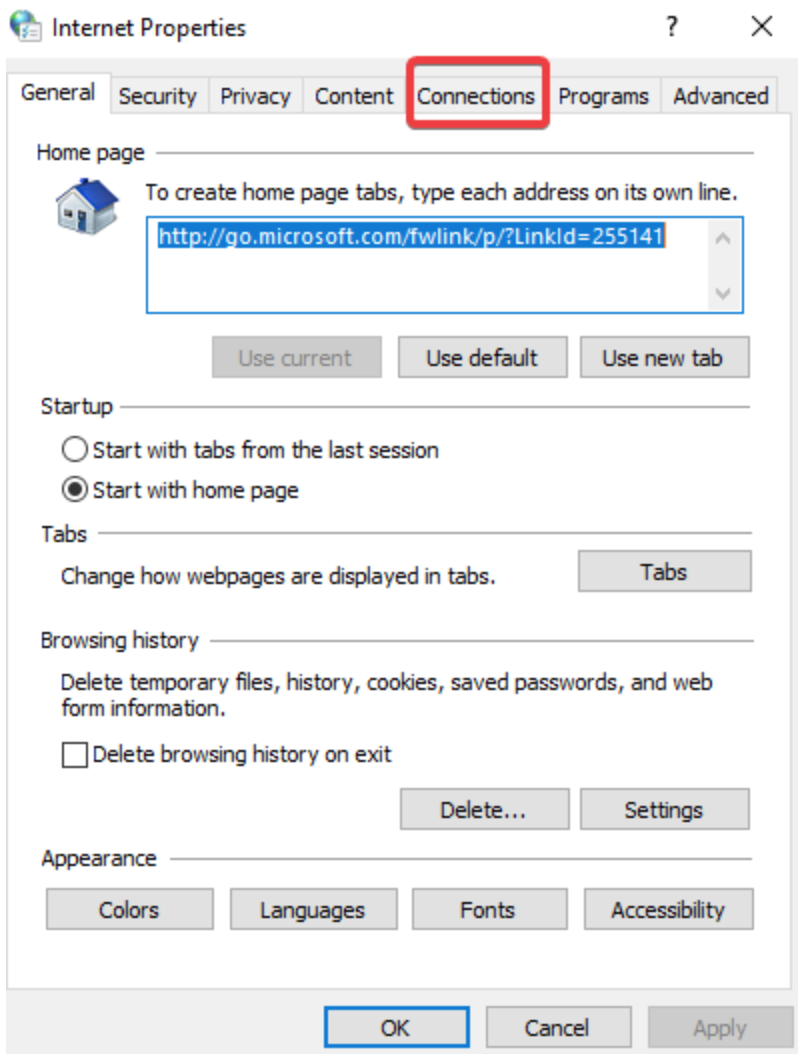
- Type Internet Options in the search bar, and open up the application.
- Enter the Connections tab present within the Internet Options window.
- Now click on the LAN settings option present at the bottom left corner.
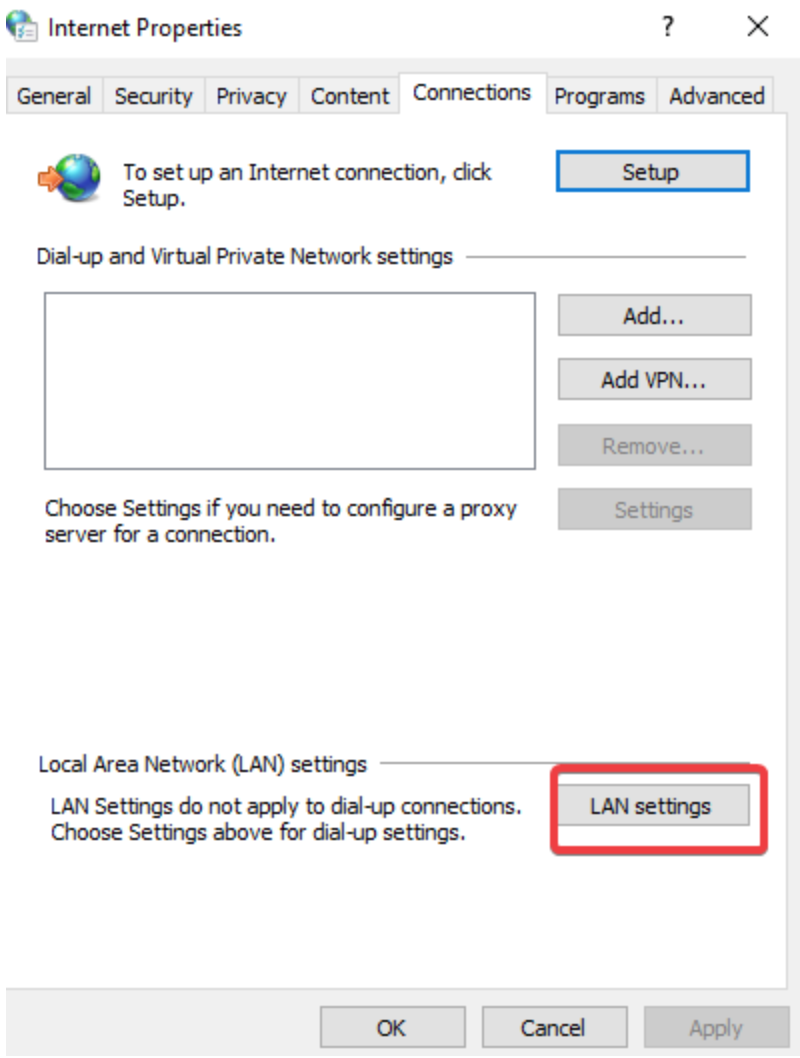
- Deselect the box present beside Use a proxy server and click on OK to save the changes.

Often proxy servers interrupt your Ethernet connection by blocking your PC’s IP address from servers you usually connect to.
Hence, not making use of proxy servers is one great way to ensure a smooth Ethernet connection that won’t disconnect from time to time.
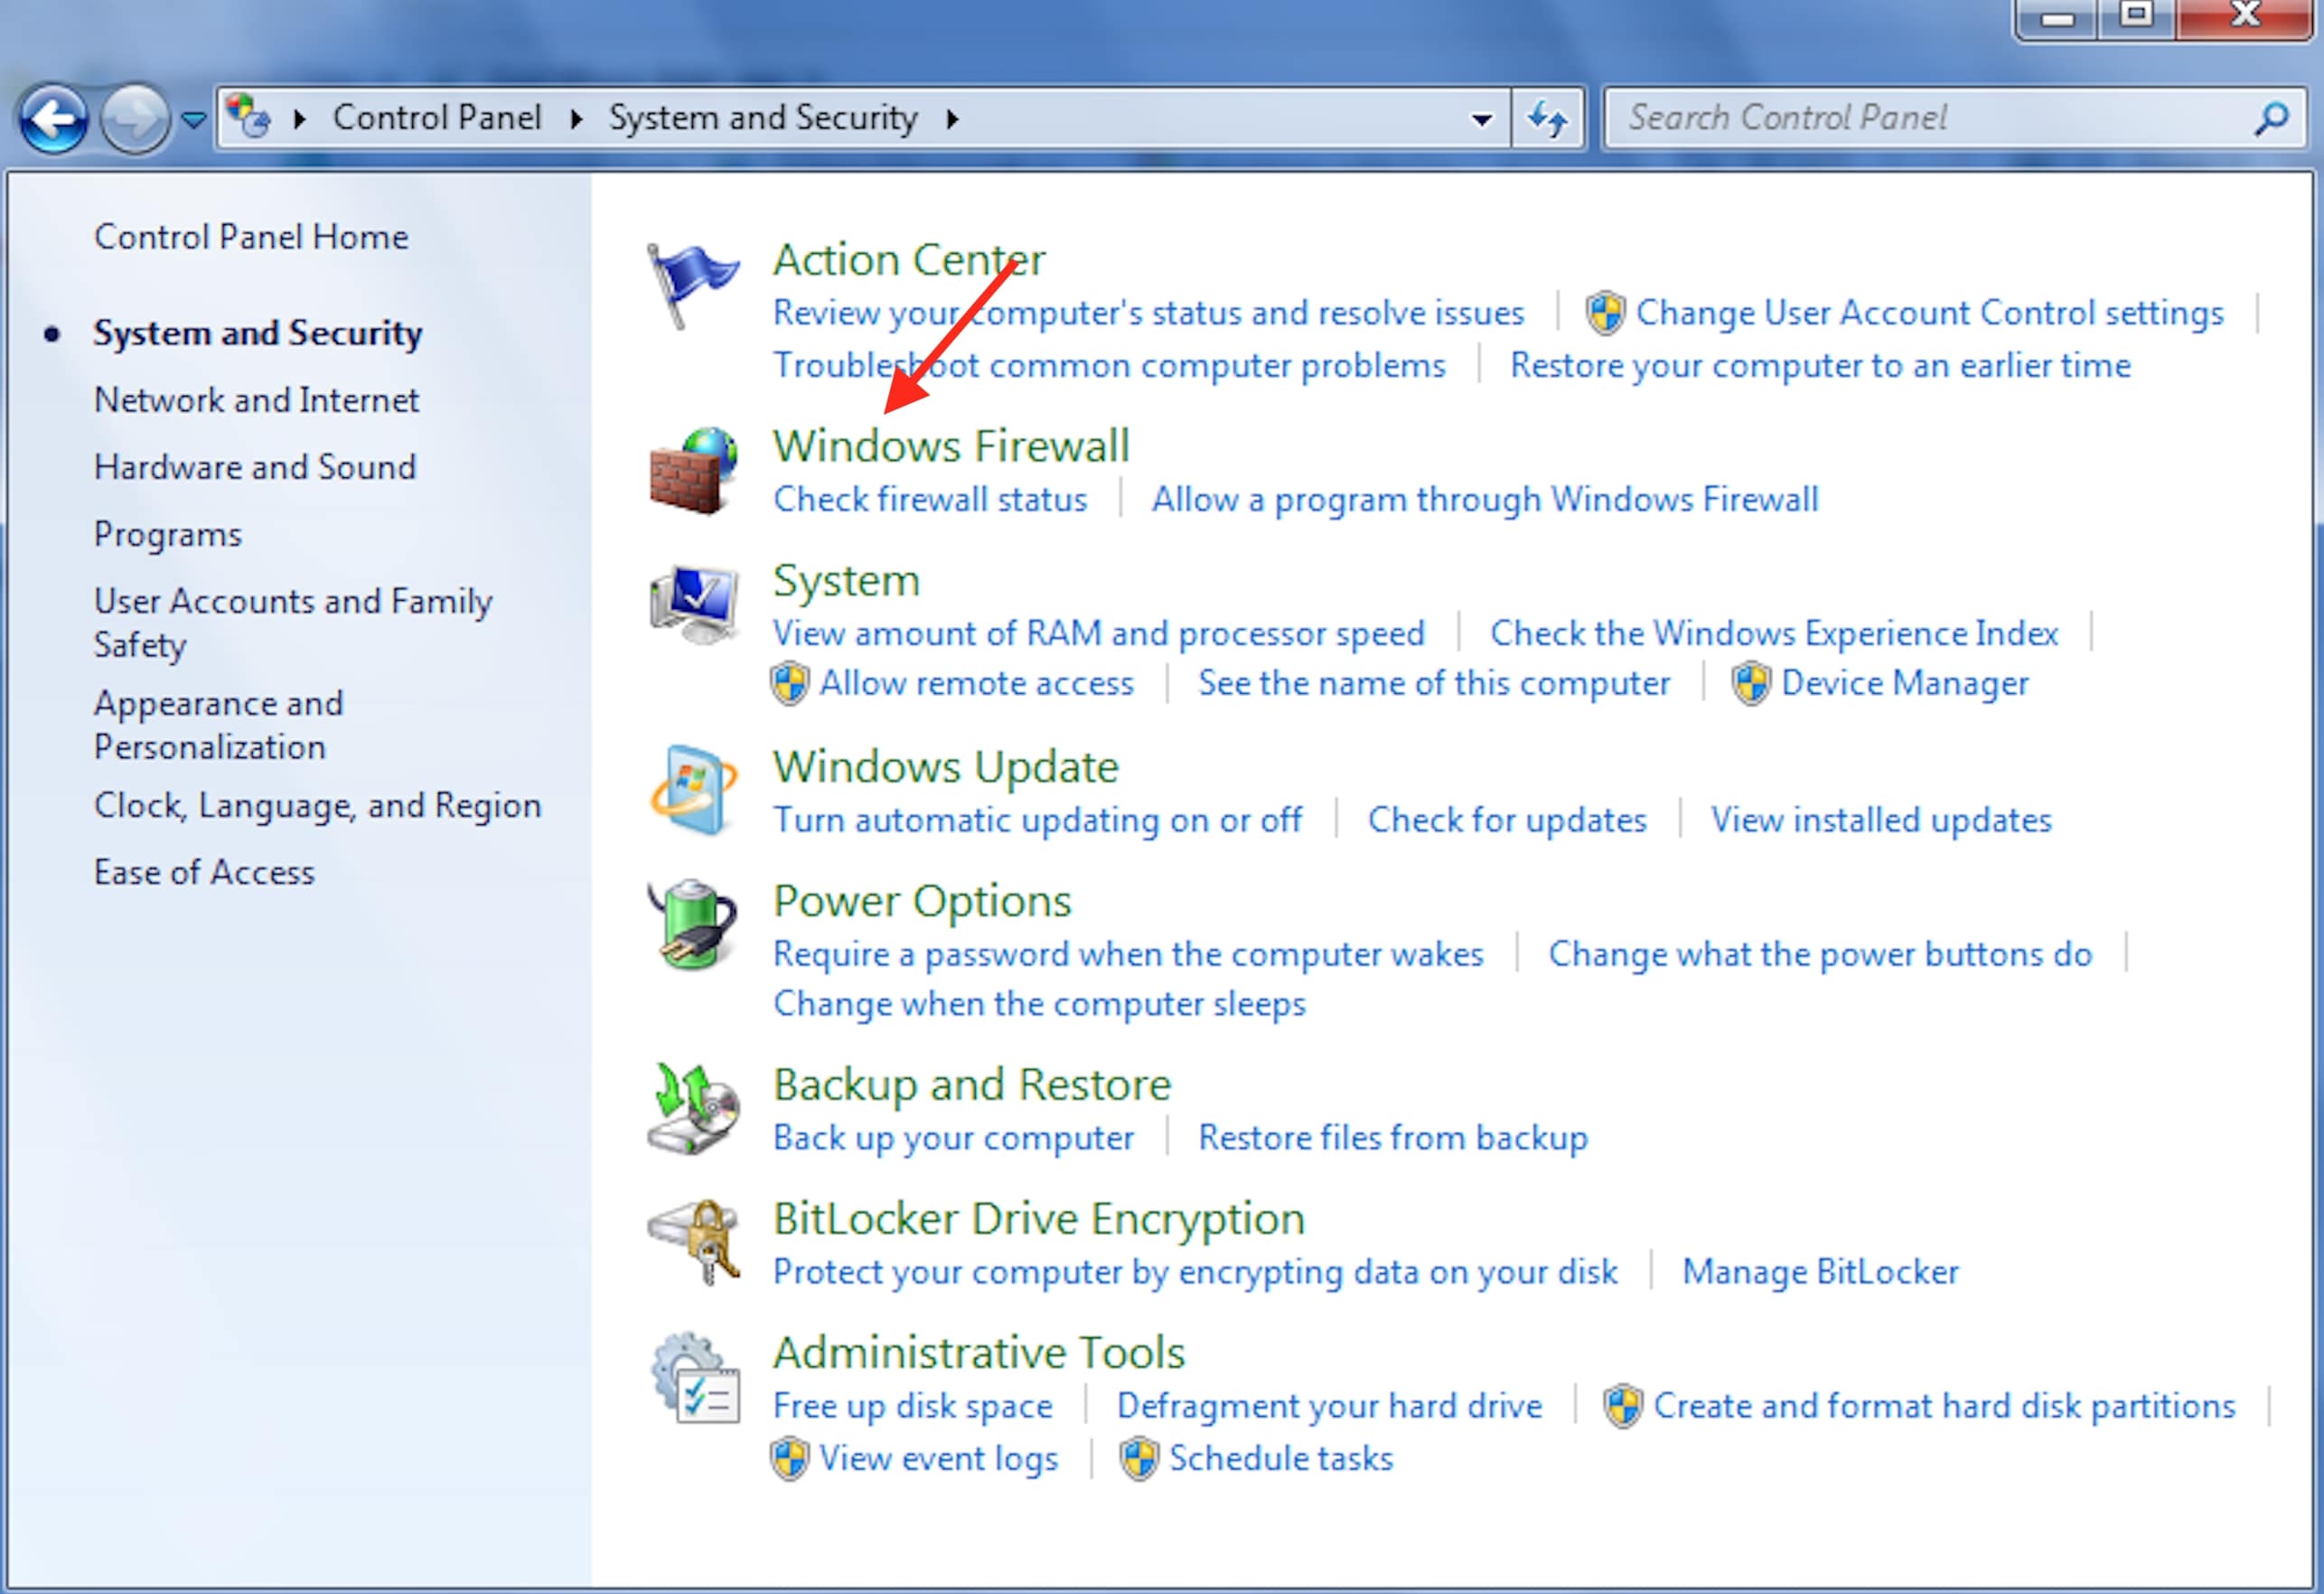
4. Turn off Windows Firewall
- Click on the Start button and then on the Control Panel to open up the application.
- Then, click on Windows Firewall.
- Inside the Windows Firewall tab, click on Turn Windows Firewall on or off, present in the left panel.
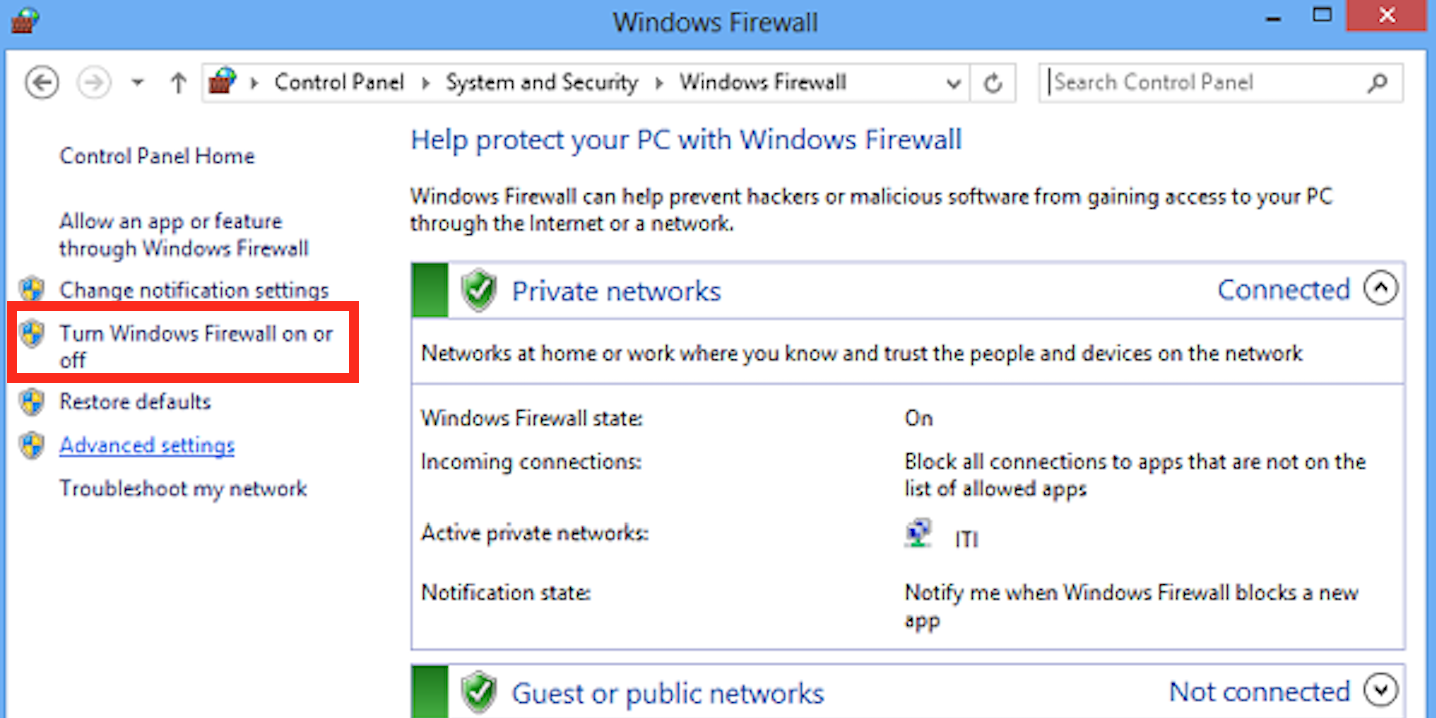
- Next up, make sure both radio buttons of Turn off Windows Firewall (not recommended) are marked, and then click on OK to save changes.

A firewall does a great job in terms of providing protection against malicious spyware however, at times, it might interrupt the Ethernet connection on your PC.
In this case, disabling the Windows Firewall is your best bet. Switching off the Windows Firewall will enable you to enjoy a seamless Ethernet connection on Windows 7.
5. Add administrative and local services via Command Prompt
- Click on the Start button, type Command Prompt and click on it to open up the application.
- Copy and paste the following command, then press Enter.
net localgroup Administrators /add networkservice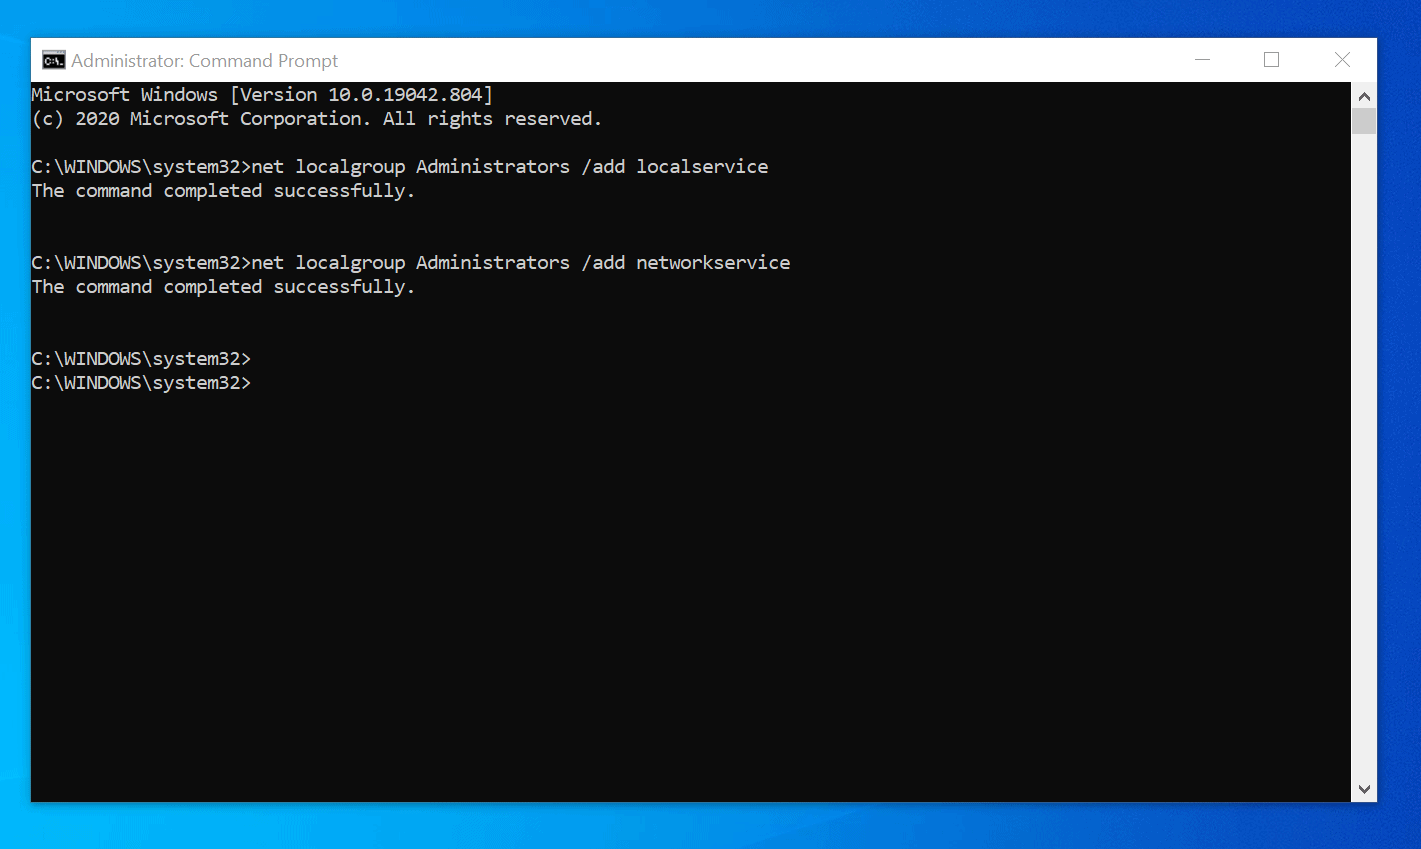
- Then, again copy and paste the following command, then press Enter.
net localgroup administrators /add localservice - Lastly, type the following command and then press Enter.
exit - Once you have run the commands mentioned above, simply restart your computer to see if you have managed to fix the Ethernet connection.
Running the commands mentioned above on Command Prompt is likely to result in a smoother and more secure Ethernet connection on Windows 7.
We hope that this guide helped you in resolving your problem. If you have any further questions, please let us know in the comments section below.
Read our disclosure page to find out how can you help Windows Report sustain the editorial team. Read more


Improve this guide


User forum
0 messages