Ethernet Not Working But WiFi is: 5 Ways to Fix It
Try these methods to get your Ethernet connection working
5 min. read
Updated on
Read our disclosure page to find out how can you help Windows Report sustain the editorial team. Read more
The Ethernet is not working, but WiFi has an error is quite common and could be because of hardware flaws, incorrect settings, or missing drivers. Whatever the reason may be, we can fix it in no time.
Here in this guide, we will discuss the methods to fix Ethernet no internet, but WiFi works right after talking about the causes of the same.
Why does my WiFi work but not Ethernet?
There could be various reasons for the ethernet cable not working, but WiFi is; some of the most popular ones are mentioned below:
- Network cables – If your network cables are loosely attached or have suffered physical damage, you might not get internet via Ethernet. So check both ends of the cable to inspect the connection and damage.
- Problem with your router or modem – The issue might occur if your router is not configured correctly. You need to restart your modem and router to see if it fixes the problem.
- DHCP server – If your device is not getting an IP address from the router, there could be an issue with the DHCP server, which is why you can’t connect via Ethernet.
- Third-party software interference – Security software can create conflict and block the connection. Check the software settings to ensure the Ethernet connection is not blocked.
- Incorrect network configuration – If your device is not set up to use the correct subnet mask, IP address, and gateway, you might face the issue.
- Issue with Network Adapter – If the network adapter on your computer is not enabled or working correctly, then the drivers on the computer might be outdated. You need to update drivers.
- Too many devices connected to the same network – If you have exceeded your router’s device limit, it may cause congestion and hence the error.
What can I do if the WiFi works but the Ethernet doesn’t?
Before engaging in advanced troubleshooting steps, you should consider performing the following checks:
- Check the ethernet cable for physical damage and loose connection. Unplug and replug it a couple of times to be sure.
- Ensure the ethernet port is working. Try the cable on another device to check.
- Restart your router and modem.
- Turn off the WiFi feature.
- Drain the residual power.
If none of the subtle tweaks helped you, then it is time for detailed troubleshooting steps:
1. Turn off Sleep Mode
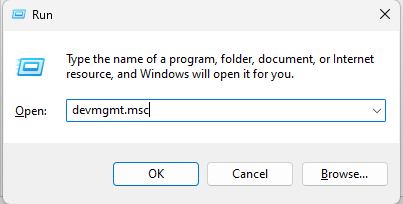
- Press Windows + R key to open the Run window.
- Type devmgmt.msc and press Enter to open Device Manager.
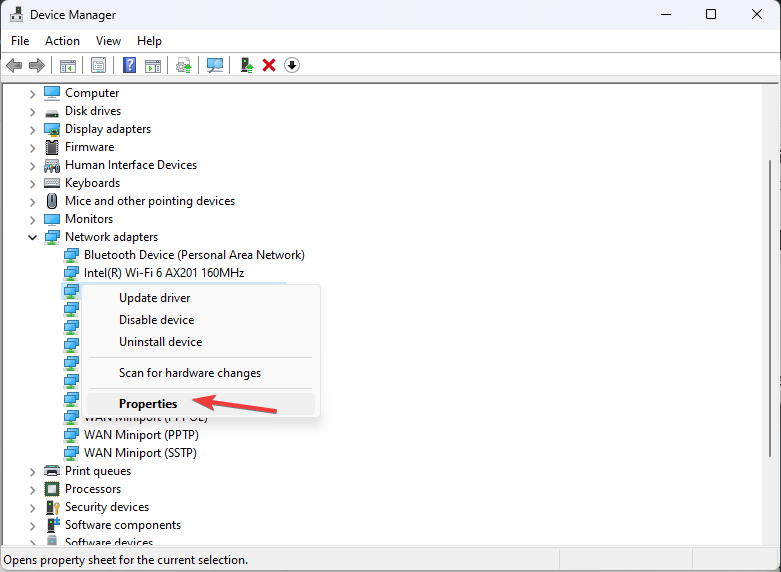
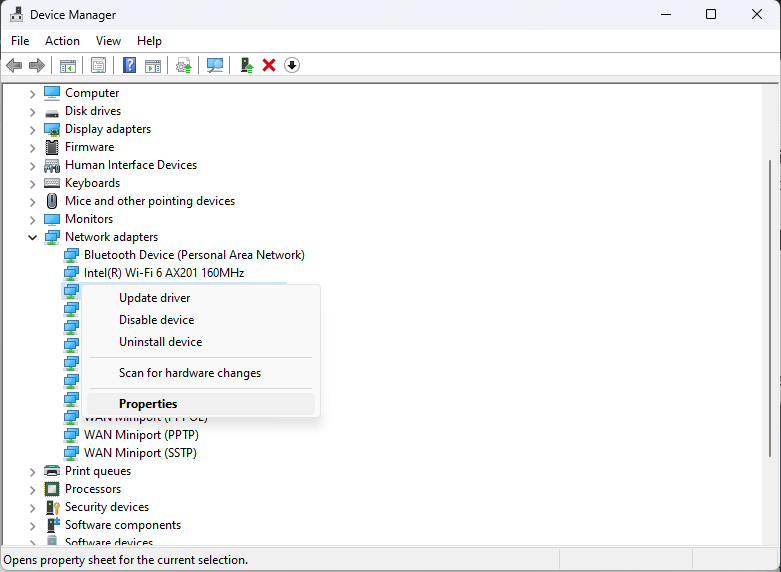
- Locate and expand Network adapters—Right-click on the driver for the Ethernet cable and select Properties.
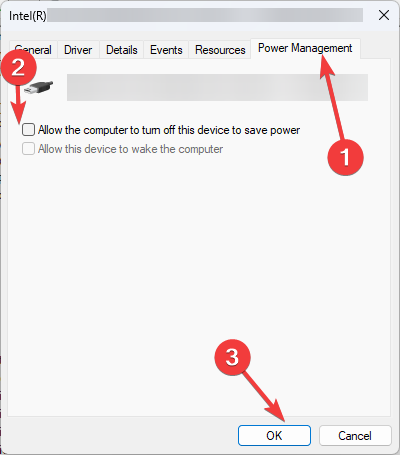
- Go to the Power Management tab, and remove the checkmark from Allow the computer to turn off this device to save power.
- Click OK.
2. Make changes in Network settings
2.1 Give Ethernet the priority
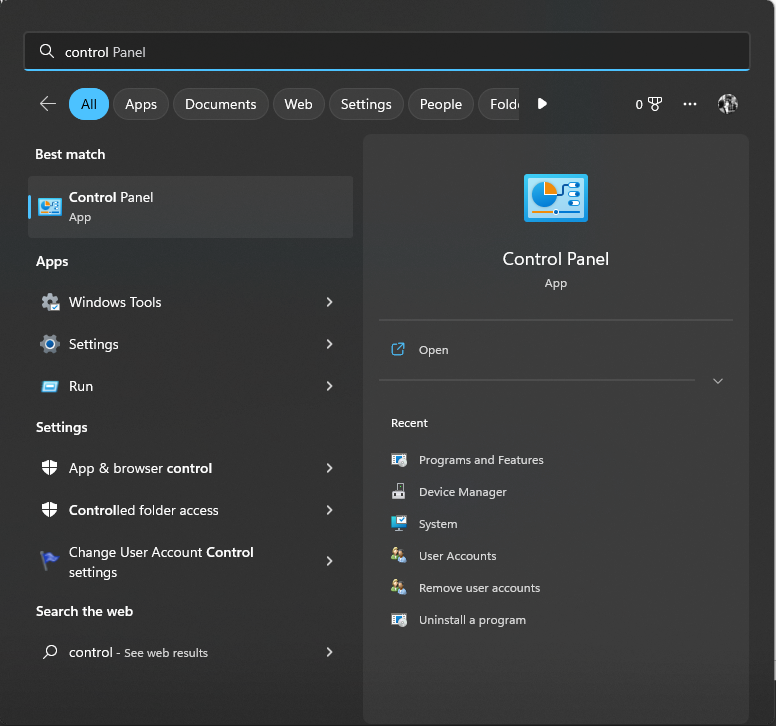
- Press the Windows key, type Control Panel and click Open.
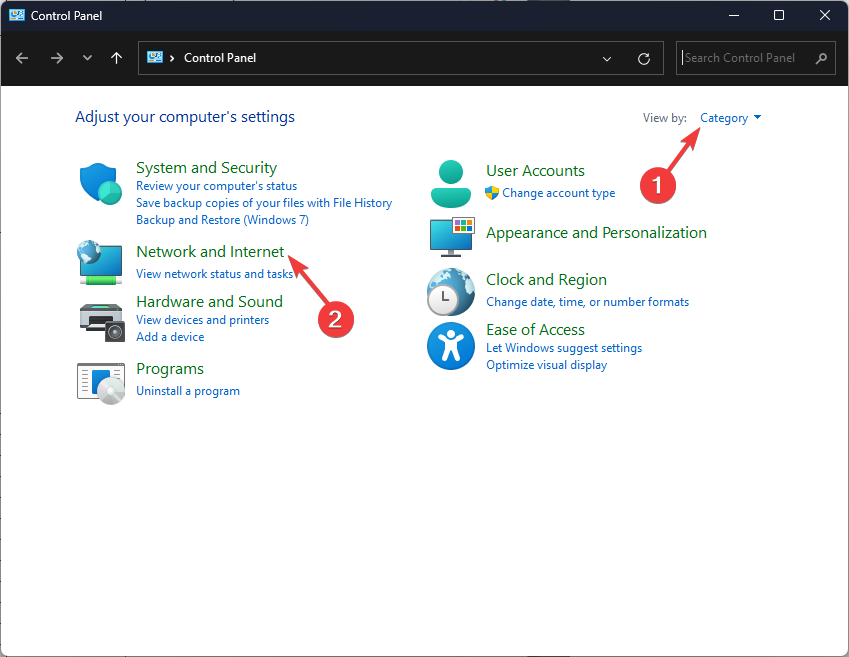
- Select Category for View by and click Network & Internet.
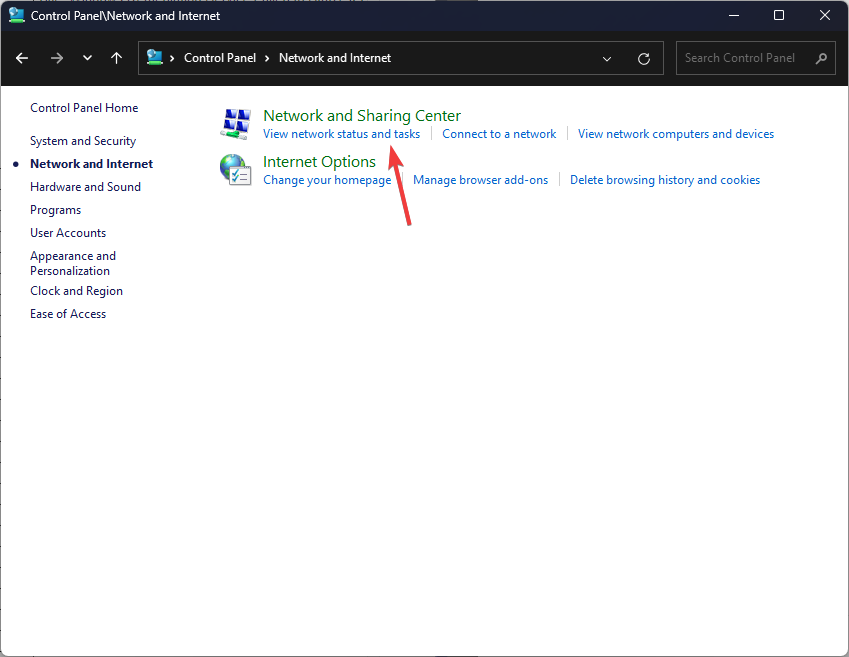
- Click View network status and tasks.
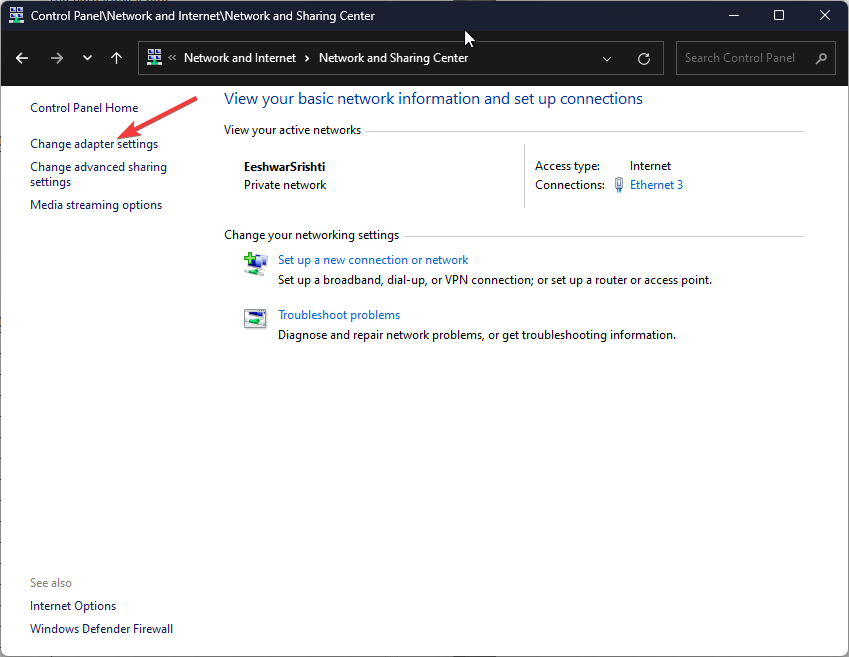
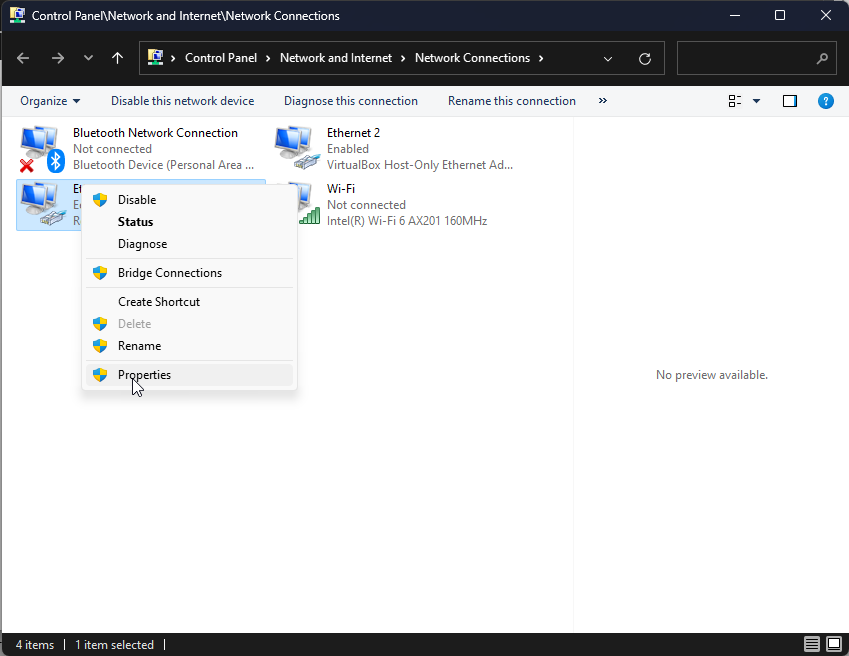
- From the left pane, click Change adapter settings.
- Right-click on Ethernet and select Properties.
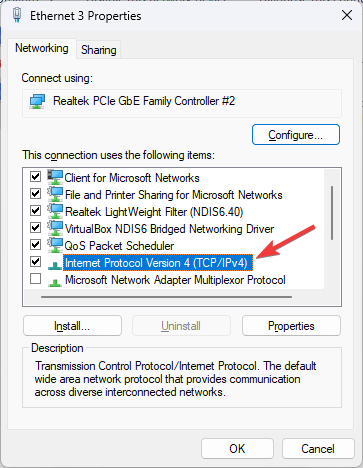
- Double-click Internet Protocol Version 4(TCP/IP) to open Properties.
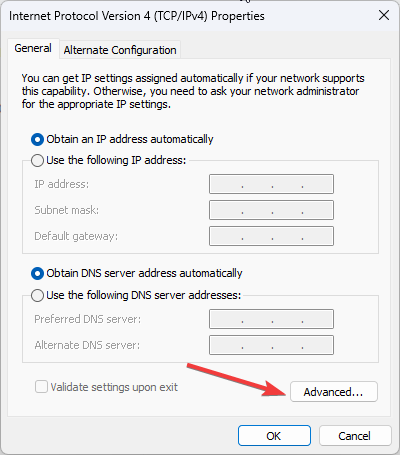
- Under the General tab, click Advanced.
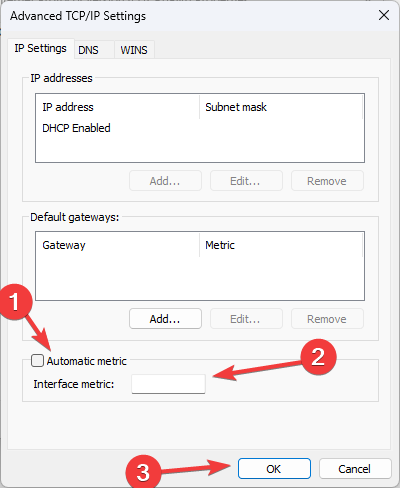
- Uncheck the Automatic metric and for the Interface metric, add 1 to set priority.
- Click OK and then OK to complete the process.
2.2 Reset Network Adapter
- Press Windows + I to open Settings.
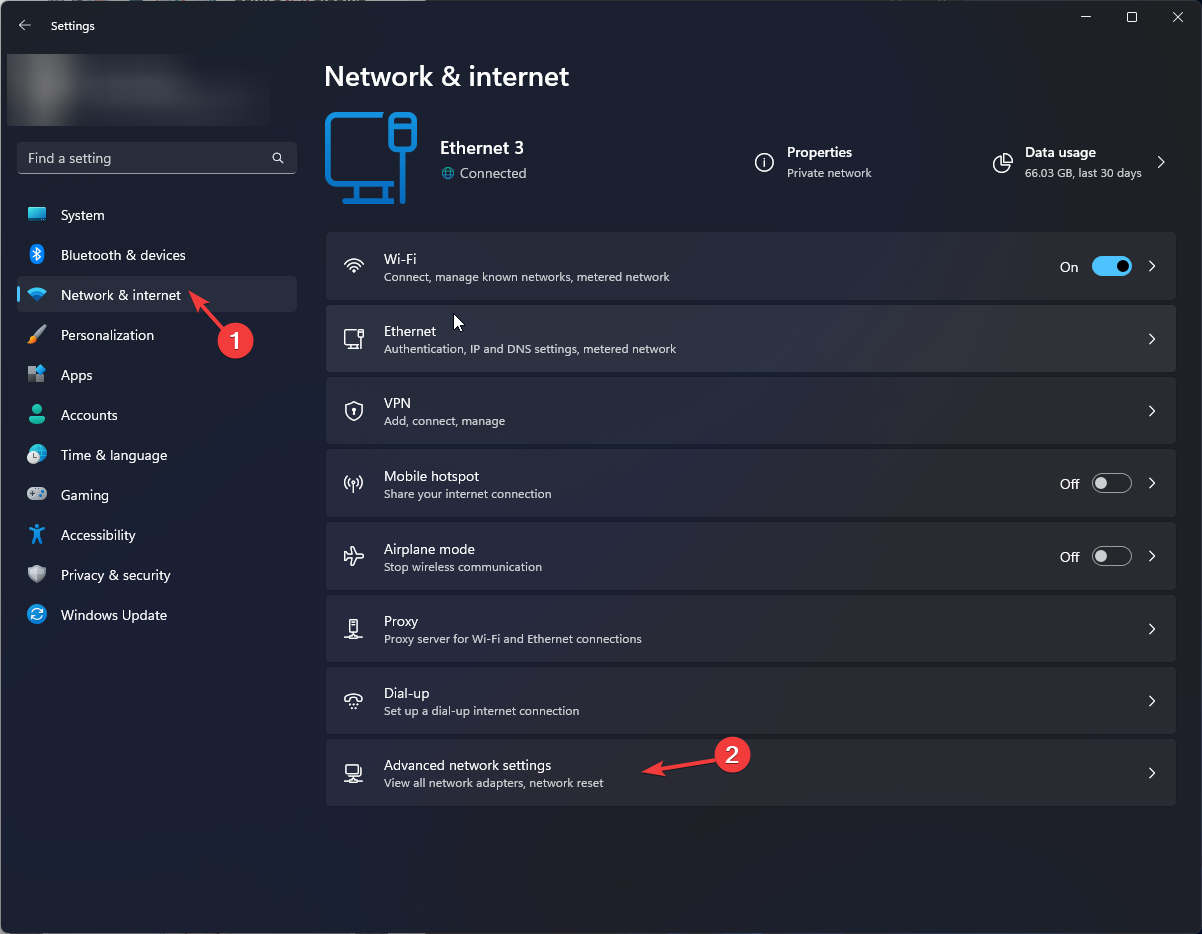
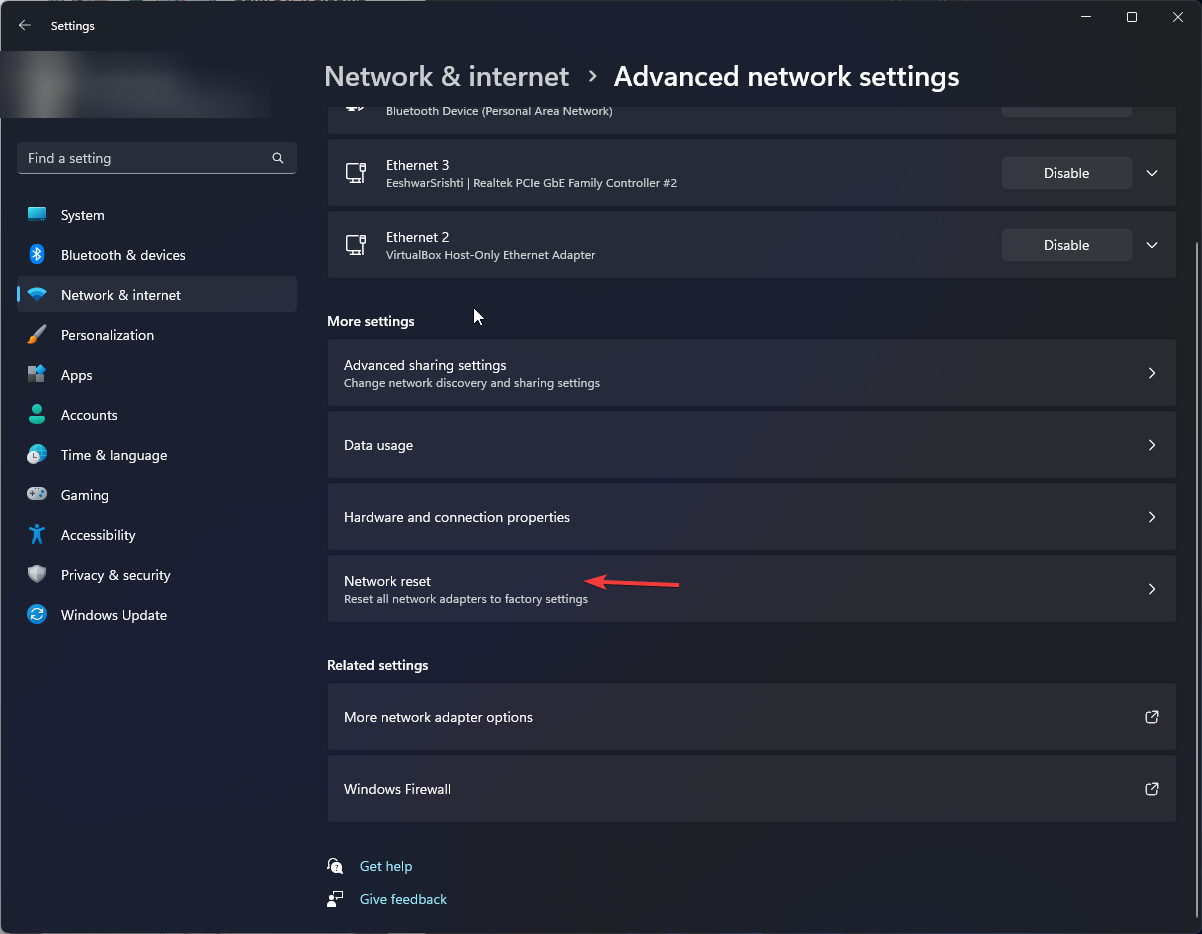
- Go to Network & Internet, then Advanced network settings.
- Click Network reset.
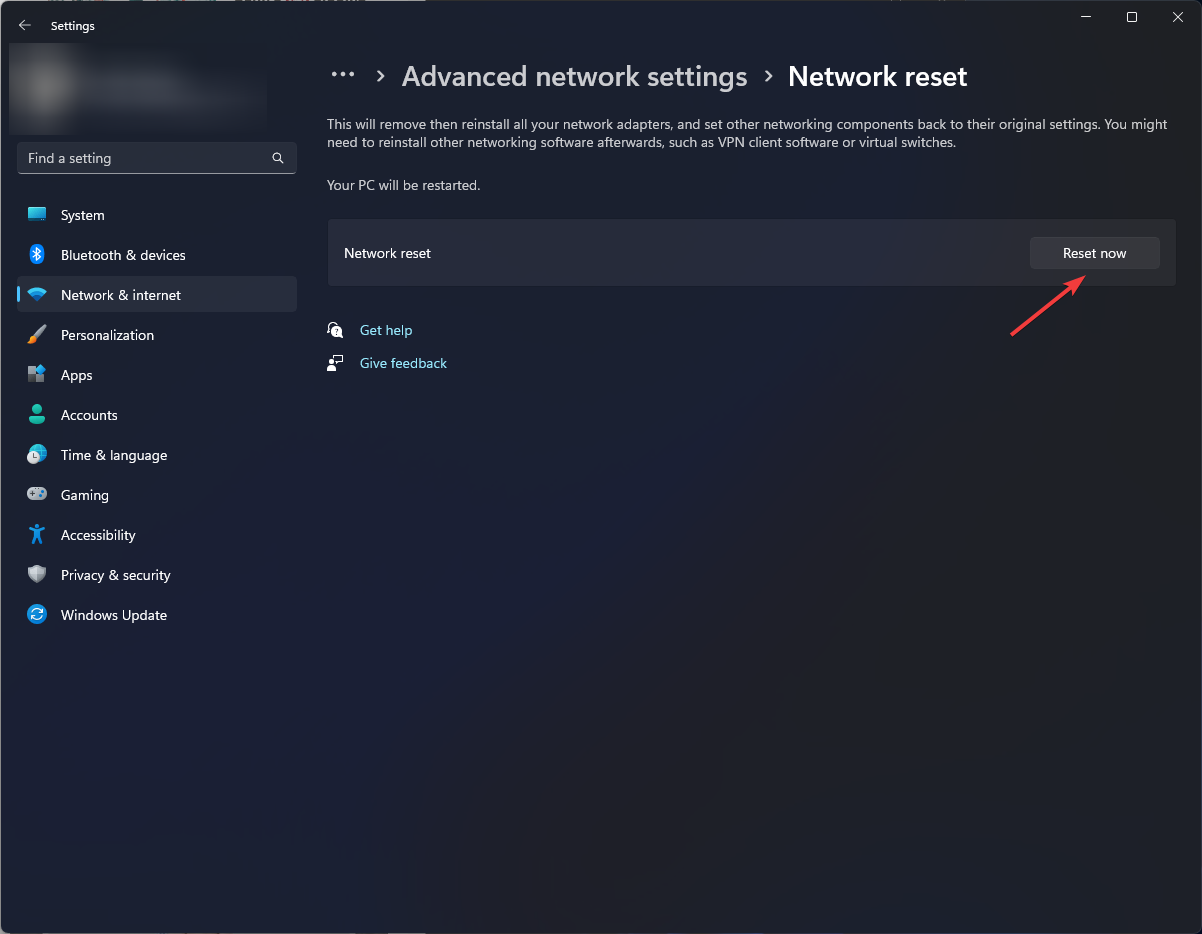
- On the next page, click Reset now.
2.3 Run the Troubleshooter
- Press Windows + I to open the Settings app.
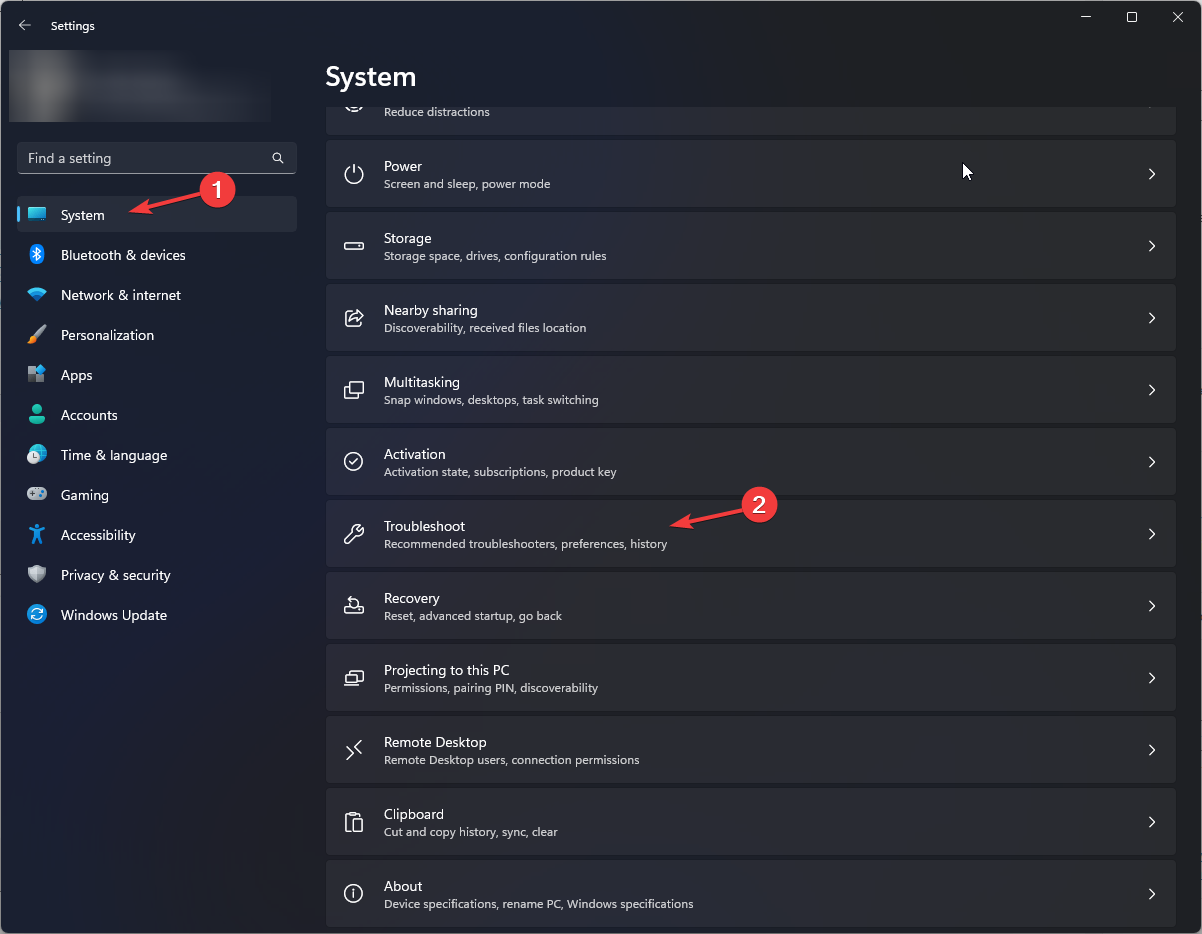
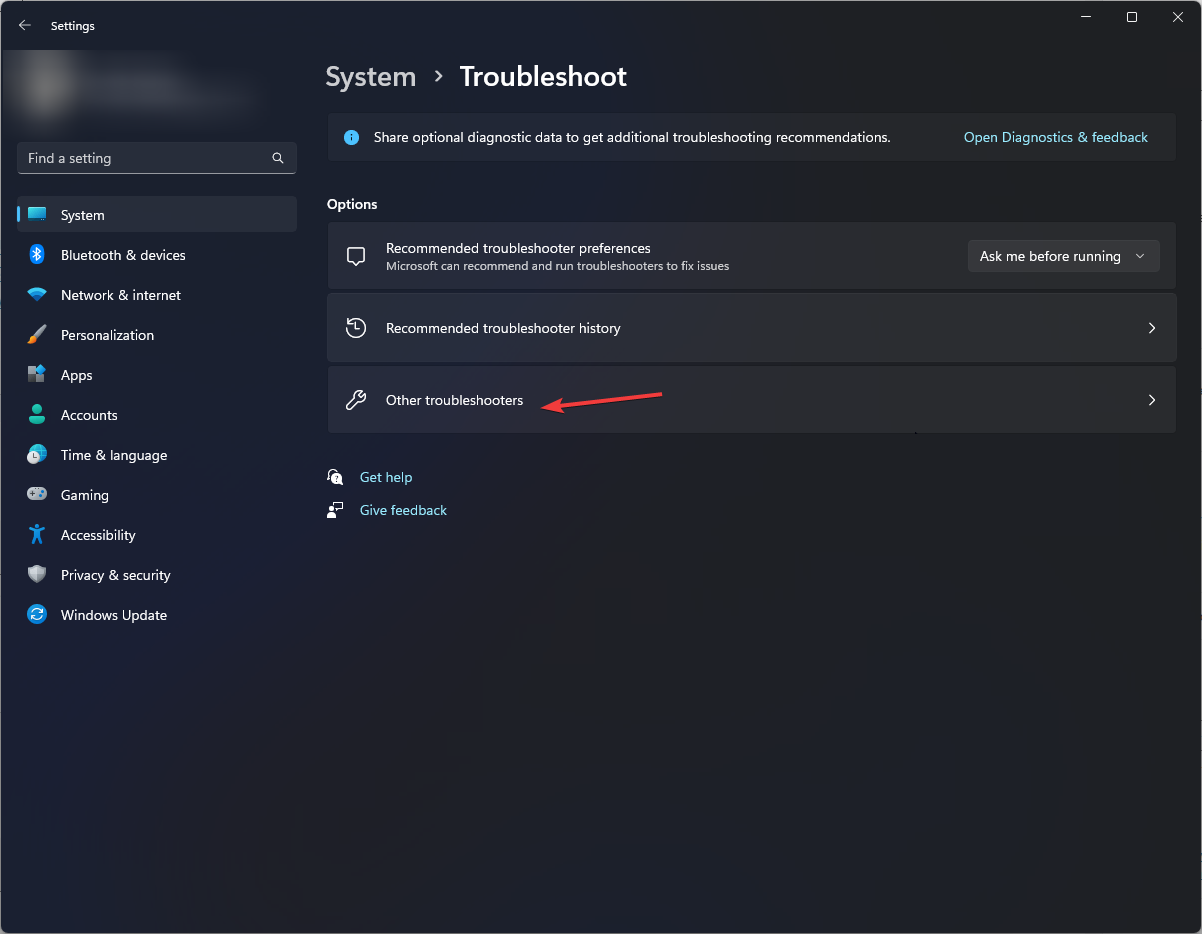
- Go to System, then Troubleshoot.
- Now click Other troubleshooters.
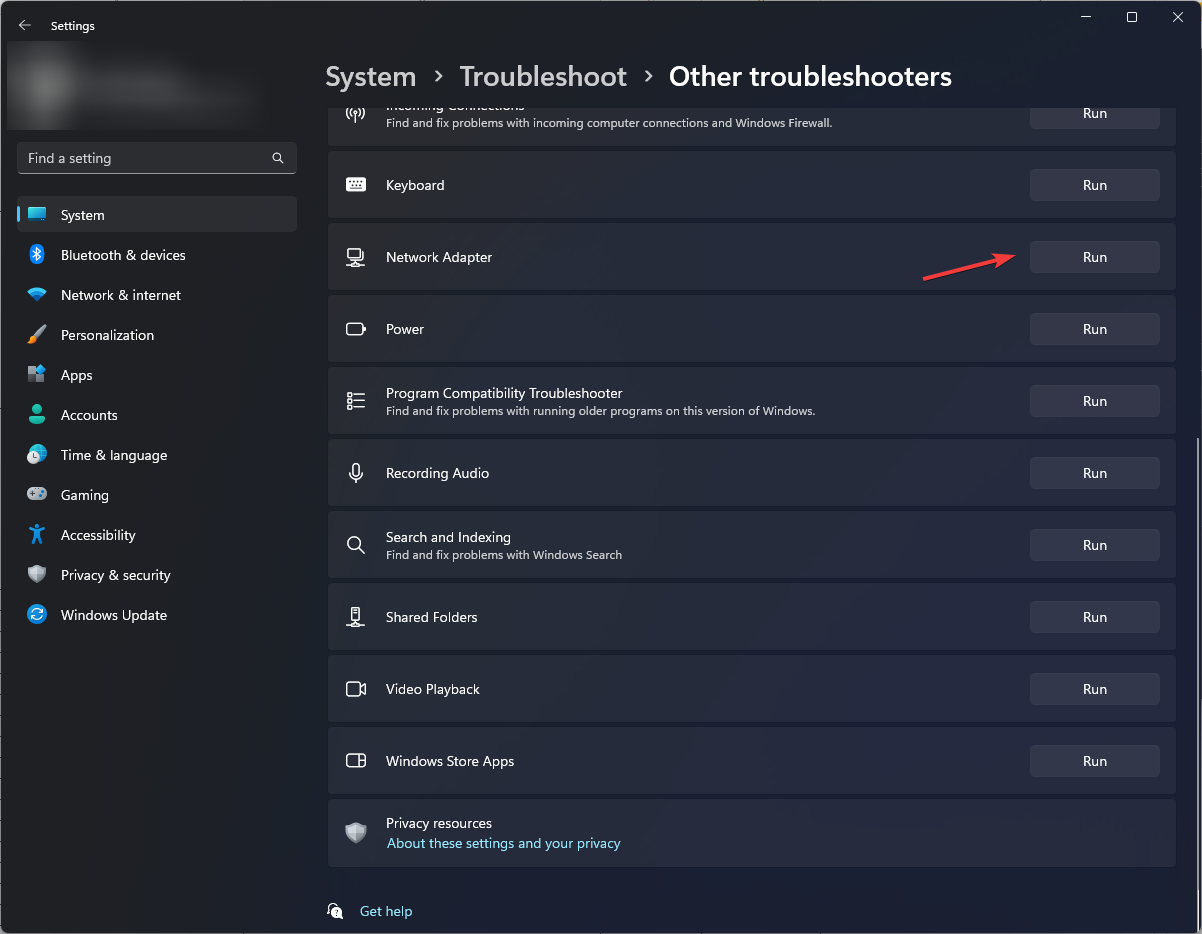
- Locate Network Adapter and click Run.
- Follow the on-screen prompts and wait for the process to complete. It will show if there is any error, along with the potential fix.
3. Change the MAC address
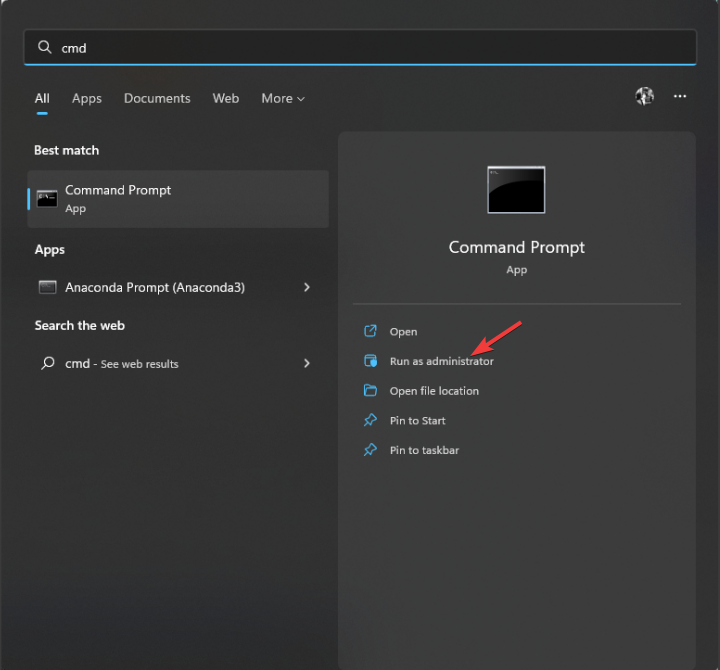
- Press the Windows key, type CMD and click Run as administrator.
- Type the following command and press Enter:
ipconfig/all - Note down your MAC address. Now, press Windows + R to open the Run window.
- Type devmgmt.msc and press Enter.
- Expand Network Adapters, right-click the Ethernet, and choose Properties.
- Go to the Advanced tab, under Property, and select Locally Administered Address. Then, for Value, type the MAC address you copied.
- Click OK and restart your computer.
4. Update drivers using Device Manager
- Press Windows + R to open the Run box.
- Type devmgmt.msc and press Enter.
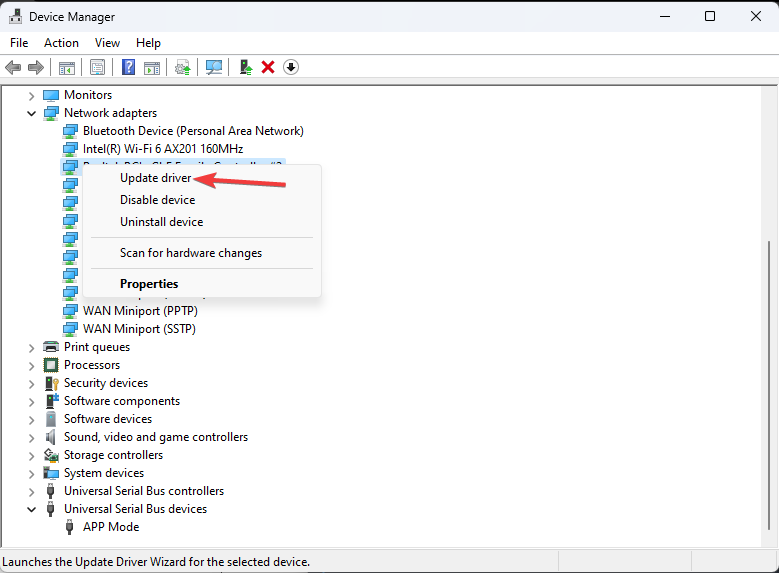
- Go to Network adapter, expand it, and right-click on Ethernet driver. Choose Update driver.
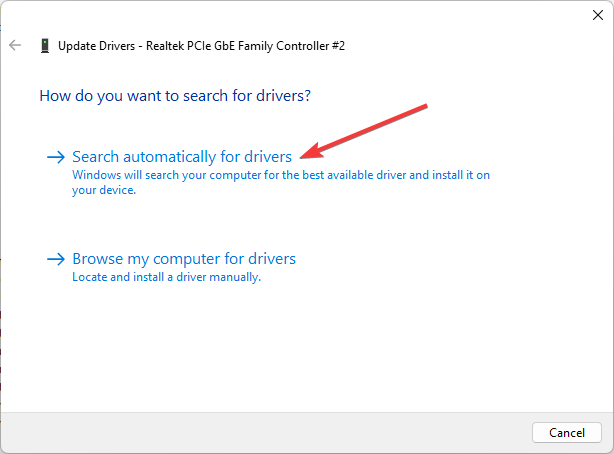
- Click Search automatically for drivers and follow the on-screen instructions.
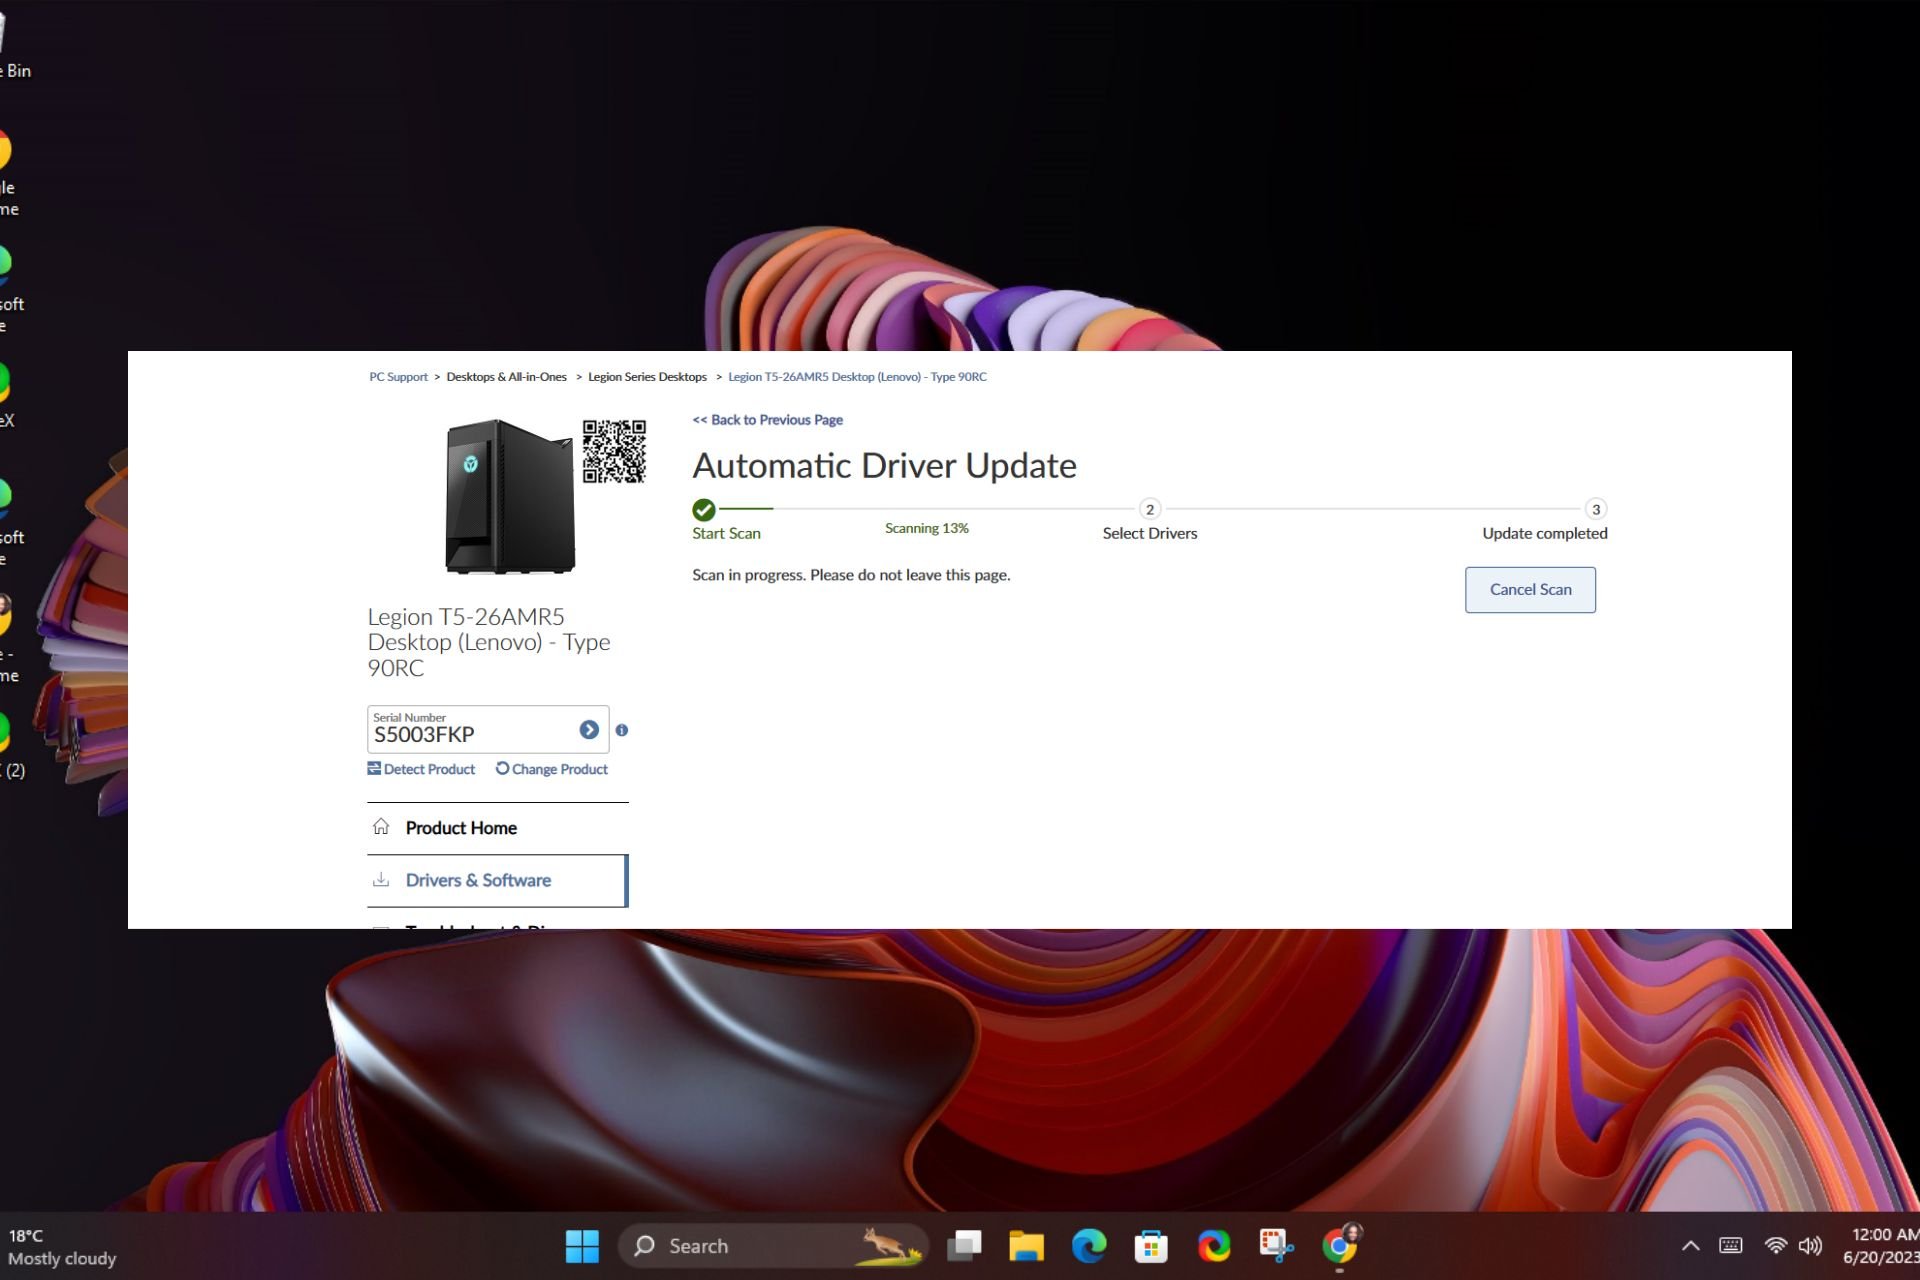
Moreover, you can easily update and replace any outdated drivers on you pc by simply use Outbyte Driver Updater. This tool will search, find and replace any drivers available for your device specifics within few minutes.
5. Scan your PC for malware
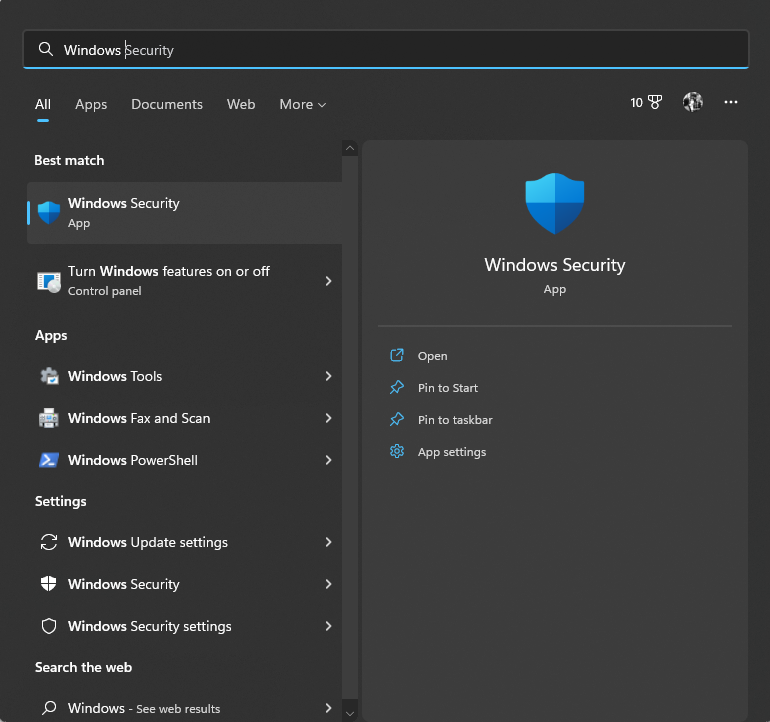
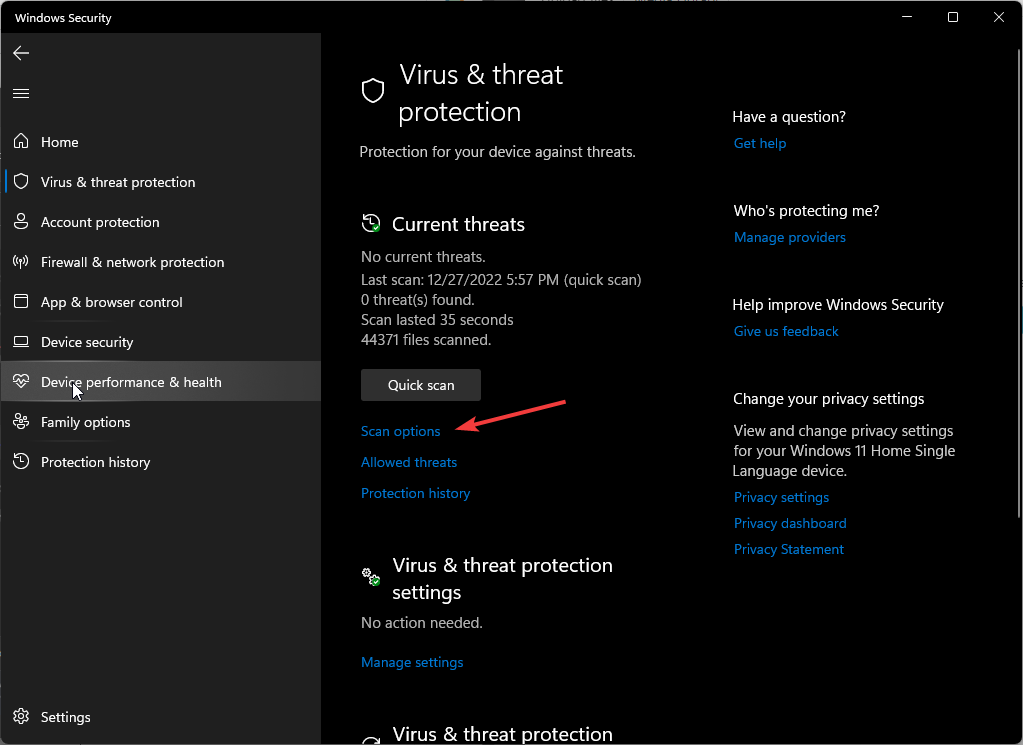
- Press the Windows key, type Windows Security and click Open.
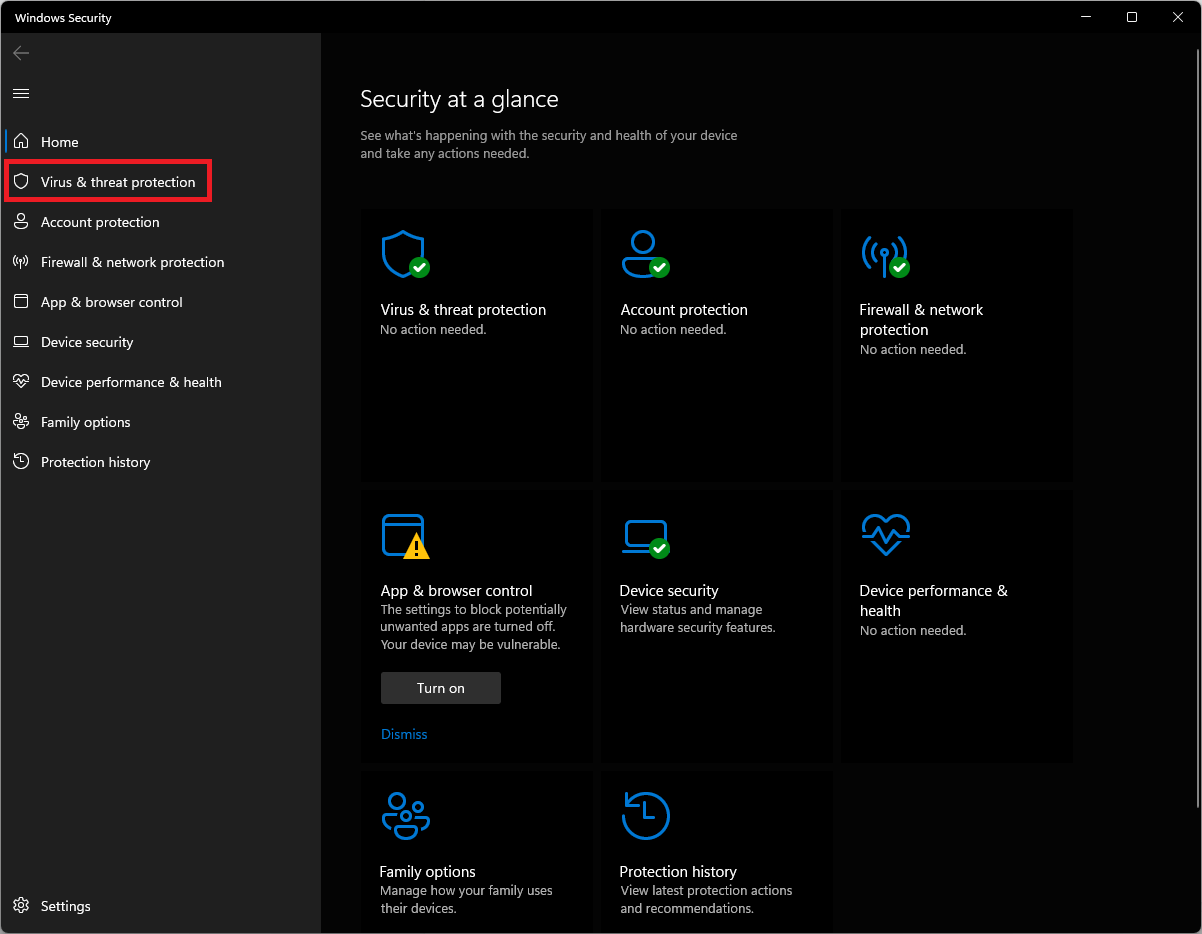
- Go to Virus & threat protection.
- Click Scan options.
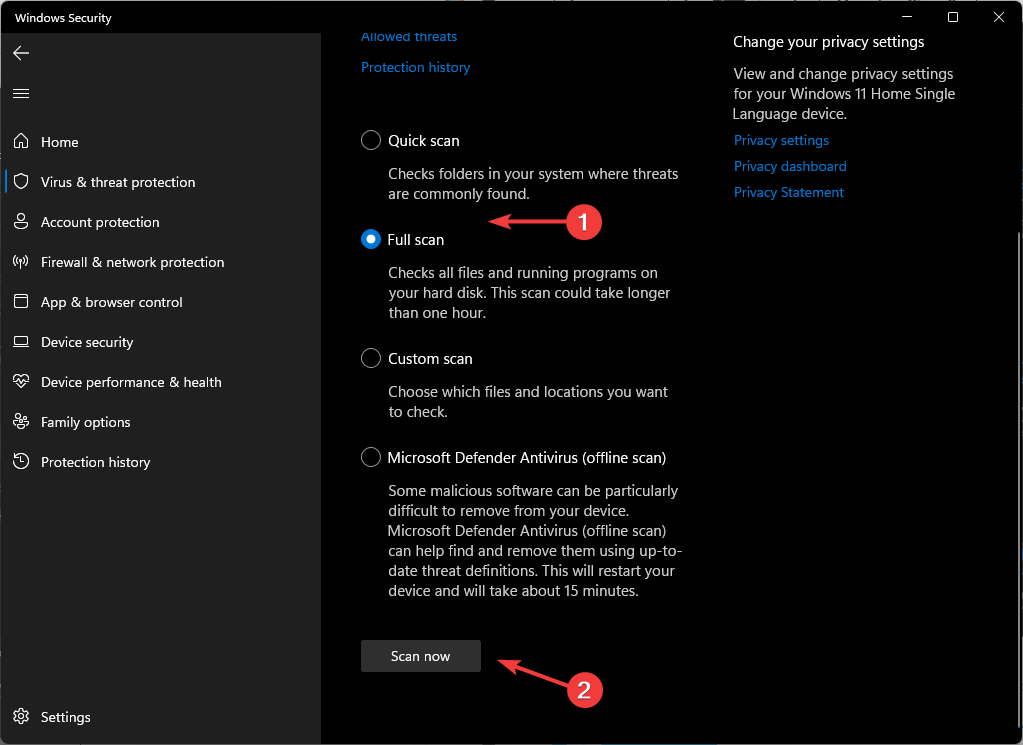
- Select Full scan and click Scan now. Wait for the process to complete.
There are other network issues you can experience, and for many only Google works on their Internet, and we have a dedicated guide that addresses this issue.
So, you need to follow these methods to resolve Ethernet not working, but WiFi is an issue. Try them and let us know which worked for you in the comments below.



User forum
0 messages