How to Disable Screenshots in Facebook: Step-by-Step Guide
Protect you privacy on Facebook using these methods
2 min. read
Updated on
Read our disclosure page to find out how can you help Windows Report sustain the editorial team. Read more

Yes, you can disable screenshots in Facebook by activating the Profile Picture Guard on the mobile version. This way, no one will be able to capture any photo on your profile. We have some solutions to restrict screenshot on Facebook on the desktop browser so read on.
How do I activate Facebook screenshot protection?
1. Use Profile Picture Guard
 NOTE
NOTE
- Visit Facebook and log in to your account.
- Go to your Facebook profile page.
- Click on your profile picture.
- Select the Options link from below the photo.
- From the context menu, hit Turn On Profile Picture Guard.
As we mentioned in the note above, the function isn’t available in all regions, but if you’re using Facebook on a browser, there is a Chrome extension that does the same thing.
2. Hide your profile from strangers
- Log in to your Facebook account.
- Click on the downward-facing arrow at the top right corner of your screen.
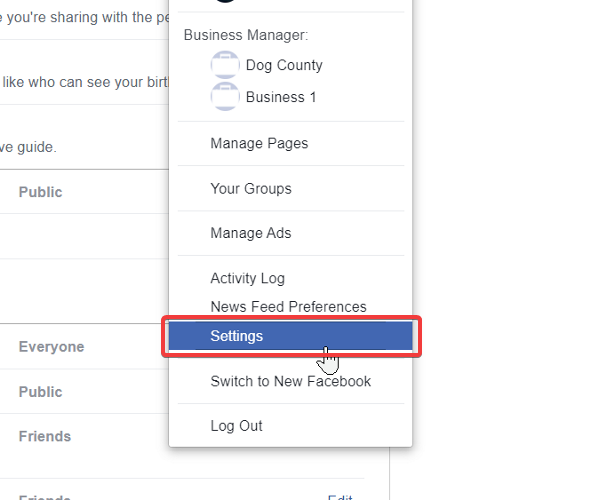
- From the dropdown, select Settings.
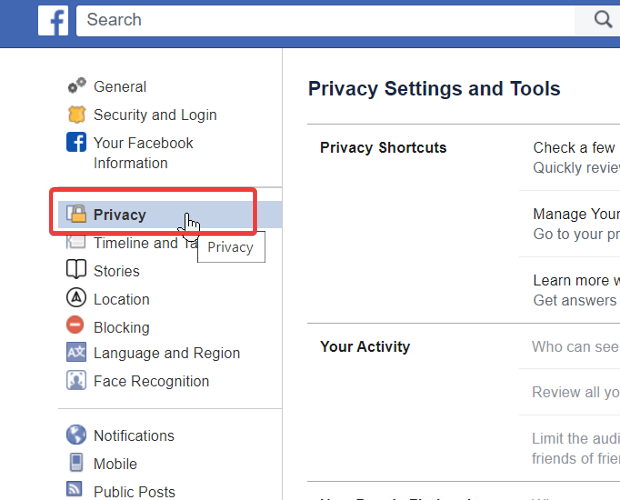
- Go to the Privacy tab on the left panel.
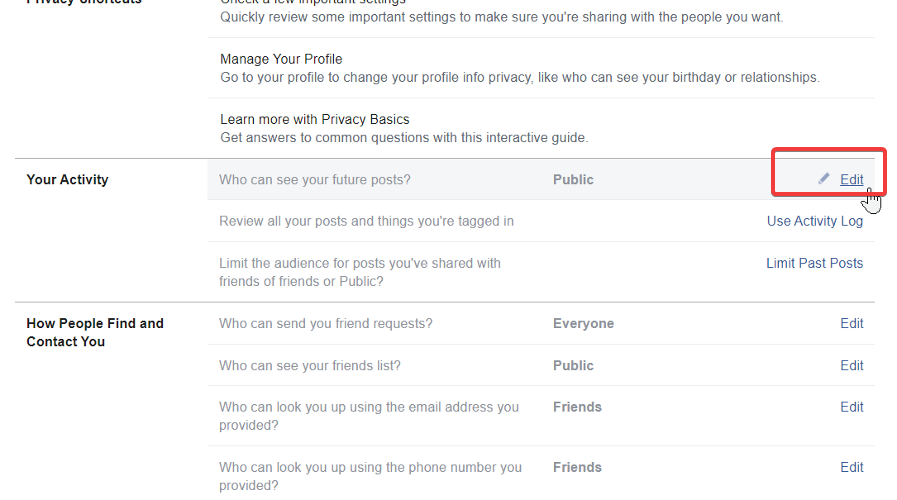
- Scroll down to the Your Activity section.
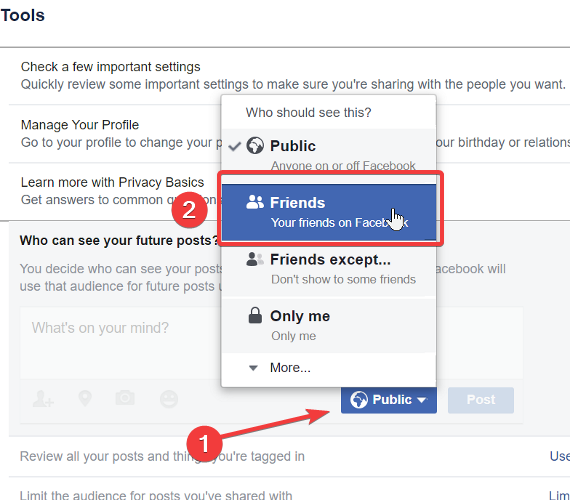
- Click on the Edit button to the right of the who can see your future posts? option.
- Click on Public and select the most suitable setting.
- Go to Limit last posts.
- Click on the Limit last posts buttons.
- Change the settings as you did in step 7 above.
 NOTE
NOTE
The first Facebook screenshot protection method doesn’t hide your profile from everyone; it only makes it impossible for them to download it. If they finally download or take a screenshot of your profile picture, they can never upload it to Facebook.
The next solution protects your privacy by showing your content to only the chosen people. Depending on your privacy needs, you can use any of these methods.
If Facebook won’t let you share anything from your PC, click the highlighted link for the proper solutions.
We also have a helpful guide on how to download a Facebook video on your PC if you were looking for that.
Let us know in the comments if you managed to block Facebook screenshotting by using our solutions.


User forum
3 messages