Fix: GTA San Andreas Mouse not Working [3 Tested Solutions]
Running the game in compatibility mode can help with this issue
2 min. read
Updated on
Read our disclosure page to find out how can you help Windows Report sustain the editorial team Read more
Key notes
- Adjusting process affinity can fix this problem.
- Missing DLL files can lead to this and other issues.
Many are still playing old GTA games, and speaking of which, many users reported that the mouse not working in GTA San Andreas.
This has made the game unplayable, but luckily, there’s a way to fix this problem, and in this guide, we’ll show you how to do it.
How do I fix my mouse in GTA San Andres on Windows 10 & 11?
1. Use a single processor core
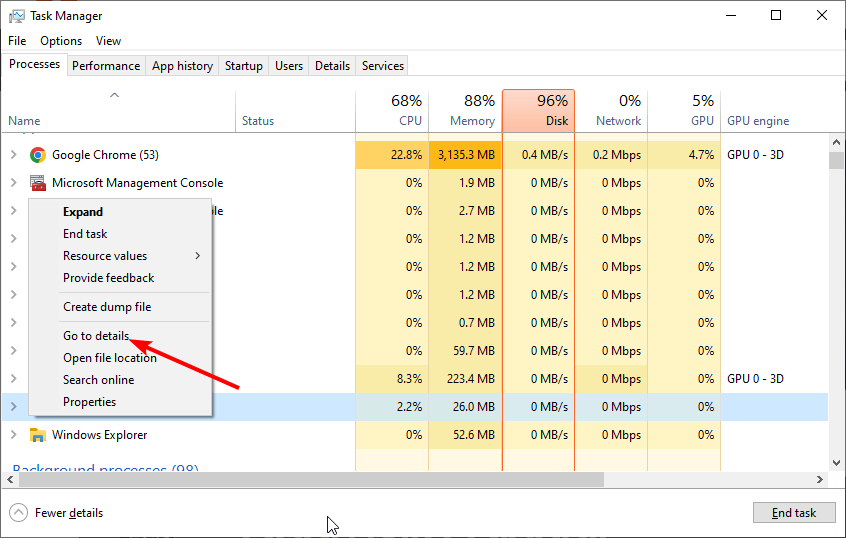
- Launch the GTA Sand Andreas game and press the Ctrl + Shift + Esc keys to open the Task Manager.
- Right-click the gta_sa.exe option and choose Go to details.
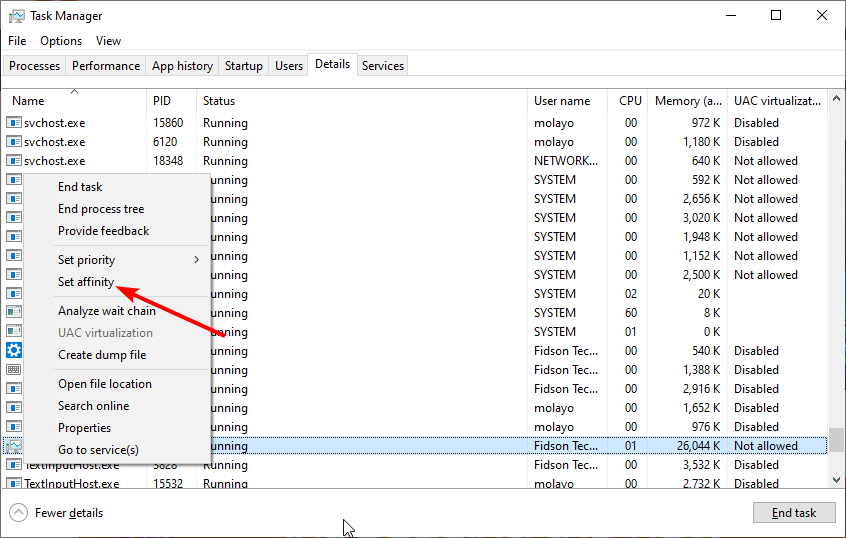
- Now, right-click gta-sa.exe under the Details tab and click Set affinity.
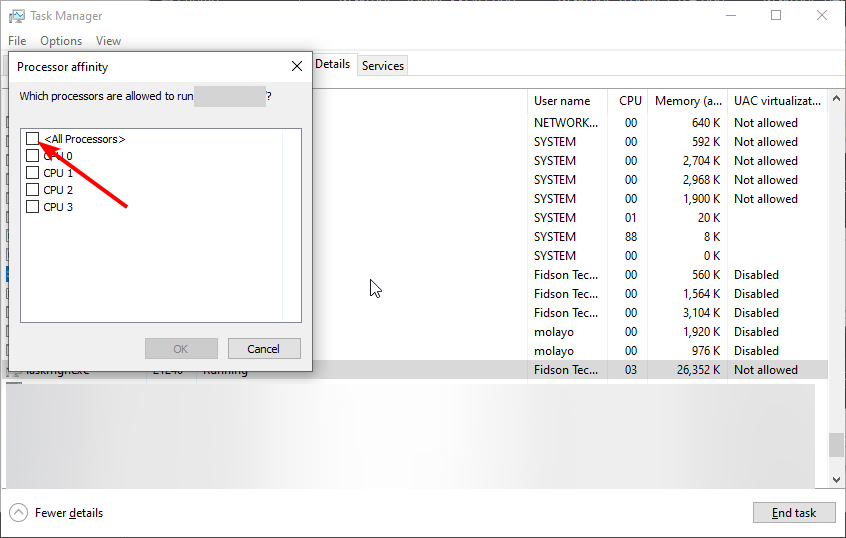
- Next, uncheck to box for All processors.
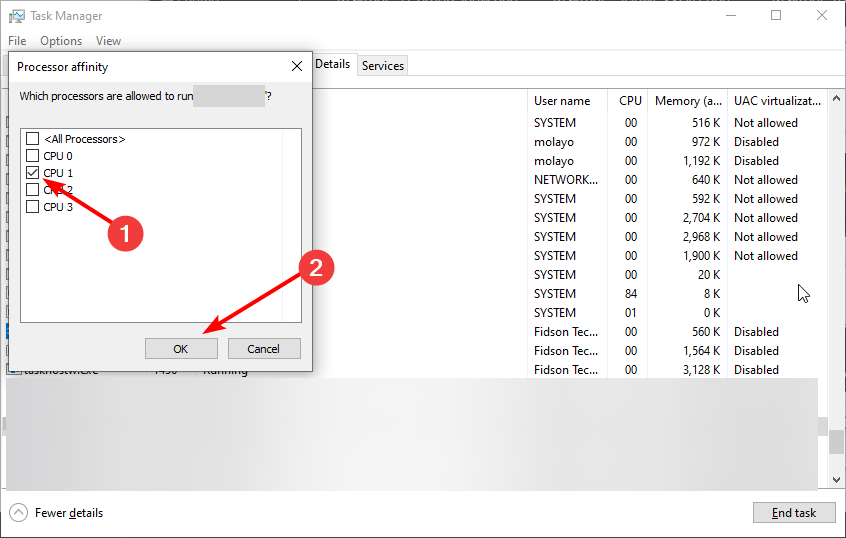
- Finally, check the box for CPU 1 and click OK.
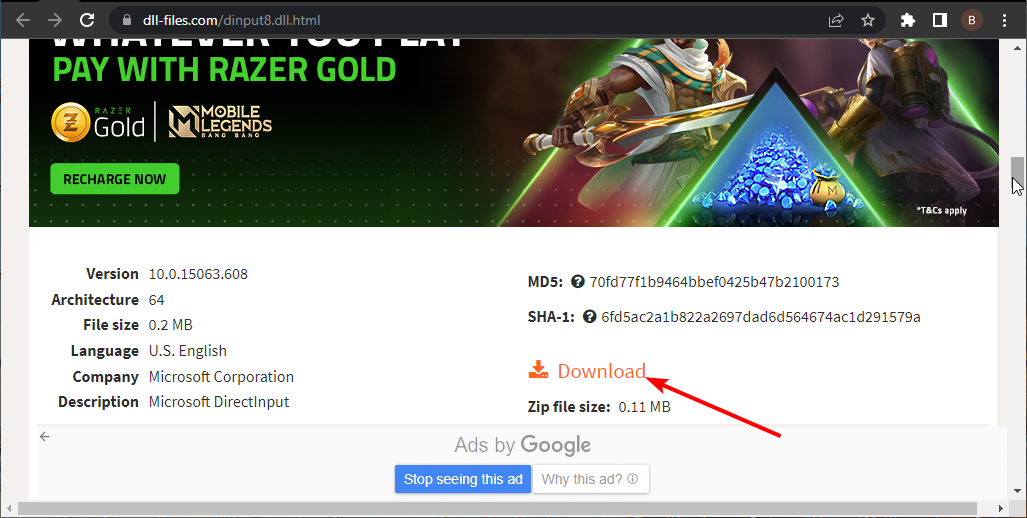
2. Download DINPUT8.dll
- Download the DINPUT8.dll file on your PC.
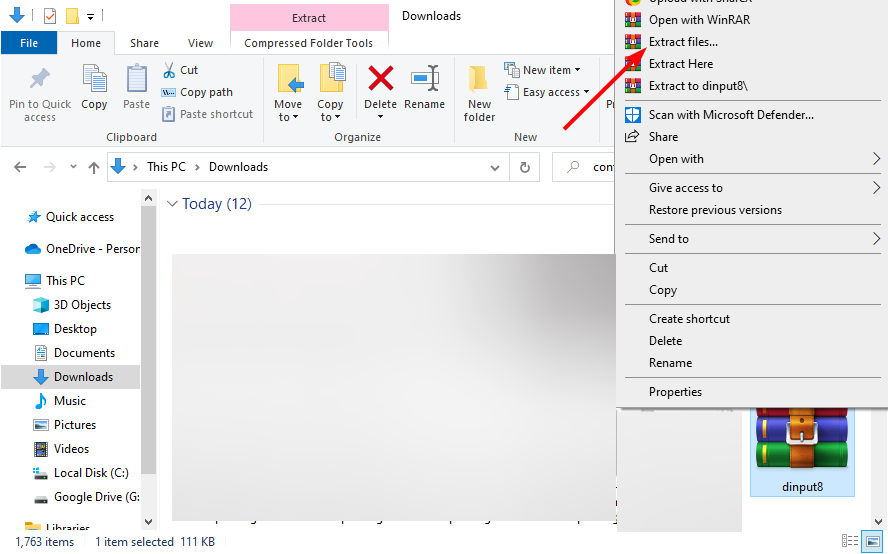
- Now, right-click the downloaded zip file and select Extract files.
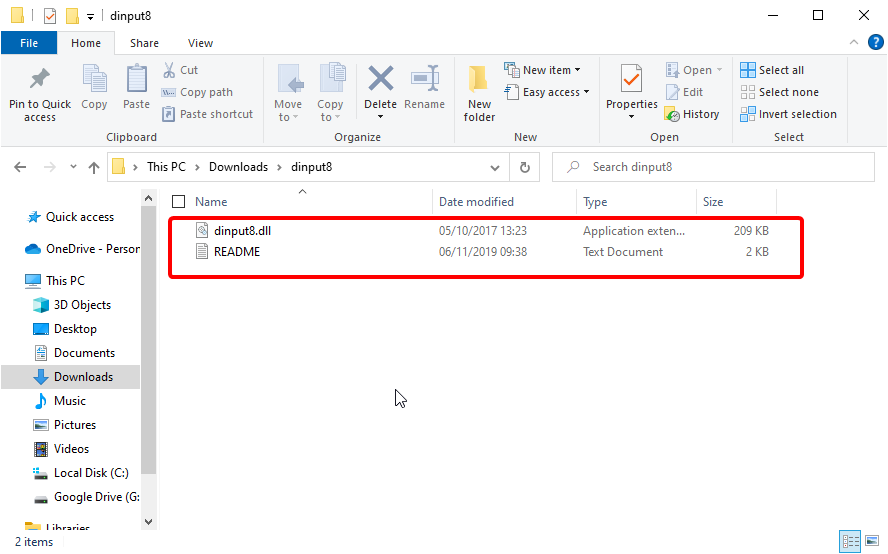
- Copy the extracted file and open the GTA San Andreas installation folder.
- Finally, paste the DINPUT8 dll files there and restart your game.
3. Run in compatibility mode
- Open File Explorer and navigate to the following path:
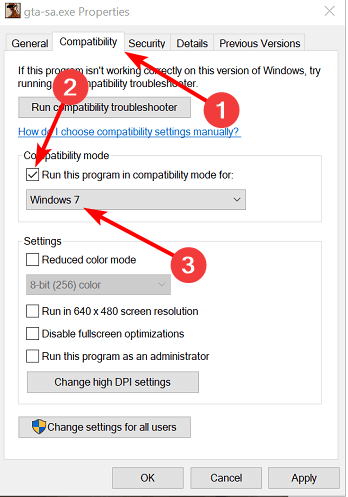
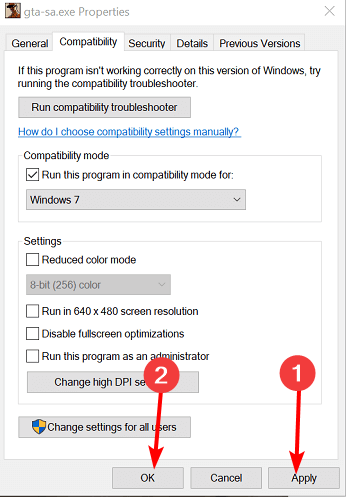
C:Program/Files/Rockstar Games/Grand Theft Auto/San Andreas - Right-click on the Gta_sa.exe file and select Properties.
- Now, click the Compatability tab at the top.
- Check the box for Run this program in compatibility mode for.
- Next, click the Compatibility mode dropdown and select Windows 7 or 8.1.
- Finally, click the Apply button, followed by OK to save the changes.
Launch the game from the Rockstar Game Launcher and check if the GTA San Andreas mouse is not working or spinning issue is resolved.
There you have everything you need to fix your mouse if it is not working on GTA San Andreas. You only need to follow the instructions to the letter, and everything should be back to normal.
If GTA San Andreas crashes on your PC, check our detailed guide to fix the problem for good. We also have a guide on how to download GTA San Andreas for Windows 11, so don’t miss it.
Feel free to let us know the solution that helped you fix this issue in the comments below.

