How to Completely Uninstall Spotify on Windows 11
You can use Windows PowerShell to completely uninstall Spotify
Key notes
- Several readers have reported that the Spotify app gets automatically installed after installing the Windows update.
- You can remove it from the Control Panel or the usual Settings menu.
- Also, you can follow the steps to remove the leftover files of the Spotify app from your PC.

Many of our readers have reported that the Spotify app is getting automatically installed on their PCs after installing the latest Windows update.
Being frustrated by this, users are looking at how to uninstall Spotify on Windows 11. In this guide, we will show you exactly how that can be done. Let us check out the solutions.
How can I uninstall Spotify on Windows 11?
1. Use Windows Settings
- Press the Win + I keys to open Settings.
- Click on Apps from the left pane.
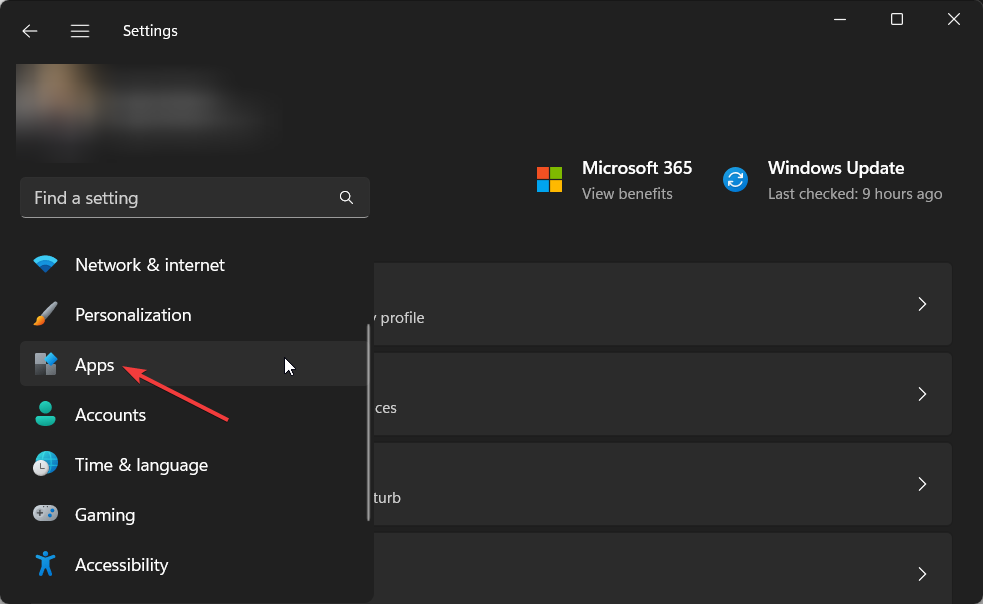
- Select Installed apps.
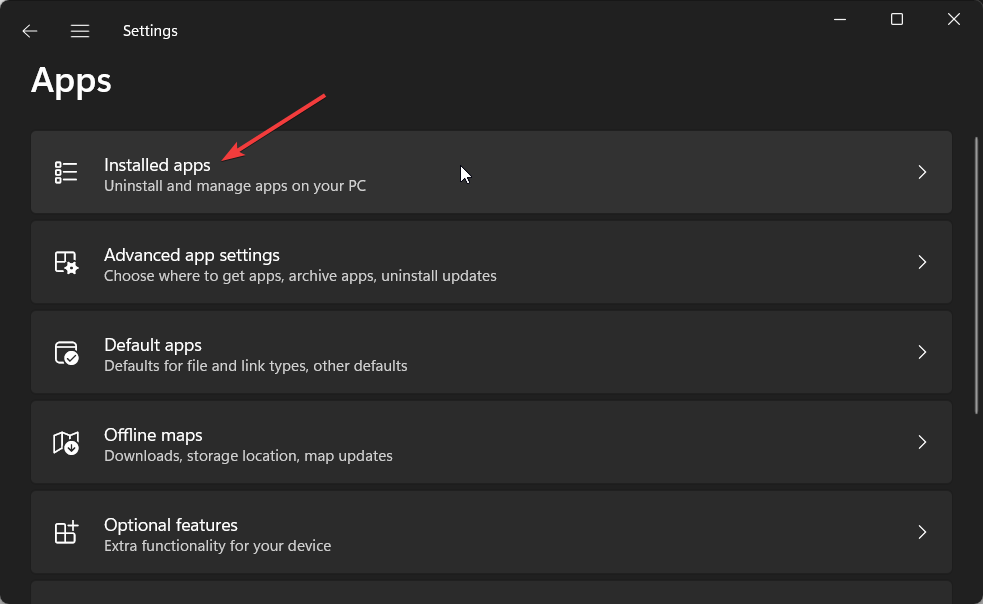
- Locate Spotify Music, click on the 3-dot menu icon, and select Uninstall.

- Follow the on-screen steps to uninstall Spotify.
- Restart your PC.
- Press Win + E keys to open File Explorer.
- Navigate to C:\Program Files.
- Click on the View tab, select Show, and then Hidden items.
- Right-click on the WindowsApps folder and select Properties.

- Switch to the Security tab.

- Click on Advanced.

- Click on Change next to Owner.

- In the Enter the object name… field type Administrators and click OK.

- Once the ownership is taken, open the WindowsApps folder.
- Delete the SpotifyAB.SpotifyMusic_1.138.558.0_x86__zpdnekdrzrea0 folder.
- Restart your PC.
Following the above steps, users were able to remove the Spotify app from their PCs for good and it never got automatically installed again.
You should also try following each step carefully without skipping any to successfully accomplish the task of how to uninstall Spotify on Windows 11.
2. Uninstall Spotify from the Start menu
- Open the Start menu by pressing the Win key.
- Click on All apps.

- Locate Spotify, right-click on it, and select Uninstall.

- Click on Uninstall on the prompt that appears.

This is another simple way of uninstalling Spotify from your Windows 11 PC. You should follow the steps and get rid of the music streaming app from your PC.
3. Uninstall Spotify using PowerShell
- Press the Win key to open the Start menu.
- Type Windows PowerShell and run it as an administrator.

- Type the below command and press Enter to fetch the list of all installed apps on your Windows 11 PC.
Get-AppxPackage
- Right-click on the Windows PowerShell title bar, select Edit and click on Find. Alternatively, you can press the Ctrl + F keys.

- Type Spotify in the Find What field and click on the Find Next button.

- Locate the Spotify app.
- Select and copy the text next to PackageFullName.

- Execute the below command in PowerShell:
Remove-AppxPackage AppName
(In place of AppName in the above command, you have to paste the PackageFullName that you have copied in step 7)
The above method will help you to resolve your query on how to uninstall Spotify on Windows 11. It will completely remove the Spotify app and its remains from your Windows 11 computer.
4. Uninstall Spotify using Control Panel
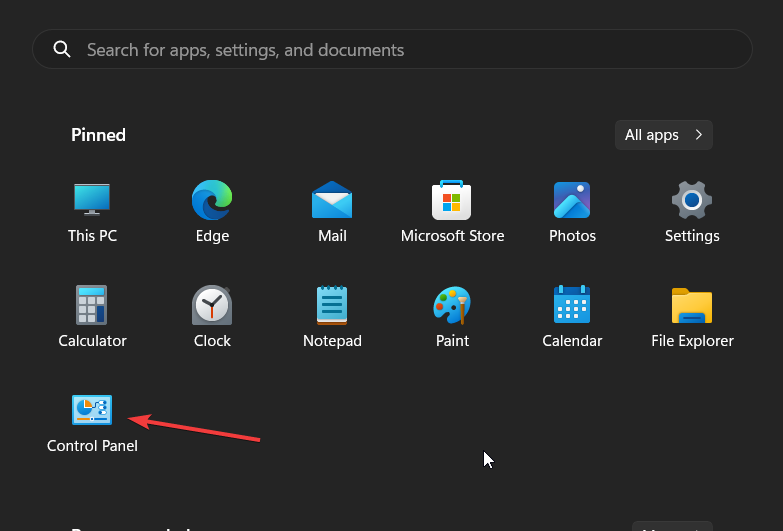
- Press the Win key to open the Start menu.
- Open Control Panel.
- Click on Programs and Features.
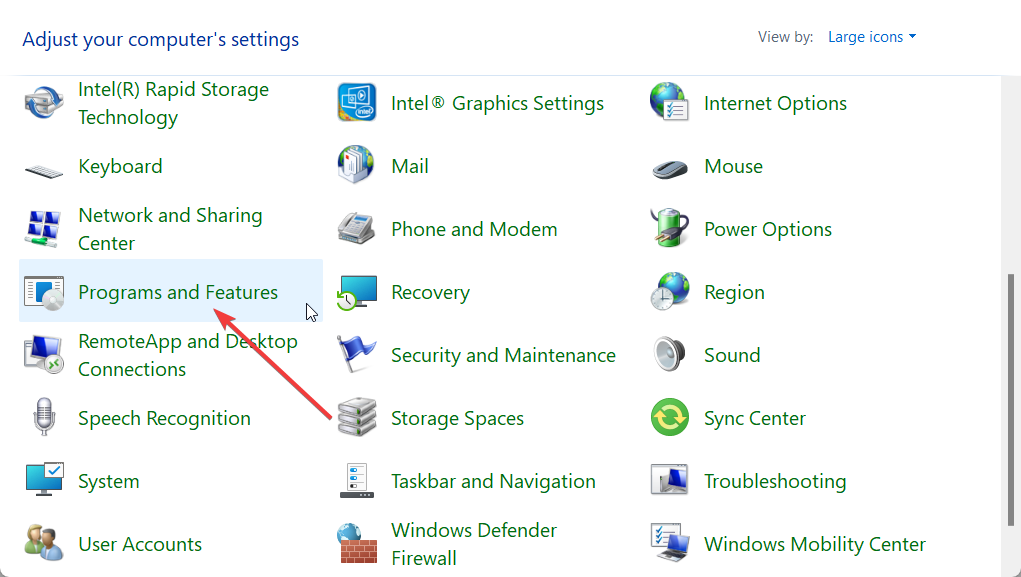
- Select Spotify and hit the Uninstall button.

- Click OK to confirm your actions.
- Restart your PC.
We have shown the steps to remove a different application just to give you an example of how to uninstall Spotify on your Windows 11 PC. You can apply the same steps to remove the Spotify app from your PC.
How to remove leftover Spotify files from your computer?
1. Use the Run dialogue
- Press the Win + R keys to open the Run dialogue.
- Type %temp% and hit Enter.

- Select all files by pressing the Ctrl + A keys.

- Hit the Del button to delete all the leftover Spotify files.
This is the basic way to not only delete all the leftover Spotify files but all the other program-related temporary files. This also helps create more storage space and also helps run your PC a bit smoother.
2. Delete Spotify paths from Registry Editor
- Press the Win + R keys to open the Run dialogue.
- Type regedit and press Enter.

- Press Ctrl + F to open the Find utility.
- Type Spotify in the Find what field and click Find next.

- Right-click on the highlighted entry and click on Delete.

- Select Yes in the UAC prompt that appears.
Be sure to delete only the Spotify-associated registry entries, as deleting any other important registry entry could hamper your device.
That is it from us in this guide. If you are getting the Spotify installation error code 53, then you can apply the solutions from our guide and resolve the problem.
Let us know in the comments below, which one of the above solutions helped you resolve your query on how to uninstall Spotify on Windows 11.
Read our disclosure page to find out how can you help Windows Report sustain the editorial team. Read more


Improve this guide


User forum
0 messages