How to Increase VRAM on Windows 11: Step by Step
You can increase VRAM only on devices with built-in graphics

Many PC users want to increase VRAM on Windows 11 to boost performance, primarily when gaming. More VRAM can help with graphically demanding software, but increasing it isn’t as simple as you think.
Today’s guide will show you how to increase the VRAM and answer some of the most asked questions about it.
How do I change VRAM on Windows 11?
 NOTE
NOTE
1. Use BIOS
- Restart your PC and press the BIOS key repeatedly during the bootup. F2, F5, F8, or the Del key can be used to access the BIOS.
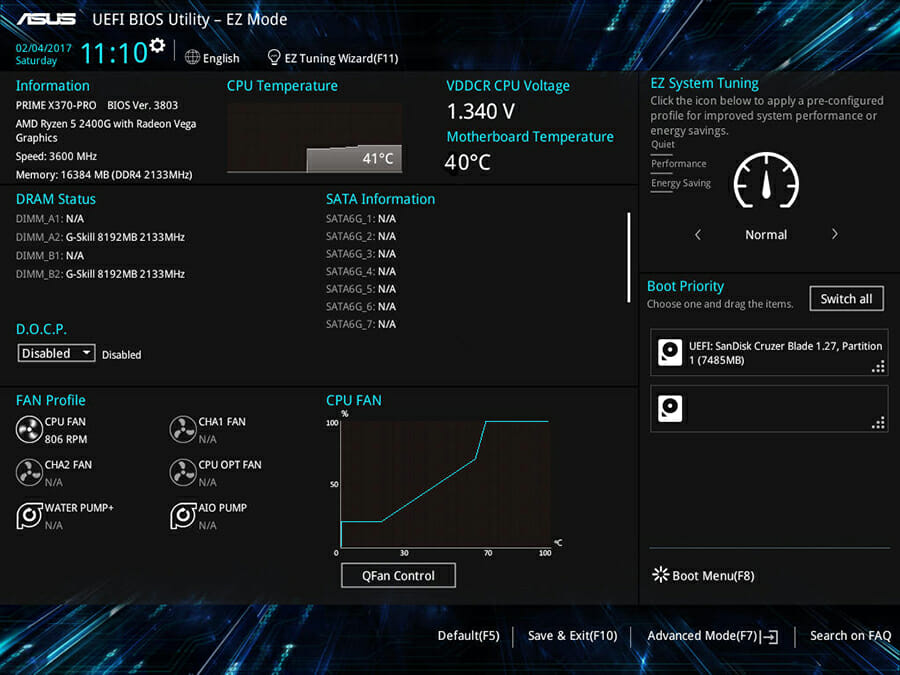
- In the BIOS menu, look for an option called Advanced Features. After that, look for Graphics Settings, Video Settings or VGA Share Memory Size options.
- This section should give you the option to change the amount of memory allocated to your GPU. The default value here is 128 MB. If you have enough memory, you can increase this amount to 256 or 512 MB.
- Finally, Save the changes and restart your computer.
This feature is present on all CPUs and BIOS; however, if this method does not work, proceed to the next solution.
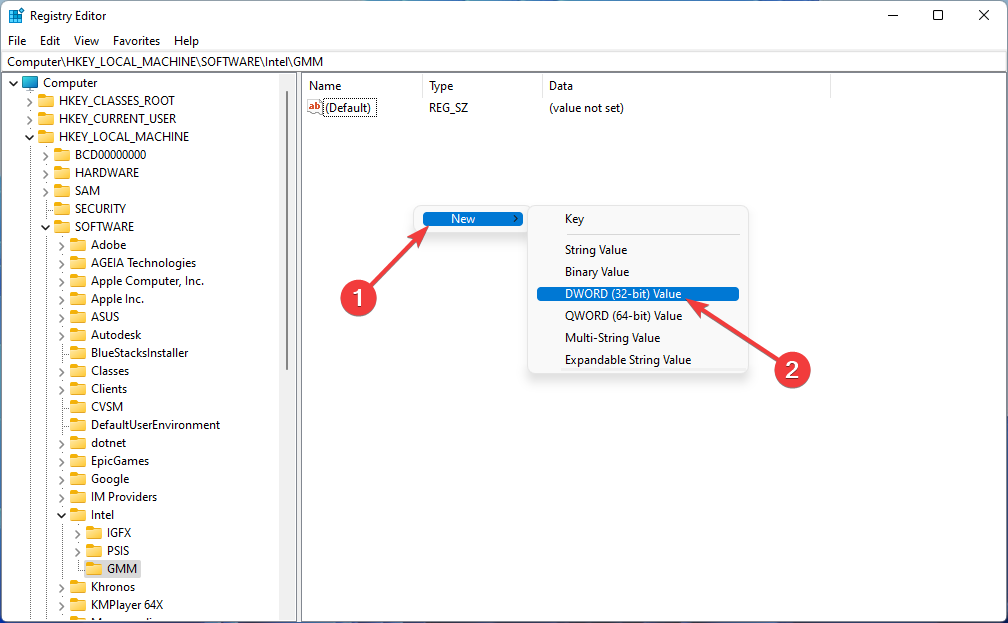
2. Use Registry Editor
- To launch the Run app, go to the Start menu, type Run, and then hit Enter.

- Then type regedit to open Registry Editor.

- Navigate to the following path:
HKEY_LOCAL_MACHINE\Software\Intel
- In the left panel, right-click on the Intel folder, hover mouse over New, and then select Key.

- Name the key as GMM then click on it.

- After that, right-click inside the right panel, select New, then click on DWORD (32-bit) Value.
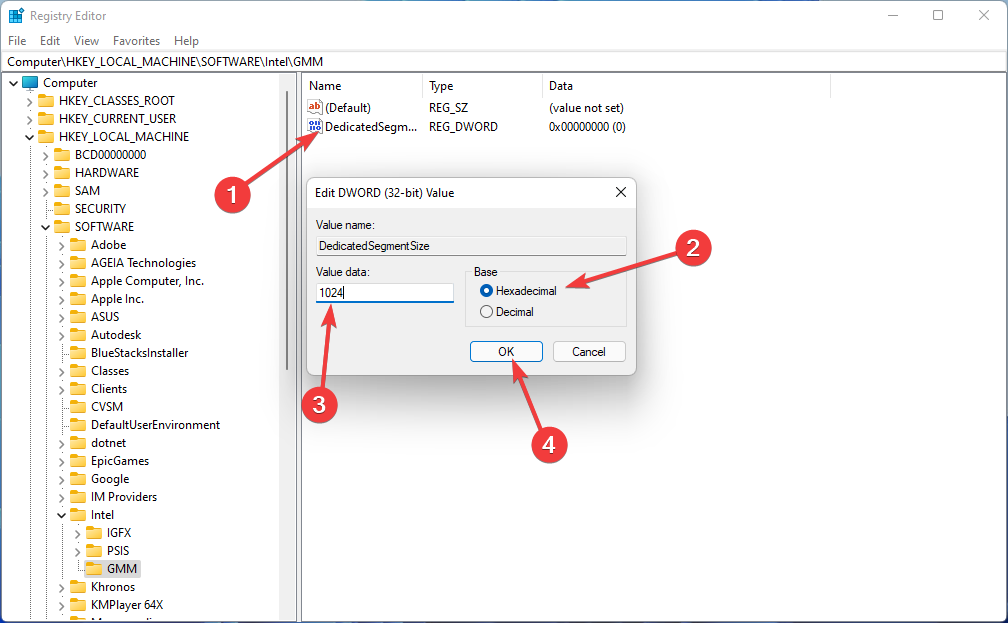
- Then name it DedicatedSegmentSize. Note that, the initial letter of each word should be capitalized, and no spaces should be used in between the words as you type them.

- Double-click it, choose Hexadecimal, then enter the recommended value data using your system RAM information and hit OK: 1GB – 128MB; 2GB – 256MB; 4GB – 512MB; 6GB – 1024MB; 8GB – 2048MB; 16GB – 4096MB; 32GB – 8192MB.
Now restart your computer to have the modifications take effect, and then test the software or games to see how they function.
NOTE
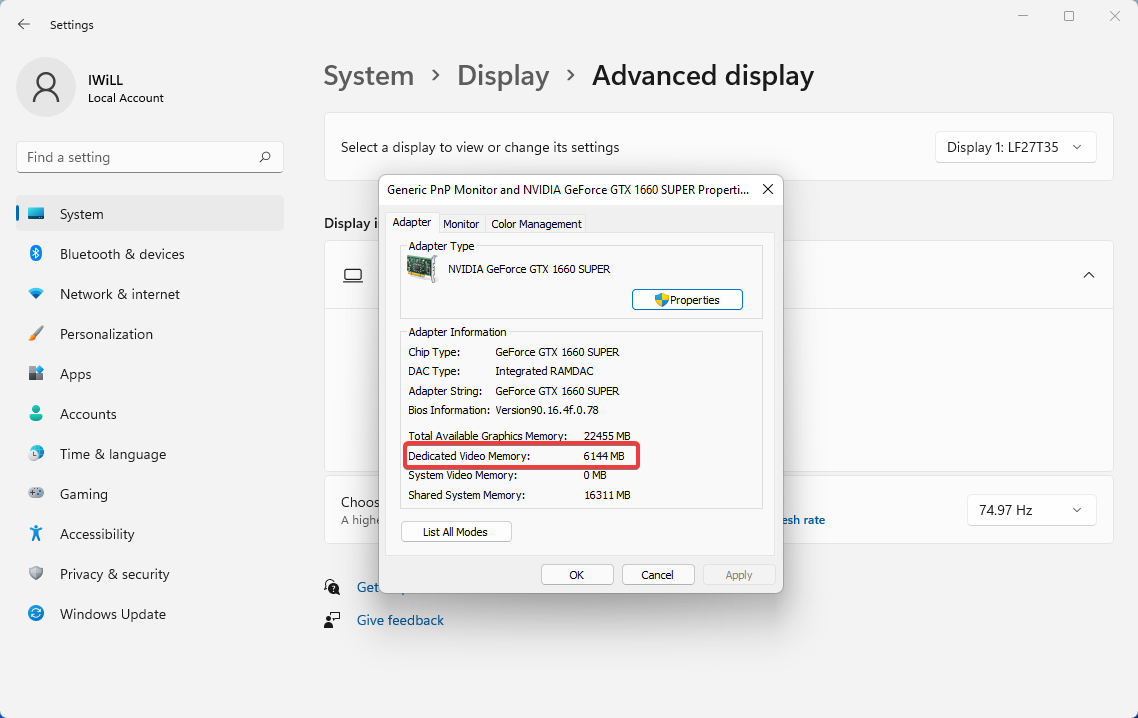
How do I check my VRAM capacity?
- Use the Windows + I key combination to open the Settings.
- Select the Display option from the left pane and choose Advanced Display option.
- Then select Display adapter properties.
- In the new window, next to the Dedicated Video Memory, you’ll see the amount of video memory in your computer.
Is it safe to increase virtual memory?
- Changing VRAM value from BIOS is perfectly safe since you can only use the values that are supported by your processor.
- Modifying VRAM value from the registry can lead to some performance issues if you don’t set the correct values.
- Improper modifications of the registry can cause additional problems with the PC.
It’s pretty simple to increase VRAM in Windows 11, but all the solutions from above only work if you’re using a dedicated graphics card.
To learn more about VRAM, we have a great guide on how to find how much VRAM you have and how to clear GPU memory.
If you’re still on Windows 10, don’t miss our guide on how to increase VRAM on Windows 10. Also, don’t forget to visit our guide on how to clear GPU memory for more information.
Have you completed the above procedure? Share your opinion with us in the comments section below.
Read our disclosure page to find out how can you help Windows Report sustain the editorial team. Read more


Improve this guide


User forum
2 messages