How to Fix Error 1 on Jio Cinema
Why an older app version may serve you better
Key notes
- Error 1 on Jio Cinema can be fixed by enabling background data or restoring your Access Point names to default.
- You can also try your luck with a VPN or roll back to a previous version.
- Sit tight as we explore more of these solutions.

Jio Cinema’s being one of India’s largest on-demand service providers means it’s not exempted from occasional issues such as error 1. Luckily, we narrowed down the top solutions so you can get back to streaming quickly.
Why is Jio Cinema showing error 1?
This error may occur while streaming, preventing playback of the video. The server could be overloaded, you may have internet connection issues, or a recent app update has issues causing another loading error 7050.
How do I fix error 1 on Jio Cinema?
Start with the following simple workarounds:
- Ensure you have a stable and working internet connection, then verify that the Jio Cinema servers are up and running.
- Close any bandwidth-hogging processes, applications, and devices.
- Check your device for firmware updates and restart it.
1. Enable background data
- On your phone, go to Settings.
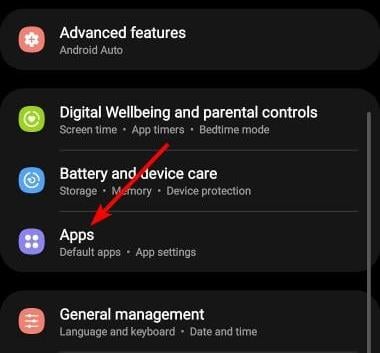
- Scroll down and select Apps.
- Locate the Jio Cinema app and click on it.
- Tap on Mobile data.
- Toggle on the Allow background data usage option.

Background data can help an app work more efficiently. It makes sure that your app is up-to-date with the latest information at all times so that you don’t have to re-download large files from scratch every time you open your app.
This is also a good time to disable any bandwidth limits you may have set up to ensure your Jio Cinema app is not capped when streaming.
2. Reset Access Point names
- On your phone, go to Settings.
- Tap on Connections.
- Next, tap on Mobile networks>Access Point Names.

- Tap on the three ellipses in the top right corner and tap on Reset to default.

Resetting access point names is changing the name of an access point. This can be used to avoid interference from other nearby networks. It’s also a good idea to reset the default login information for your wireless router if someone else has gotten hold of your credentials.
3. Delete app cache
3.1 TV app
- On your TV, find your Settings.
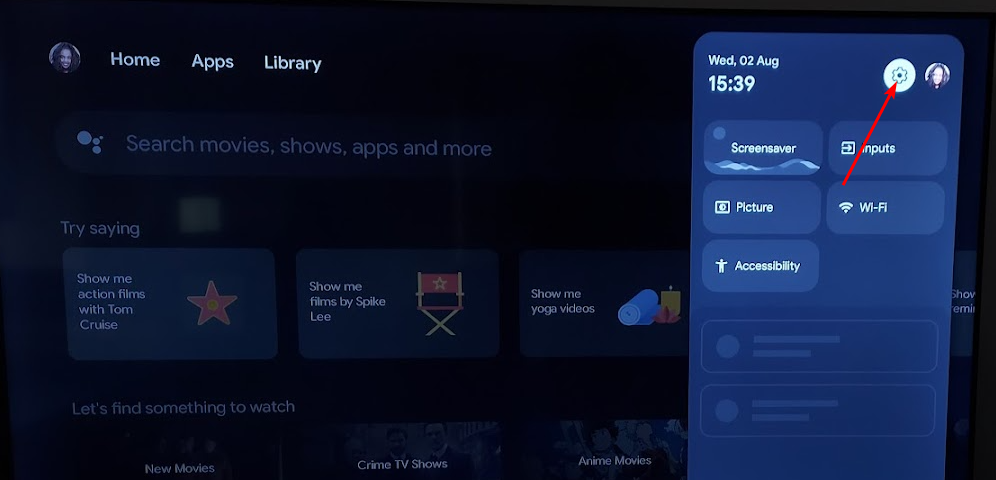
- Go to Apps and select Jio Cinema.
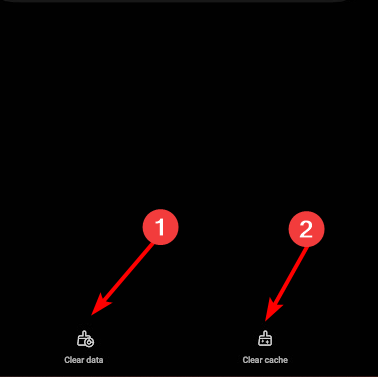
- Scroll down and hit Clear data and Clear cache.
3.2 Android app
- Tap on settings on your phone.
- Next, tap on Apps.
- Find the Jio Cinema app and tap on it.
- Scroll down and select Storage.
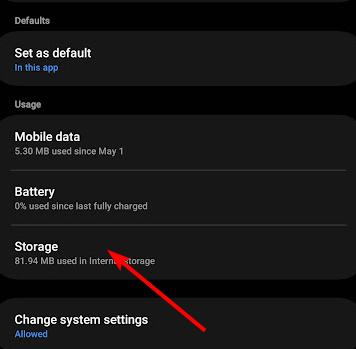
- Tap on Clear data and Clear cache, then try again.
3.3 Browser cache
- For this step, we shall be using the Chrome browser.
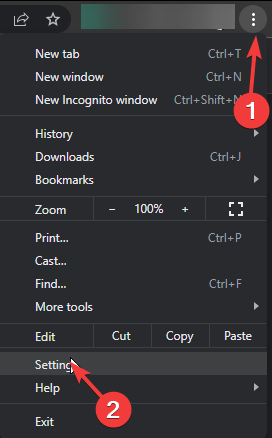
- Launch your Chrome browser and click the three vertical ellipses in the top right corner.
- Select Settings.
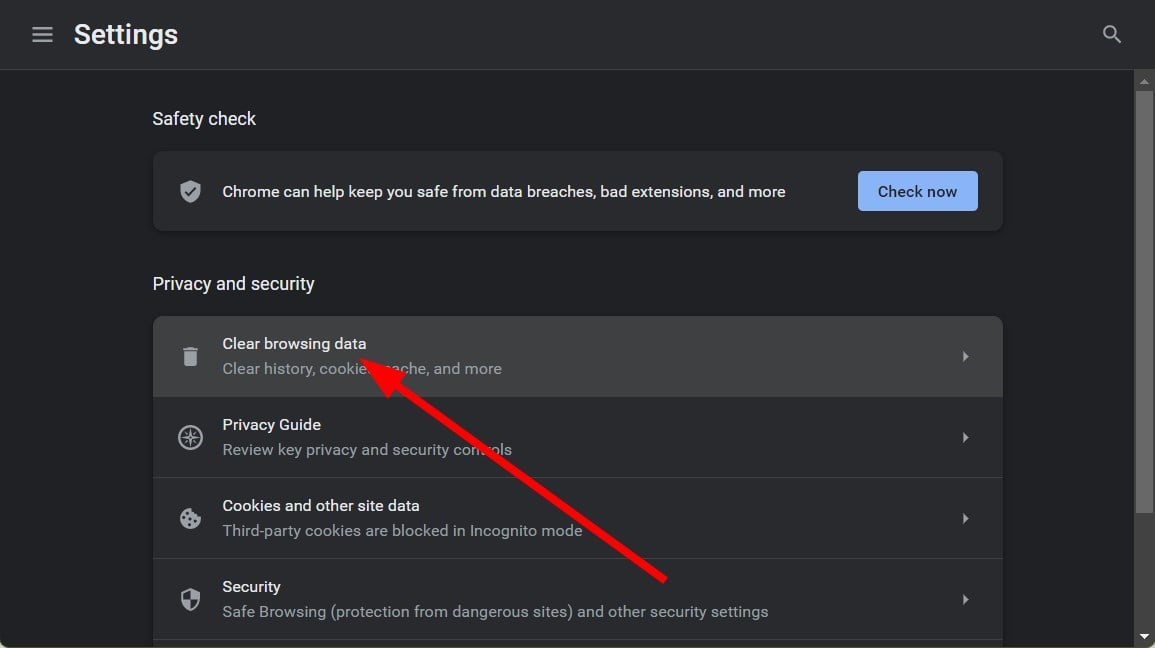
- Click on Privacy and security, then select Clear browsing data.
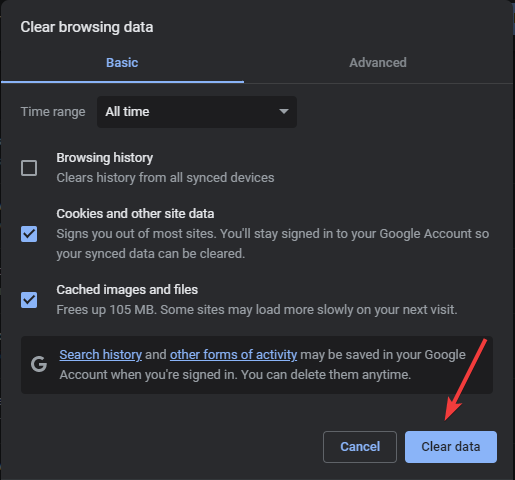
- Check Cookies and other site data and Cached images and files, then hit Clear data.
4. Use a VPN
Error 1 on Jio Cinema happens for many reasons, and one of them is the VPN connection you might be using. When you connect to a VPN server, your IP address changes and this can cause issues. The app already has location restrictions, so you need to tread carefully when selecting your server.
So, we recommend that users turn off their VPN connection before connecting to the Jio Cinema app or switch to a more reliable VPN option, such as ExpressVPN.
ExpressVPN is a powerful dedicated VPN solution that can be used to bypass connection errors, coming either from the local network setup or from the ISP. Also, due to its large number of servers, located in 105 countries, ExpressVPN is perfect for watching geo-blocked content.

ExpressVPN
Do not let any errors ruin your experience when watching your favorite movies with this amazing VPN solution.5. Uninstall recent app updates
- On your TV, find your Settings.
- Go to Apps and select Jio Cinema.
- Select Uninstall updates.

For other devices, this option may be unavailable. You’ll have to download an older version from a third-party site. Just ensure you have a comprehensive antivirus for maximum protection.
 NOTE
NOTE
6. Change your DNS settings
- Head over to the Settings app using the Windows + I shortcut.
- Select Network & internet from the left sidebar and choose Wi-Fi or Ethernet from the right section, depending on your internet connection.

- Scroll down and select Hardware properties.

- Locate the DNS server assignment setting and click the Edit button next to it.

- This will open the Edit DNS settings popup. Here, expand the drop-down on the top and choose Manual instead of Automatic (DHCP).
- Next, enable the toggle for either IPv4 or IPv6, based on the IP connection type.

- Now provide the primary DNS server address in the Preferred DNS field followed by a secondary DNS server address in the Alternate DNS field. (For instance, 8.8.8.8 is the preferred DNS address, and 8.8.4.4 alternative DNS address for Google’s DNS server)

- If you wish to enable the DNS over HTTPS feature to encrypt DNS requests, choose Encrypted only (DNS over HTTPS) for both Preferred DNS Encryption and Alternate DNS Encryption dropdowns.

- Press the Save button once you are done with the changes.
7. Reinstall the Jio Cinema app
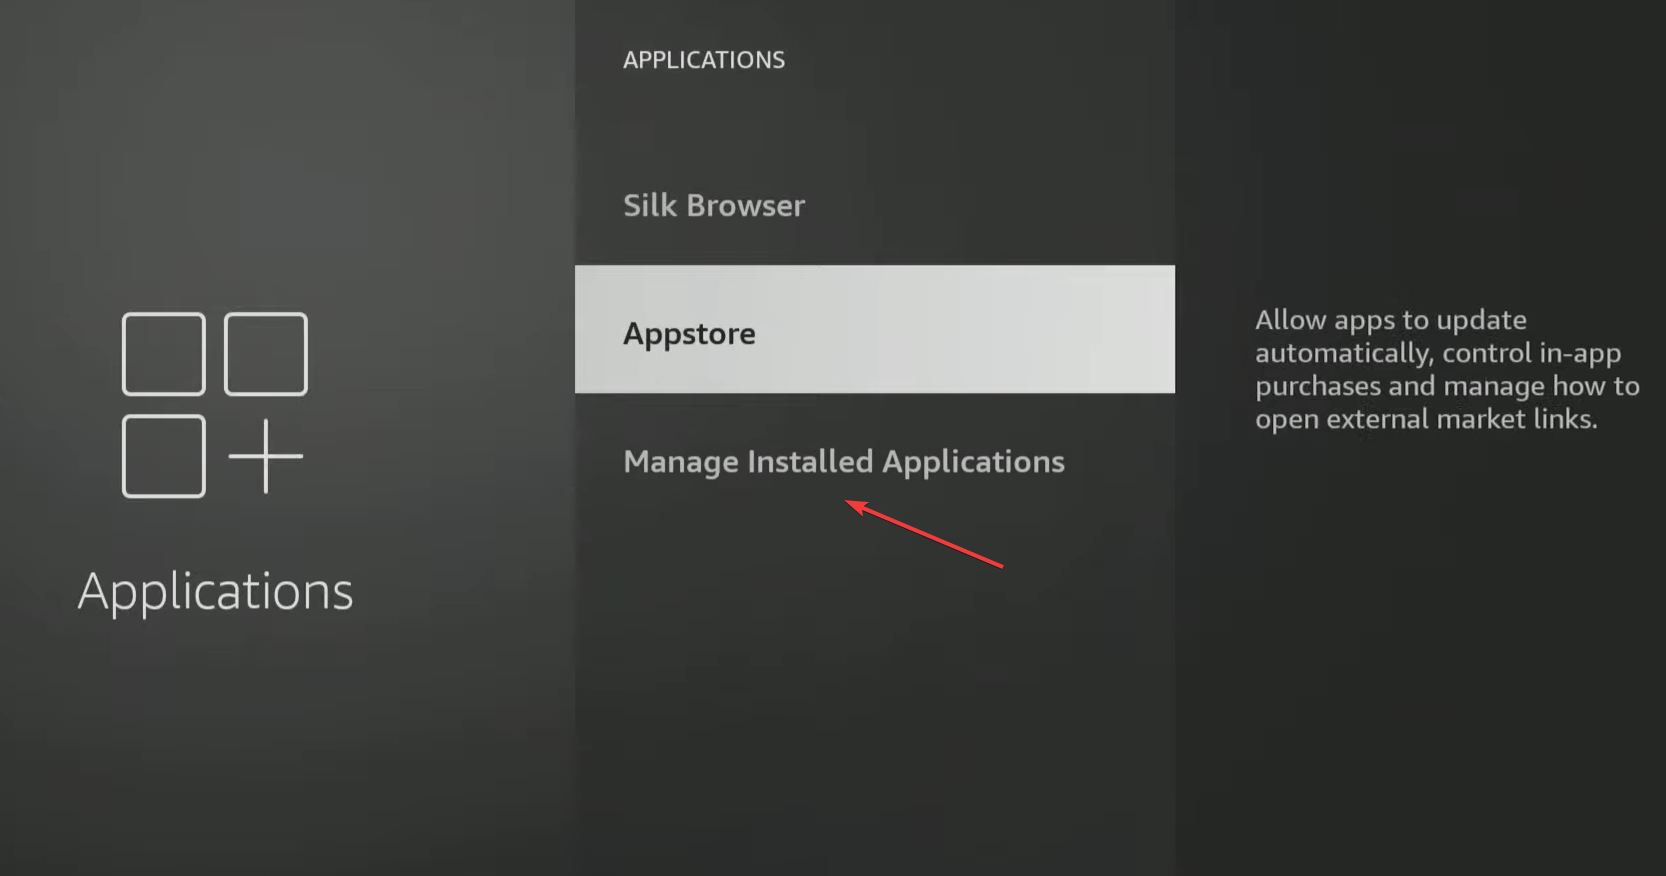
- On your TV, open Settings, and go to Applications.
- Head down and select Manage installed applications.
- Choose Jio Cinema from the list.
- Scroll down to the bottom and select Uninstall.
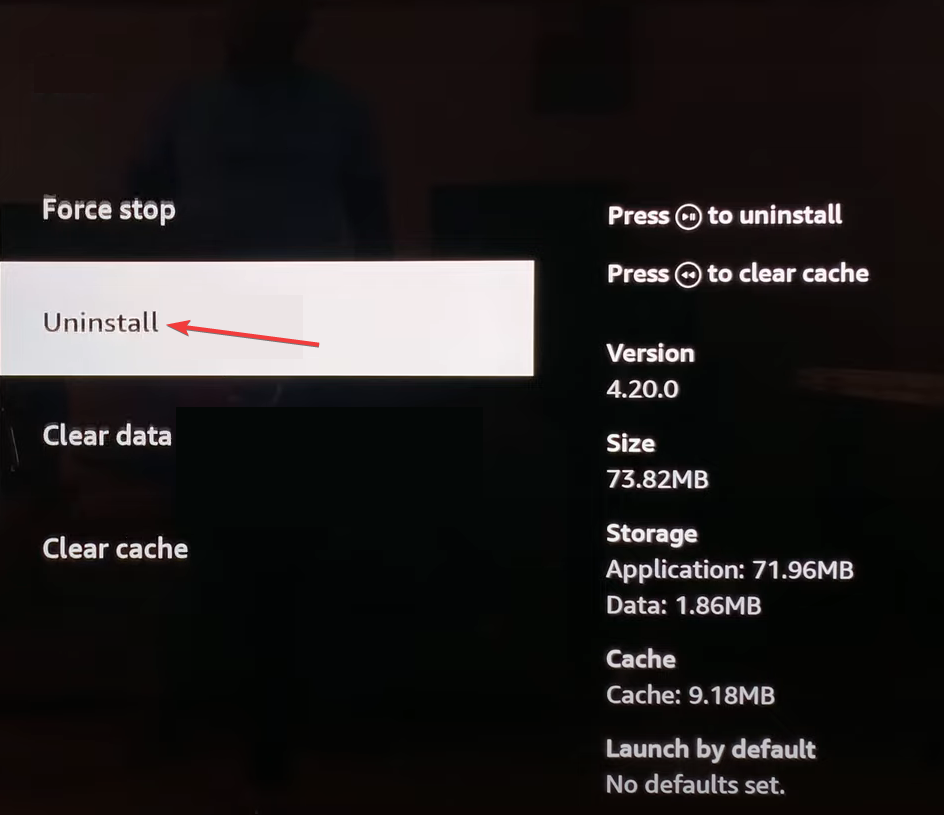
- Finally, choose Confirm to start the uninstallation.
- Once done, reinstall the Jio Cinema app from the dedicated app store and verify whether error code 1 has disappeared.
8. Contact support
There are many different kinds of errors that can occur while using Jio Cinema on your device. Some might be pretty simple to solve, while others may require advanced technical knowledge to resolve them successfully.
If error 1 has become extremely hard to crack, the Jio Cinema help center may be able to come through for you.
While you’re still here, check out the top browsers that work well with JioTV as they do for Jio Cinema.
Have any other solution in mind that worked for you? We’d love to hear about it. Leave a comment down below.
Read our disclosure page to find out how can you help Windows Report sustain the editorial team. Read more


Improve this guide


User forum
0 messages