Laptop Camera Not Working Windows 11 - DIY Troubleshooting Guide
![]() 7 min. read
7 min. read
![]() Updated on
Updated on
Share this article
Improve this guide
Read our disclosure page to find out how can you help Windows Report sustain the editorial team. Read more
Is your laptop camera not working on Windows 11?
First, it’s important to note that it’s different from a peripheral webcam you can connect to your PC. I’m talking about built-in laptop cameras which are much finer and fragile from the hardware point of view.
In this DIY troubleshooting guide, I’ve outlined tried and tested fixes you can try at home. I’ve reproduced the Windows 11 laptop camera’s black screen and no signal issues to ensure that the fixes actually work. So, let’s begin!
Why Is My Laptop Camera Not Working on Windows 11?
When a laptop camera doesn’t work on a Windows 11 OS, you’ll get the following preview when you open the Camera app or API:
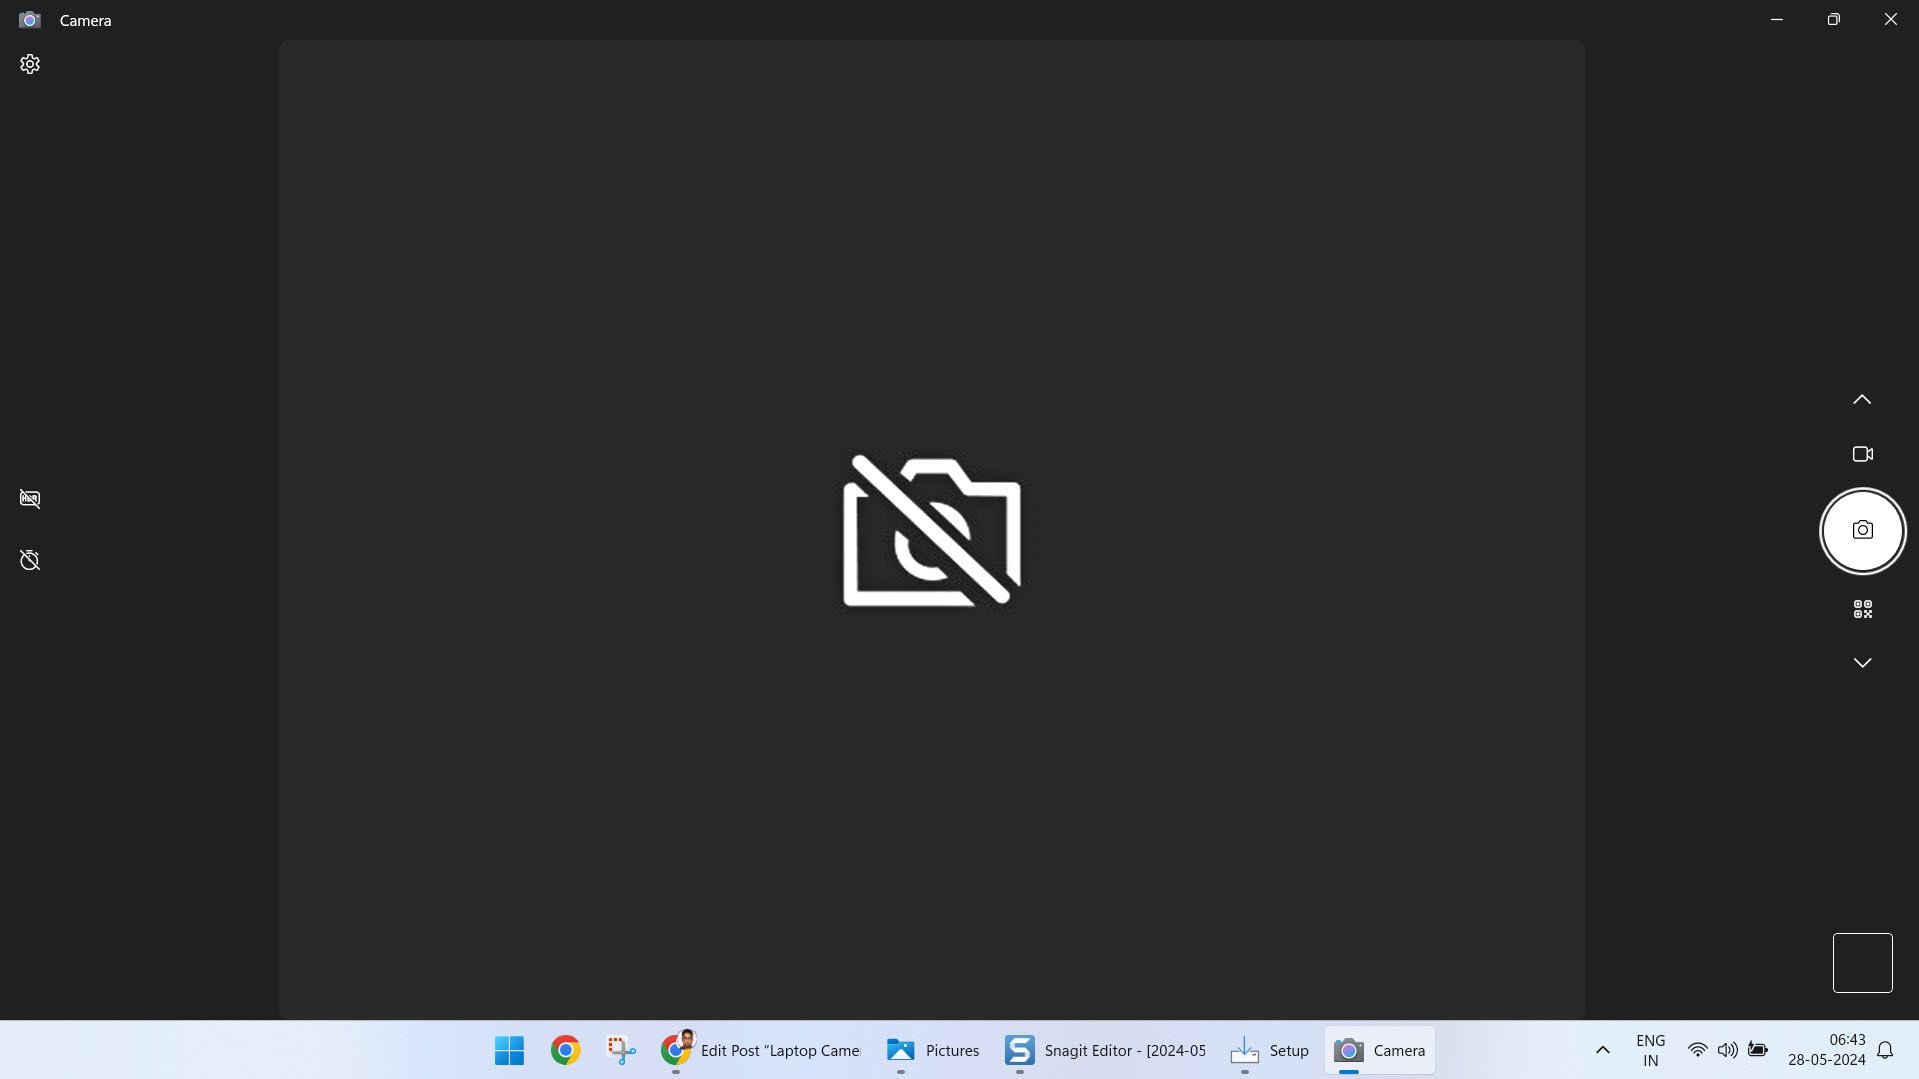
The root cause behind this could be any of the following issues:
- Windows 11 Camera app crashing in the background.
- The camera is suffering from a driver error or the firmware is outdated.
- Third-party apps don’t have camera feed permission.
- The device’s access to the camera driver and feed has been blocked with privacy restrictions.
- Windows 11 is outdated.
- Camera hardware issue (require advanced technical assistance from manufacturer’s support team).
Supported Windows 11 Laptop Models
The troubleshooting instructions below are suitable for Windows 11 laptop devices rather than desktop PCs. The fixes I’ve mentioned are generic and will apply to any of the following laptop manufacturers and brands:
- HP
- Lenovo
- ASUS
- Acer
- Dell
- Microsoft
- ACEMAGIC
- MSI.
How To Fix Laptop Camera Not Working Windows 11
Now that you understand the basics of why your laptop camera isn’t working, try these fixes. I’ve listed them from the simplest to the most complex.
Basic Troubleshooting Steps
Try these quick checks you go ahead with more time-consuming troubleshooting methods:
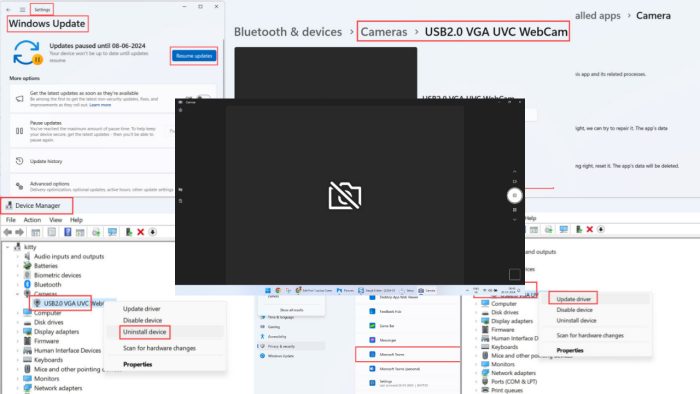
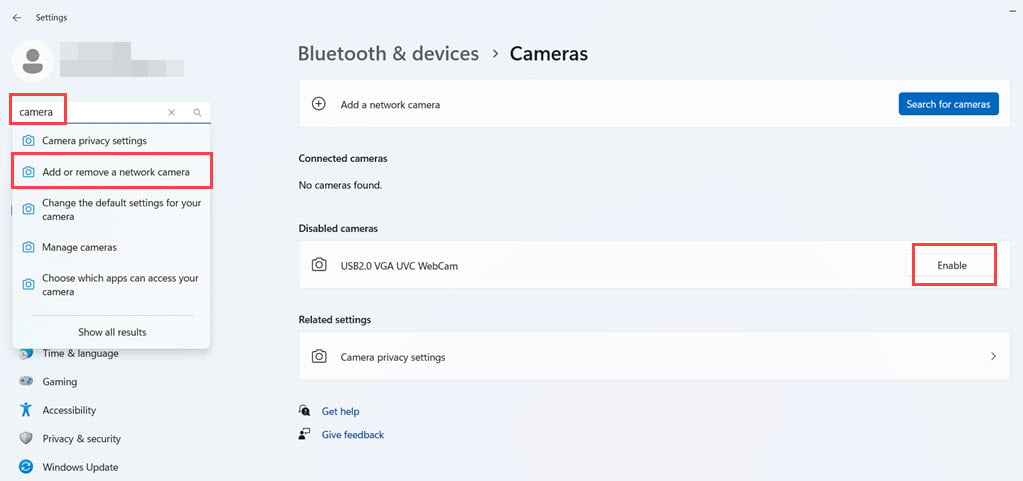
- Switch to an appropriate camera: Windows 11 allows you to use network cameras as well as the built-in ones. Open the Windows Settings app by pressing the Windows + I keys. Type Camera in the Search field and go to the Add or remove a network camera page. There, click on the Enable button of the appropriate camera.
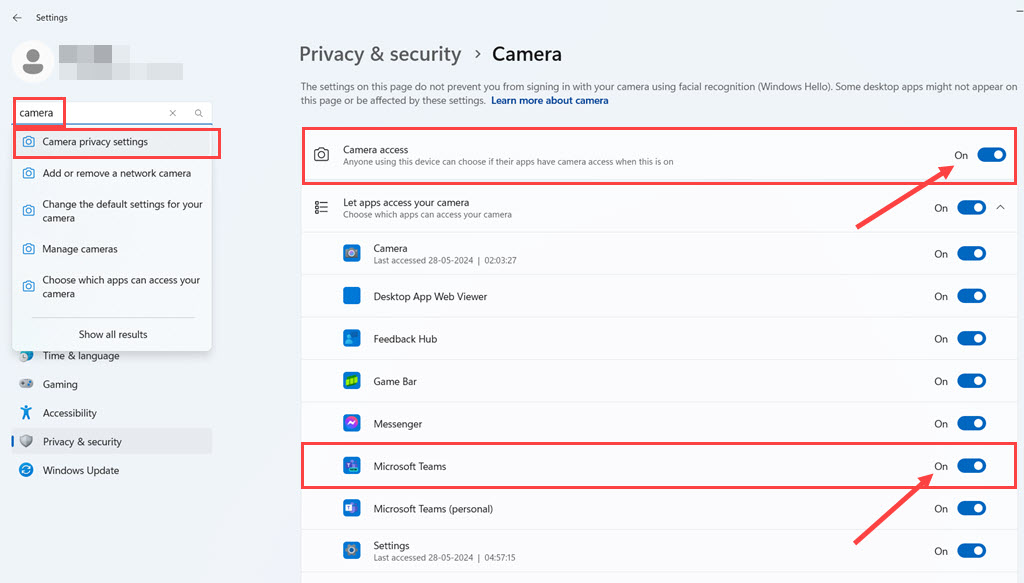
- Allow access to the laptop webcam: If you’re unable to access the webcam feed from a specific app, like Microsoft Teams, it might be due to Privacy & security settings. Go to Settings and search for the Camera privacy & settings window. Ensure that the global camera feed is online by moving the Camera access toggle button to the right edge. Also, scroll down to the specific app on which the webcam isn’t working to allow the camera feed.
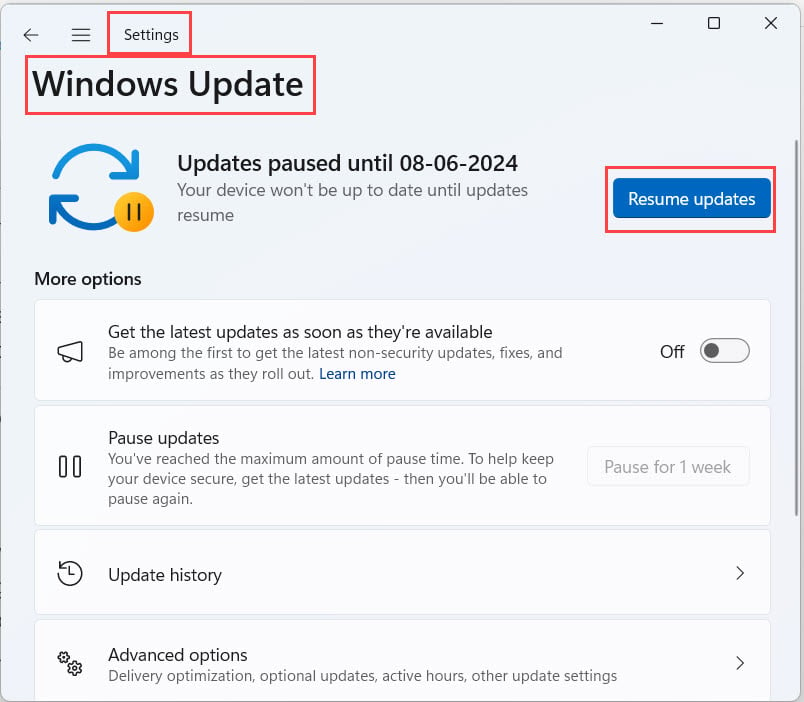
- Update Windows 11: Press the Windows + I keys together to open the Settings. In the Find a setting field, type Update. Click on the Windows Update settings on the search result drop-down. On the Windows Update screen, choose either Resume updates, Download and install updates, or Restart or reboot device. Restart the PC once the update is done. If Windows doesn’t ask you to reboot, force restart by pressing the PC case power or reset button.

- Reboot the device: Restart the laptop and test the camera again.
Reset the Windows 11 Camera App
The Camera app is the default interface that relays the digital signal received from the camera hardware. Since this is a built-in app, it might suffer from a temporary bug caused by the latest Windows Update. Follow these steps to reset it:
- Press Windows + I to bring up the Settings app.
- Type Apps in the Find a setting field and access the Add or remove programs menu.

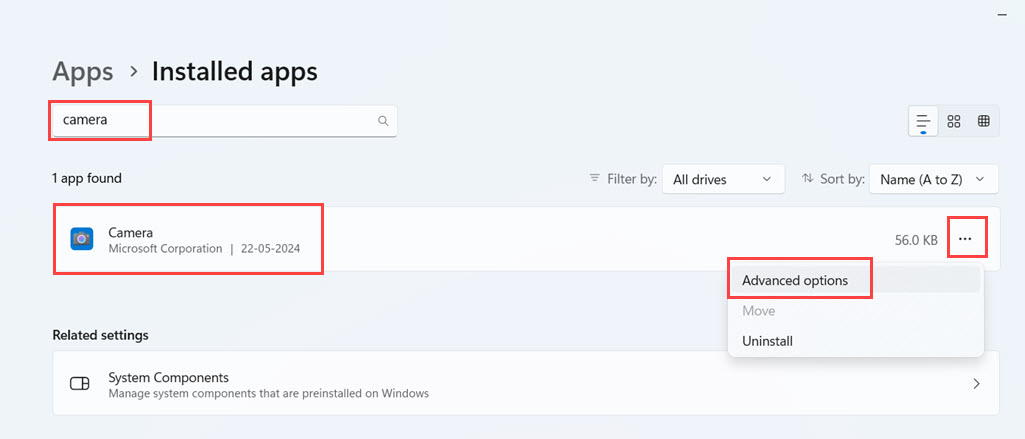
- Beneath the Installed apps heading, look for the Camera app in the Search apps field.
- Click on the three dots menu on the right edge of the Camera app block and choose Advanced options.
- You should now see the Specifications page of the Camera app.
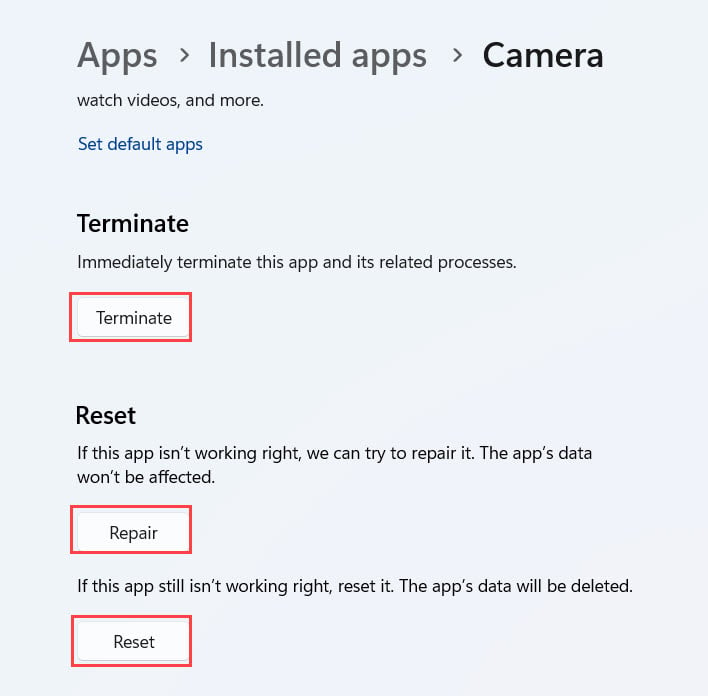
- Scroll to the bottom to find Terminate.
- Click Terminate to close the app from the background processes list.
- Under Reset, click on the Repair button.
- Once repaired, check if the laptop camera is working.
- If it works, that’s great! If it doesn’t, click on the Reset button.
- Wait for the Camera app to be reset.
- Restart the PC once done and test your webcam again.
Run Windows 11 Camera Troubleshooter
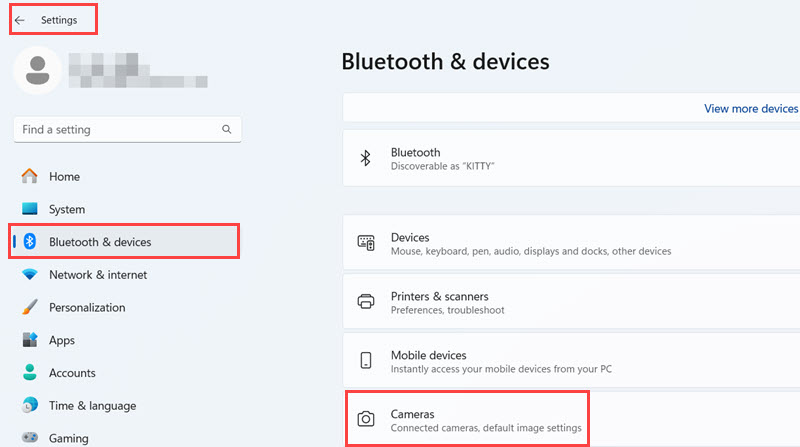
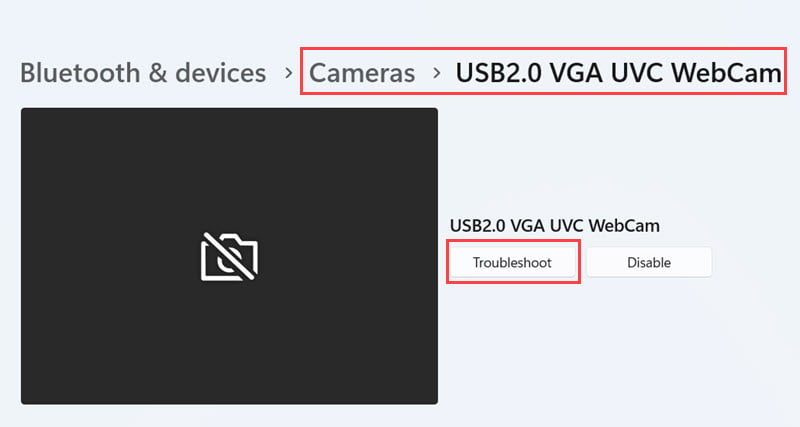
- Open the Windows 11 Settings and click on the Bluetooth & devices menu on the left-side navigation panel.
- On the right side, below Mobile devices, click on the Cameras settings block.
- Below the Connected cameras menu, you should see the built-in laptop camera. Click on that.
- You should see a small preview screen for the camera feed on the top.
- There, find the Troubleshoot button and click on that.
- You’ll see a new window, named We’re here to help.
- On this window, scroll down to the Do we have your consent… section and click Yes.
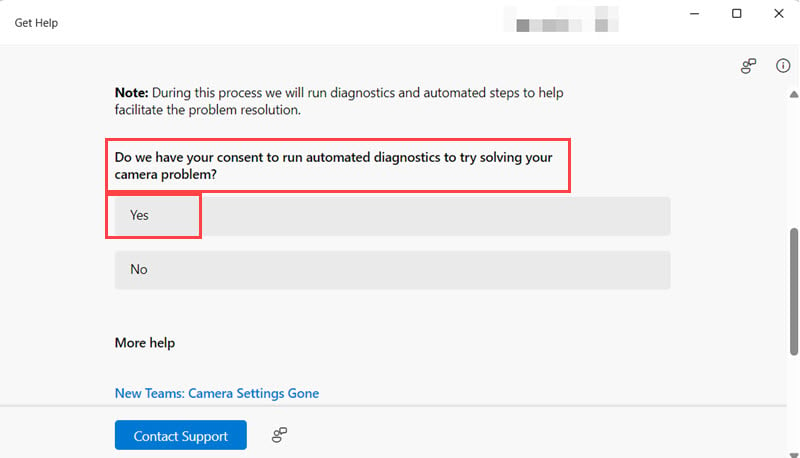
- Let the Check for automation capabilities tool run.
- Then, the troubleshooter will show Reset camera services. Click on that.
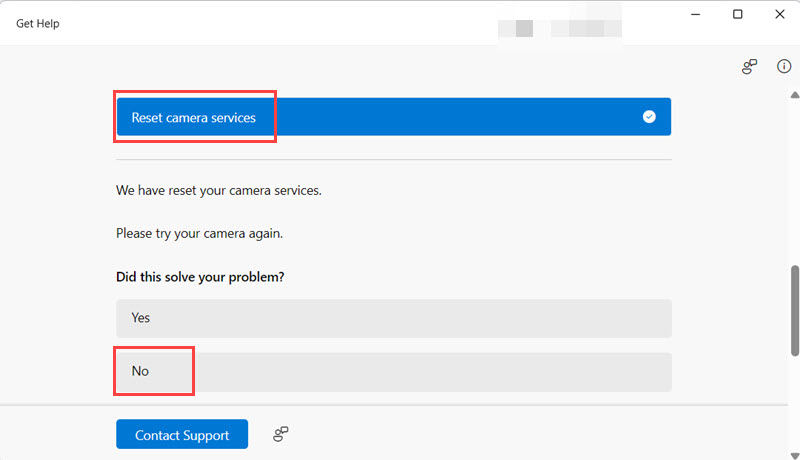
- Now, go to the Desktop and run any app that uses the laptop webcam.
- Alternatively, run the Camera app from the Start menu.
- If the issue is fixed at this phase, close the Camera troubleshooter tool.
- If the issue persists, click No for Did this solve your problem? prompt.
- The tool will run a camera diagnostics.
- Choose Built In for Is the camera connected… dialog.
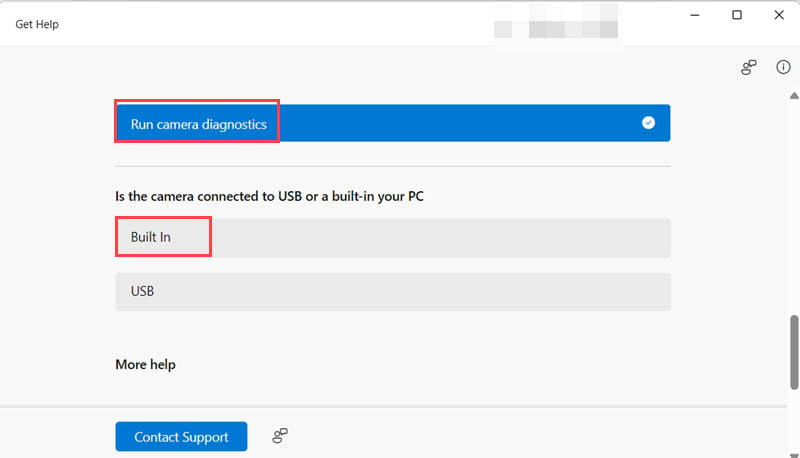
- Now, the troubleshooter will ask you to shut down the device and disconnect the power cable.
- After 30 seconds, connect the power cable again and boot up the laptop.
- Check if the camera is working now.
Update Camera Driver
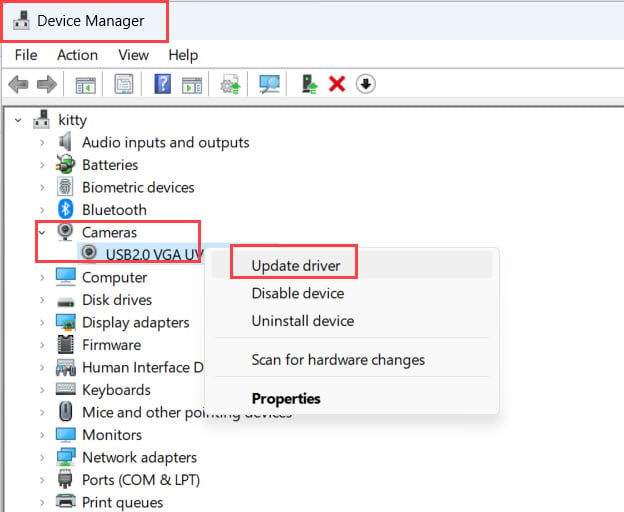
- Open the Device Manager app from the Start menu.
- You should find the Cameras hardware tree just below the Bluetooth tree. Click on the Cameras tree to expand it.
- The listed hardware is your built-in laptop webcam.
- Right-click on it and choose Update driver from the context menu.
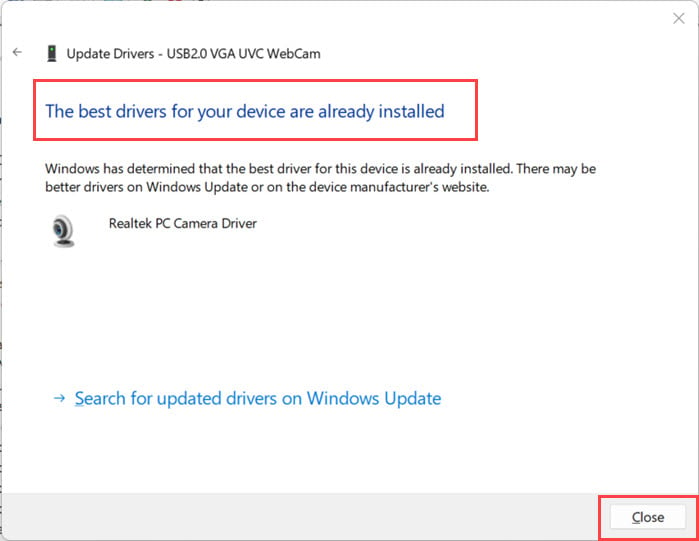
- On the next window, click on the Search automatically for drivers option.
- When you see The best drivers… notification, click Close.
If you would like to streamline the driver updating process you can always opt for specialized tools, such as PC HelpSoft Driver Updater for example. This tool will fix any issues related to drivers and you will gain control over your laptop camera in no time at all.
Uninstall and Reinstall Camera
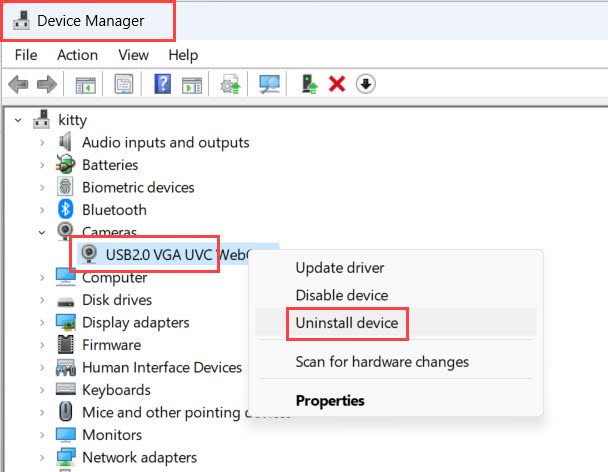
- Open the Device Manager tool.
- Find the built-in Camera and right-click.
- On the context menu, click on the Uninstall device option.
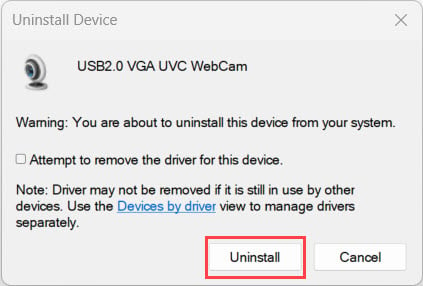
- Click Uninstall on the Uninstall Device dialog box to approve the action.
- Don’t checkmark the box for the Attempt to remove the driver… option.
- Device Manager will refresh. You won’t see the Cameras tree anymore.
- Click on the Action tab in the top menubar.
- Select the Scan for hardware changes option in the context menu.
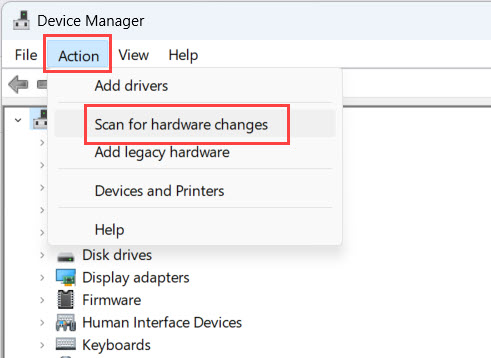
- You should now see the Cameras tree again.
Download and Install Camera Firmware
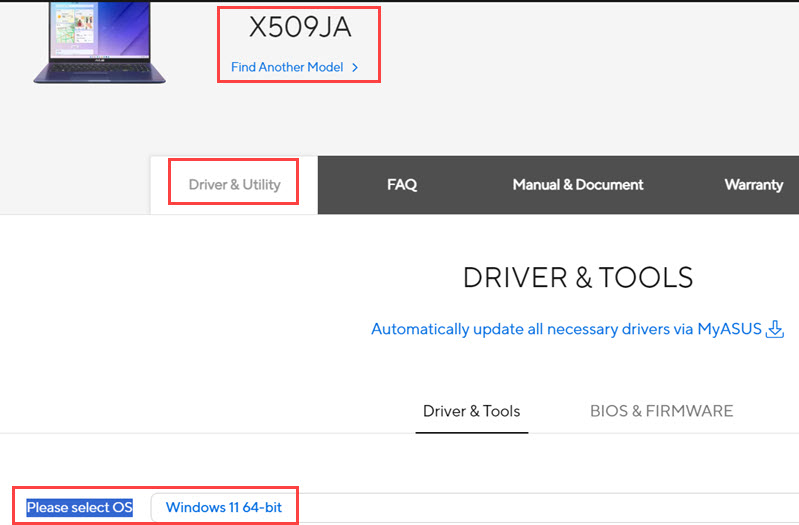
You can also try to run the built-in webcam using the manufacturer’s own camera app and utilities. For that, you must download the relevant software from your laptop’s driver support page. Find below the steps for an Asus VivoBook X509JA laptop. The instructions are similar for other laptop make and models.
- Visit the Product Support portal for the specific model on the manufacturer’s website.
- Click on the Driver & Utility tab.
- Select an appropriate Windows 11 edition in the Please select OS field. Most devices will be 64-bit.
- Scroll down on the list of drivers until you find the Camera section.
- The latest camera driver will be on the top.
- Click the Download button next to the driver you want to get.
- Your browser will download a software package.
- Double-click on it to install.
- Once the installation is over, restart the PC.
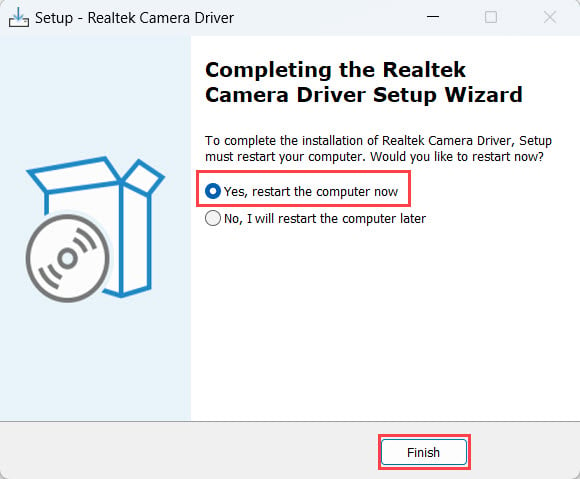
- Now, use this newly installed Camera app and see if the webcam is working or not.
If none of these troubleshooting ideas work for you, don’t hesitate to reach out to the manufacturer’s support team for advanced technical support.
Find below a list of support page links for the top Windows 11 laptop brands:
Summary
Is your laptop camera not working on Windows 11? If you follow this guide until the end, it should be back in proper shape. I included quick fixes that usually resolve this issue and more advanced solutions with step-by-step instructions.
If this guide helped you or you’d like to share critical feedback, comment below.


User forum
0 messages