How to Fix Laptop Lagging When Charging
First, close all the unnecessary background programs
4 min. read
Published on
Read our disclosure page to find out how can you help Windows Report sustain the editorial team. Read more
Key notes
- If your laptop lags when charging, it could be due to your PC's power settings, overheating, or faulty power adapter.
- Keep reading to learn how to fix it!
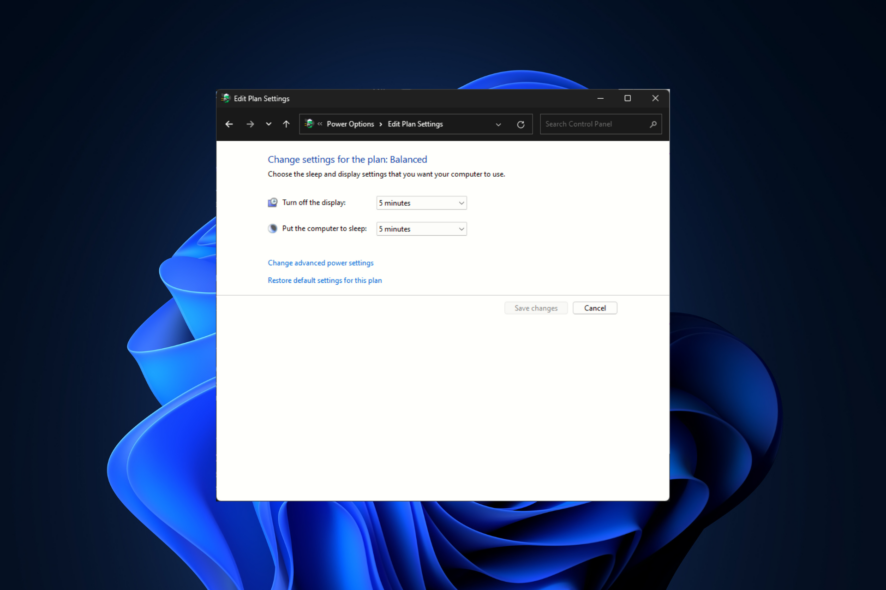
If you often find yourselves grappling with frozen screens and slowdowns when your laptop is plugged in, this guide can help!
In this guide, we will delve into common causes behind the laptop lagging when charging issue and offer you WR expert-recommended solutions to fix it in no time.
Why does my laptop lag on charging?
- Misconfigured power settings or processor throttling.
- Resource hogging background processes or malware infection.
- Graphics settings set to save power or outdated drivers.
How can I fix the laptop lagging when charging issue?
Before proceeding with any steps to fix the lagging issue, go through the following preliminary checks:
- Check your power adapter & laptop hardware to ensure it is not faulty, and check if the charger provides sufficient power flow.
- Run a deep scan using a reliable antimalware tool.
- Ensure there is no electrical interference or grounding issue when you plug in your laptop to power outlet.
1. Close unwanted background processes
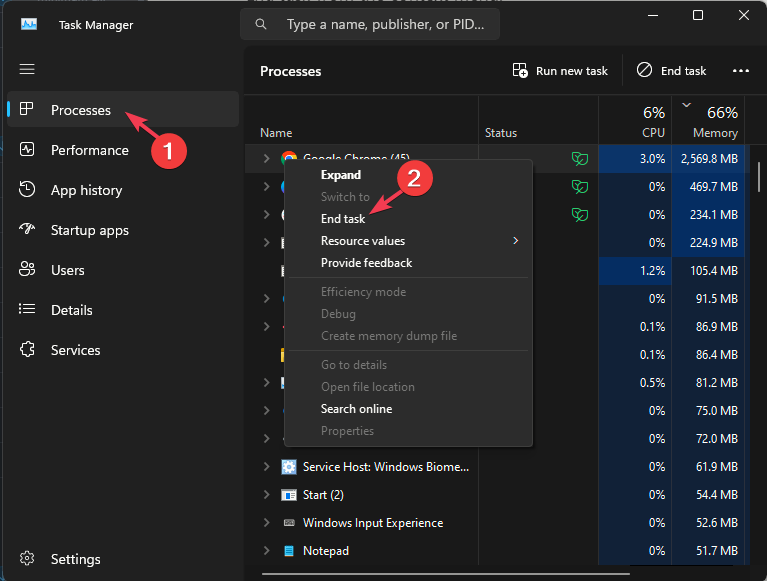
- Press Ctrl + Alt + Esc to open Task Manager.
- Go to the Processes tab, right-click all the unnecessary processes or apps one by one, and select End task from the context menu.
2. Edit the power settings
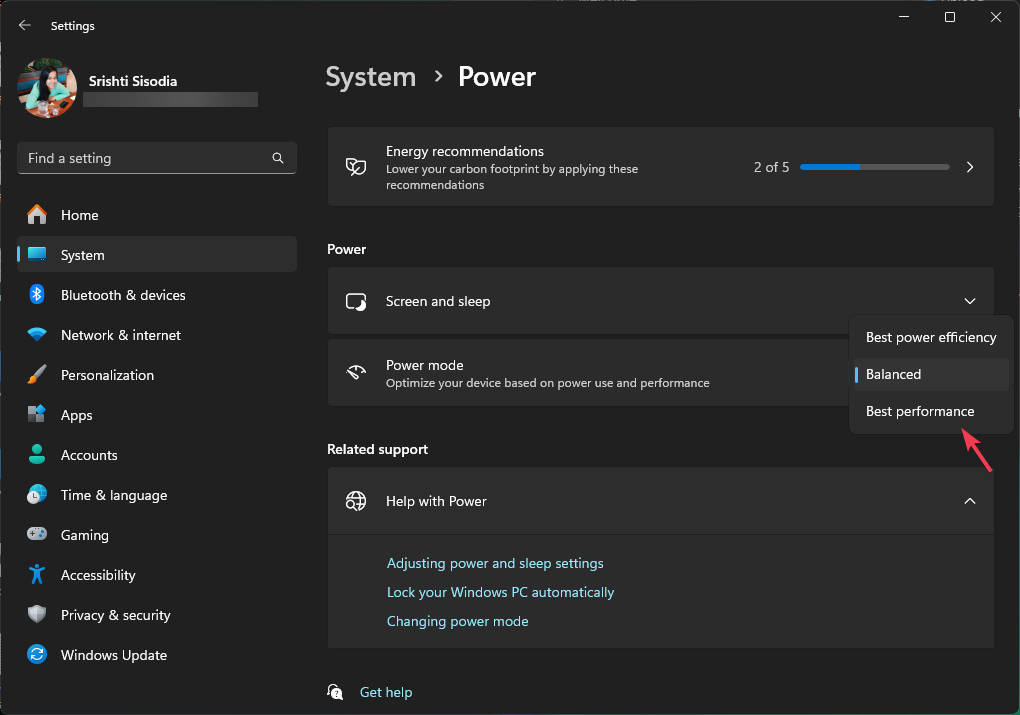
- Press Windows + I to open the Settings app.
- Go to the System, then select Power & battery.
- Locate Power mode, and select Best performance from the drop-down list.
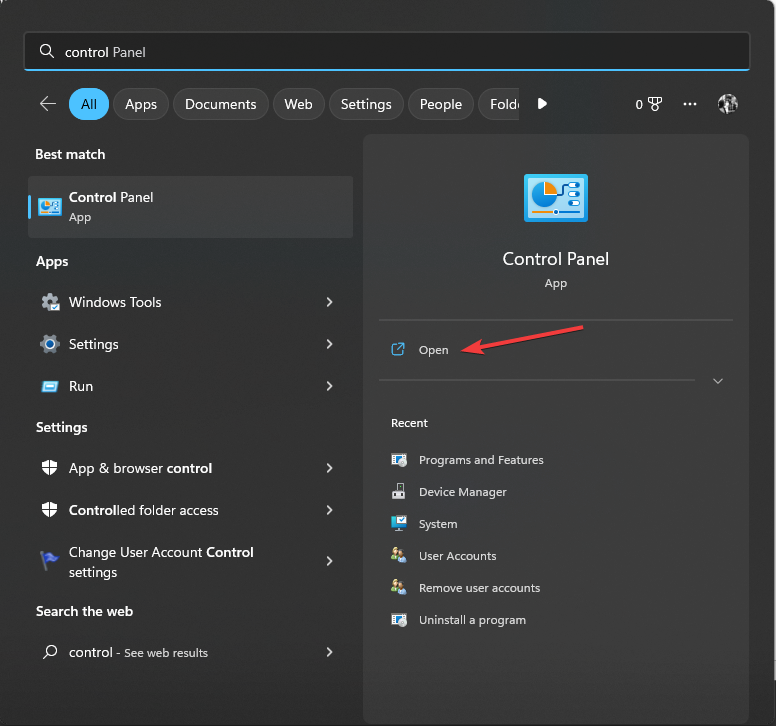
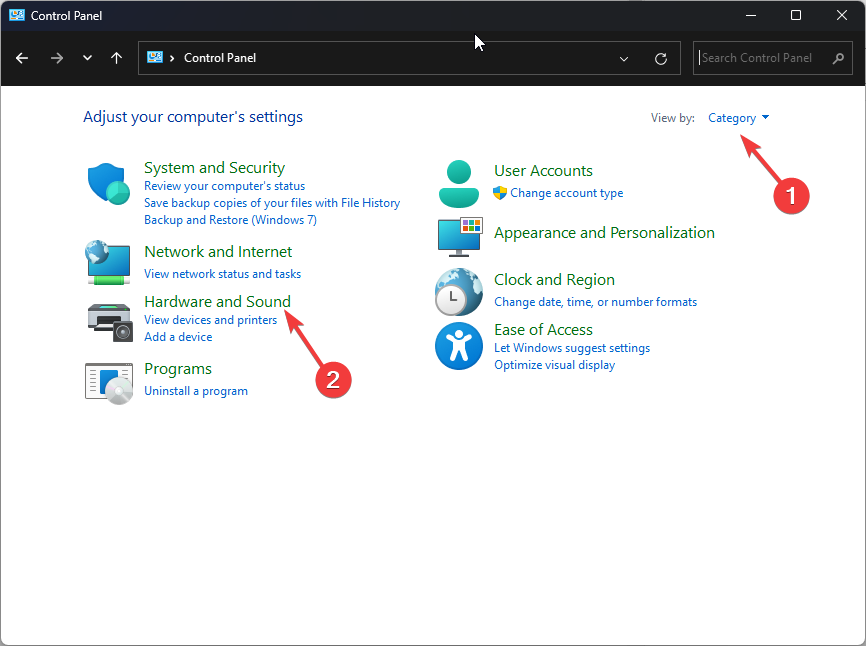
- Press the Windows key, type control panel on the search box, and click Open.
- Choose Category for View by, and select Hardware and Sound.
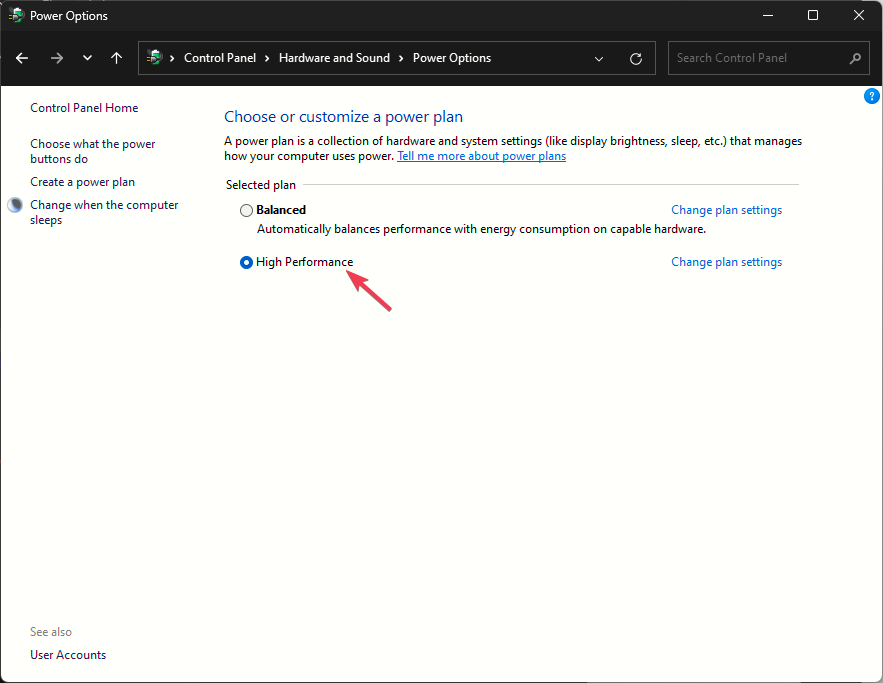
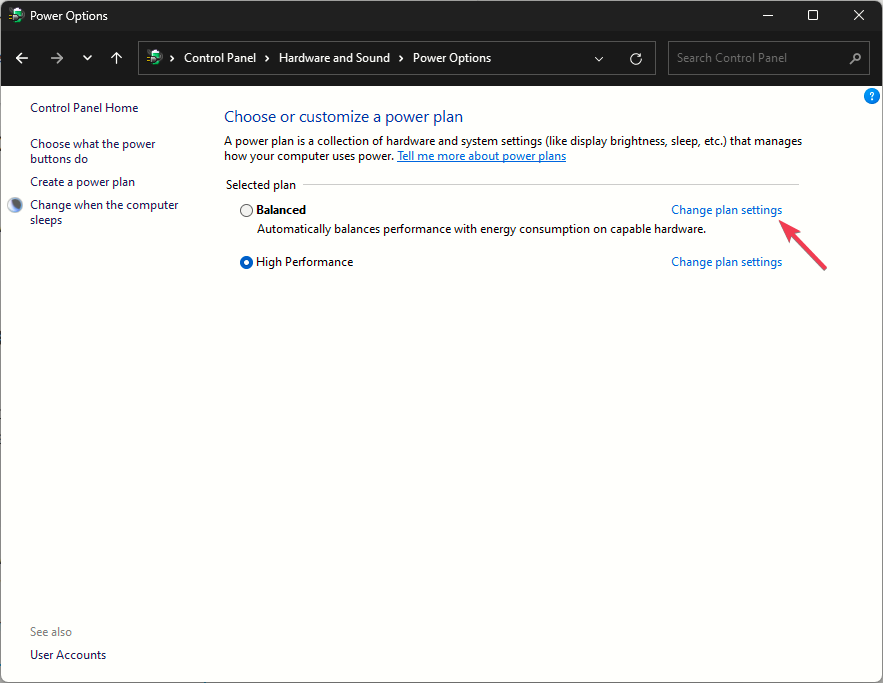
- Click Power Options.
- Under the Selected Plan option, choose Balance instead of High Performance.
3. Update the drivers
- Press Windows + R to open the Run window.
- Type devmgmt.msc and click OK to open the Device Manager.
- Go to each category of drivers listed, expand them one by one, and check if you see a yellow triangle exclamation mark.
- Right-click the one that has it, and select Update driver.
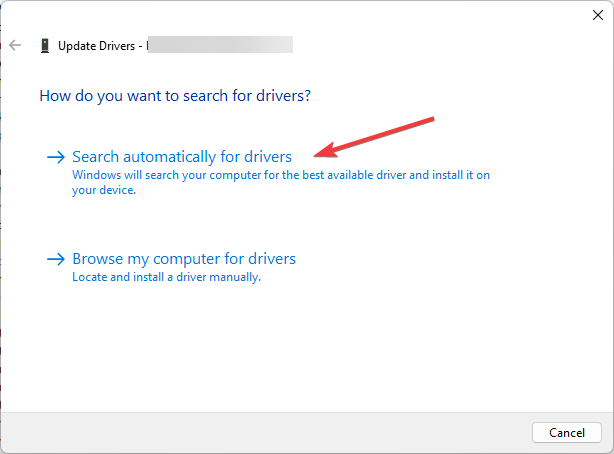
- Click Search automatically for drivers.
- Follow the on-screen instructions to complete the process.
If you see The best drivers for your device are already installed, follow these steps to reinstall the driver:
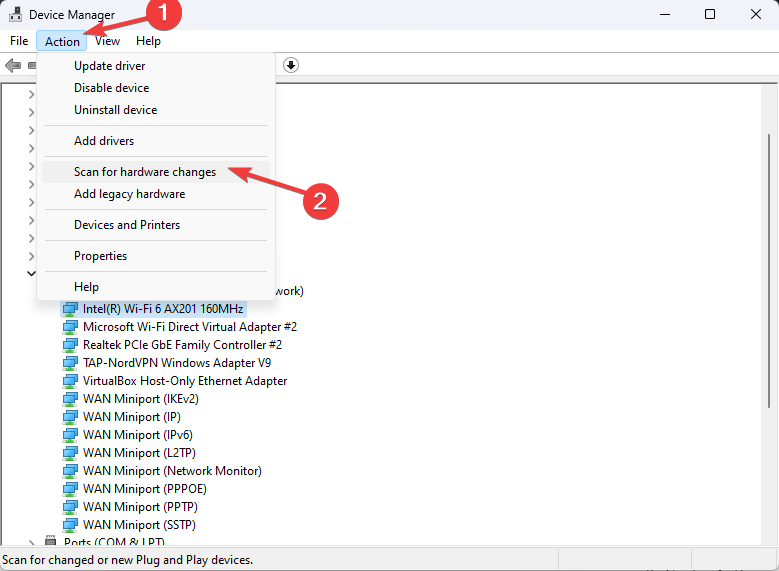
- Right-click the driver and select Uninstall device.
- Next, click Action, then choose Scan for hardware changes to reinstall the driver.
- Restart your computer to let the changes take effect.
- Download and install Outbyte Driver Updater.
- Launch the software.
- Wait for the app to detect all faulty drivers.
- Now, it will show you all the malfunctioning drivers listed to select the ones to Update or Ignore.
- Click on Update & Apply Selected to download and install the newest versions.
- Restart your PC to ensure the applied changes.

Outbyte Driver Updater
Secure your Windows PC with Outbyte from various errors caused by problematic drivers.Keeping the drivers up to date can help you fix other issues like Windows 10 running extremely slow; read this guide to learn more.
4. Modify the processor power management settings
- Press the Windows key, type control panel on the search box, and click Open.
- Choose Category for View by, and select Hardware and Sound.
- Click Power Options.
- Now, click the Change plan settings option.
- Select Change advanced power settings.
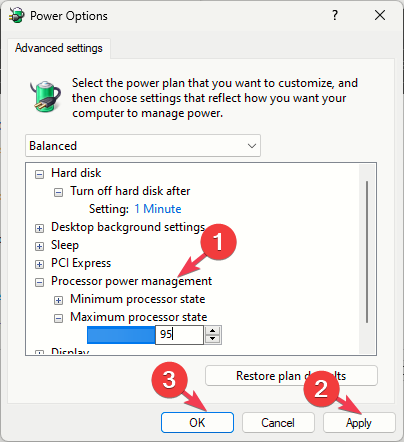
- On the Power Options window, click the Plus icon next to Processor power management.
- Click the Plus button next to Maximum processor state, and change the percentage next to Plugged into 95% or lower.
- Click Apply, then OK to save the changes.
5. Reset the BIOS settings
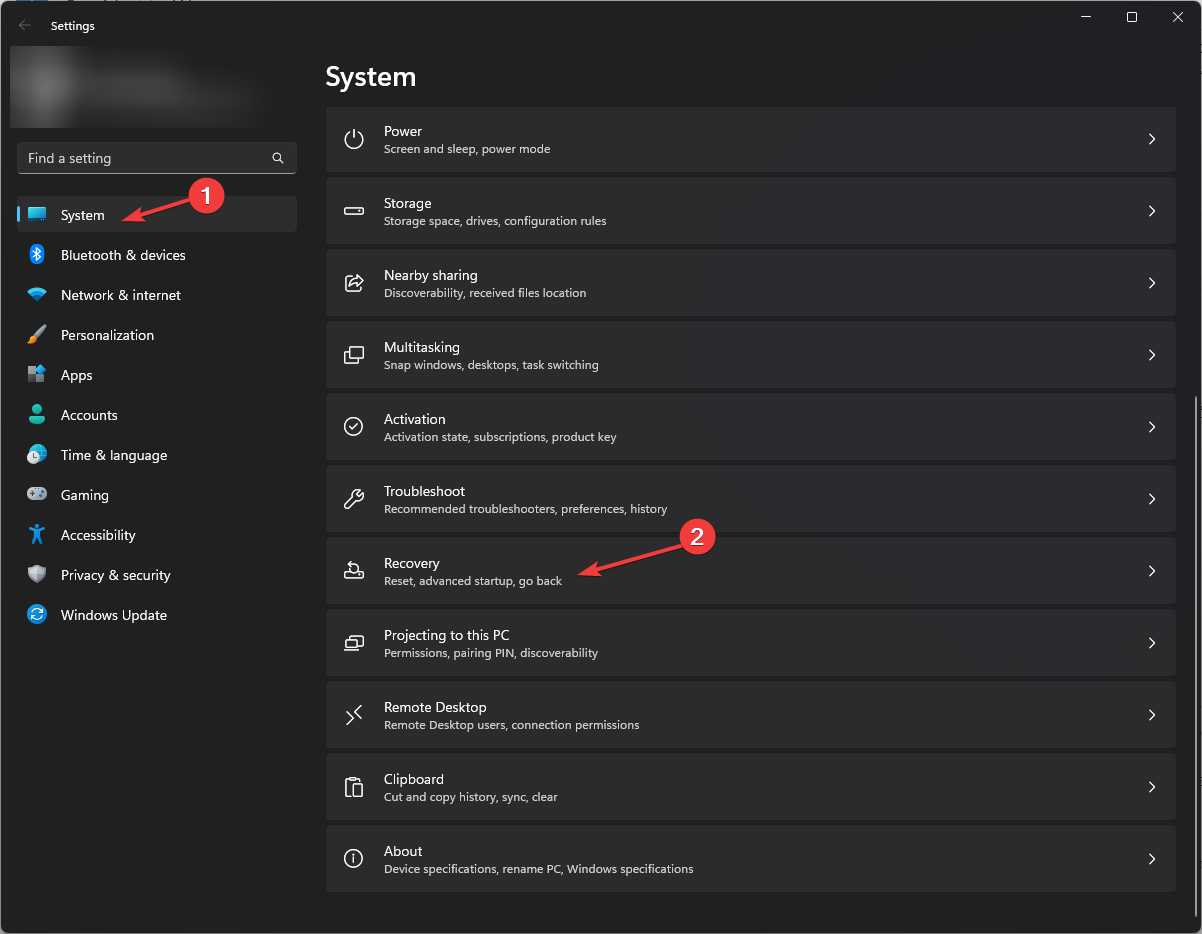
- Press the Windows + I to open the Settings app.
- Go to System, then select Recovery.
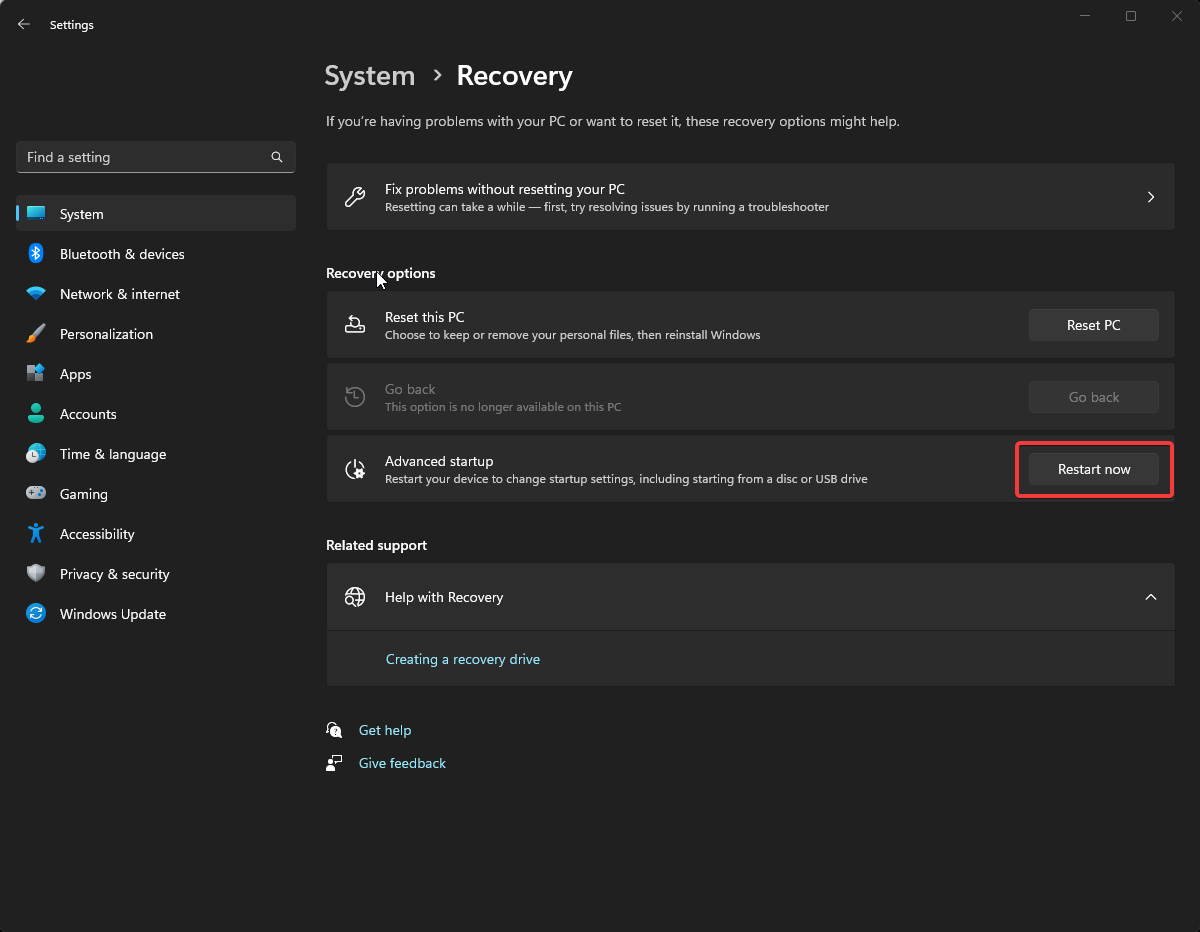
- Under the Recovery options section, look for Advanced Startup, and click the Restart Now button.
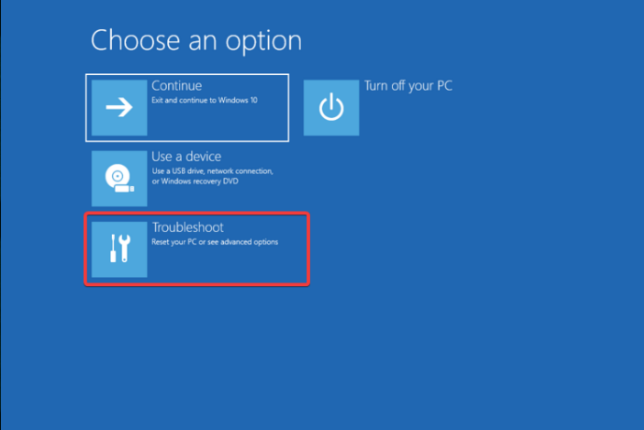
- On the Choose an option screen, select Troubleshoot.
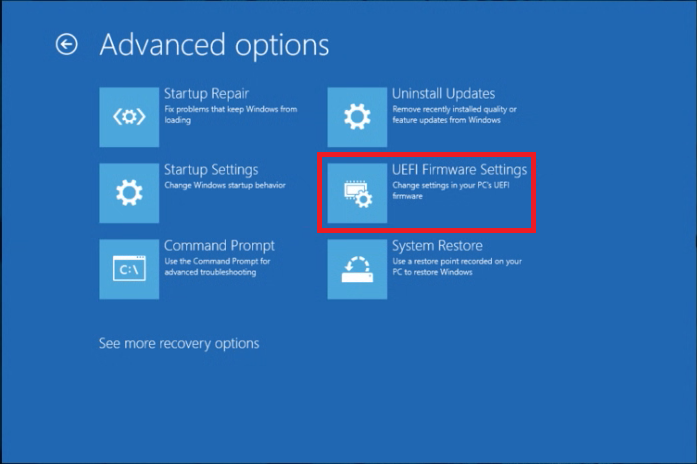
- Choose Advanced options on the Troubleshoot page.
- From the Advanced options screen, select UEFI Firmware Settings.
- Click Restart.
- Now, in the BIOS menu, go to File, then select Apply Defaults, then choose Exit.
The BIOS settings vary for each computer, depending upon the system manufacturer. Therefore, it is essential to locate similar options in the BIOS to reset it to default settings.
Resetting BIOS can also help if your Windows 10 won’t boot on your computer; read this guide to get other solutions.
To conclude, to fix the laptop lagging when charging issue, you need to check your laptop for overheating and if you have a dedicated graphics card, check its control panel and optimize the settings for better performance.
Remember that your power adapter should be in working condition, and the power outlet should be able to provide the right flow.
If nothing has worked for you so far, you must try to reset your computer to fix all the inconsistencies once and for all.
Did we miss a step that helped you? Don’t hesitate to mention it in the comments section below. We will happily add it to the list.










User forum
0 messages