Laptop Won't Shut Down: 7 Easy Methods That Will Fix It
Adjust your power settings or try our other solutions to fix this issue
6 min. read
Updated on
Read our disclosure page to find out how can you help Windows Report sustain the editorial team. Read more
Key notes
- If your laptop is not shutting down, it might be because of the Hybrid shutdown feature.
- Changing the Intel Management Engine Interface driver setting is another effective way to fix the issue.
Windows is a great operating system, but many reported that their Windows laptop won’t shut down properly.
Shutdown-related problems, like the shutdown button not working, are among the prominent issues, so let’s see how we can fix them.
Why my laptop won’t shut down?
When it comes to shutdown issues, here are the most common causes:
- Power settings – In some instances, power settings such as Hybrid Sleep can affect your PC. Many users also reported that Hybrid Sleep is missing on their PC, so check if it’s available.
- Power plan configuration – Improperly configured power plan can cause this issue. In case the power plans are missing, or the laptop won’t shut down with the Power button, you’ll need to restore them to fix this problem.
- Missing updates – Keeping your system updated is important if you want to keep your system bug-free. Sometimes, PC bugs can interfere with the process and can lead to the PC not shutting down fully.
Below are some of the variations of the issue as reported by users and the possible causes:
- Laptop won’t shut down or restart, hibernate, or lock: According to users, their laptops won’t shut down, restart, hibernate, or lock. This can be a big problem, but you should be able to fix it using our solutions.
- The laptop will not shut down when the lid is closed: According to users, their laptops won’t shut down when the lid is closed. This minor problem can be fixed by changing your power settings.
- Laptop won’t shut down with the Power button: Few users reported this problem while trying to turn off their laptop with the power button. This issue is caused by your power settings and can be quickly resolved.
- My laptop won’t shut down, it just restarts: Several users reported that their laptop wouldn’t shut down, instead of shutting down, their laptop restarts.
- Laptop not shutting down black screen: Some users reported a black screen while trying to shut down their laptops. This can be a big problem, but you can fix it using our solutions.
- Laptop won’t sleep, turn off: Sometimes your laptop won’t sleep or turn off. This issue can cause many problems, but you should be able to fix it by changing your power settings.
- My laptop won’t turn off but the power light is on: If the laptop does not turn off though the power light indicates being pressed, it’s likely misconfigured power settings or corrupt system files to blame.
How do I fix a laptop that won’t shut down?
Before we start fixing, there are a couple of quick checks and solutions that you can perform:
- Disconnect USB peripherals – Users reported issues using USB peripherals, such as USB audio cards. If you have those, disconnect them and check if the problem is gone.
- Clean your laptop from dust – Dust can sometimes cause issues with shutdown, so use pressurized air to properly clean your laptop.
- Remove your laptop battery – A quick way to fix this issue can be to remove your laptop battery. After doing so, wait a minute or two and connect it again.
1. Disable Hybrid Shutdown manually
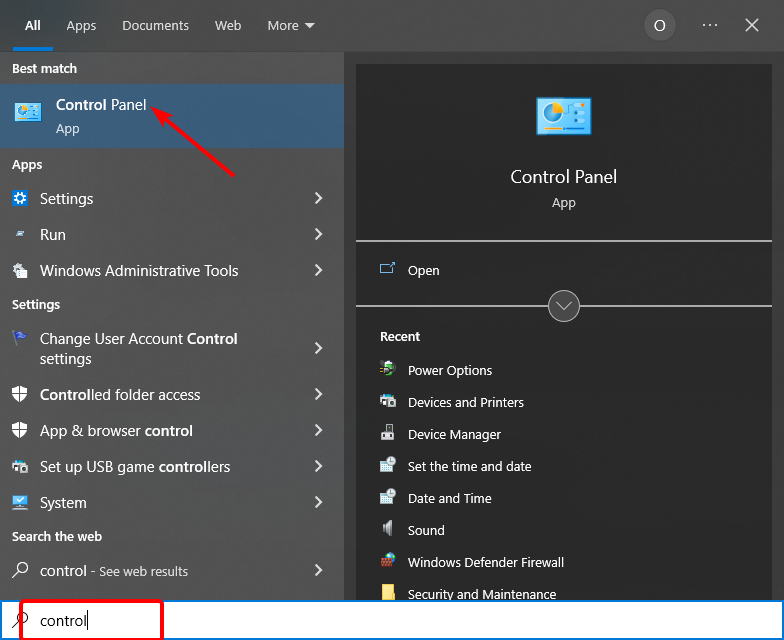
- Press the Windows key + S, type Control, and click on Control Panel.
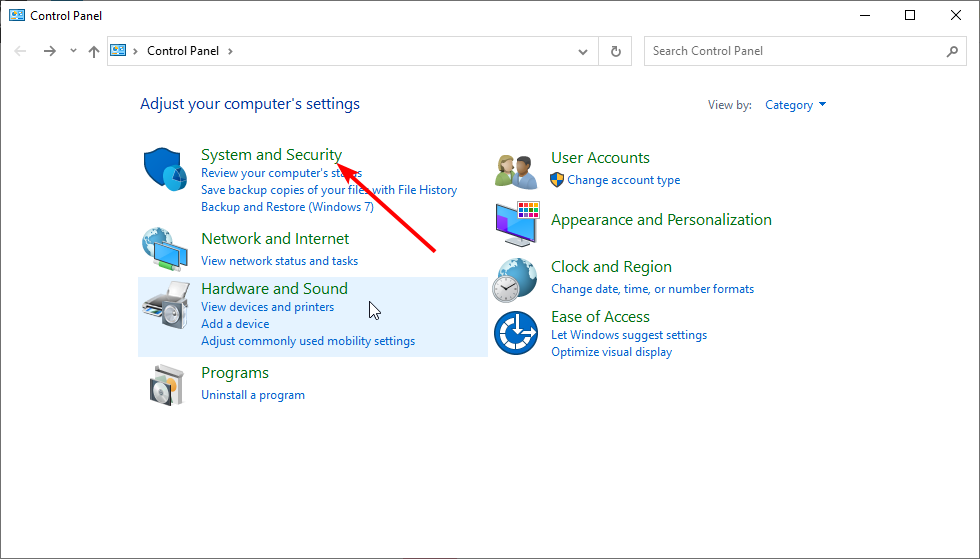
- Choose the System and Security option.
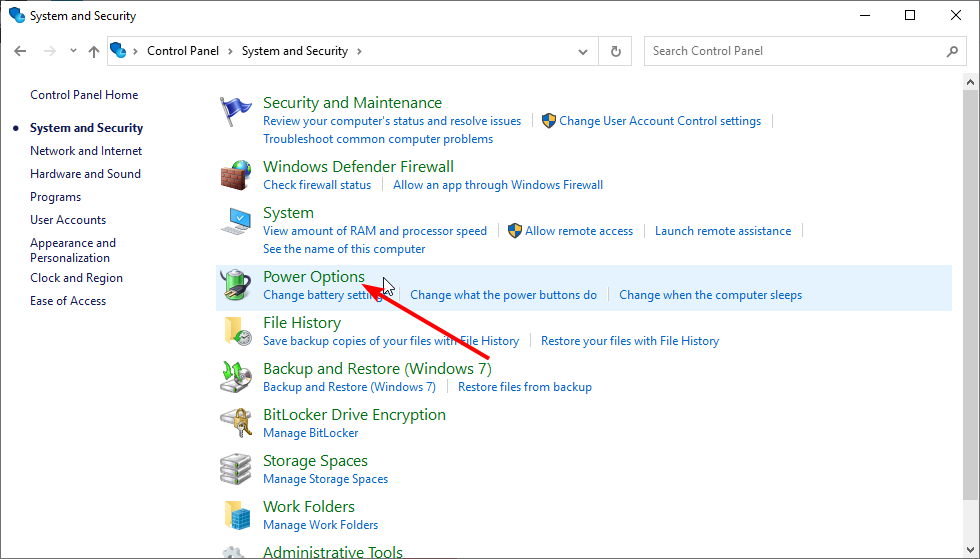
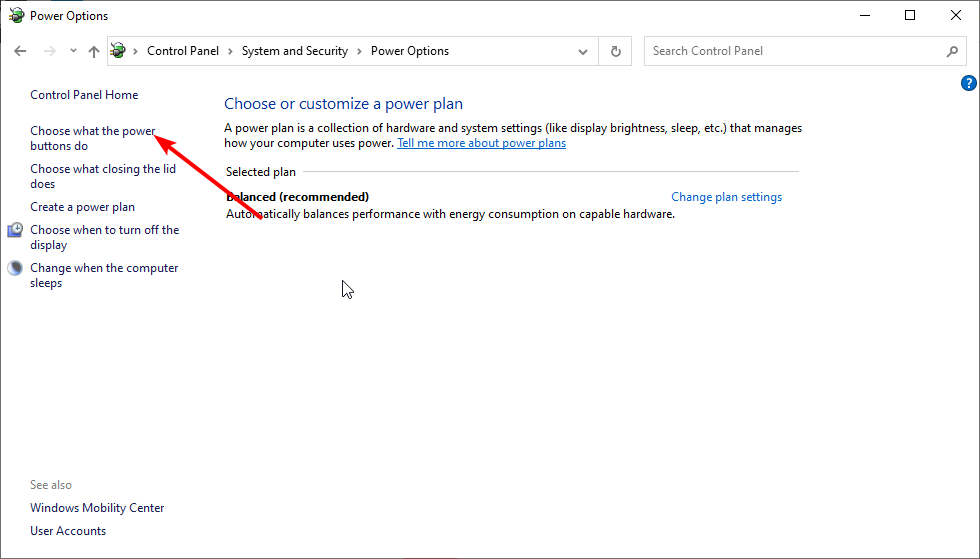
- Select Power Options.
- Click the Choose what the power buttons do option in the left pane.
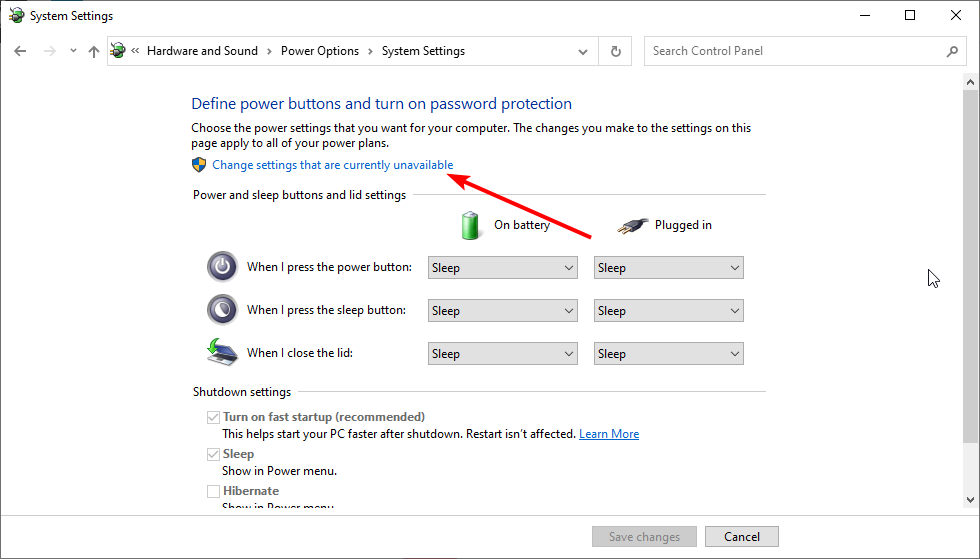
- Click on Change settings that are currently unavailable.
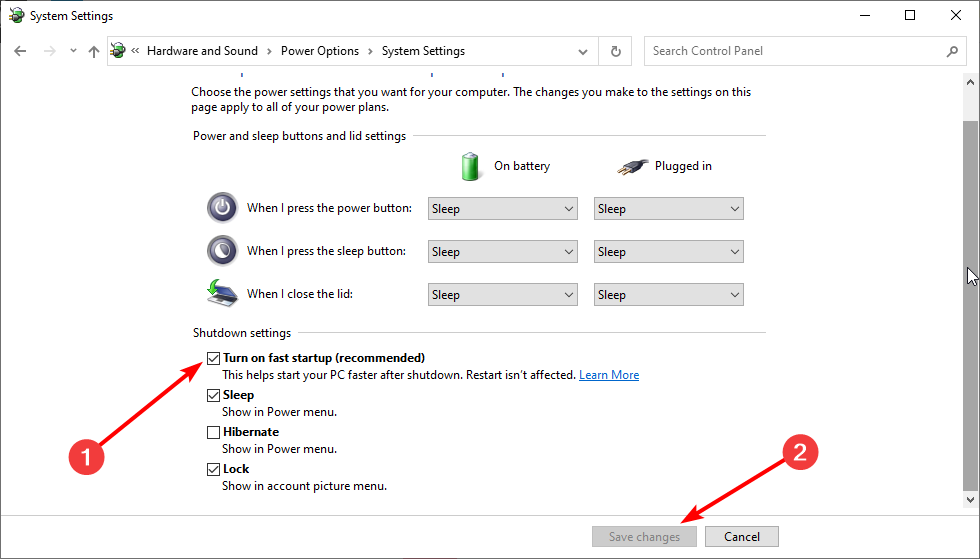
- Uncheck the Turn on fast startup (recommended) checkbox to disable Hybrid Shutdown.
- Click the Save changes button to save the modified settings.
- Close the Power Options window when done.
2. Perform a Full Shutdown
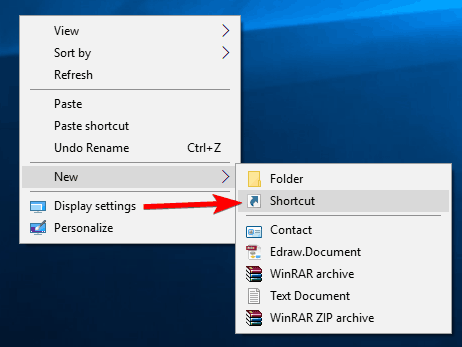
- Right-click on your Desktop.
- Go to New and select Shortcut.
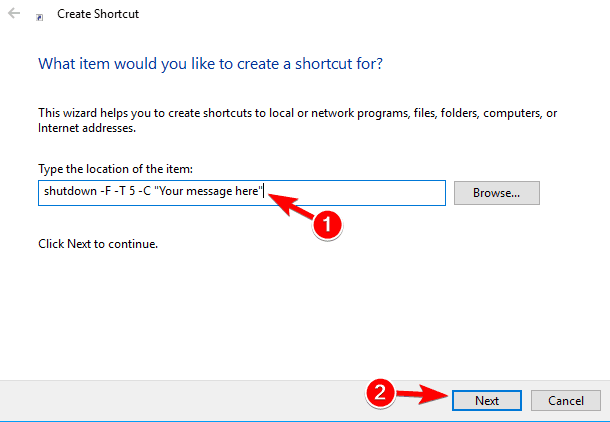
- Copy the text below in the Type the location of the item space:
shutdown -F -T ## -C "Your message here" - Note that ## can be any number from 0 and 315360000, and “Your message here” could be any text you want.
- Click Next.
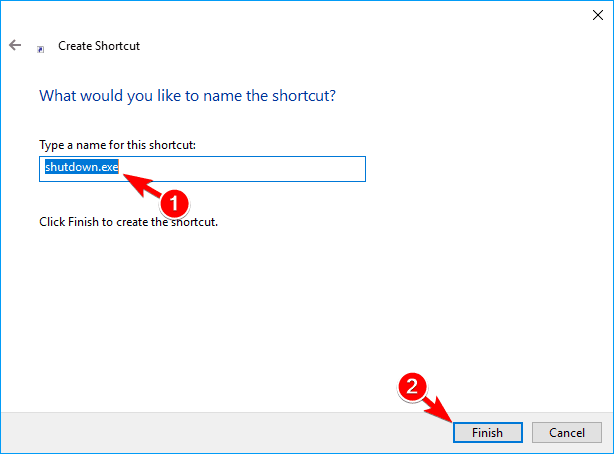
- Name the shortcut as you want and click on Finish.
- Pin the shortcut to your start menu, and you’re ready.
After doing that, click the newly created shortcut to perform a complete shutdown. Remember that this is just a workaround, but it might help you with the laptop not shutting down issue.
3. Run Windows Update troubleshooter
- Press the Windows key + I to open the Settings app.
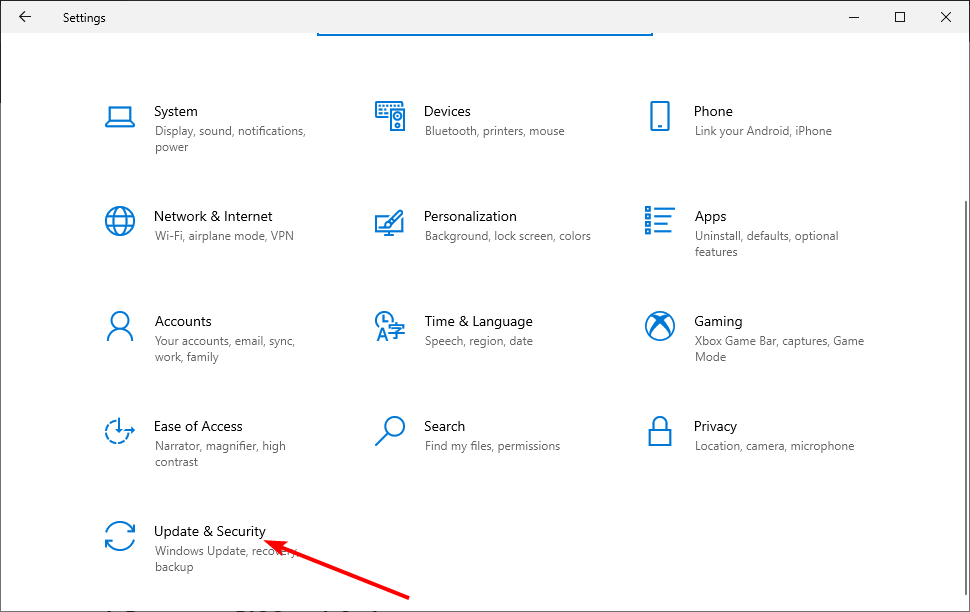
- Choose the Update & Security option.
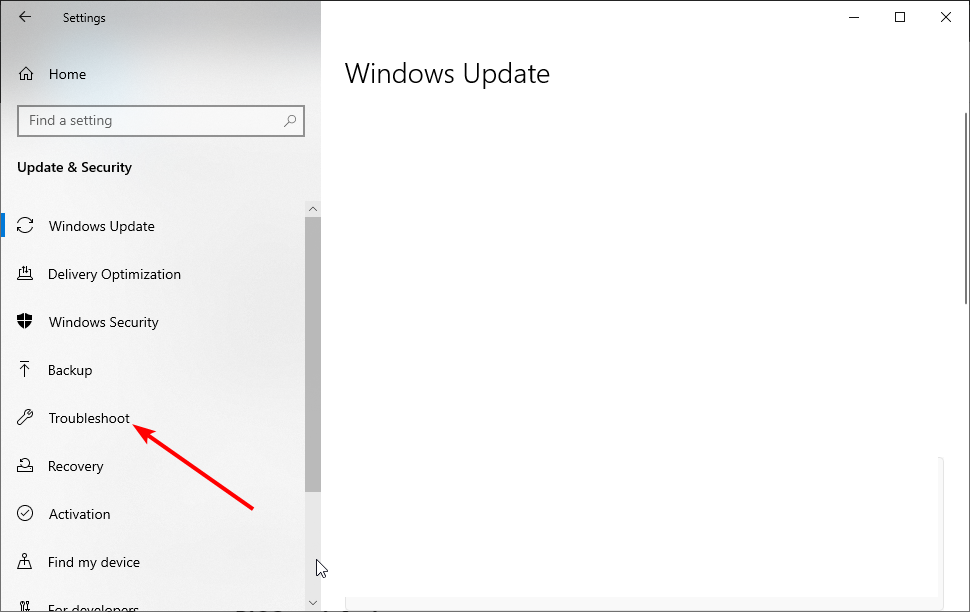
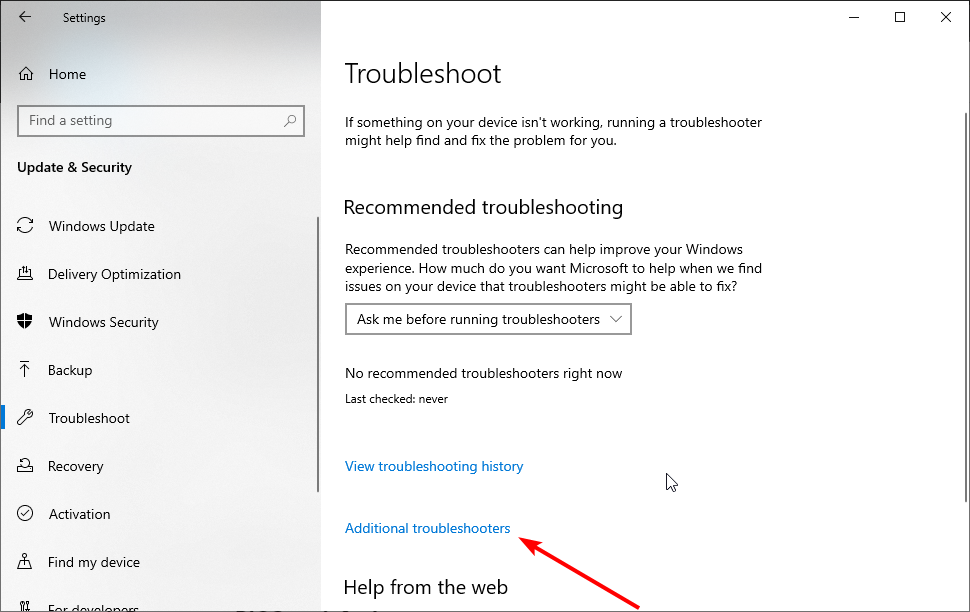
- Click the Troubleshoot option in the left pane.
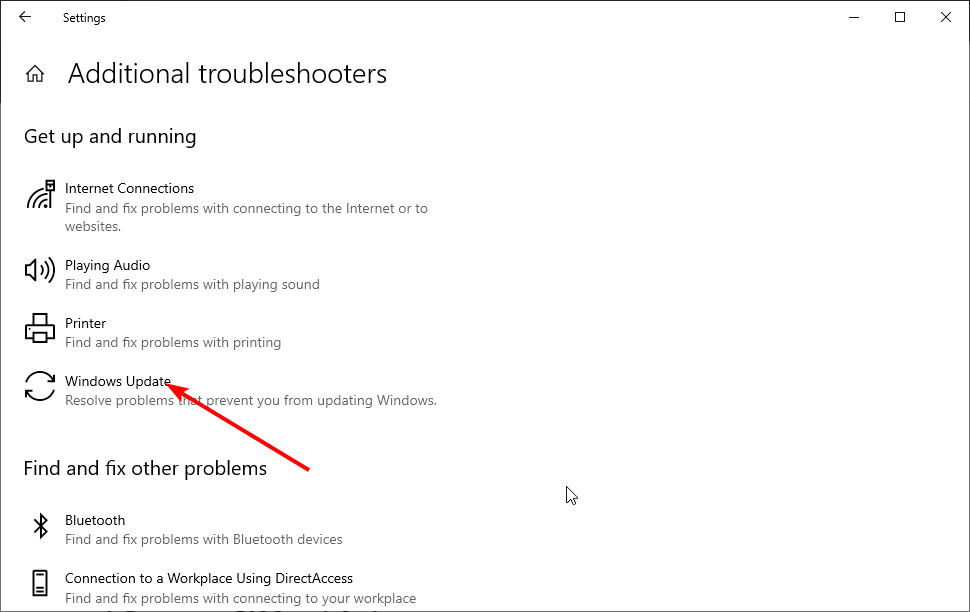
- Select Additional troubleshooters.
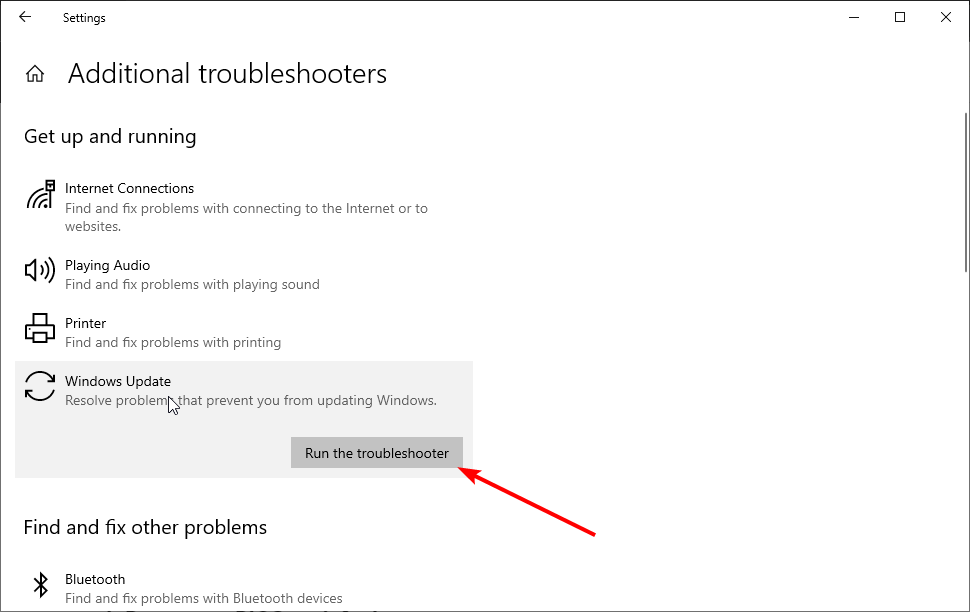
- Click on the Windows Update option.
- Finally, click the Run the troubleshooter button.
According to users, problems after a Windows Update can sometimes prevent your laptop from shutting down.
After the scan is finished, check if the problem is resolved. Several users reported that running the Power Troubleshooter fixed the issue, so be sure to try that as well.
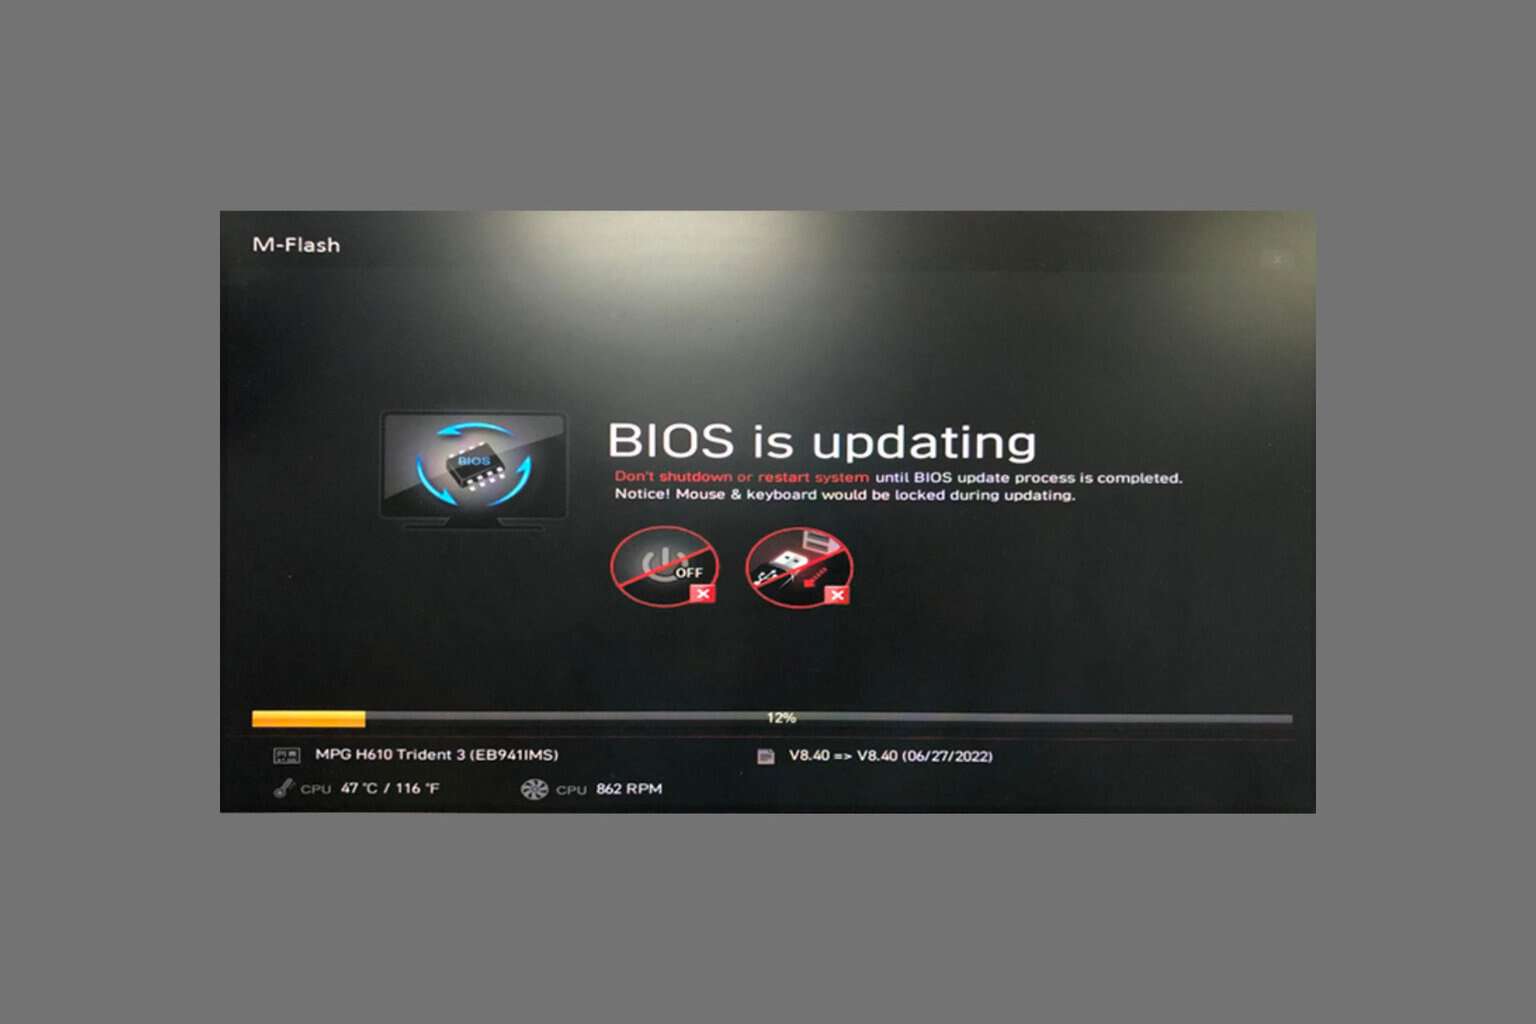
4. Reset your BIOS to default
- Restart your PC.
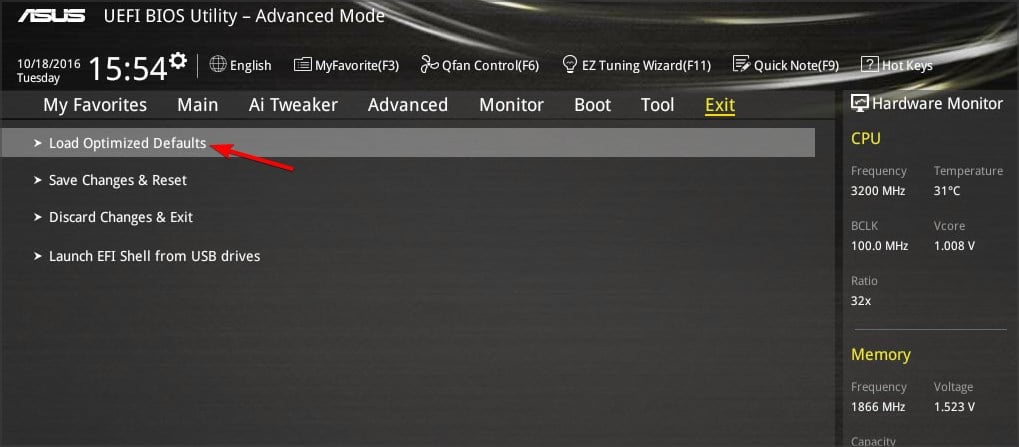
- While booting, press Del or another dedicated key to access BIOS.
- Navigate to the Exit section and select Load Optimized Defaults.
- Confirm that you want to reset your BIOS.
- Save changes.
 NOTE
NOTE
5. Change advanced power options
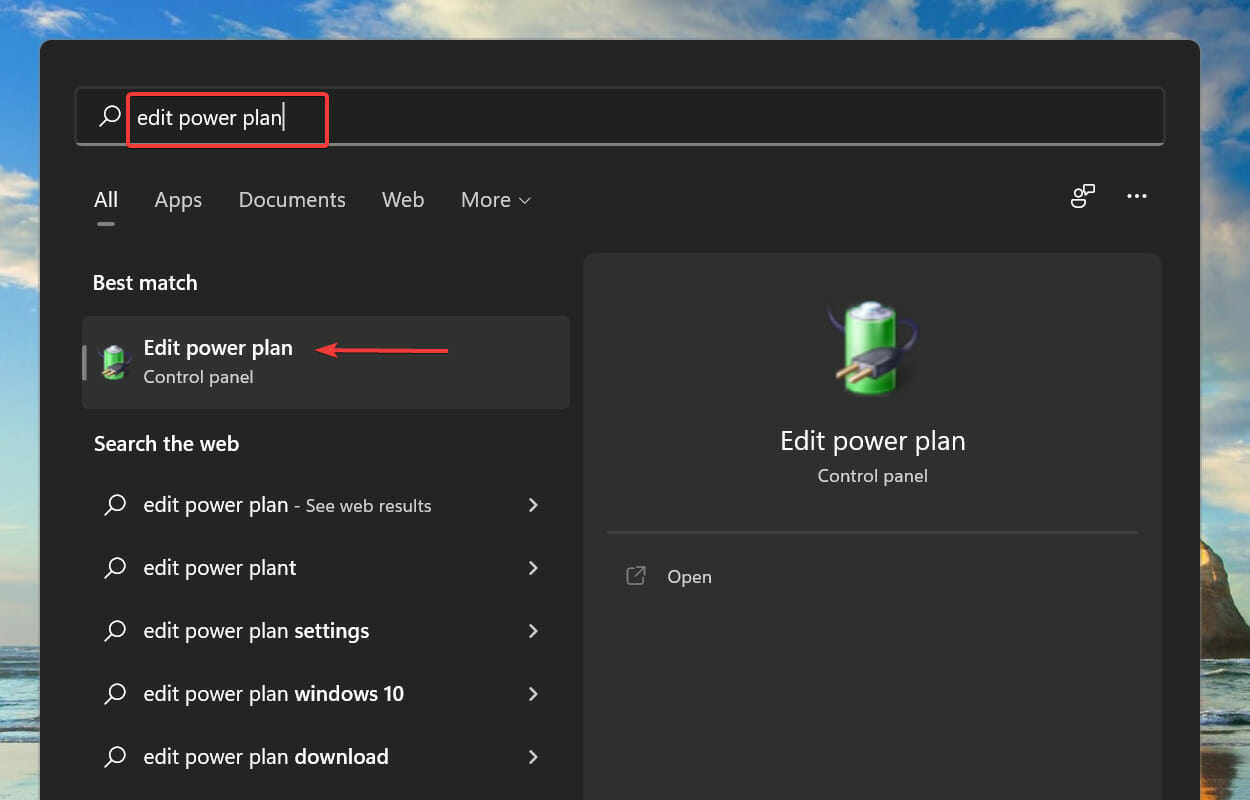
- Press the Windows key + S and type power plan. Select Edit power plan.
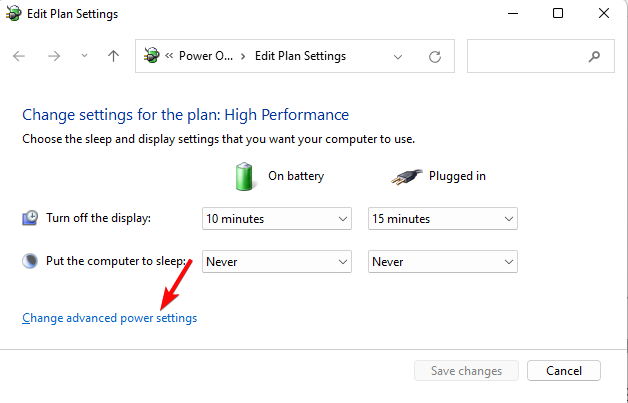
- Click on Change advanced power settings.
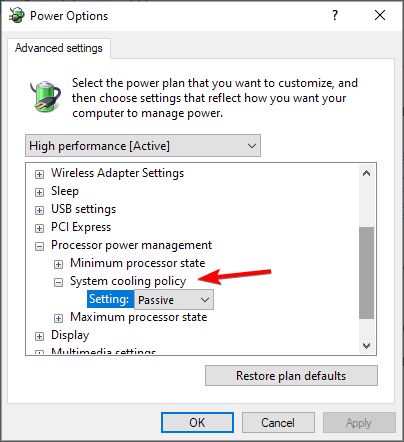
- Expand Processor power management. Now go to System cooling policy.
- Set Battery to On and save changes.
6. Reset your power plan to default
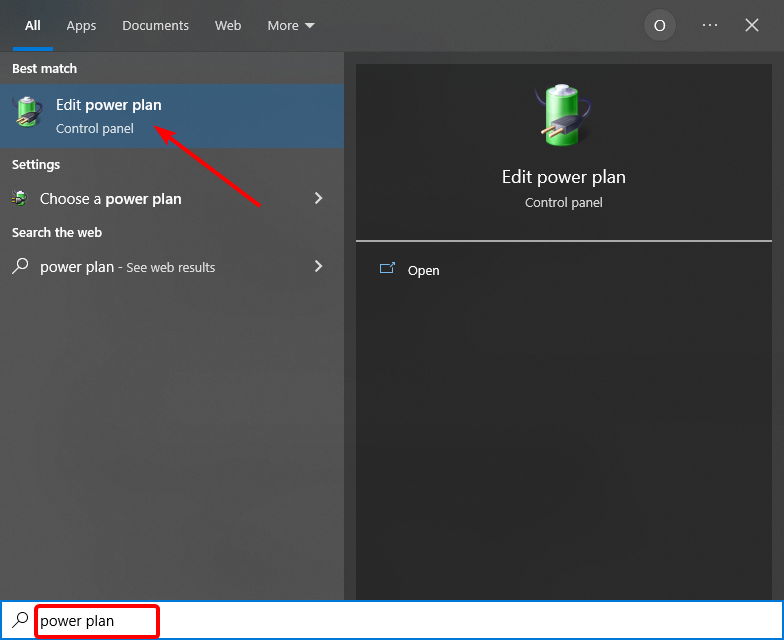
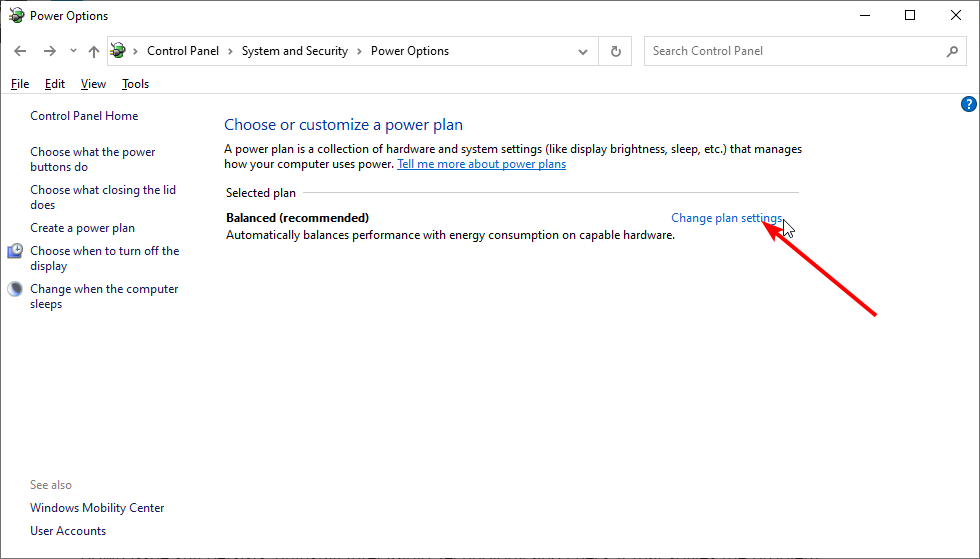
- Press the Windows key + S and type power plan.
- Choose Edit power plan.
- Click the Change plan settings under your Preferred power plan.
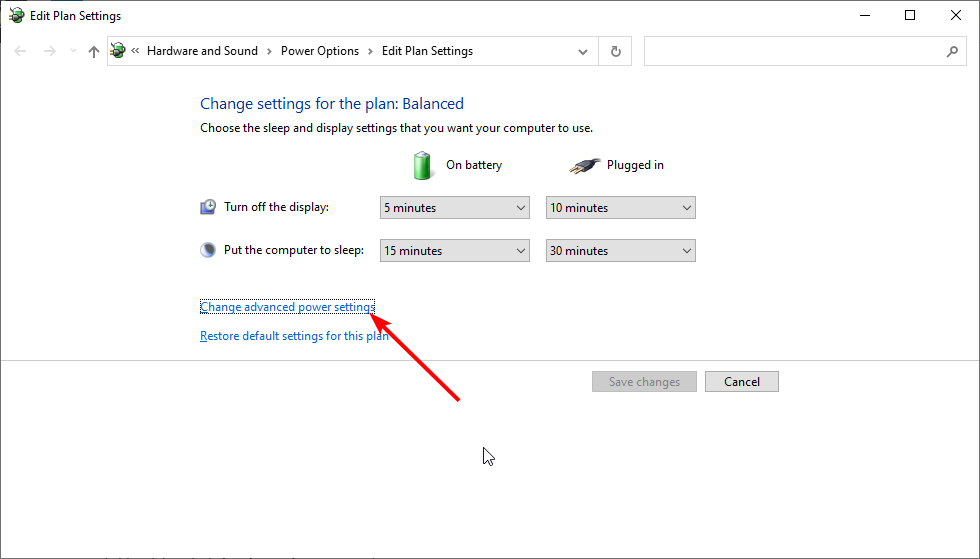
- Now, click on Change advanced power settings.
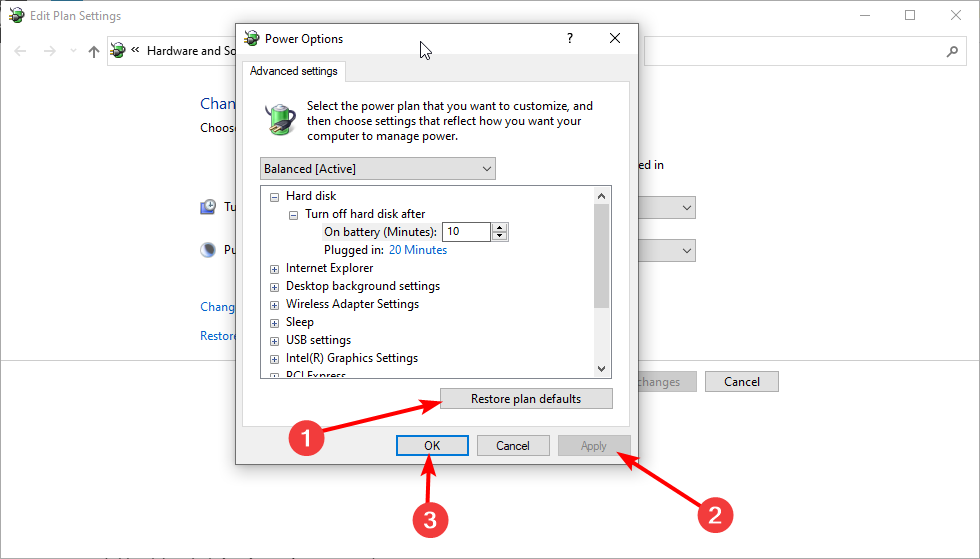
- Click the Restore plan defaults button.
- Finally, click Apply and OK to save changes.
After resetting your power plan to default, the Windows 10 laptop not shutting down issue should be resolved.
7. Uninstall Intel Management Engine Interface
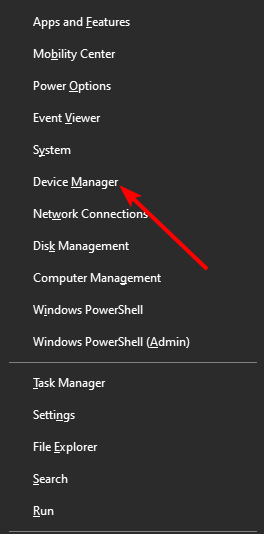
- Press the Windows key + X and choose Device Manager from the list.
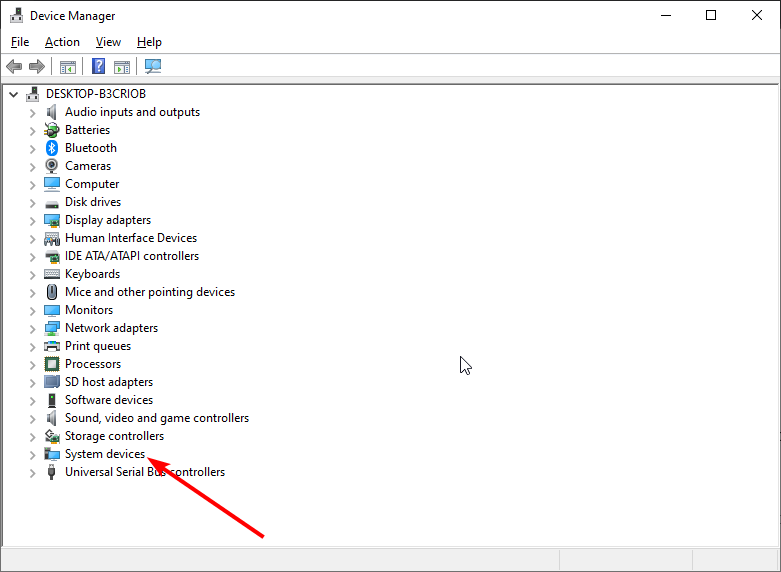
- Double-click the System devices option.
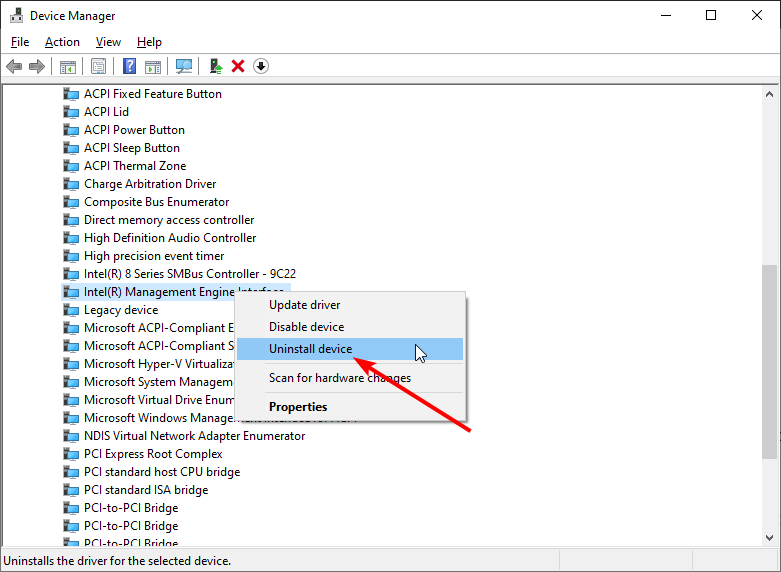
- Right-click on Intel(R) Management Engine Interface.
- Choose Uninstall device from the menu.
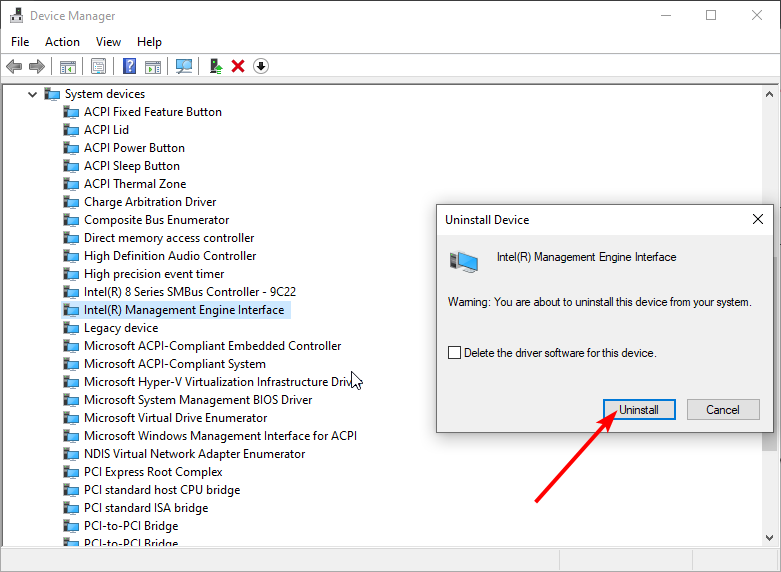
- Now, click on the Uninstall button to confirm the action.
According to users, if your HP, Dell, or Lenovo Windows 10 laptop is not shutting down fully, you might have to uninstall the Intel Management Engine Interface.
If you want to know how to schedule an automatic shutdown on Windows 10, check our detailed guide to do it quickly.
If you have any other suggestions or questions, don’t hesitate to leave them in the comments section below, and we’ll be sure to check them out.




User forum
37 messages