Change the Boot Logo or Screen on Windows 11 [How to]
This process requires third-party tools
3 min. read
Updated on
Read our disclosure page to find out how can you help Windows Report sustain the editorial team. Read more
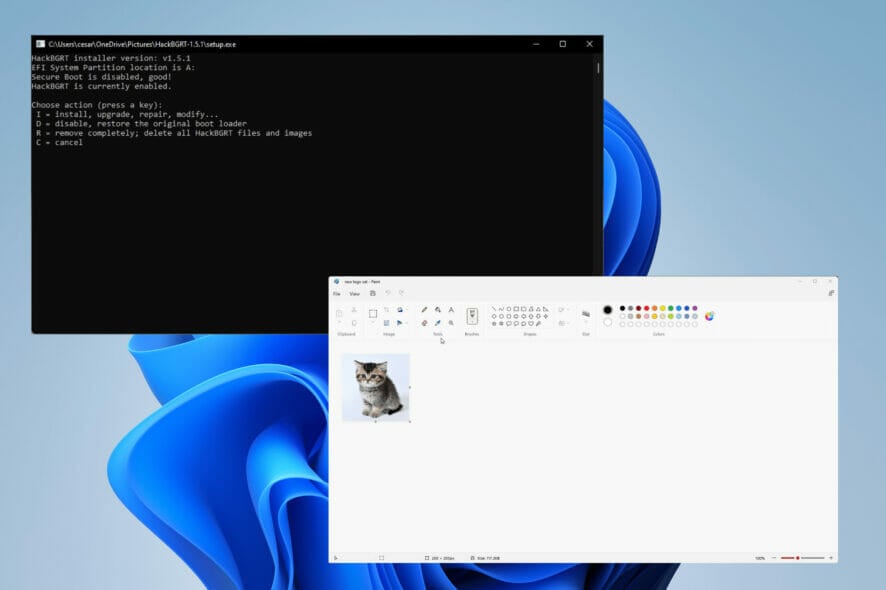
Windows 11 isn’t known for its customization features, but many are wondering how to change boot logo in Windows 11, and in this guide, we’re going to show you how to do it.
How do I change the startup logo in Windows 11?
1. Check for UEFI
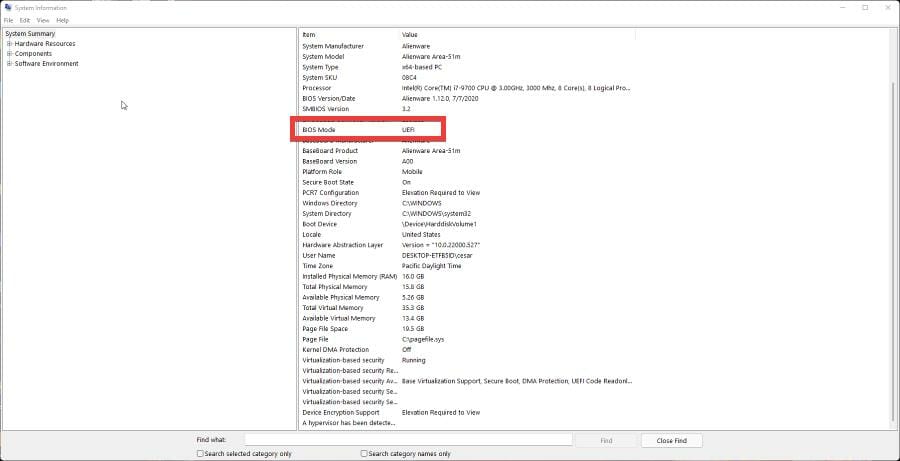
- Now you can get started on changing the logo. Start by search for System Information in the search bar.
- Click on the System Information entry.
- In System Information, make sure that it says UEFI under BIOS Mode.
- If it doesn’t, then you won’t be able to change the boot logo.
2. Disable Secure Boot
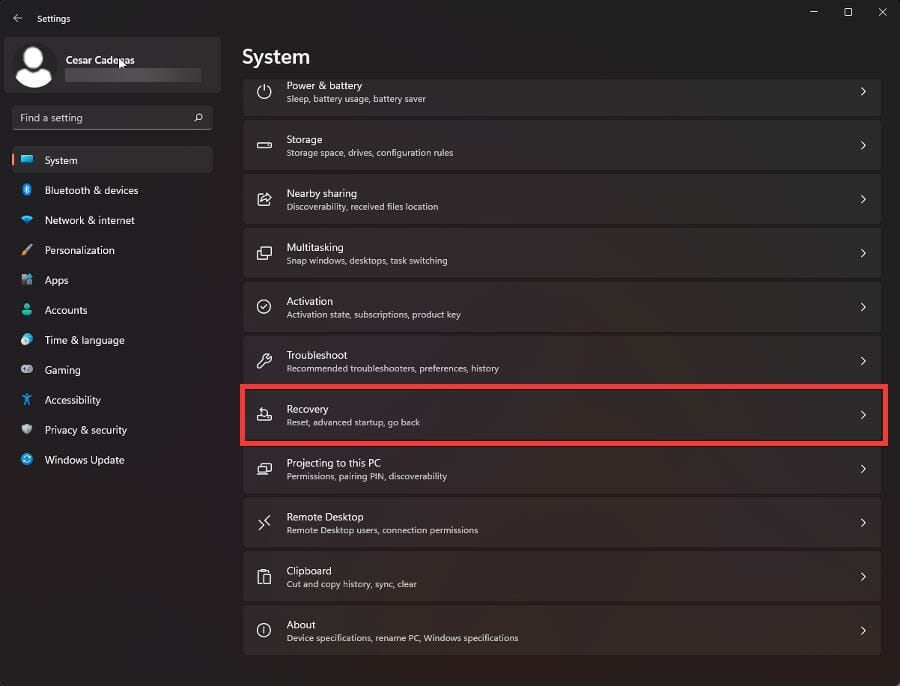
- Open the Settings menu and stay on the System tab. Scroll down until you see Recovery.
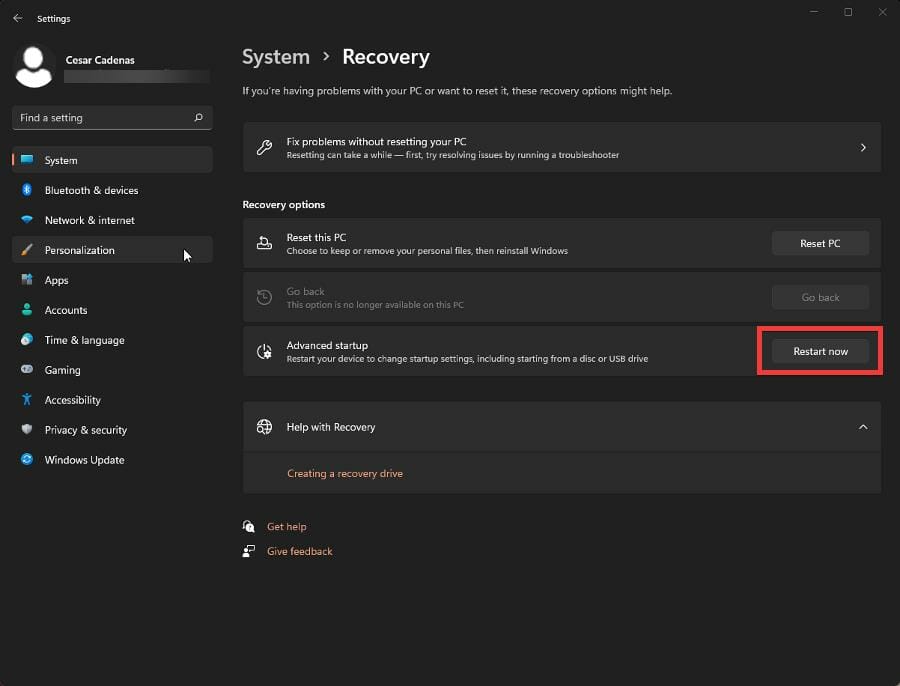
- Click Recovery. Click the Restart now button next to Advanced startup. Make sure your work is saved before clicking.
- In the advanced startup menu, select Troubleshoot. Next, go to Advanced options. Lastly, select UEFI Firmware Settings.
- Click Restart under UEFI Firmware Settings.
- After a reboot, you will be in your computer’s BIOS.
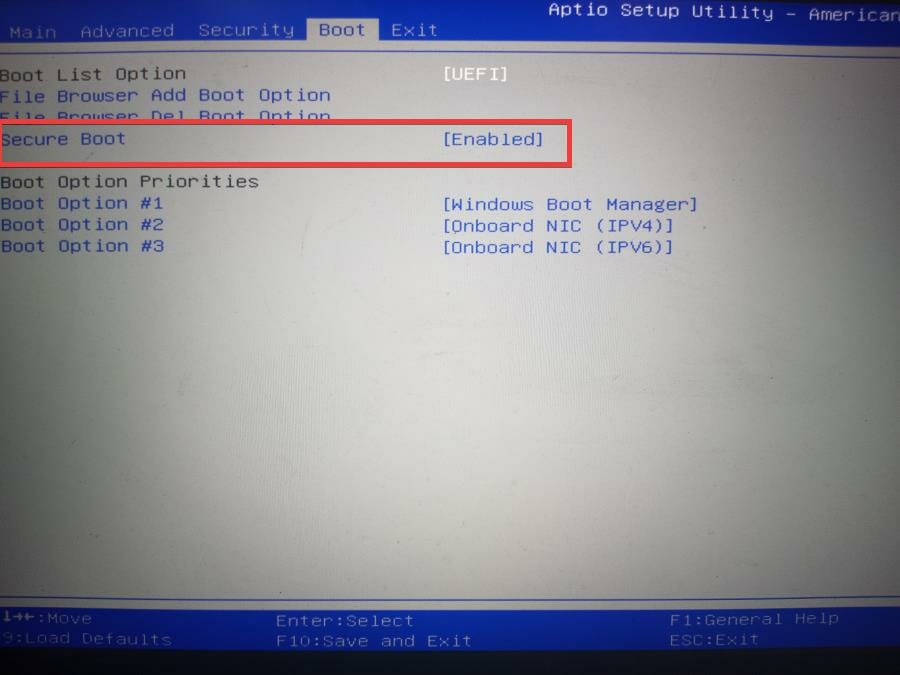
- With your keyboard’s arrow keys, move on to the Boot tab. Move the highlighted text down to Secure Boot.
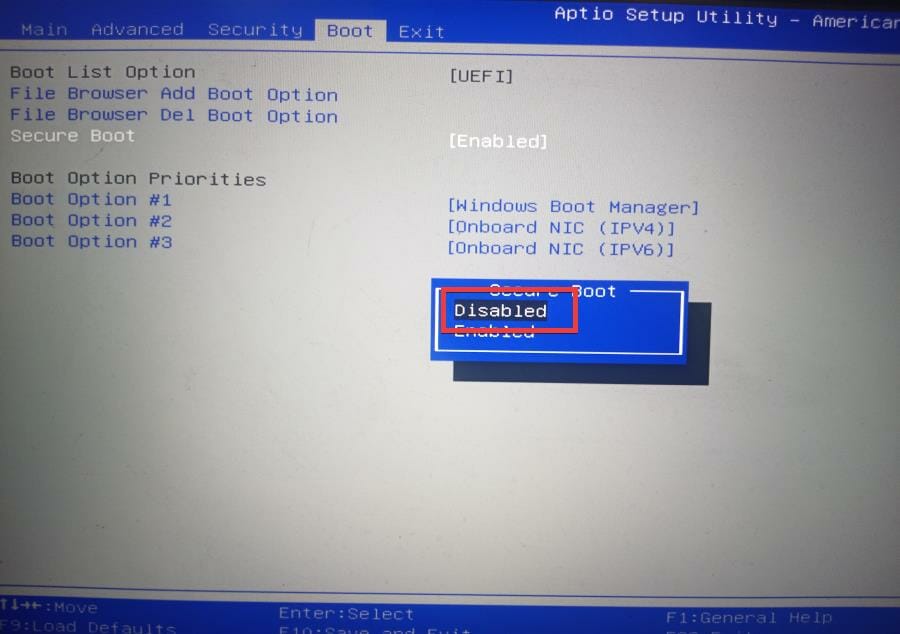
- Hit Enter and select Disabled.
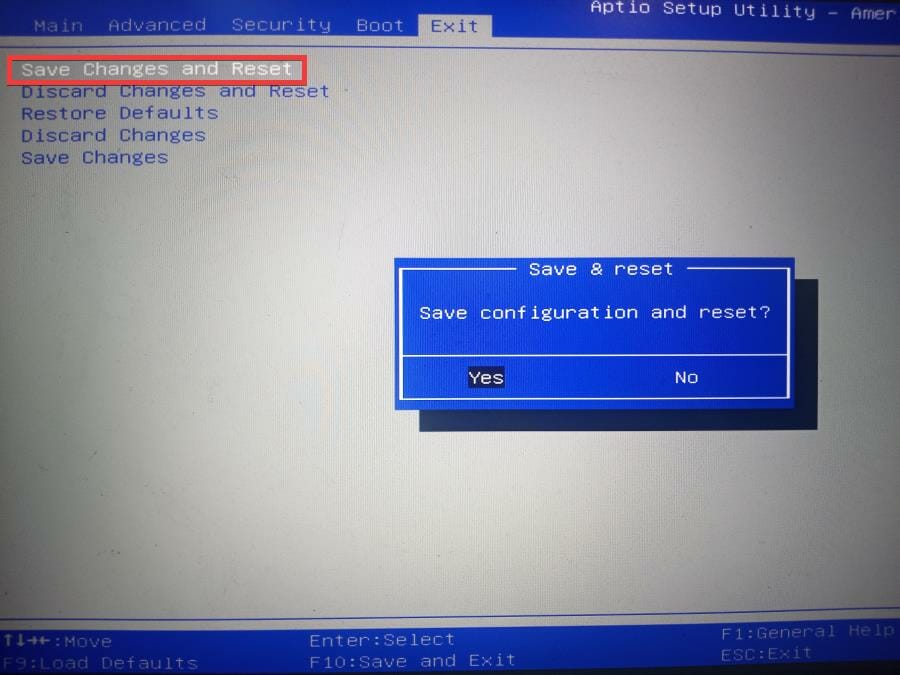
- Once done, go back up to the tab bar at the top and scroll over to Exit. Select Save Changes and Reset.
- Save changes.
3. Create the logo
- Open the search bar and look for the Paint app.
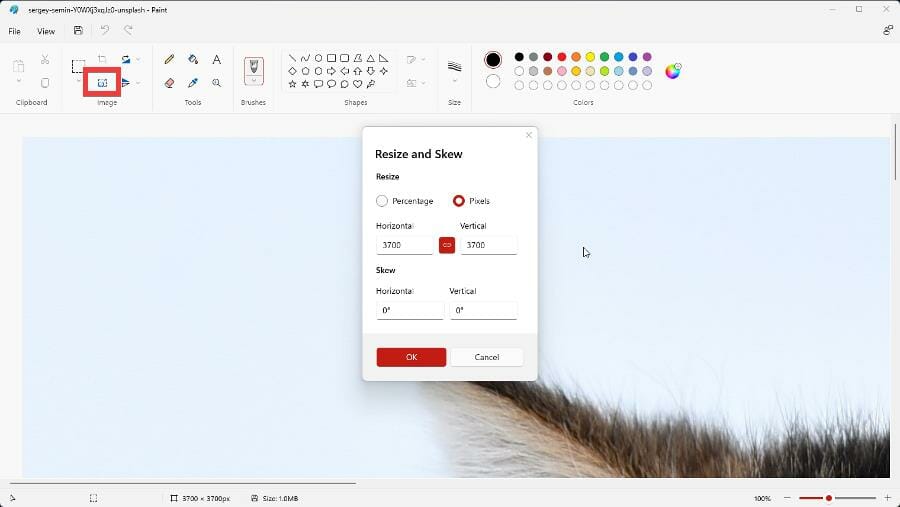
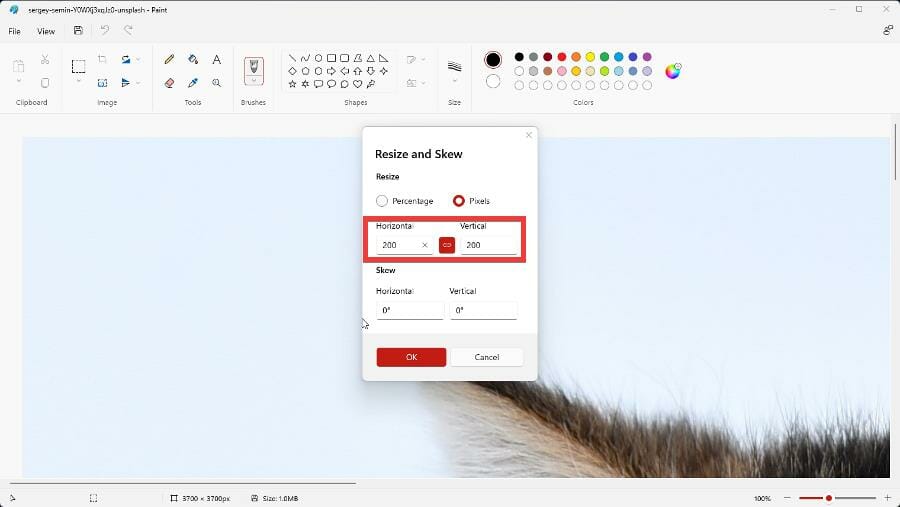
- Open the image you intend to use for your logo. Select the Resize tool in Paint.
- In the Resize and Skew tool, ensure that Pixels is selected. Set the Horizontal and Vertical values to 200 pixels. The new logo must be 200 x 200 pixels.
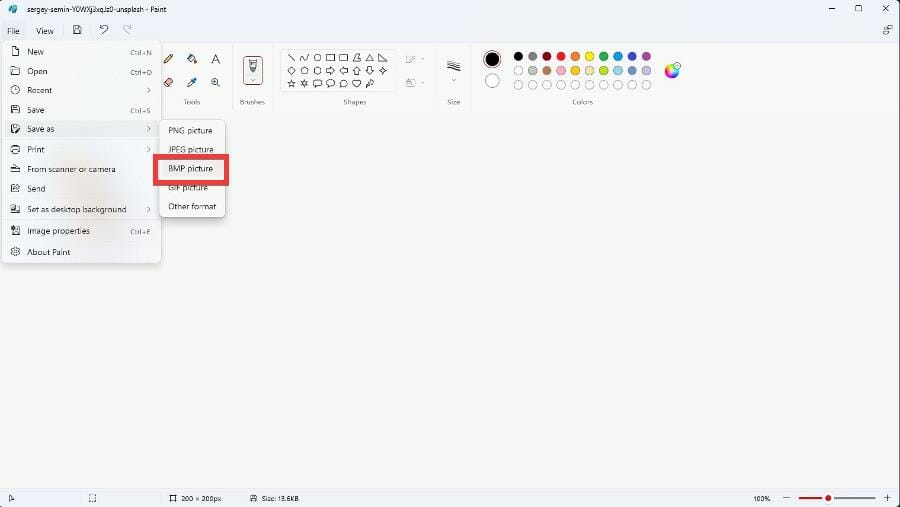
- Next, click File in the upper left corner. Hover over Save as and select BMP File.
- Name your new logo splash and then save it.
4. Install HackBGRT Tool
- In a web browser, visit the GitHub page for the HackBGRT app. Click the Zip file in the middle of the page to download the app. Make sure you have an app that can extract Zip files.
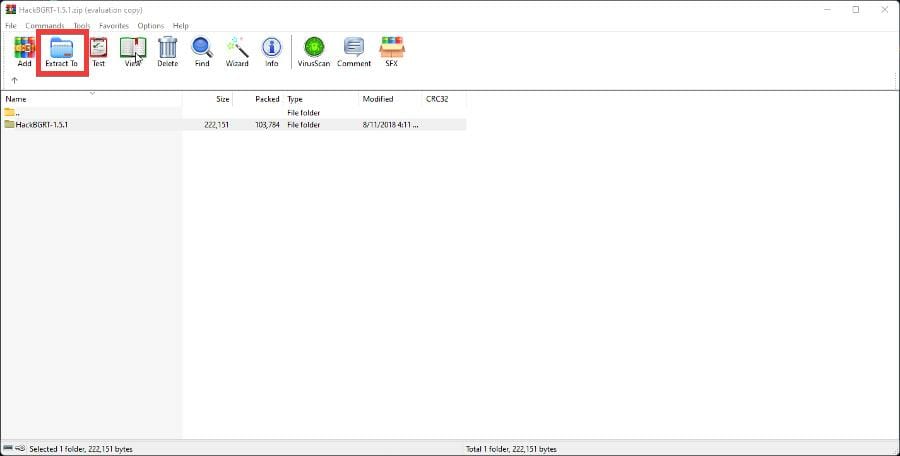
- In the Zip file app, highlight HackBGRT and click Extract To. Pick the location where the file will be extracted to and click OK at the bottom.
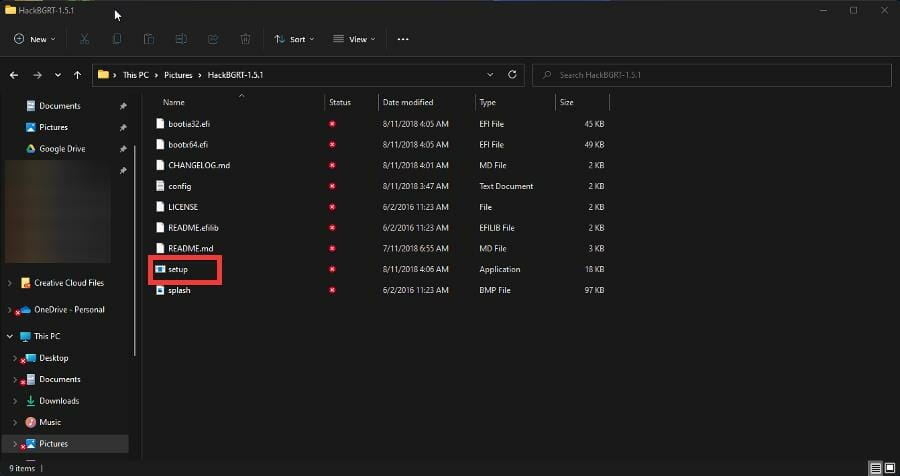
- Go to the app’s location and double-click the setup file to begin installation.
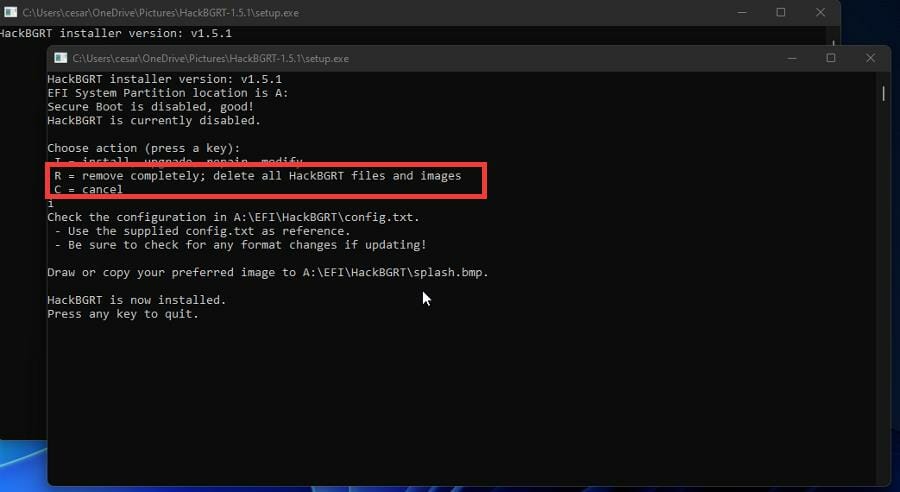
- HackBGRT will open up giving an option to install, upgrade, repair, and modify, or cancel. Press I on your keyboard to install.
- A Notepad file will open. Close it. Paint will open with your new logo.
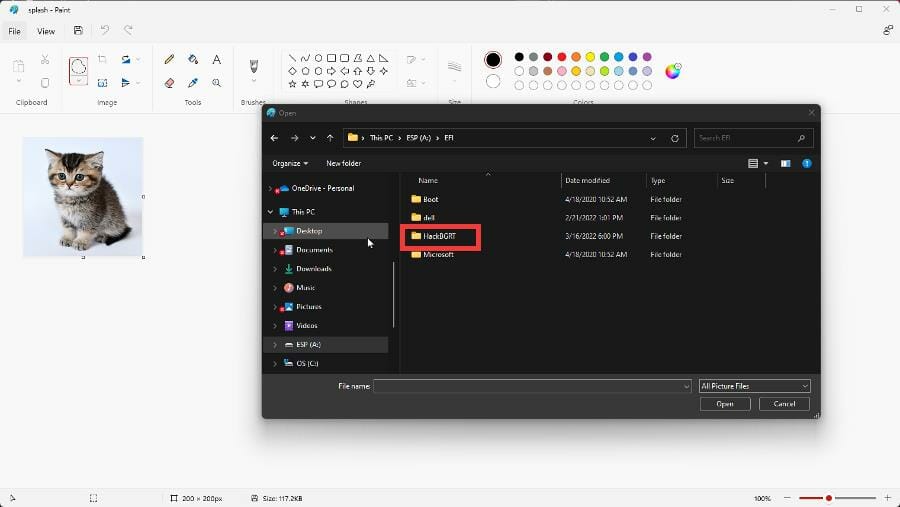
- Click File and select Open.
- In this new window, click This PC. Next go to ESP (A:). Select the EFI and lastly choose HackBGRT.
- Click your logo and select Open.
- Close the Paint and HackBGRT apps. Restart your computer and you will see your new boot logo.
To remove the logo, do the following:
- To remove the logo, open the setup file again, but this time, press R on your keyboard to remove the logo.
- Wait for the process to finish.
Now you know everying about how to change boot logo in Windows 11. If you’re using a previous version, we also have a guide on how to change boot logo on Windows 10, so don’t miss it.
Boot screen also has its share of isseus, and many reported that there’s No Boot Screen on Windows as well as that their PC is stuck on motherboard boot screen, but we covered those issues in separate guides.
Feel free to leave a comment below if you have any questions on other Windows 11 systems. Also, leave comments about reviews that you’d like to see or information on other Windows 11 features.









User forum
2 messages