Fix: MEMORY1_INITIALIZATION_FAILED 0x00000065
Check for hardware compatibility issues
6 min. read
Updated on
Read our disclosure page to find out how can you help Windows Report sustain the editorial team. Read more
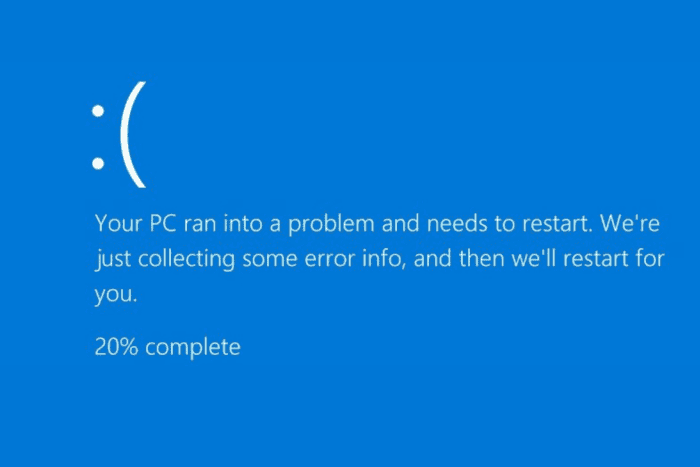
Many users have reported getting a blue screen error 0x00000065 MEMORY1_INITIALIZATION_FAILED on Windows devices. This error usually appears when Windows encounters a problem related to system memory initialization. It can occur due to corrupted system files, outdated device drivers, faulty hardware, malware infection, or Windows Update problems.
To begin with, check if the recently installed hardware is compatible with your system, review the PC’s specifications, and ensure all installed hardware matches the requirements.
How can I fix the MEMORY1_INITIALIZATION_FAILED 0x00000065 issue?
1. Update Windows
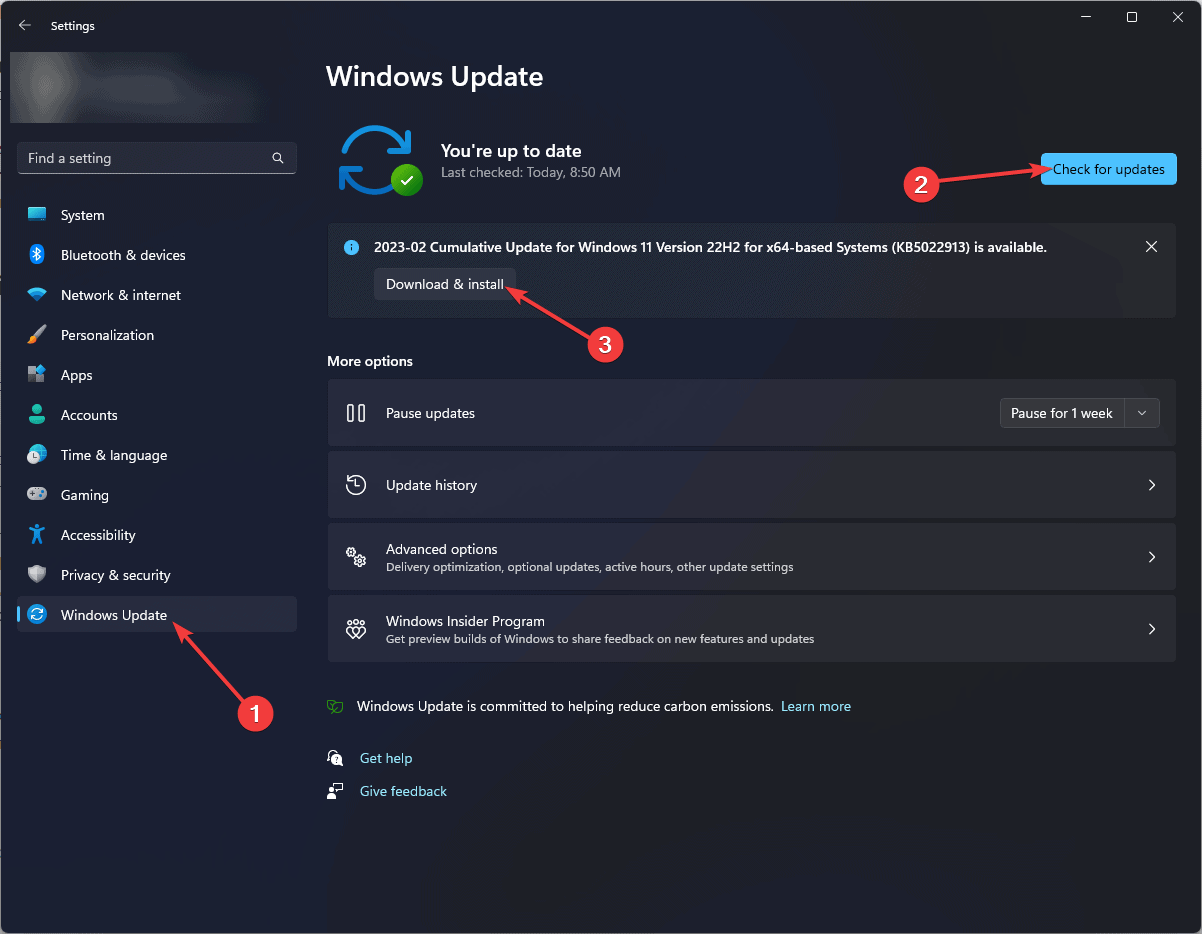
- Press Windows + I to open the Settings app.
- Go to Windows Update, and click Check for updates.
- If updates are available, click Download and install to update your Windows version.
2. Run SFC and DISM scans
 NOTE
NOTE
- Press the Power button on your computer to start it.
- When you see the Windows logo during booting, press the Power button again to shut down your PC. Repeat the power-on and power-off process three times.
- In the third restart, you will see a blue screen, which means you have accessed the Windows Recovery Environment (WinRE).
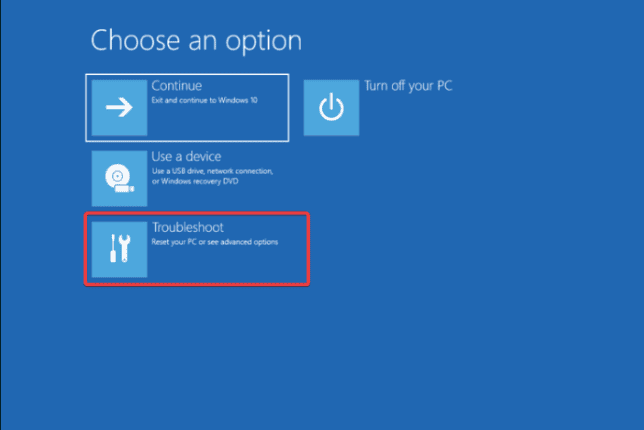
- Click Troubleshoot on the Choose an option screen.
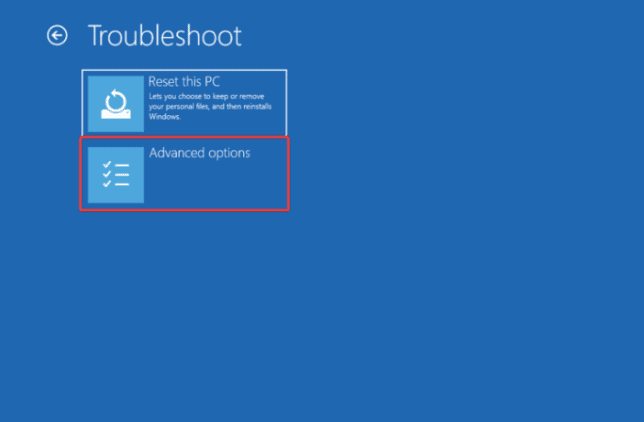
- Select Advanced options.
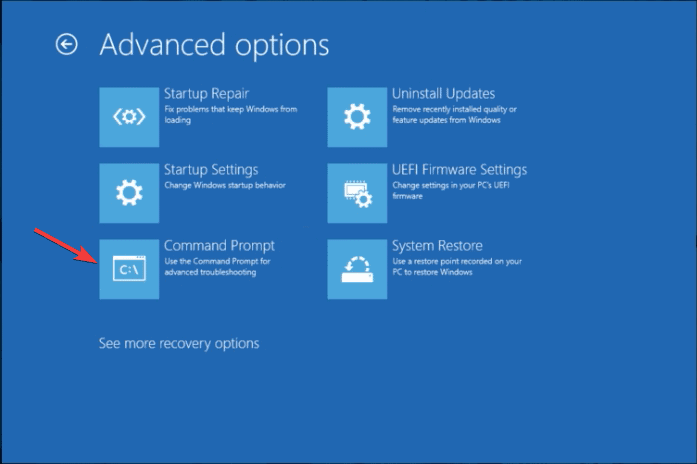
- On the Advanced Options screen, choose Command Prompt.
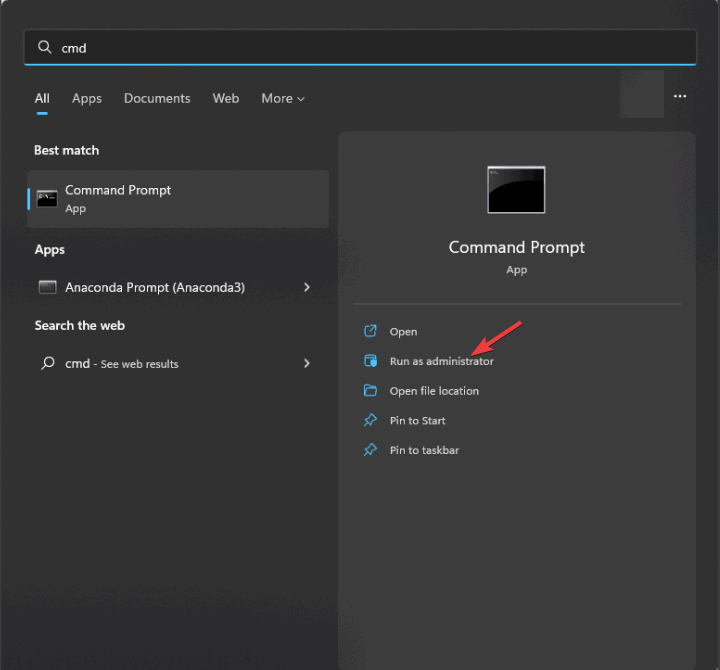
- If your computer can boot up normally, press the Windows key, type cmd in the search bar, and click Run as administrator.
- In the command prompt window, type the following command to run the DISM scan and hit Enter:
dism /online /cleanup-image /restorehealth - Wait for some time to let the command execute properly, then copy & paste the following command to repair the system files and press Enter:
sfc /scannow - Wait for the process to finish, then reboot your computer to let the changes take effect.
Repairing the system files via SFC and DISM scans can also help you fix the LPC_INITIALIZATION_FAILED error; check out this guide to learn other fixes.
3. Run the CHKDSK command
- Use steps 1 to 3 from Method 2 again to access the Windows Recovery Environment.
- Click Troubleshoot on the Choose an option screen.
- Select Advanced options.
- On the Advanced Options screen, choose Command Prompt.
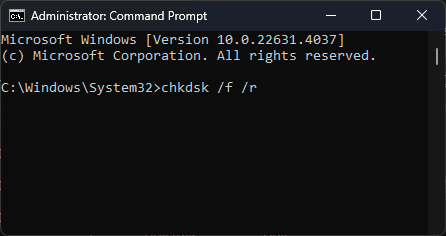
- Type the following command to run the disk check scan and press Enter:
chkdsk /f /r - CHKDSK will prompt you to schedule the scan for the next system restart; type Y to reboot your computer and start the disk check.
Running a check disk scan can also help you fix the SCSI_DISK_DRIVER_INTERNAL 0x0000002D; check out this guide for more solutions.
4. Replace the SMSS.EXE file
 NOTE
NOTE
4.1 Create a bootable installation media
- Connect your USB flash drive to the PC and go to the Windows 11 download page.
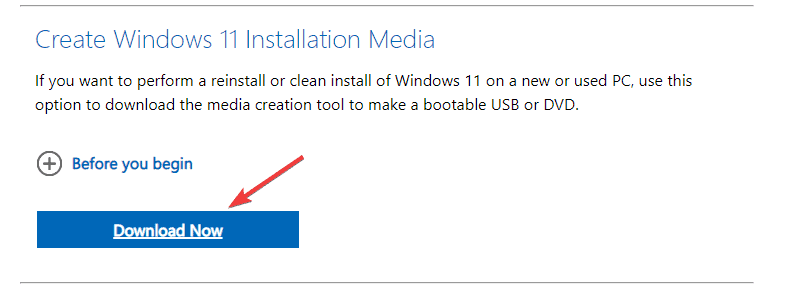
- Locate the Create Windows 11 Installation Media section and click the Download Now button.
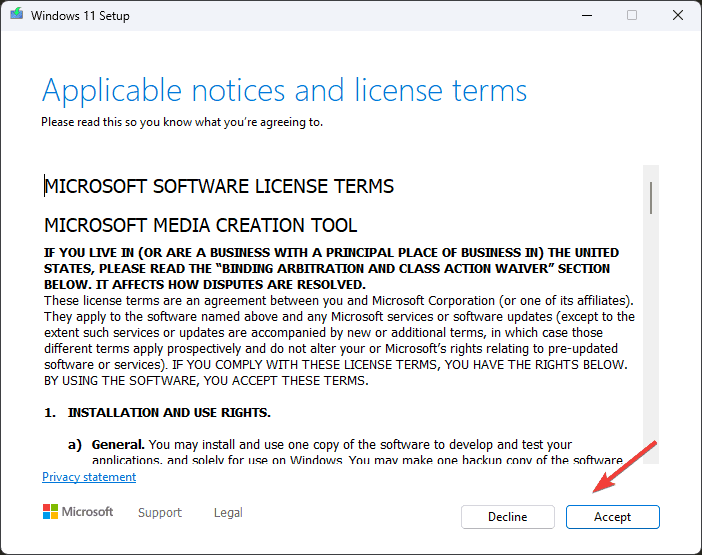
- Once the setup file is downloaded, run it, then on the Windows 11 Setup, click Accept to accept the terms of service.
- On the following window, select language and edition, then click Next.
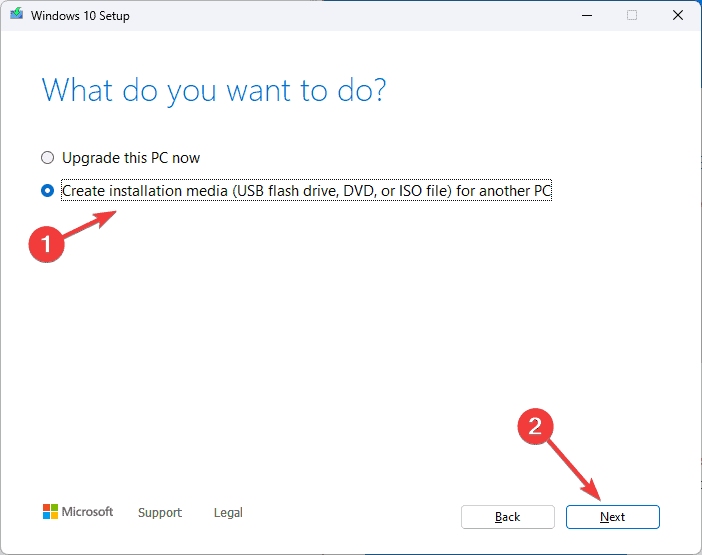
- Select Create installation media (USB flash drive, DVD, or ISO file) for another PC and click Next.
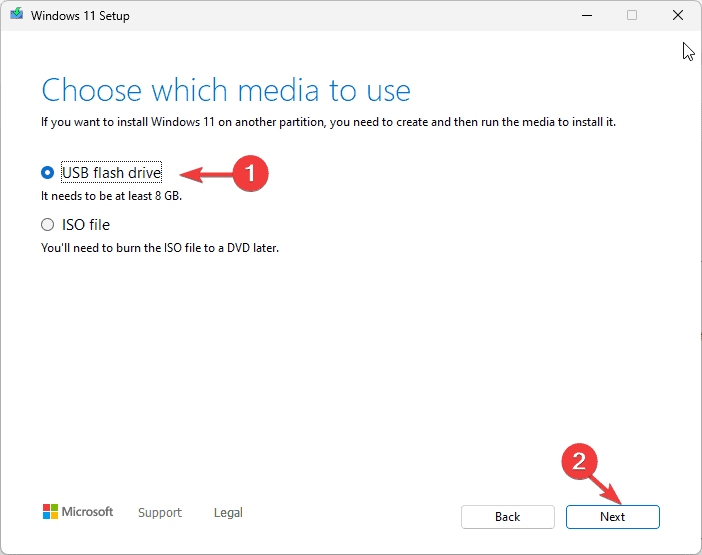
- Choose the USB flash drive option and click Next.
- Select your pen drive and choose Next.
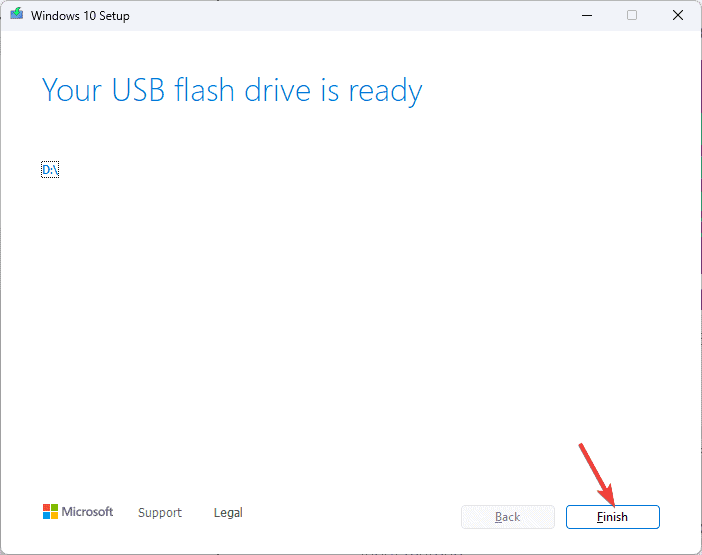
- The process will take some time; once done, click Finish to close the setup.
4.2 Boot using the USB drive
- Restart your computer and tap the F12 key until you enter the One Time Boot menu.
- Select the USB drive from the list and hit Enter.
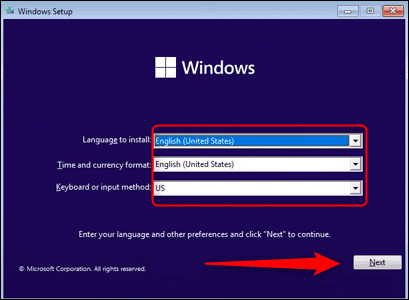
- Choose the language to install, time and currency format, keyboard or input method, and then click Next.
- On the Windows Setup screen, click Repair your computer.
- Select Troubleshoot on the Choose an option screen.
- Choose Advanced options.
- On the Advanced Options screen, select Command Prompt.
- In the Command Prompt window, copy & paste the following commands one by one, pressing Enter after each command:
C:
cd windows/system32/
copy c:\windows\system32\dllcache\smss.exe
- After executing the commands, reboot your PC to check if the issue is resolved.
5. Update BIOS/UEFI
 NOTE
NOTE
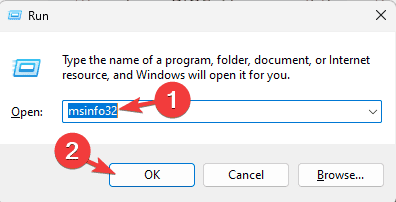
- Press Windows + R to open the Run window.
- Type msinfo32 and click OK to open System Information.
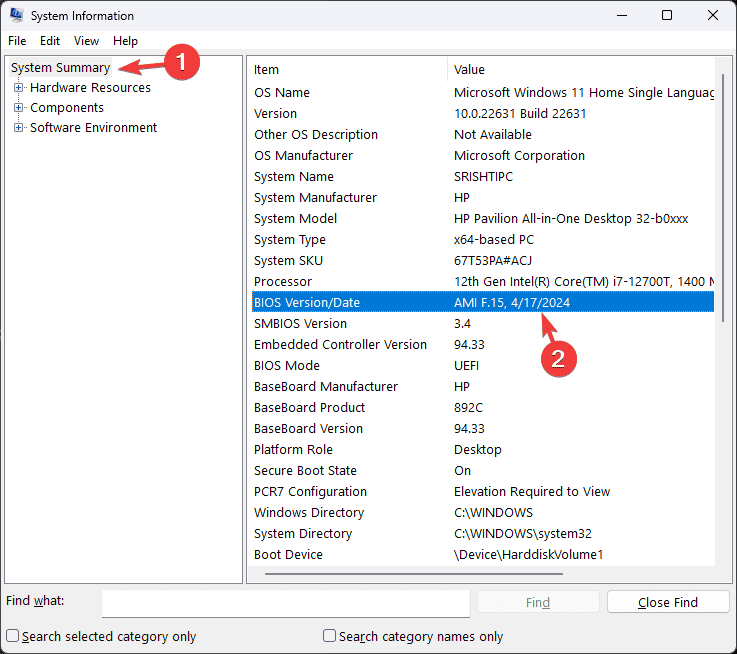
- Go to System Summary, and locate BIOS Version/Date.
- Now go to your PC manufacturer’s website, enter your PC details, like the Product number and Serial number, and follow the manufacturer’s instructions to download and install the update.
- Once updated, reboot your computer to check whether the new BIOS/UEFI version is running.
6. Perform a memory diagnostic test
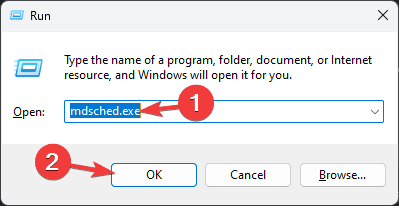
- Press Windows + R to open the Run window.
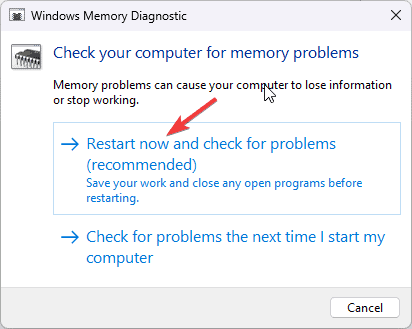
- Type mdsched.exe and click OK to open the Windows Memory Diagnostic tool.
- Save your word before proceeding, then click Restart now and check for problems.
- Your computer will restart, and the scan will take a few minutes. Once done, the PC will restart and take you to the login screen.
- When you log in, you will see the scan results. If they aren’t displayed, you can review them by checking the Event Viewer logs.
7. Perform a system restore
- Use steps 1 to 3 from Method 2 again in the Windows Recovery Environment.
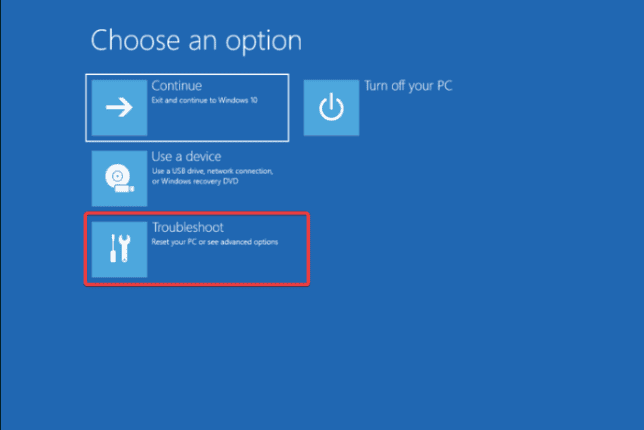
- Click Troubleshoot on the Choose an option screen.
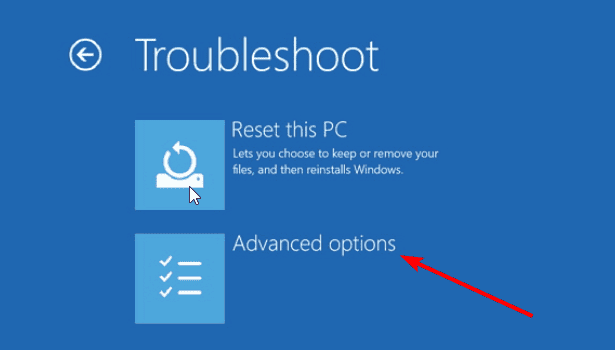
- Select Advanced options.
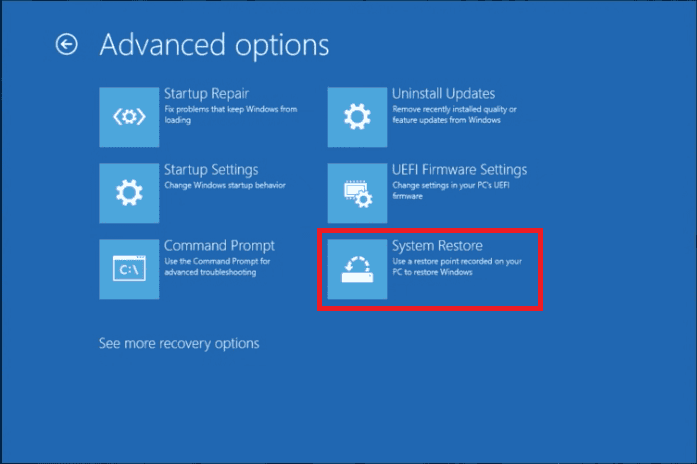
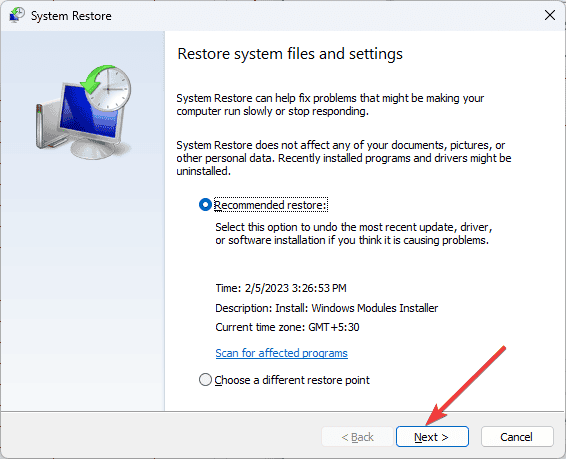
- On the Advanced Options screen, choose System Restore.
- Click Next on the System Restore window.
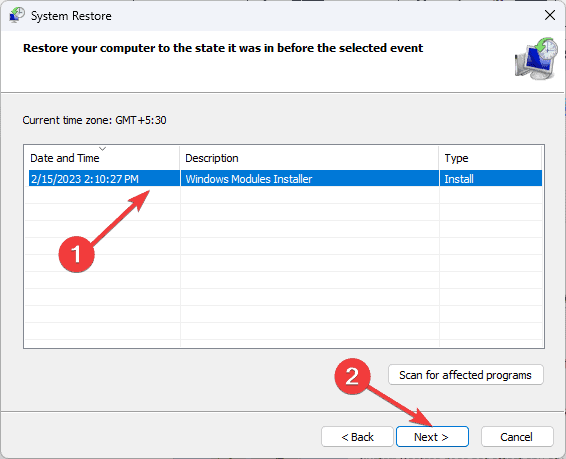
- Choose the restore point you want and click Next. If you have several, it is recommended that you choose the oldest one.
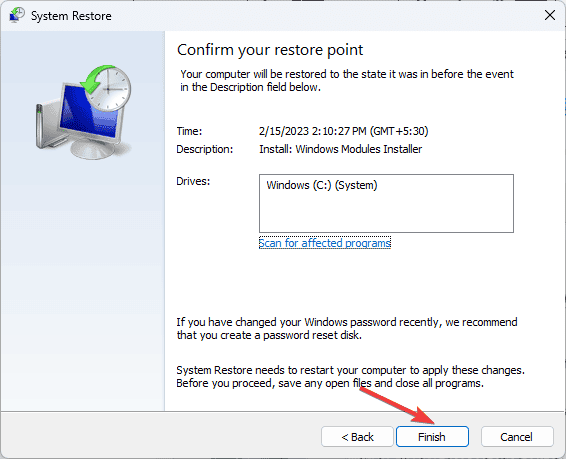
- Click Finish. Your computer will restart and take your computer to the previous system settings.
If your system was not able to restore to the previous version and you see the System Restore did not complete successfully message, check out this guide for quick solutions.
Restoring your computer to the oldest restore point can also help you get out of the Blue Screen loop; read this guide to learn more about it.
8. Reset your Windows computer (Last resort)
- Use steps 1 to 3 from Method 2 again to enter the Windows Recovery Environment.
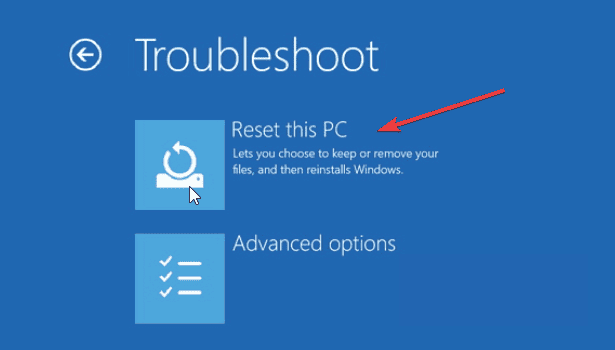
- Click Reset this PC from the Choose an option screen.
- On the following screen, you will get two options:
- Keep my files – Choose this if you want to remove apps and settings, but keep the personal files.
- Remove everything – Select this if you want to delete everything.
- On the next screen, choose the method to reinstall Windows
- Cloud download – This will download and reinstall Windows
- Local reinstall – This will reinstall Windows from this device
- Click the Reset button to initiate the process.
To resolve the 0x00000065 MEMORY1_INITIALIZATION_FAILED error in Windows, you can run SFC and DISM scan to restore or repair system files, check the RAM for disk errors, or restore your PC to the previous version.
Want to access Blue Screen of Death crash files? Here is a separate guide with four simple methods for doing that. As for memory errors, we also wrote about ERROR_MEMORY_HARDWARE in our latest article, so you might want to check it out.
If you have any questions or suggestions about the error? Feel free to mention them in the comments section below.





User forum
0 messages