Microsoft Planner Templates: How to Create and Use Them
The new Planner tool comes with a lot of pre-built templates
5 min. read
Published on
Read our disclosure page to find out how can you help Windows Report sustain the editorial team. Read more

Managing projects can be a hassle without the right tools. Thankfully, Microsoft Planner offers several ways to create and use templates, making project management a breeze. Here are some top methods to create templates in Microsoft Planner for effortless project management.
How do I find Microsoft Planner templates?
1. By creating a new plan
- Go to the Microsoft Planner page and log in with your Microsoft account.
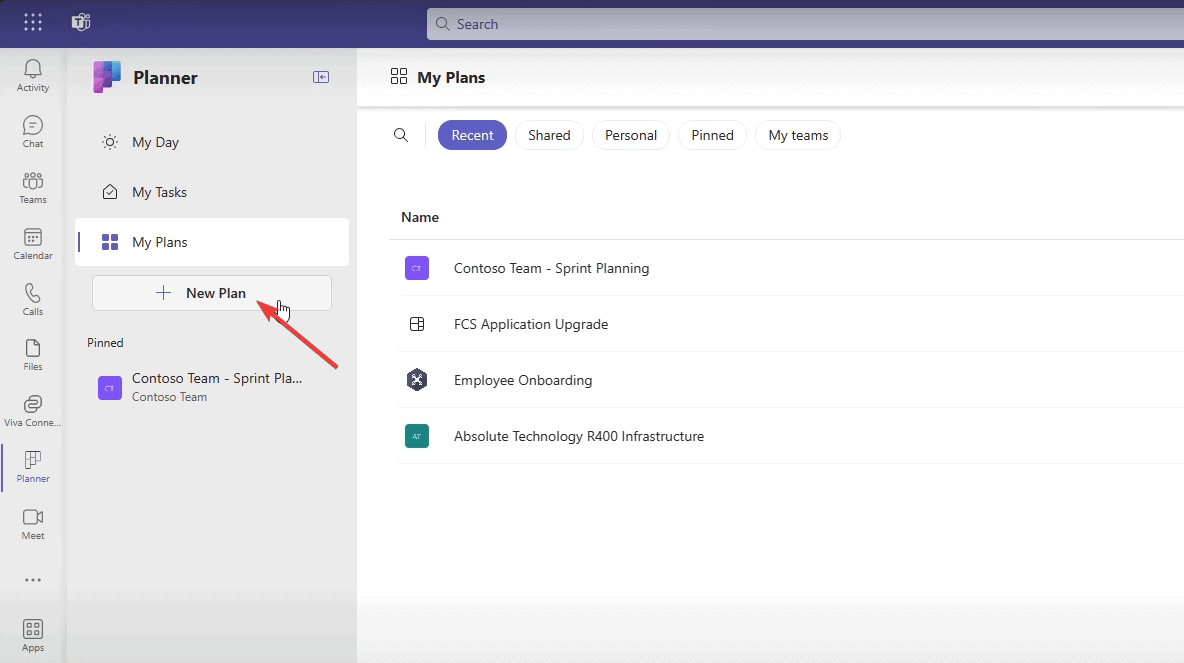
- Click on New Plan from the menu on the left.

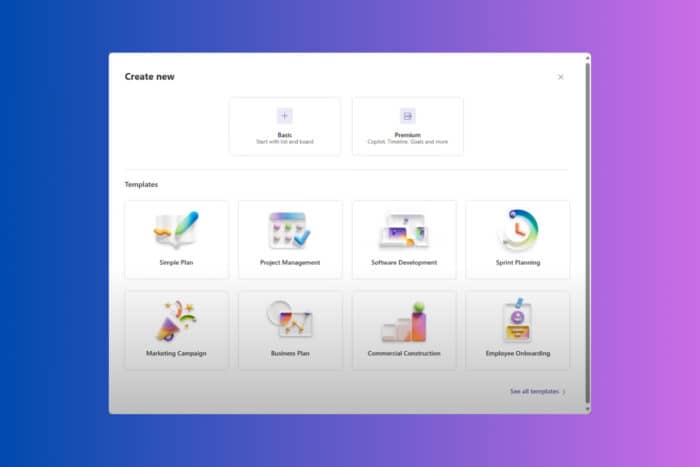
- Now, you can either create one from scratch or choose from the recommended templates shown in the window below.
- Of course, you may also click on List all templates to see all of them and select the one that suits you better.
You should note that at the moment this piece was written, the new Microsoft Planner version with this feature was just rolling out. Therefore, it might not be available to all users yet. Check if you have the latest version. Also, you may access the templates from Teams, within the Planner app inside.
2. Using the Copy Plan feature
- Go to the Microsoft Planner page and log in with your Microsoft account.
- In the Planner Hub, locate the plan you want to use as a template.
- Click the three dots (…) in the upper right-hand corner of the plan card.
- Select Copy plan from the dropdown menu.
- Name your new plan and choose which elements to include (Priority, Dates, Description, Checklist, Labels).
- Decide whether to create a new group or add the plan to an existing Microsoft 365 Group.
- If creating a new group, click New Group. For an existing group, select it from the dropdown list.
- Click Copy Plan.
- Wait for the copying process to complete, which might take a few minutes.
This solution allows you to duplicate a full plan, including its structure and tasks, without manually re-creating each task.
3. Creating Teams Templates with pre-built Planner tabs
- Open Microsoft Teams and create a new team intended for template use (e.g., Template Team).
- Within this team, set up the channels and tabs, including Planner tabs, as needed.
- Each time you need a new project team, copy the Template Team:
- Go to Teams > Join or create a team > Create team > Create from… > Team.
- Select Template Team (the one you created in the first step) from the list.
- Add or remove members, and adjust any settings or tasks as necessary for the new project.
This method creates a consistent starting point for new projects, ensuring all necessary Planner tabs and configurations are included.
4. Using Power Automate to copy plans
- Go to the Power Automate website and sign in with your Microsoft account.
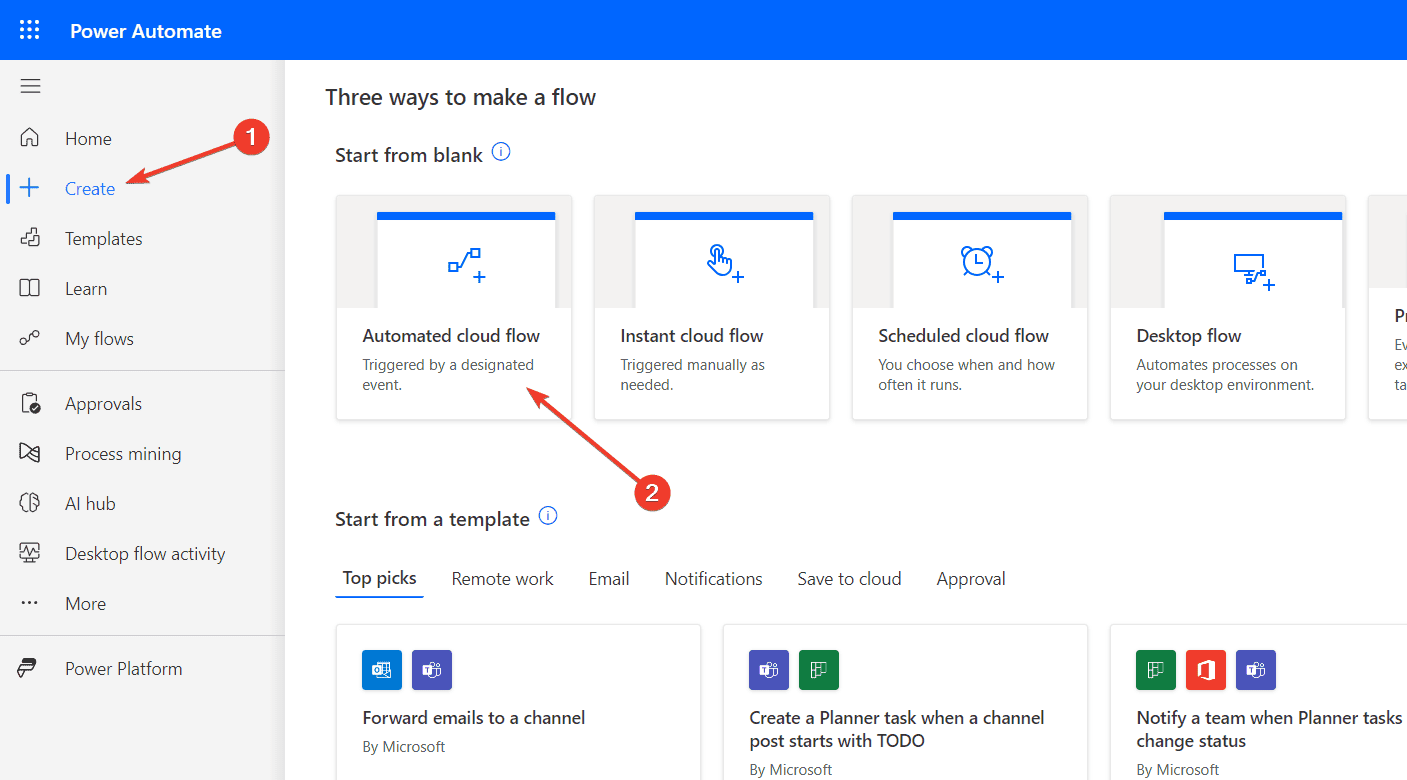
- Click Create in the left-hand menu.
- Choose Automated flow and set the trigger (e.g., When a new channel is created in Teams).
- Add an action to copy an existing Planner plan.
- Customize the flow to include the specific tasks, assignments, and due dates you want to replicate.
- Run the flow manually or trigger it with the specified action to ensure it works as expected.
Using Power Automate enables automated plan duplication, especially useful for recurring projects or tasks.
5. Manual template creation and usage
- Set up a plan in Microsoft Planner with all the specific tasks and configurations.
- Name this plan something indicative, like Template Plan.
- When you need to use the template:
- Go to the Template Plan.
- For each task, click the three dots (…) and select Copy task.
- Assign the copied tasks to the new plan.
This straightforward method leverages manual copying and ensures each new plan starts from a consistent base. It is a bit more tedious, especially if you have many tasks, but you will get to the desired result.
6. Using Microsoft Lists for Task Management
- Access Microsoft Lists and create a new list based on your required project structure.
- Include columns for task name, assignee, due date, and other relevant details.
- Each time you start a new project, export the list to Planner:
- Open the list and select Export to Excel.
- Use the imported tasks to quickly set up your Planner.
- Manually adjust any tasks or details after exporting to ensure everything conforms to the specific project’s needs.
Using Microsoft Lists provides a flexible template system that integrates seamlessly with Planner, ensuring tasks are organized and easy to track.
These solutions provide various ways to create, manage, and utilize templates in Microsoft Planner, ensuring you can streamline your project management processes efficiently. Whether through direct copying, leveraging Teams or Power Automate, or using Microsoft’s new template features, each method caters to different organizational needs and technical proficiencies.
Did you know that Microsoft Planner Copilot helps you manage projects even faster? You may also create custom fields in Microsoft Planner. Click the highlighted links for more information.
Moreover, you can check out alternatives if Planner doesn’t suit you completely.
If you have any questions or suggestions, don’t hesitate to access the comments section below.


User forum
0 messages