Sound Not Working on Dual Monitor in Windows (Fix Guide)

Having sound not working on dual monitor setups in Windows is a common issue. It usually happens when the wrong audio output is selected or the monitor lacks built-in speakers. Here’s how to fix it step by step.
How do I get sound to work on dual monitors?
Table of contents
- How do I get sound to work on dual monitors?
- 1. Reconfigure the Default Audio Playback device
- 2. Update or reinstall the Sound Card Driver
- 3. Open the Volume mixer to check the audio settings
- 4. Open the Windows Playing Audio Troubleshooter
- 5. Set the Correct Audio Output on Each Monitor
- 6. Check HDMI or DisplayPort Audio Settings
- 7. Enable Audio on Second Monitor
- 8. Check Monitor Settings
- 9. Disable Stereo Mix
Before we start, check your speakers and ensure they are properly connected and configured.
1. Reconfigure the Default Audio Playback device
- First, right-click the speaker icon on the Windows system tray and select Playback devices to open the window in the snapshot directly below.
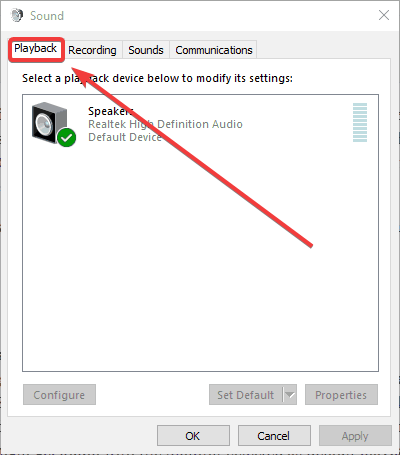
- Select the speakers that are usually your default playback device.
- Then press the Set Default button.
- Alternatively, you can right-click a playback device and select Set as Default Device on the context menu.
- Press the Apply and OK buttons to confirm your newly selected default playback device.
- If your secondary VDU does include built-in speakers, try unplugging the speakers and connecting the monitor with a secondary audio cable. Then you might get audio with the monitor selected as the default playback device.
It is often the case that audio is lost after connecting a second VDU because the connected monitor automatically becomes the default playback device.
2. Update or reinstall the Sound Card Driver
2.1. Update drivers with a dedicated tool
The easiest way to fix sound card driver issues is to let a trusted tool do the work for you. PC HelpSoft Driver Updater scans your PC, finds outdated or missing drivers, and installs the correct updates in minutes.
Here’s how to do it:
- Download and install PC HelpSoft Driver Updater.
- Launch the program and click Scan.
- Wait for the scan to finish. Outdated drivers will be listed.
- Click Update All to install the latest versions automatically.
- Restart your PC if prompted.
This method is fast, safe, and avoids the risk of installing the wrong driver.
2.2. Update drivers manually on Windows
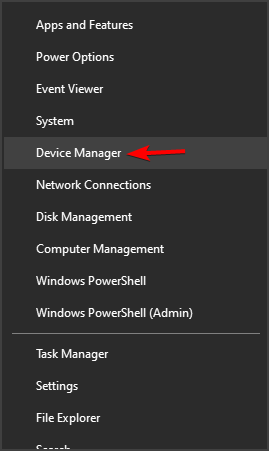
- First, you’ll need to get the latest driver from the sound card manufacturer’s website. If you’re not sure what website to open, press the Win key + X hotkey and select Device Manager.
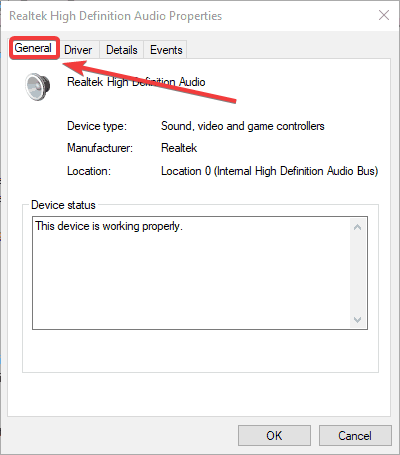
- Double-click Sound, video and game controllers, right-click your listed sound card, and select Properties to open the window in the snapshot directly below. The manufacturer for your sound card is listed on the General tab.
- Open the sound card manufacturer’s website in your browser.
- Next, open a driver or download section on the manufacturer’s website.
- Then search for the required sound card driver by entering the sound card in a search box or selecting it from drop-down menus on the website.
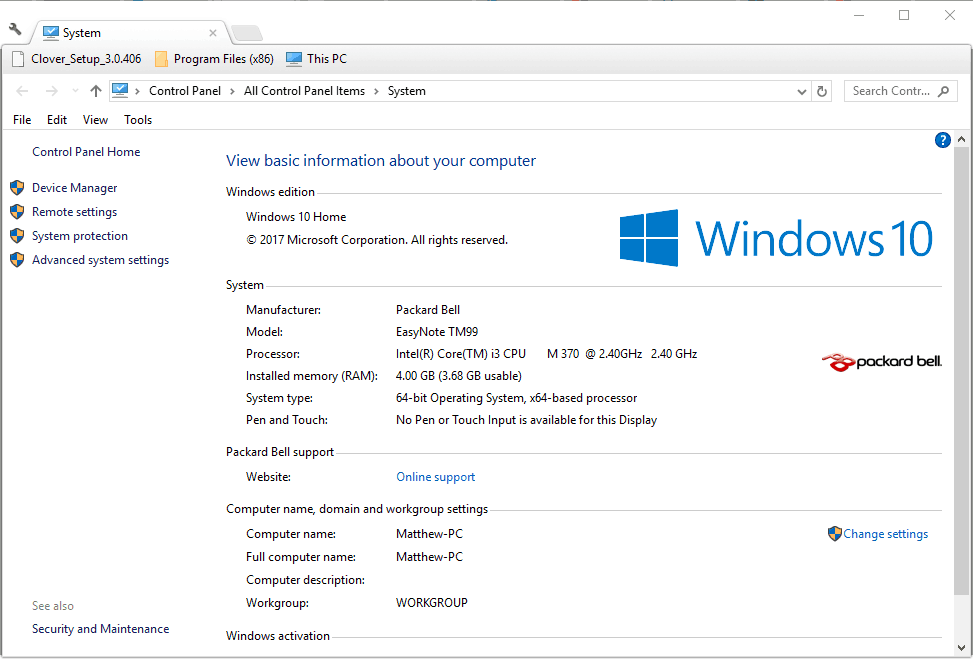
- Download the most updated driver for your sound card that’s compatible with your Windows platform. To check your system type, enter the keyword system in Cortana’s search box and select System to open the window directly below.
- After downloading the sound card driver, open Device Manager again, right-click your listed sound card, and select Update driver.
- Select the Browse my computer for driver software to manually browse for the saved driver.
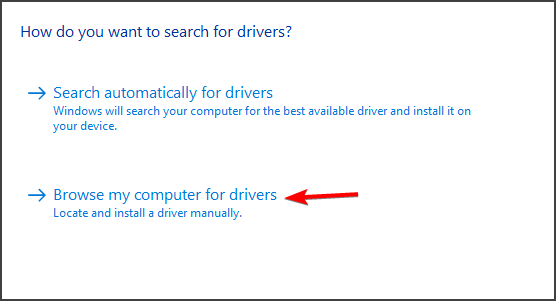
- Click the Let me pick from a list from a list of available drivers button, and then press the Have Disk button in the shot directly below.

- Click Browse, select the driver you downloaded, click Open, and then press the Next button.
2.2 Update drivers automatically
Manually updating the drivers can be a long task that implies a little bit of skill. That’s why, if you don’t want any headaches, we recommend updating your drivers automatically by using a dedicated, third-party tool.
The solution recommended below will update and repair all your drivers in one swift action, quickly and with the minimal implication from you.
3. Open the Volume mixer to check the audio settings
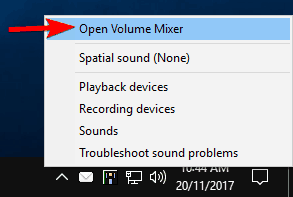
- Right-click the volume icon in the bottom right corner and choose Open Volume Mixer.
- Make sure that the volume isn’t muted.
- Raise all speakers to at least 70% and check if the problem is still there.

If dual monitor sound is not working, the lack of sound doesn’t have anything to do with the audio level settings. If the volume control doesn’t work in Windows 10 we’ve got a guide on volume control not working to help you fix it.
4. Open the Windows Playing Audio Troubleshooter
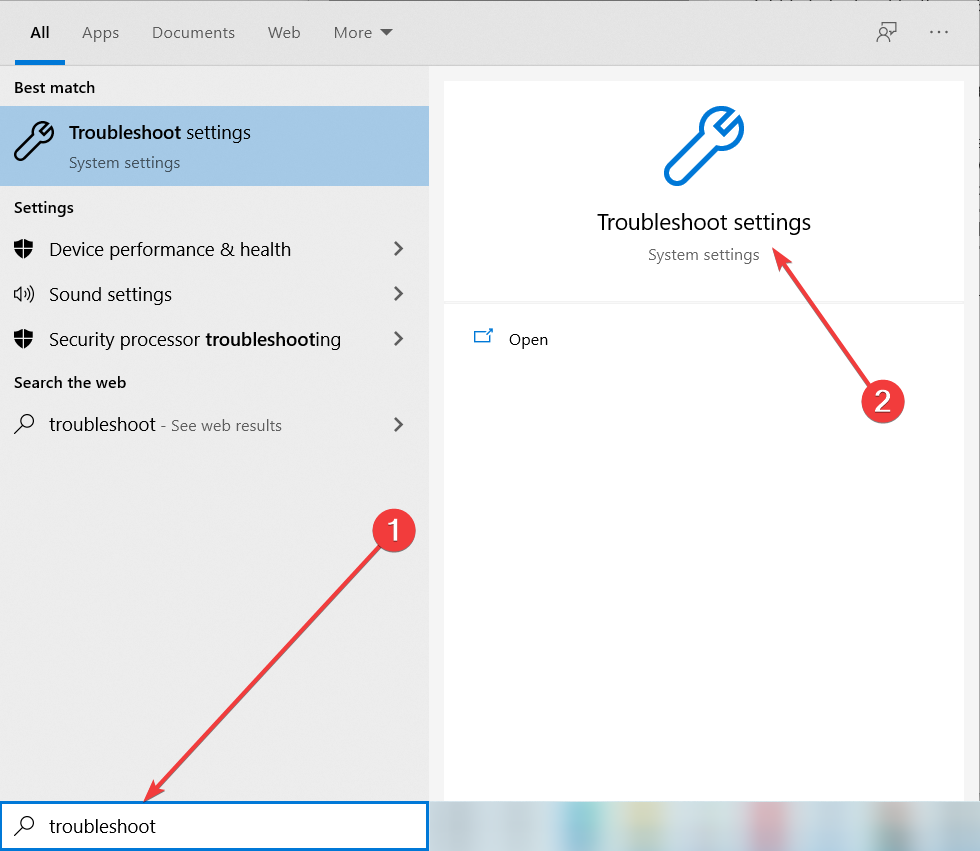
- Type troubleshoot in the Windows search box.
- Click Troubleshoot settings to open the system settings shown directly below.
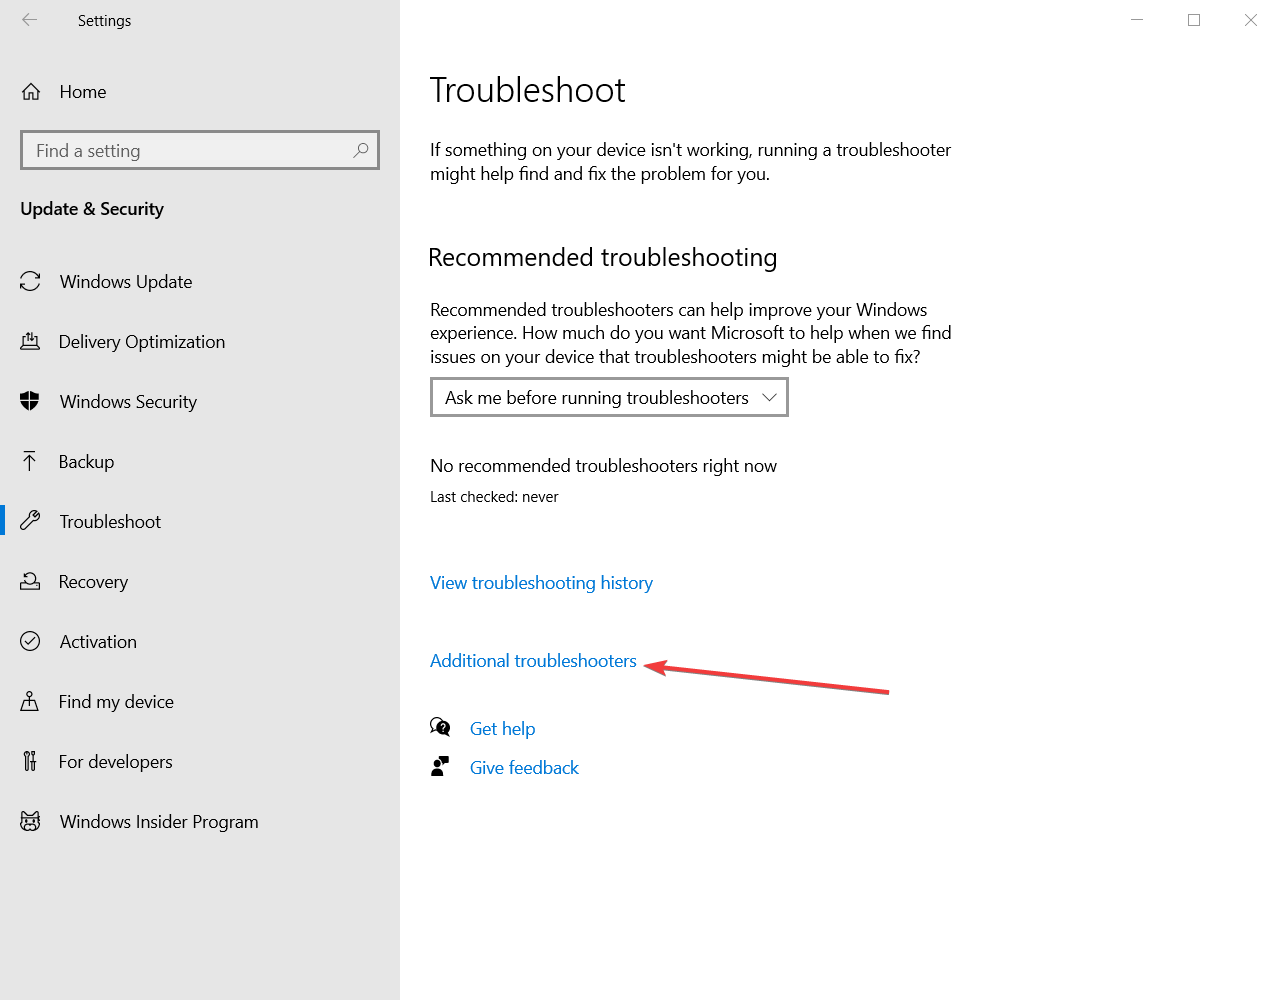
- Click on Additional troubleshooters.
- Select Playing Audio and press its Run the troubleshooter button.
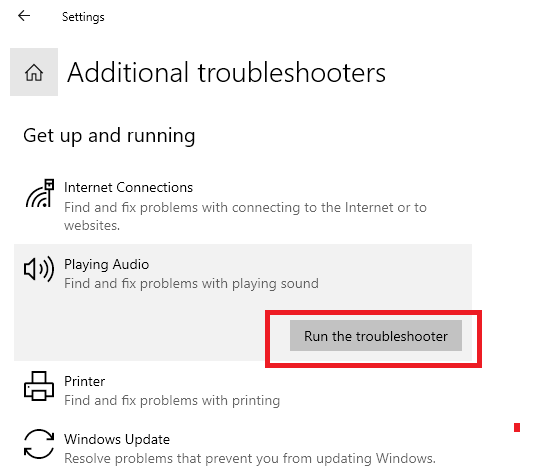
- Now go through the troubleshooter’s suggested fixes to fix the sound.
5. Set the Correct Audio Output on Each Monitor
- Right-click the sound icon in the system tray (bottom-right corner of the screen).
- Select Open Sound Settings.
- Under the Output section, click the dropdown menu next to Choose your output device.
- Select the correct monitor (or speakers) that should be outputting the sound. If you’re using multiple monitors, make sure the correct one is chosen for audio output.
6. Check HDMI or DisplayPort Audio Settings
- Right-click the sound icon in the system tray.
- Select Open Sound Settings.
- Under the Output section, look for devices like “HDMI” or the name of your second monitor.
- Select the correct monitor that should play sound.
- If the HDMI or DisplayPort option isn’t listed, you may need to adjust the settings in your graphics card software (e.g., NVIDIA Control Panel or AMD Radeon Settings).
7. Enable Audio on Second Monitor
- Right-click the sound icon in the system tray and select Sounds.
- In the Playback tab, right-click on an empty area and select Show Disabled Devices.
- Look for your second monitor listed here (often named “HDMI” or the monitor model).
- Right-click the second monitor and select Enable.
- Set the second monitor as the default playback device by right-clicking and selecting Set as Default Device.
8. Check Monitor Settings
- On your second monitor, use the buttons or menu to open the monitor’s settings.
- Navigate to the Audio or Sound section in the menu.
- Make sure the volume is up and audio output is enabled.
- If there’s an audio mute setting, ensure it’s turned off.
9. Disable Stereo Mix
- Right-click the sound icon in the system tray and select Sounds.
- Go to the Recording tab.
- Look for Stereo Mix in the list of devices. If it’s enabled, right-click on it and select Disable.
- Click OK to save the settings.
These steps should resolve sound issues with dual monitors on your Windows PC.
That’s it! We hope that our solutions restore the lost sound for dual-monitor setups and benefit again from the signal out of your second display.
For more information, you can visit our no sound on Windows 11 guide. We also have an article that shows you what to do if HDMI audio isn’t working, so don’t miss it.
If you have any other questions, feel free to drop them in the comments section below.
Read our disclosure page to find out how can you help Windows Report sustain the editorial team. Read more


Improve this guide


User forum
4 messages