Solving the nvvsvc.exe Runtime Error in Windows
Update Nvidia drivers to troubleshoot the runtime error
Key notes
- Corrupt registry entries usually trigger runtime errors.
- A registry cleaner can easily fix problems caused by incorrect or damaged registry entries.
- nvvsvc.exe runtime errors can lead to the blue screen of death.
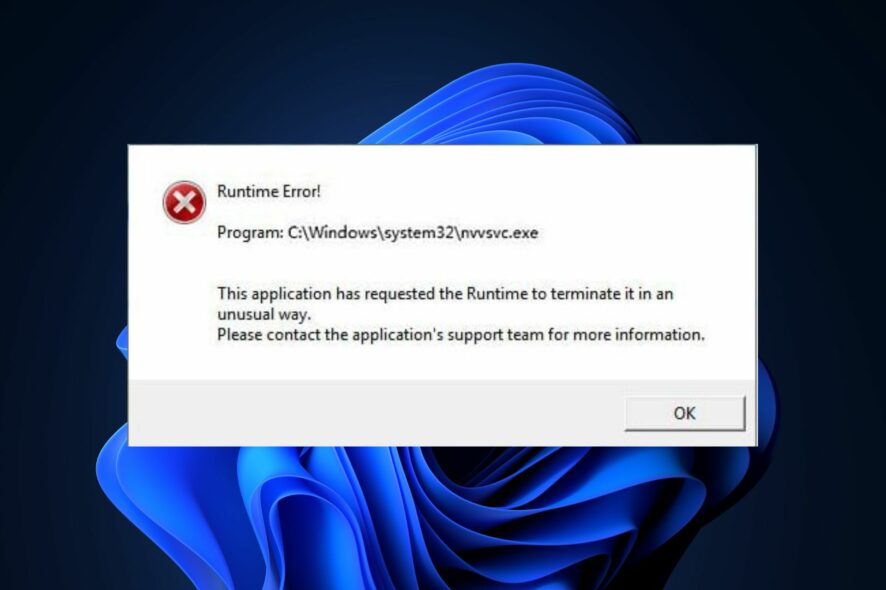
The Nvidia driver helper service consists of a series of files and processes that facilitates the driver’s functionality; one such is the nvvsvc.exe. The file is an essential driver component but sometimes triggers runtime errors and a blue screen of death.
In this article, we’ll briefly discuss the nvvsvc.exe process and suggest steps you can apply to solve the nvvsvc.exe runtime error.
What is nvvsvc.exe?
nvvsvc.exe is an Nvidia Graphics card driver file used to manage display drivers in Windows. It is responsible for rendering graphics and also for the functioning of the Nvidia control panel.
- It is not an essential Windows process but a utility for configuring and setting up Nvidia hardware without entering BIOS mode.
- The executable file is in the following file location path: C:\Windows\System32\
- The file size is about 663KB on virtually all systems.
- Nvidia drivers and services heavily utilize it, and if removed, you’ll run into rendering issues with your graphics driver.
To ensure its legitimacy, you should check the security risk ratings and ensure it has Nvidia corporation in the digital signature. Further, the original file appears in the core process in Task Manager.
What are the common errors associated with nvvsvc.exe?
nvvsvc.exe is responsible for rendering 3D graphics; sometimes, you can run into runtime errors while using your PC. This will give you a blank screen for an endless period, eventually leading to a blue screen of death error.
The nvvsvc.exe runtime error is usually caused by
- Failed driver startup: If the driver fails to load during startup, you can trigger runtime errors leading to a black Windows screen.
- Corrupt drivers: A PC running a corrupt or outdated driver can trigger runtime errors.
- Corrupt registry: If Windows has problems with the registry entries or configurations, it’ll lead to crashes and a blue screen of death errors.
Now that we know what we’re dealing with, let’s fix the problems associated with nvvsvc.exe.
How do I fix the nvvsvc.exe runtime error?
Before we troubleshoot the nvvsvc.exe runtime error, here are a few quick tips you can attempt:
- Click OK to terminate the error and restart your PC to prevent the error.
- Make sure to update the Nvidia driver and if you don’t know how to do that, the highlighted guide will help you.
- Use any of these registry cleaners available for Windows to troubleshoot.
- Run an SFC scan to identify issues with the system files and repair them.
If the error remains unfixed, proceed with the steps below
1. Reinstall the graphics driver
- Press the Windows key, type device manager in the search bar, and hit Enter.
- Expand the Display Adapter, right-click on the Nvidia driver from the drop-down menu, and click on Uninstall.
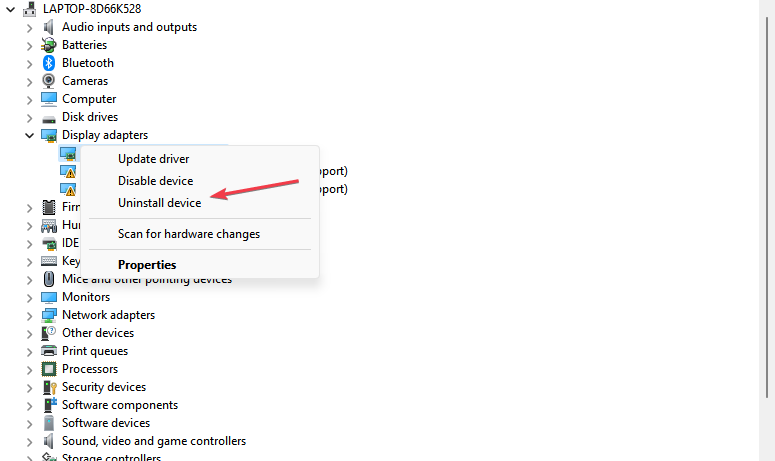
- Click Uninstall to confirm your actions, and wait for Windows to complete the process.

- Once the drivers are removed, you’ll need to download and install the latest version of your driver from Nvidia’s driver downloads page.
- Run the installer once the driver is downloaded, and follow the instructions to finalize the process.
Check out our guide on how to manually install drivers on Windows.
- Download and install the Outbyte Driver Updater app.
- Launch the software and wait for the app to detect all incompatible drivers.
- Now, it will show you a list of all faulty drivers to select the ones to Update or Ignore.

- Click on Update & Apply Selected to download and install the newest versions.
- Restart your PC to ensure the applied changes.

OutByte
Keep your GPU in a flawless state without worrying about possible driver issues.2. Run a system restore
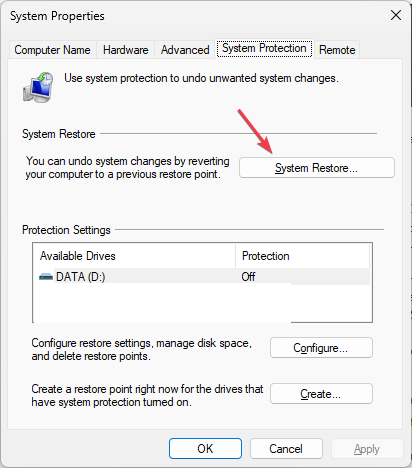
- Left-click the Start menu, type restore and click Create a restore point.
- Select System Properties and choose System Restore button.
- In the Restore Files and Settings box, click Next.
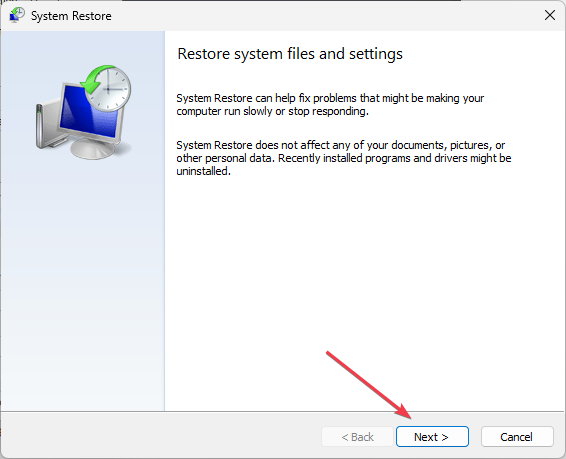
- Then, select the Restore Point to which you wish to restore your PC, and click Next.
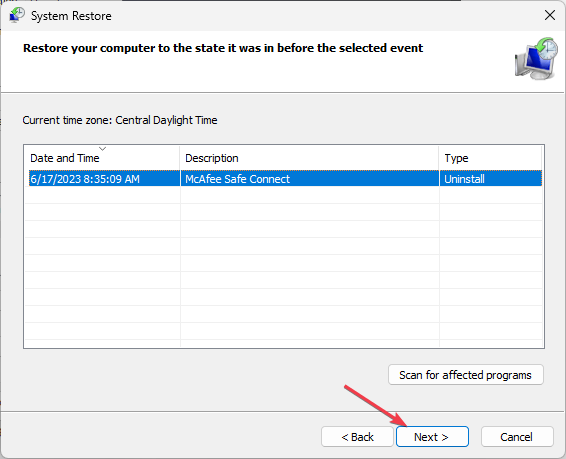
- Finally, click Finish to complete the system restore.
Here is a guide on how to perform a full image backup of your PC.
4. Disable Nvidia Display Driver service startup
- Left-click the Start menu, type services, and click Run as administrator.
- Locate the Nvidia Display Driver service and double-click on it.
- Select Startup-type, click on Disabled, and click OK.
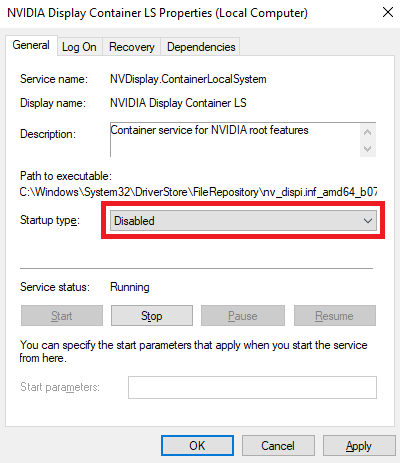
Disabling the Nvidia driver service startup should prevent the file from being active when not in use.
If you noticed the nvvsvc.exe in the Task Manager, it’s simply a driver component Nvidia uses to manage the software. Removing the file is not recommended unless you have genuine reason to believe the file is a virus or is causing high CPU usage.
If you’ve got any questions or suggestions, let us know by dropping them in the comments.
Read our disclosure page to find out how can you help Windows Report sustain the editorial team. Read more


Improve this guide


User forum
0 messages