Fix: Windows Explorer High CPU Usage [9 Tested Solutions]
Lower CPU usage translates to better performance
10 min. read
Updated on
Read our disclosure page to find out how can you help Windows Report sustain the editorial team Read more
Key notes
- If your PC has 100% disk usage over long periods of time, it will affect its functionality.
- Many users reported the Explorer.exe high CPU usage issue that affects the performance of their PCs.
- You should remove old and temporary files in order to optimize the system and resolve this issue.
- Plus, the cause of this high CPU usage issue may be specific icons on your PC’s desktop.
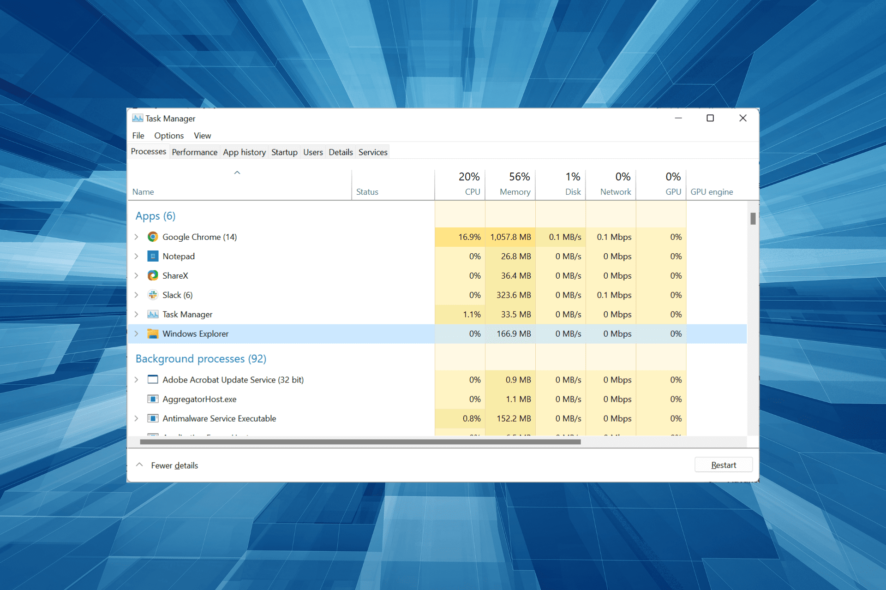
High resource consumption can be a problem and affect the device’s performance. And many reported high CPU usage due to the explorer.exe process on Windows 10.
High CPU usage is one of the most dreaded problems, and it often takes a while before users can identify what’s actually causing the issue since the system doesn’t throw any error messages.
Here are some similar issues that users reported:
- Windows explorer hogging CPU Windows 10 – This issue can occur if your system is infected by malware. However, you should be able to fix the issue by performing a full system scan.
- Windows 10 explorer high CPU utilization – This is a variation of the original error, and in most cases, you can fix the problem simply by removing the problematic application from your PC.
- Windows explorer constant CPU usage – Another common issue that can occur with Windows Explorer is constant CPU usage. This can be caused by temporary files, so be sure to remove them.
- Explorer.exe high CPU usage when moving mouse – This is a slightly unusual issue, but you should be able to fix it using one of our solutions.
Let’s now walk you through all one needs to know about the problem and the most effective solutions for it.
Why does explorer.exe use high CPU?
Explorer.exe is the name of the Windows Explorer process, and under an ideal scenario, it shouldn’t consume much CPU, typically in the range of 0-5%. If it’s higher than that, there’s a problem that needs to be identified and eliminated to get the best performance.
One of the common reasons behind Windows Explorer high CPU usage in Windows 10 is corrupt system files. Certain third-party apps are also known to trigger CPU usage for explorer.exe.
Besides, system errors, temporary files, issues with the hard disk, and malware can also lead to the problem. In addition to these, if the computer idles out too soon or incompatible hardware has been connected, you might witness explorer.exe high CPU usage when moving the mouse.
What is the normal memory usage for Windows Explorer?
It depends on the number of Windows Explorer windows you have open, in addition to the task being carried out. Also, when you launch Windows Explorer, the memory usage will suddenly spike and then lower automatically after a few seconds.
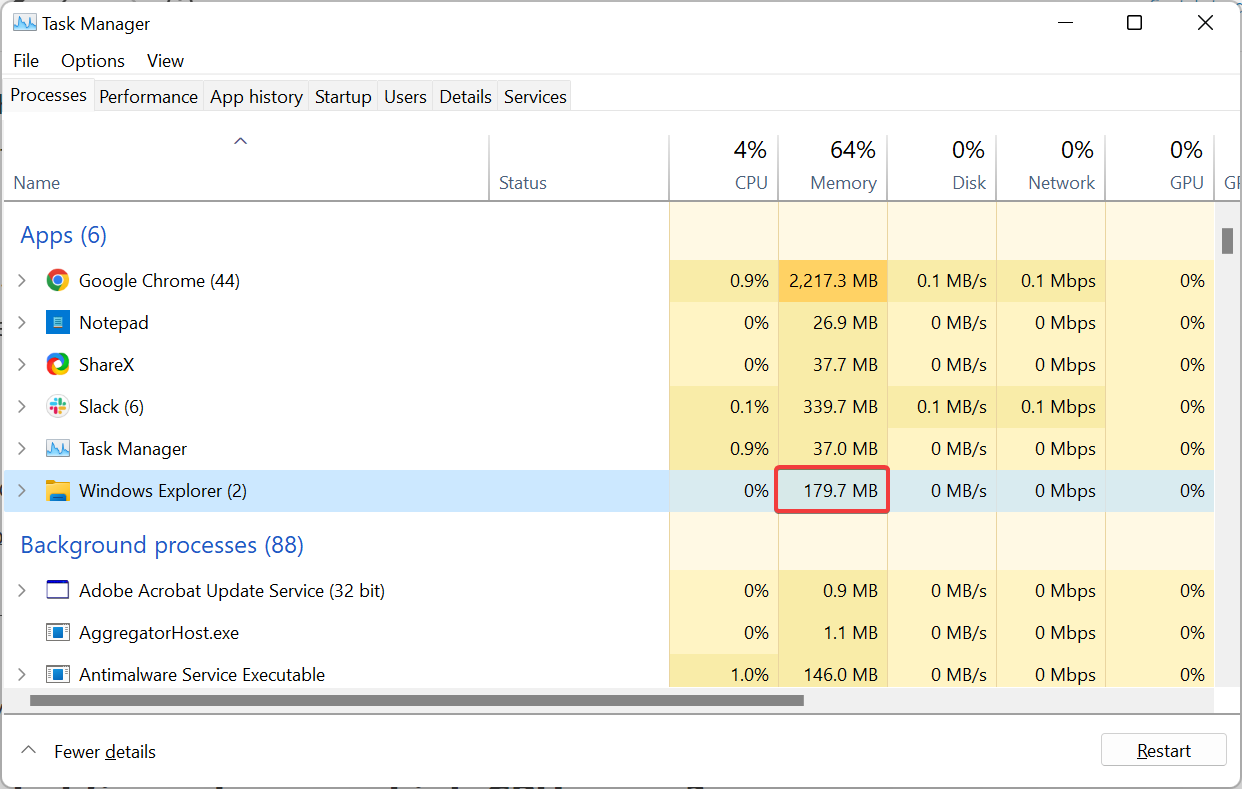
In most cases, the memory usage of Windows Explorer, when left idle, will hover around 40-100 MB, while my computer currently shows 179.7 MB when actively using it in two different windows. If there is an issue with the system, it might increase even further.
How do I fix explorer.exe high CPU usage?
1. Remove old and temporary files
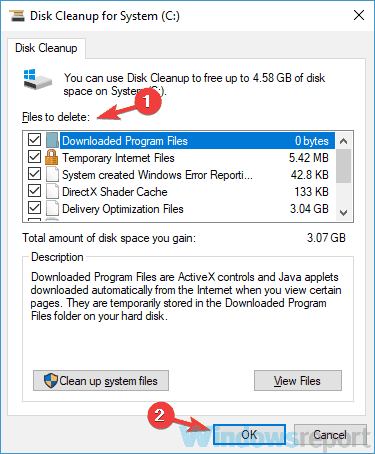
- Press Windows + S, type Disk Cleanup, and click on the relevant search result.
- Make sure that your system drive, by default C, is selected and click OK.
- Your PC will now scan the selected drive. This process usually takes a couple of seconds.
- Select the files you want to remove and click OK.
- If you want, you can click the Clean system files button in order to remove additional files.
If you’re having problems with explorer.exe high CPU usage in Windows 10, the problem might be caused by old and temporary files.
Programs on your computer create hundreds of temporary files, and sometimes these can interfere with your system, so it’s advised to remove them.
Alternatively, there are specialized cleaning tools that can efficiently erase temporary files on your PC without leaving any leftovers.
2. Disable cloud storage clients
According to users, sometimes this issue can occur due to cloud storage services such as Dropbox or OneDrive.
These services sync files automatically in the background, and that can cause explorer.exe high CPU usage in Windows 10.
To fix the problem, users recommended disabling OneDrive and uninstalling Dropbox temporarily and see if that solves the problem.
There are several ways to uninstall an application, but the most effective one is to use uninstaller software. It will remove all files and registry entries associated with the application you’re uninstalling, ensuring no leftover files interfere with the system.
3. Check for misleading desktop icons
Sometimes explorer.exe high CPU usage can occur due to certain icons on your desktop. This is an unusual occurrence, but it can happen on your PC.
Apparently, the issue is caused by a file or a shortcut on your desktop that doesn’t have an icon. For some reason, these types of files cause issues such as high CPU usage with explorer.exe in Windows 10.
To fix the problem, you just have to remove files/shortcuts without icons from the desktop, and the problem will be resolved.
4. Check for malware
Sometimes explorer.exe high CPU usage can occur due to malware. A certain process can be running in the background without your knowledge, and that can cause high CPU usage on your PC.
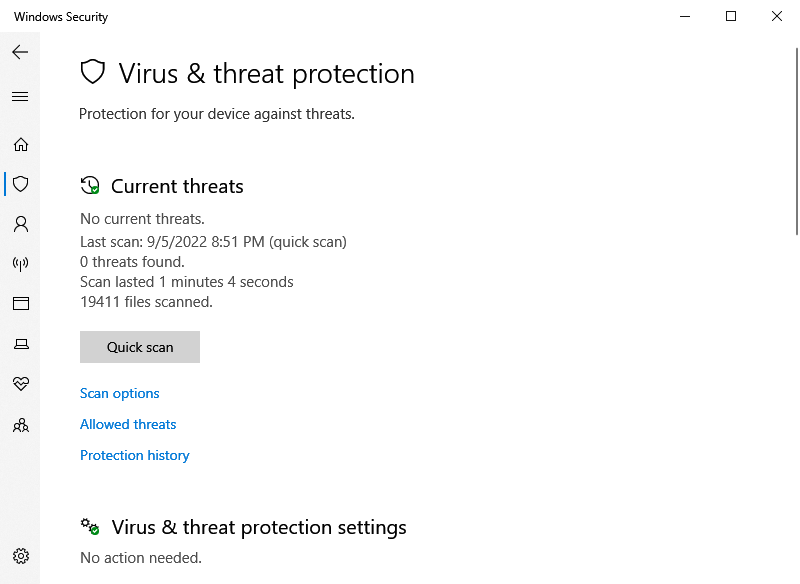
If you’re having this issue on your PC, we advise you to perform a full system scan and check if that solves the problem. To run the scan, you may use the built-in Windows Security or go with the third-party solution.
If Windows Security is unable to find the malware, you might want to move over to an effective antimalware tool that has the ability to detect malware, spyware, and other dangerous threats.
As an alternative, there is a powerful security tool that will safeguard your PC against digital threats with the latest protection functionality.
You can check our tested recommendations and choose an antivirus that is capable of securing your system from spyware or ransomware attacks, without affecting other processes or slowing down your computer.
5. Install the latest updates
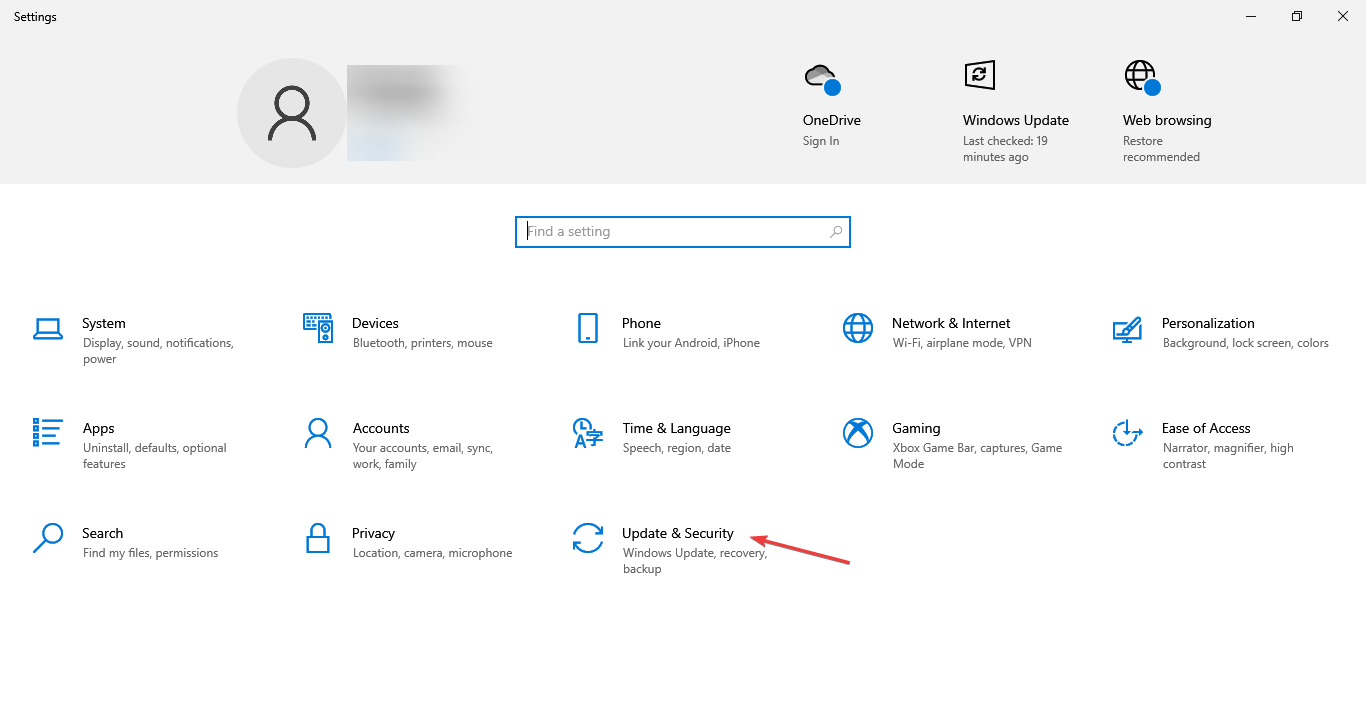
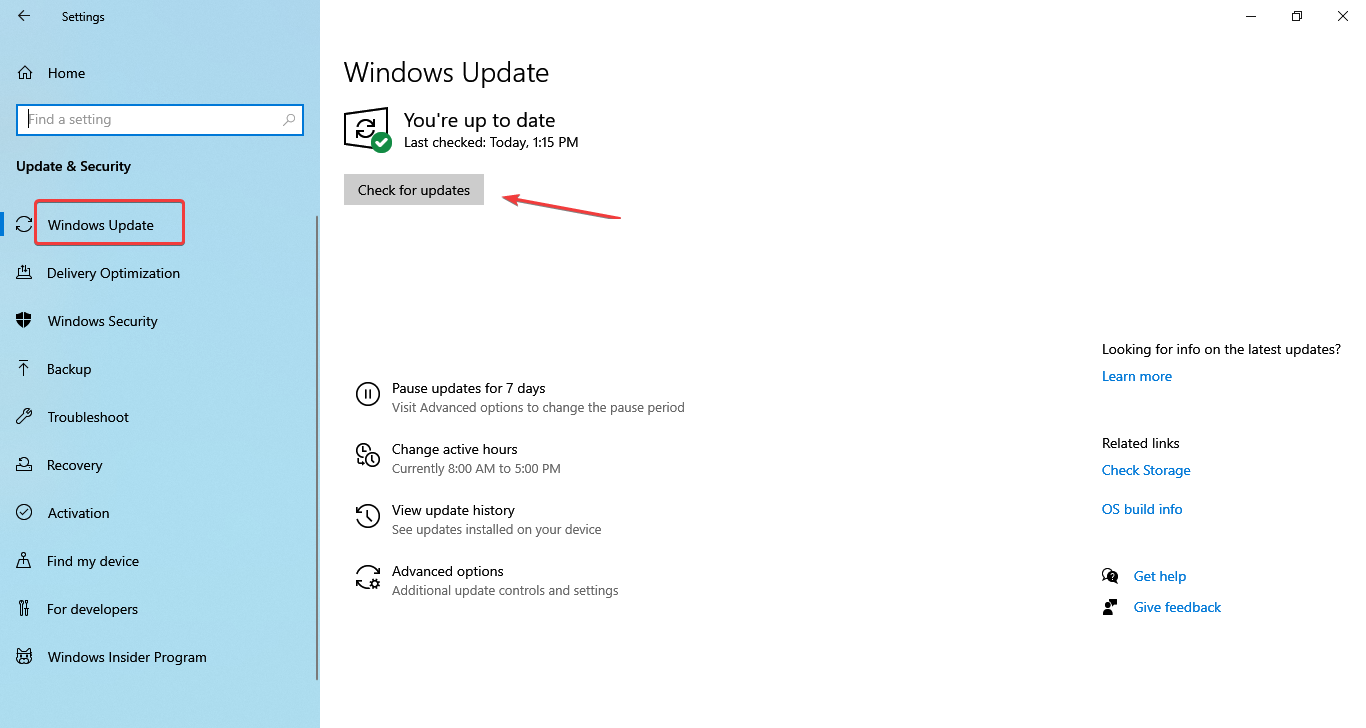
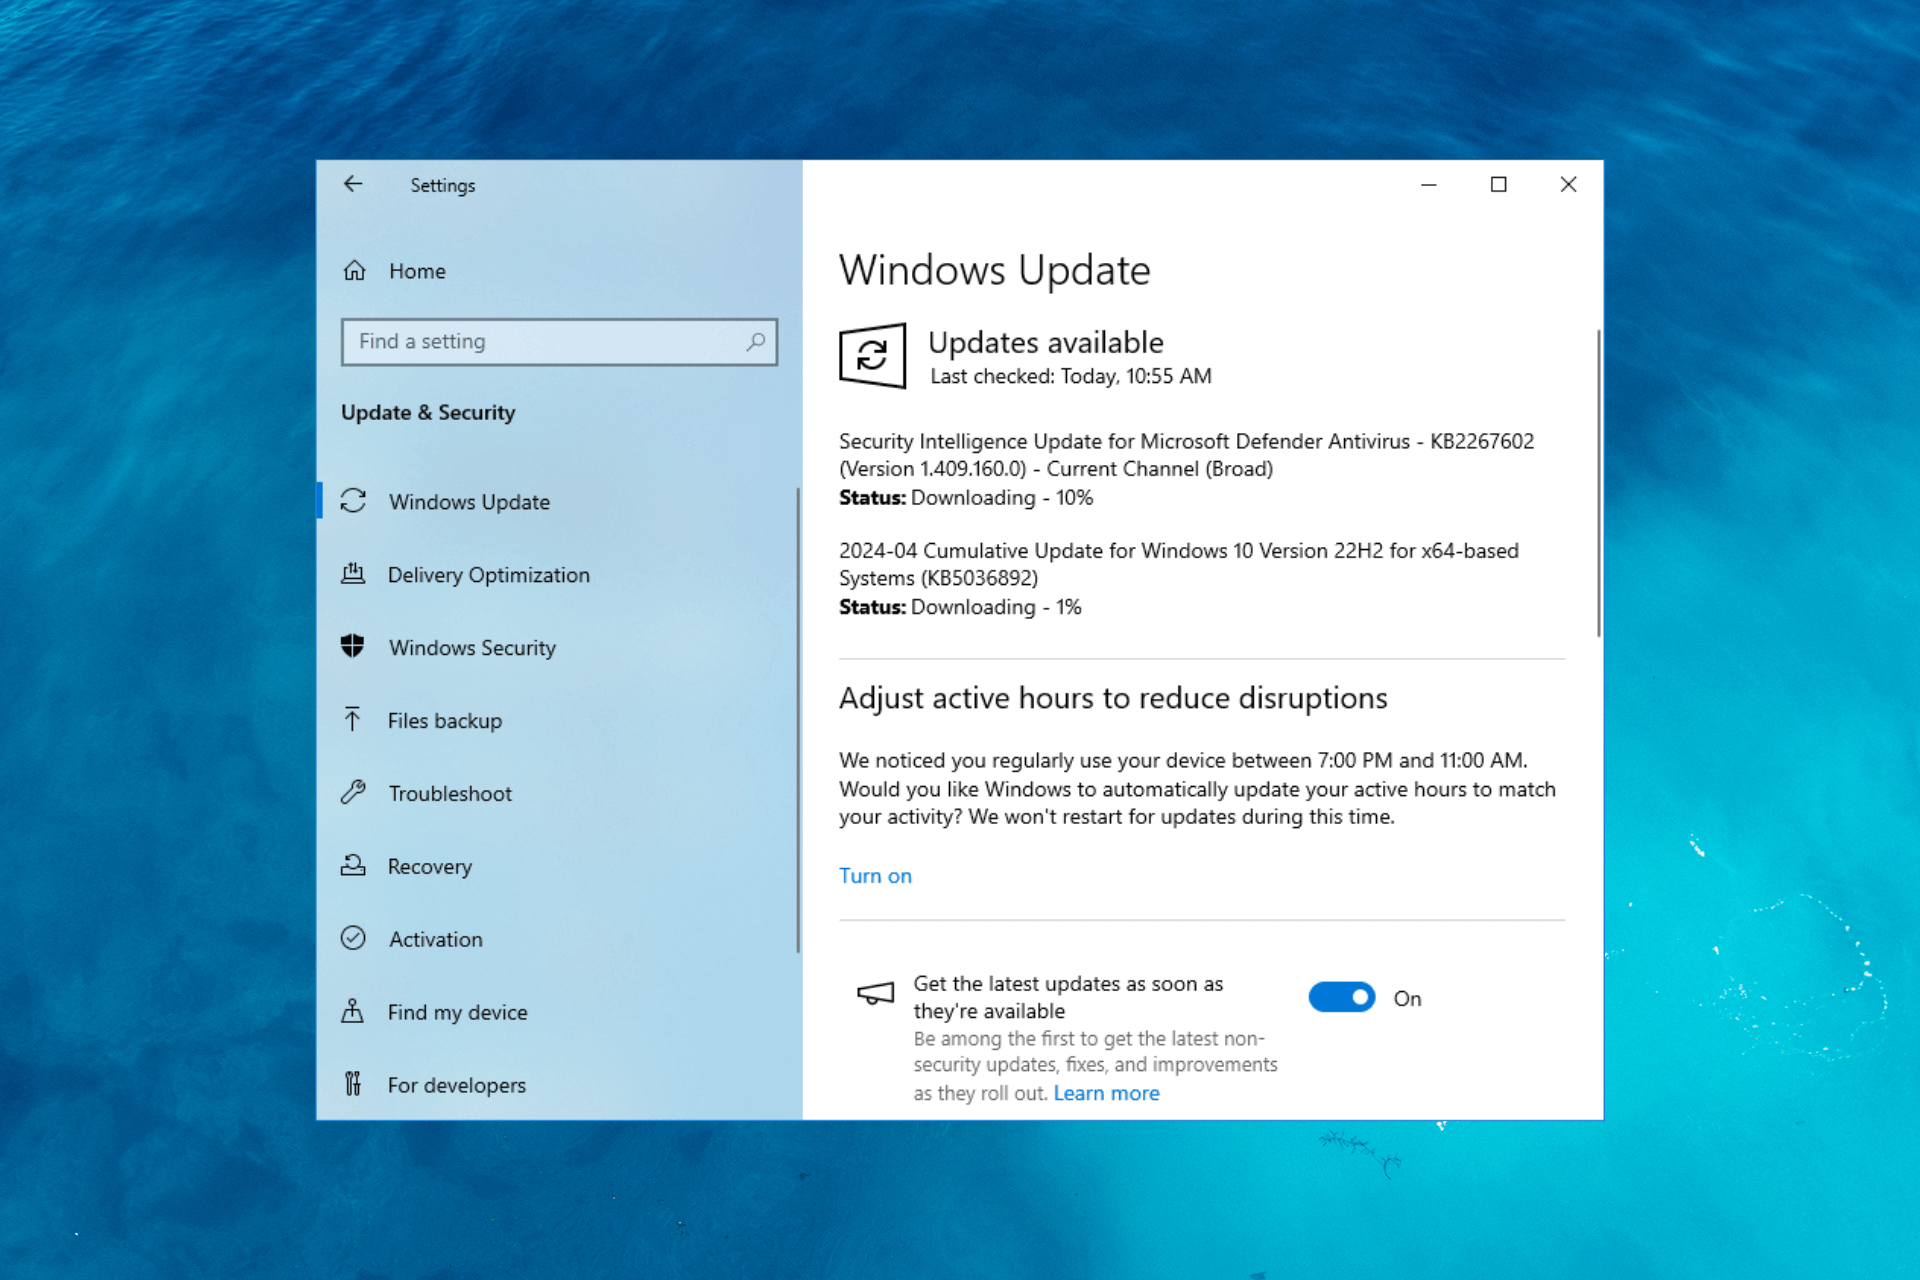
- Press Windows + I to open the Settings app, and select the Update & Security section.
- Click on the Check for updates button.
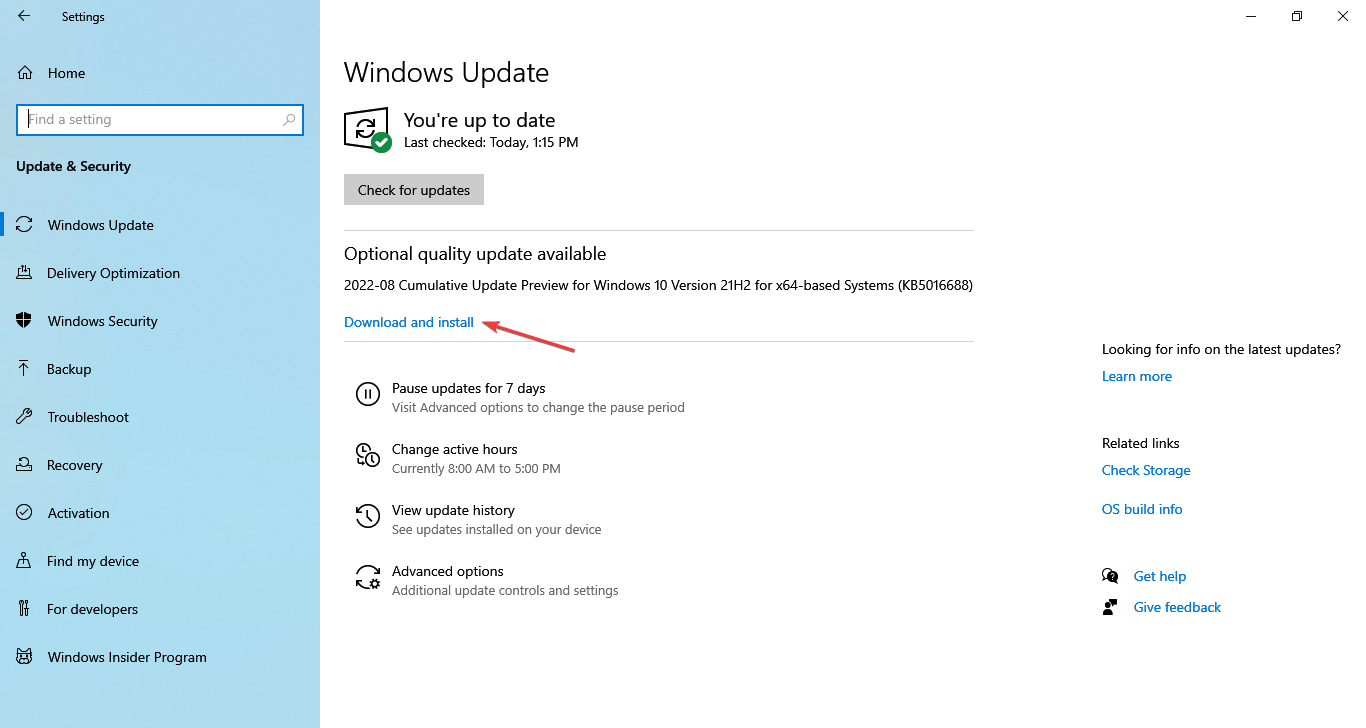
- Wait for Windows to scan and locate the available updates, and if any are listed, click on Download and install.
- Restart your PC to install them, and check if the problem is still there.
If you’re having issues with explorer.exe high CPU usage on your Windows 10 PC, the problem might be the missing updates. Windows 10 is a solid operating system, but sometimes certain bugs can appear and cause high CPU issues.
However, you can fix this problem simply by installing the latest updates. Windows 10 usually installs the updates automatically, but you can always check for updates on your own.
6. Perform a Clean boot
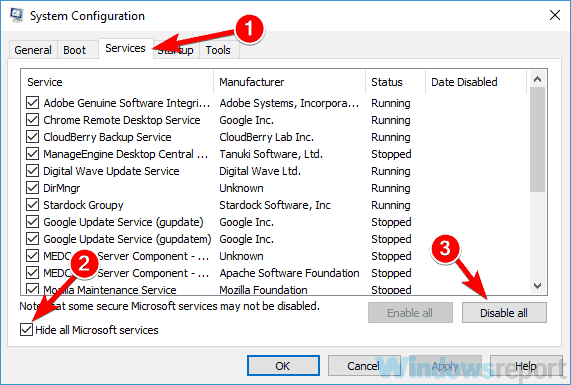
- Press Windows + R, type msconfig in the text field, and click OK.
- Go to the Services tab, check the Hide all Microsoft services option, and then click the Disable all button.
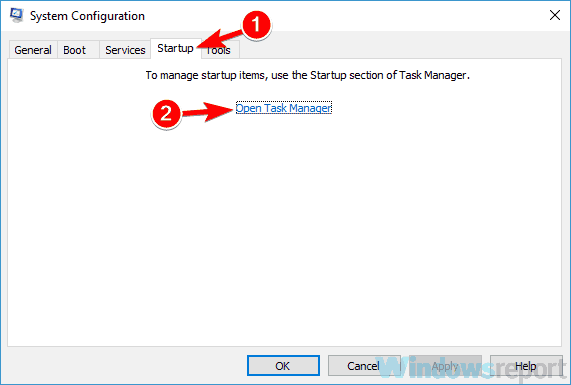
- Head over to the Startup tab and click Open Task Manager.
- Locate all apps that read Enabled under the Status column, right-click on them individually and select Disable.
- Head back to the System Configuration window and click on Apply and OK to save changes.
- Now, restart your PC.
Once your PC restarts, check if the problem is still there. If not, enable services and applications one by one until you manage to recreate the problem. Keep in mind that you’ll need to restart your PC every time you enable a group of services or applications.
According to users, sometimes explorer.exe high CPU usage in Windows 10 can occur due to third-party applications on your PC.
Many applications and services tend to start automatically when Windows is booted, and that can cause this and other problems to appear.
Also, you can fix this issue simply by performing a Clean boot. In the Clean boot state, all startup applications and services should be disabled, allowing you to troubleshoot the problem.
7. Clear the contents of the Temp folder
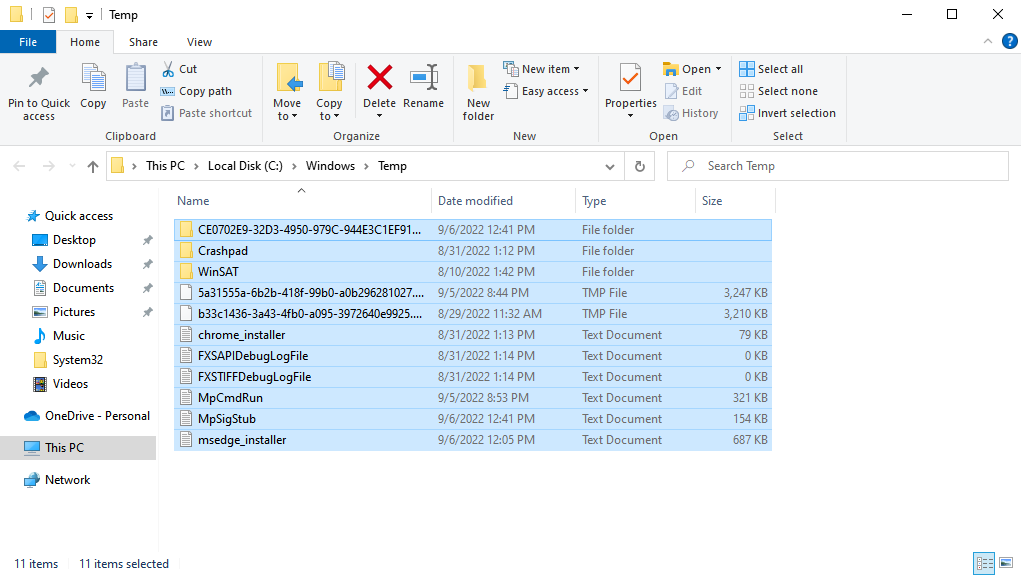
- Press Windows + R to open Run, paste the following path in the text field, and click OK:
C:\Windows\Temp - Press Ctrl + A to select all the files here, and then hit the Del key.
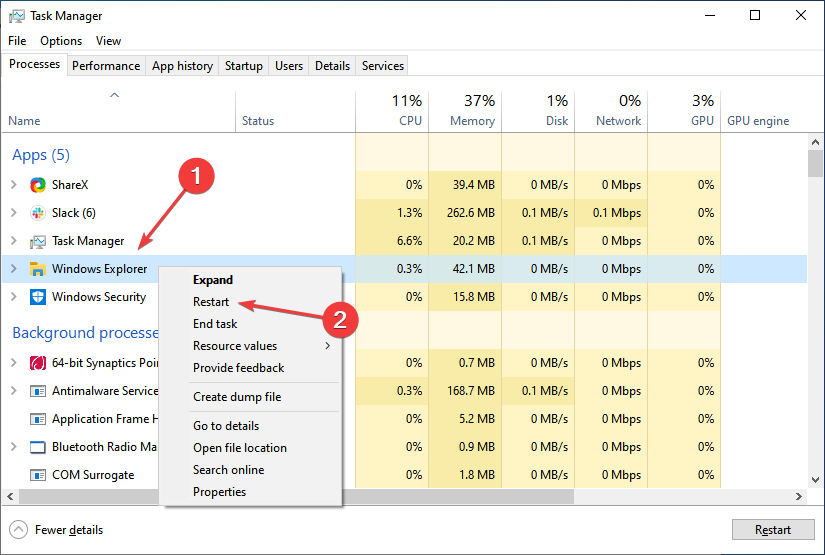
- Next, press Ctrl + Shift + Esc to open Task Manager.
- Locate Windows Explorer, right-click on it, and select Restart from the menu.
After restarting Windows Explorer, the problem should be completely resolved. According to users, explorer.exe high CPU usage in Windows 10 can sometimes be caused by files in the Temp directory, and if Disk Cleanup couldn’t do it, the manual approach should do the trick.
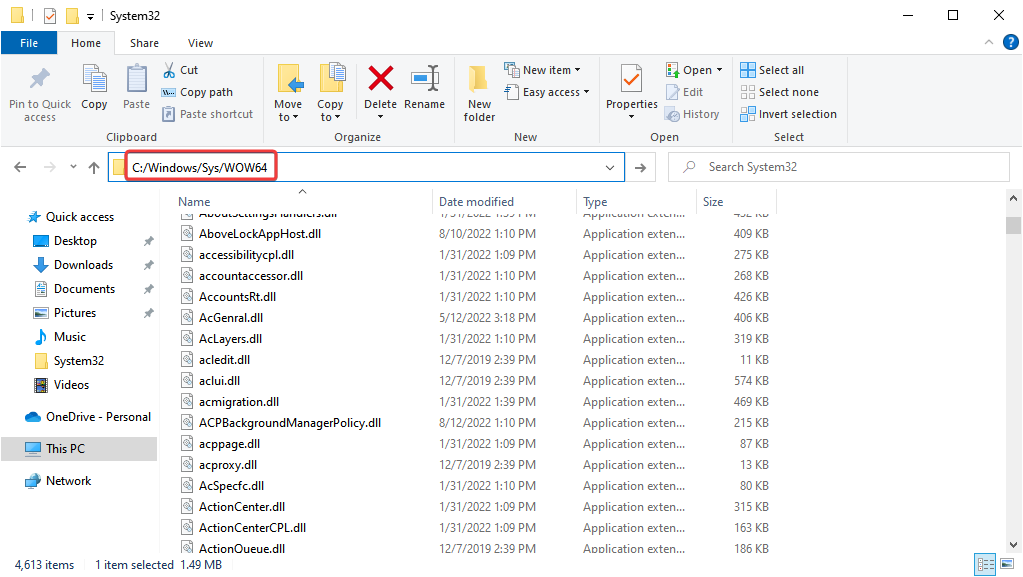
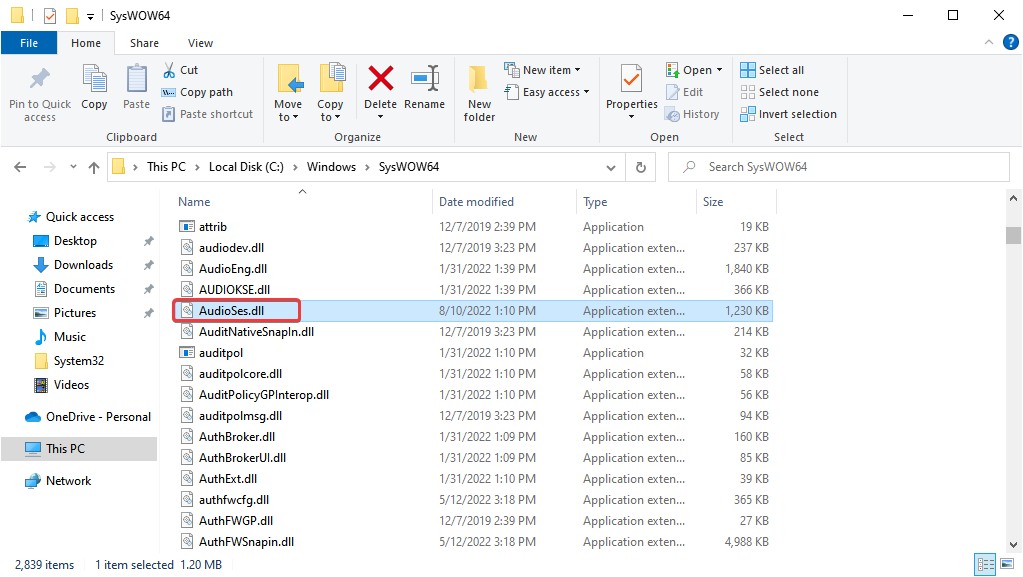
8. Delete the AudioSes.dll
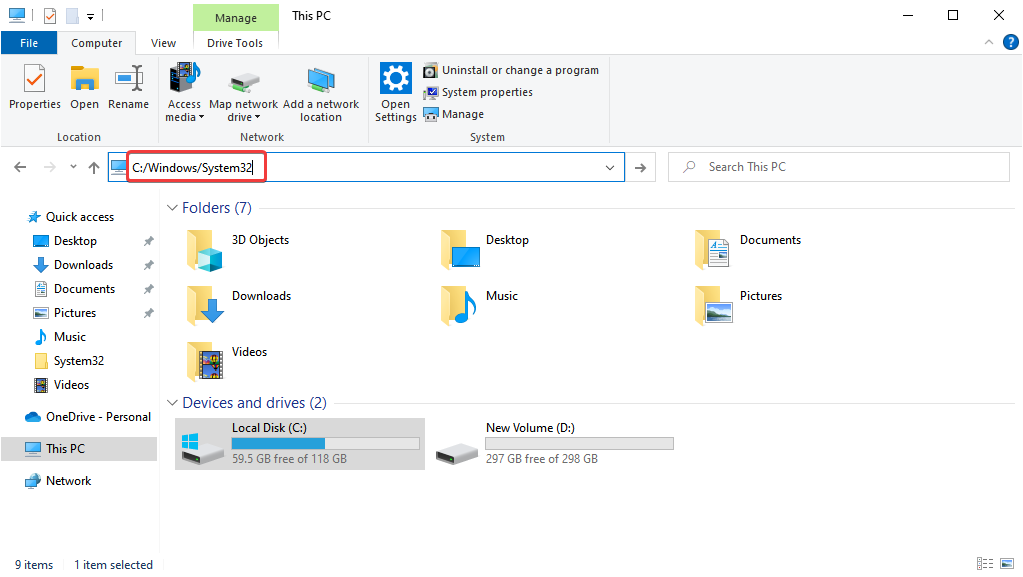
- Press Windows + E to open the File Explorer, paste the following path in the address bar, and hit Enter:
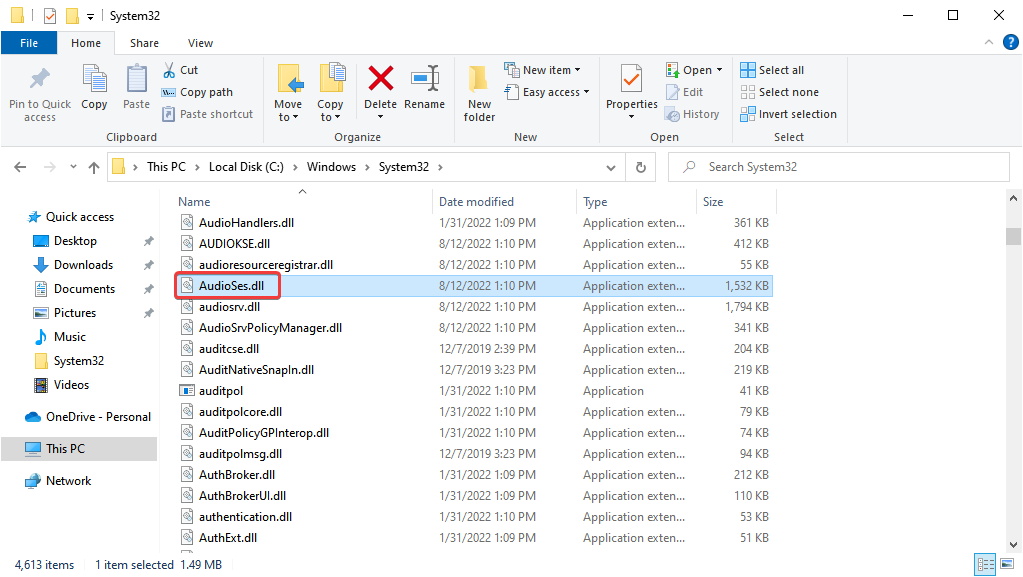
C:/Windows/System32 - Locate AudioSes.dll and move it to the Desktop.
- Now, paste the following path in the address bar and hit Enter:
C:/Windows/SysWOW64 - Locate AudioSes.dll, and move it to a different directory.
If you’re having explorer.exe high CPU usage in Windows 10, the problem might be related to the AudioSes.dll file. According to users, this file can sometimes cause the issue, and the only way to fix it is to move this file.
This isn’t the most reliable solution, and modifying the contents of the Windows directory is usually not advised, so be sure to use extra caution. If any new problems occur, restore these two files to their original locations.
9. Run SFC and Check Disk scans
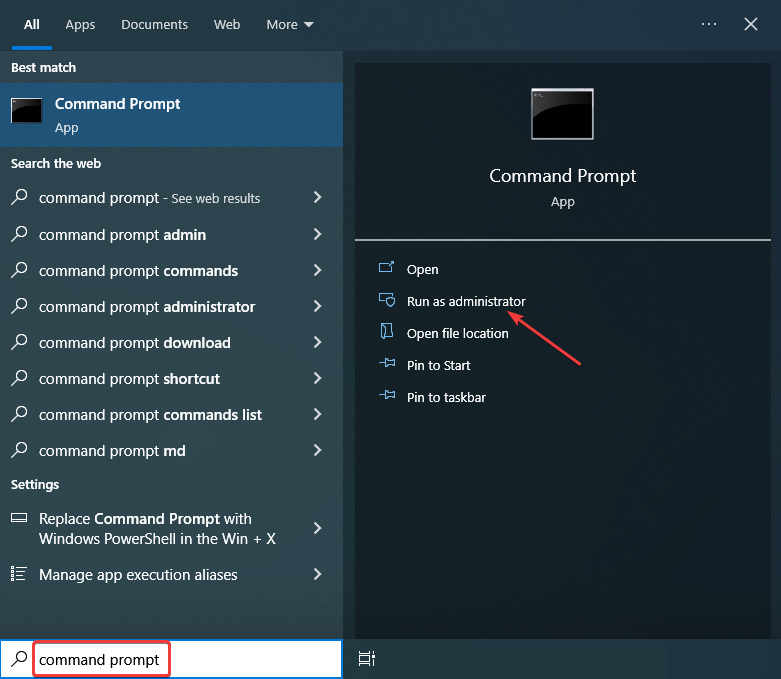
- Type Command Prompt in the Search bar, and click on Run as administrator.
- Click Yes in the UAC prompt.
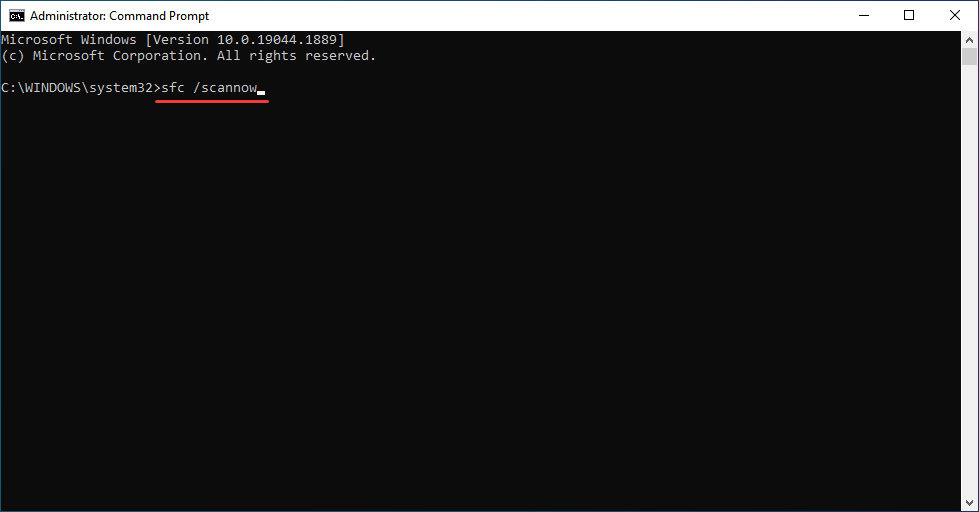
- Now, paste the following command and hit Enter to run the SFC scan:
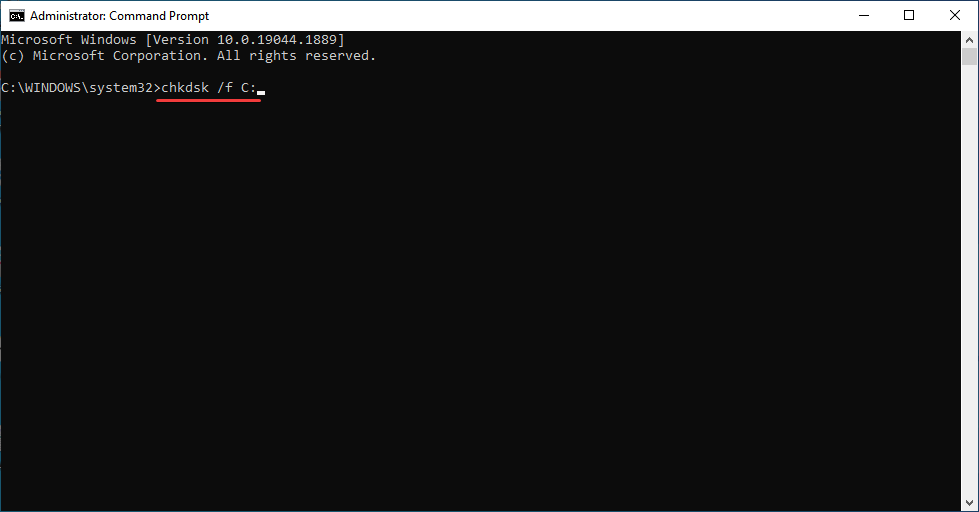
sfc /scannow - Next, execute the following command to run Check Disk, while replacing X with the system drive on your computer, which should, in all likelihood, be C:
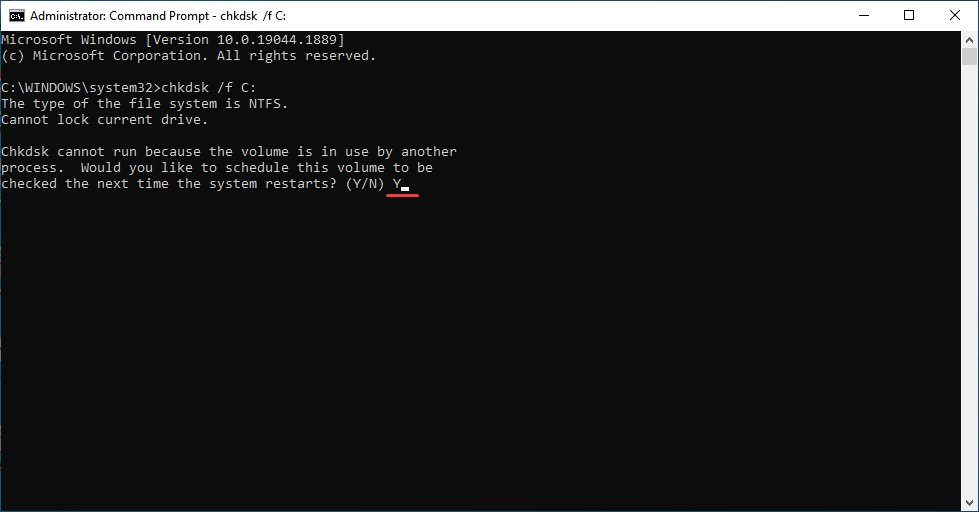
chkdsk /f X: - You’ll be asked to schedule a scan, press Y to do so, and then hit Enter.
- Now, restart the computer.
Sometimes the explorer.exe high CPU usage problem in Windows 10 can occur due to corrupted files on your PC. In this case, the SFC (System File Checker) scan comes to your rescue. Also, run the Check Disk scan to look for issues with the hard drive.
How do I stop Windows Explorer from running in the background?
Though many recommend terminating the Windows Explorer process from the Task Manager, the method doesn’t make sense because the taskbar and other critical elements are coupled with it.
So, when the Windows Explorer process is terminated, the Taskbar and even the desktop icons would disappear.
In this case, it’s best that you remove it from the startup apps if Windows Explorer or a particular folder has been configured to launch at boot.
That’s it! By now, you should be able to fix explorer.exe high CPU usage in Windows 10. Some of the solutions here would also work in the case of Windows Explorer high memory usage in Windows 10.
Besides, if the system heats up, find out how to fix a high CPU temperature in Windows.
Don’t forget to tell us whether these steps helped you deal with the problem. You can do that in the comments section below.


