Outlook Won't Print in Color [PERMANENT SOLUTION]
![]() 3 min. read
3 min. read
![]() Updated on
Updated on
Share this article
Improve this guide
Read our disclosure page to find out how can you help Windows Report sustain the editorial team. Read more
Sometimes, when you print your calendar from the Outlook client you may find that it is only printing in black and white color. The issue is known to occur in Outlook 2016 and later versions.
According to Microsoft, the issue may occur due to a bug in the Outlook client that does not respect the Print using the grey shading setting.
When the user goes to the preview, the print screen only shows Black and White option. If you are facing a similar error, here is how to fix this error on your Windows 10 device and Outlook client.
Why won’t Outlook print in color?
1. Disable Print Using Grey Shading
- Launch Outlook client.
- Click on File and select the Print option.
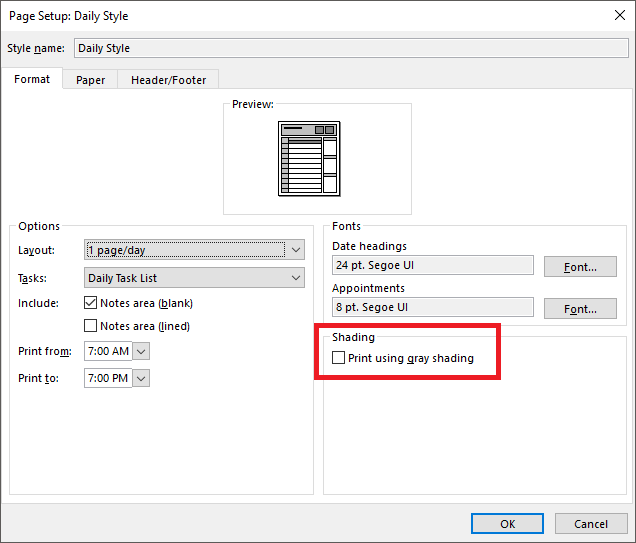
- Click on Print Option and then under Print Style, click on Page Setup button.

- Under Shading, Uncheck “Print using grey shading” option.
- Close the Outlook client and relaunch it. Check if the color print options are back and you are able to print color documents as well.
If the printer won’t print in color, the solution above will most likely fix the problem quickly.
2. Check your Printer Settings
- Click on Start and select Settings.
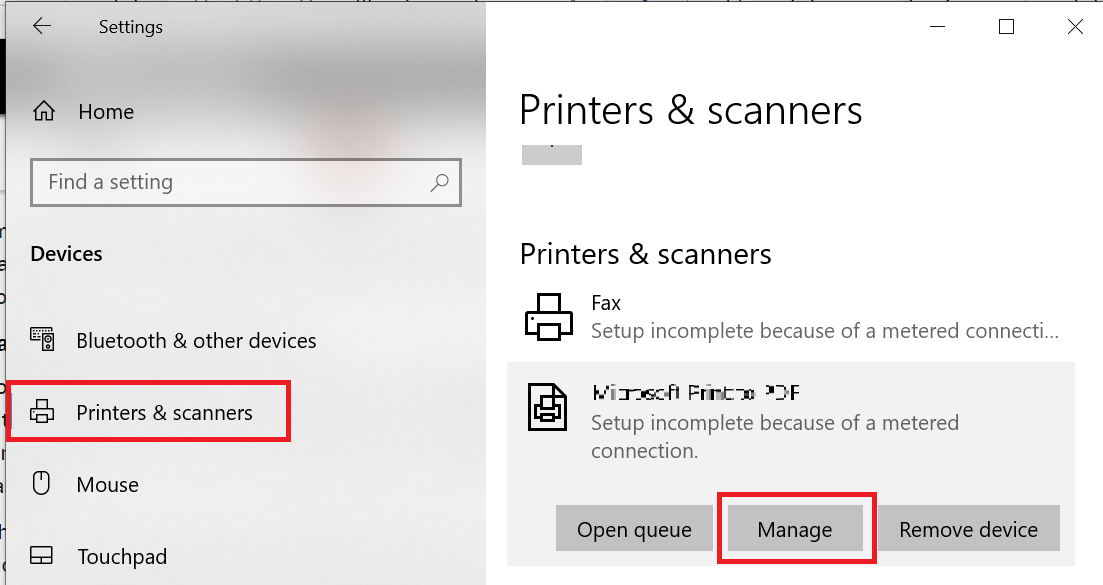
- Click on Devices and then click on Printers and Scanner from the left pane.
- Look for your printer in the list of the printer. Click on your printer and select Manage.

- Under “Manager your Device” click on “Printing Preferences“.
- Depending on your printer configuration, find the option and select whether you want to print in color or black and white. Since you want to print in color, check if it is set to Black and White. If so, set it to print color.
- Close the Printer properties window and launch Outlook. Try printing any document and check if the color printing option is available.
3. Update the Printer Driver
- Press Windows Key + R to open the Run dialogue box.
- Type “devmgmt.msc” and hit enter to open the Device Manager.
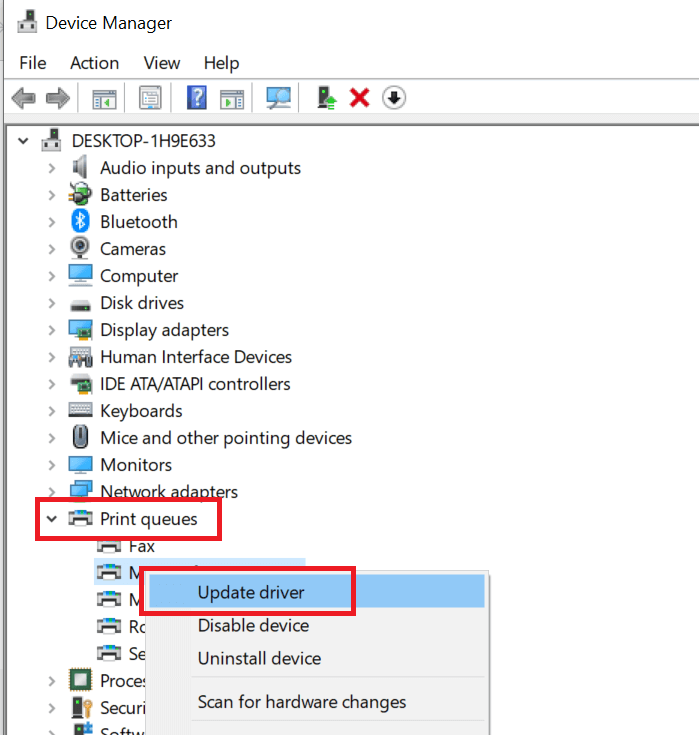
- In the Device Manager, expand “Print queues“.

- Look for the affected printer in the list. Select the printer and select Update Driver.
- Choose “Search automatically for updated driver software“.
- Windows will look for any new update for the driver and download it. After the driver is installed. Close the Device Manager, and launch Outlook. Check for any improvements.
If the manual method of updating your drivers didn’t work out, don’t stress about it. You have a more practical alternative to manage all the PC drivers automatically.
So, you should use effective driver update support for Windows given by a fully automated program. It offers a detailed driver scan and a complete list of outdated drivers you can fix by only pressing one button.
⇒ Get PC HelpSoft Driver Updater
4. Repair MS Office
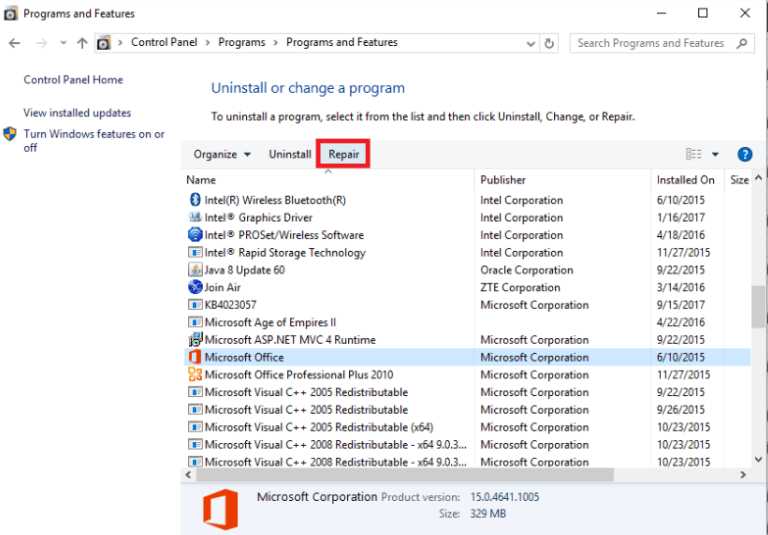
- Press Windows Key + R, type Control and hit enter to open Control Panel.
- Go to Programs > Programs and Features.

- Locate Microsoft Office and click on Change.
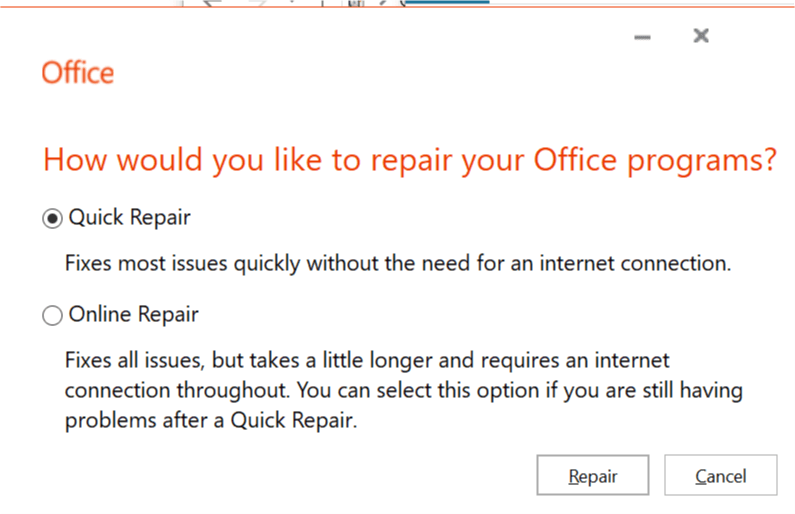
- In the Office Repair tool, select Quick Repair and click the Repair button. Wait for the troubleshooter to complete the repair. Check for any improvement.

- If the issue persists, again launch the office repair tool and select the Online Repair option. Click on Repair button again. This option requires an internet connection to work properly.


User forum
0 messages