How to Create, Add & Customize Priority Fields in Outlook
Add a column using the Field Chooser option
5 min. read
Updated on
Read our disclosure page to find out how can you help Windows Report sustain the editorial team Read more
Key notes
- If the default priority settings are not sufficient for you, you can add a custom priority field on Outlook.
- All you need to do is right-click column header, select Field Chooser, click New, add a name, & drag it to the task list.
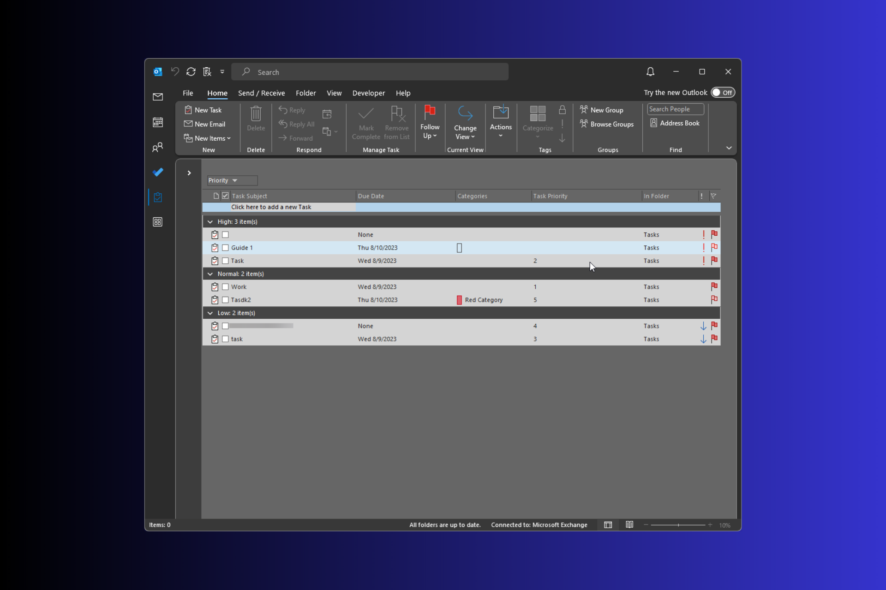
To determine the urgency of an assigned task on Outlook, you can use the inbuilt priority levels (High, Normal, and Low), color tags, due date, and the status field.
However, if you want to add more details, you need to create a custom priority field in Outlook, which requires a few extra steps.
In this comprehensive guide, we will explain the step-by-step instructions to create & add custom priorities, along with the steps on how to customize priorities in Outlook.
What are priority fields in Outlook?
In Outlook, the priority field shows the level of importance assigned to a task, email, or other items, which indicates if you can delay the task or should handle it immediately.
Adding tags, including relevant info in the subject field for a task, will further help you sort the to-do list and help attend to the high-priority items first.
The default priority settings have three options, High, Medium, and Low, which are not always enough, especially when you are working in a team wherein members might have varying interpretations of priorities.
Also, customizing the priority field can help you adapt Outlook task management, thereby personalizing the workflow.
For further personalization, you can customize the Outlook Quick Access toolbar so that you can access all the frequently used options right in front of you, which makes using the app easier than ever.
How do I create a custom field in Outlook?
1. Create a custom field
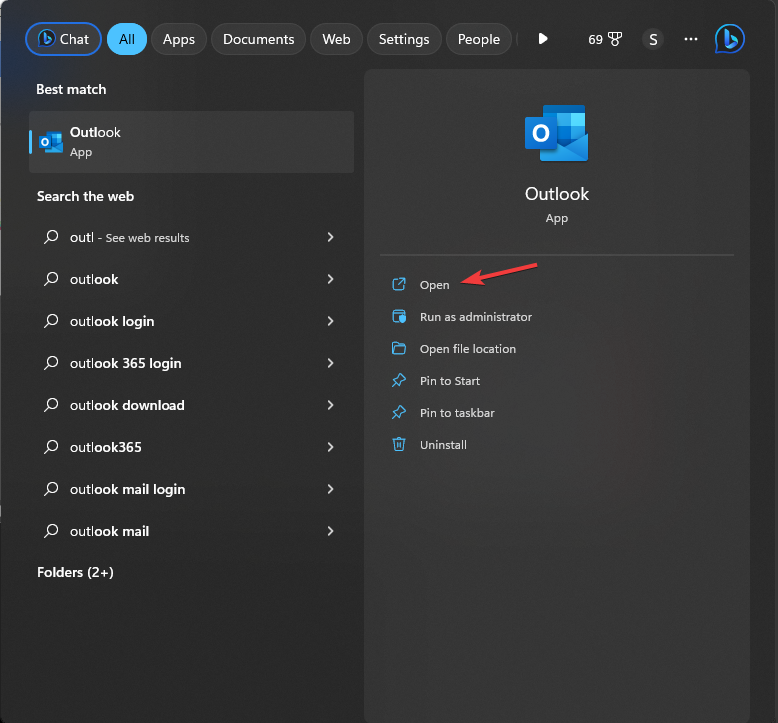
- Press the Windows key, type outlook, and click Open.
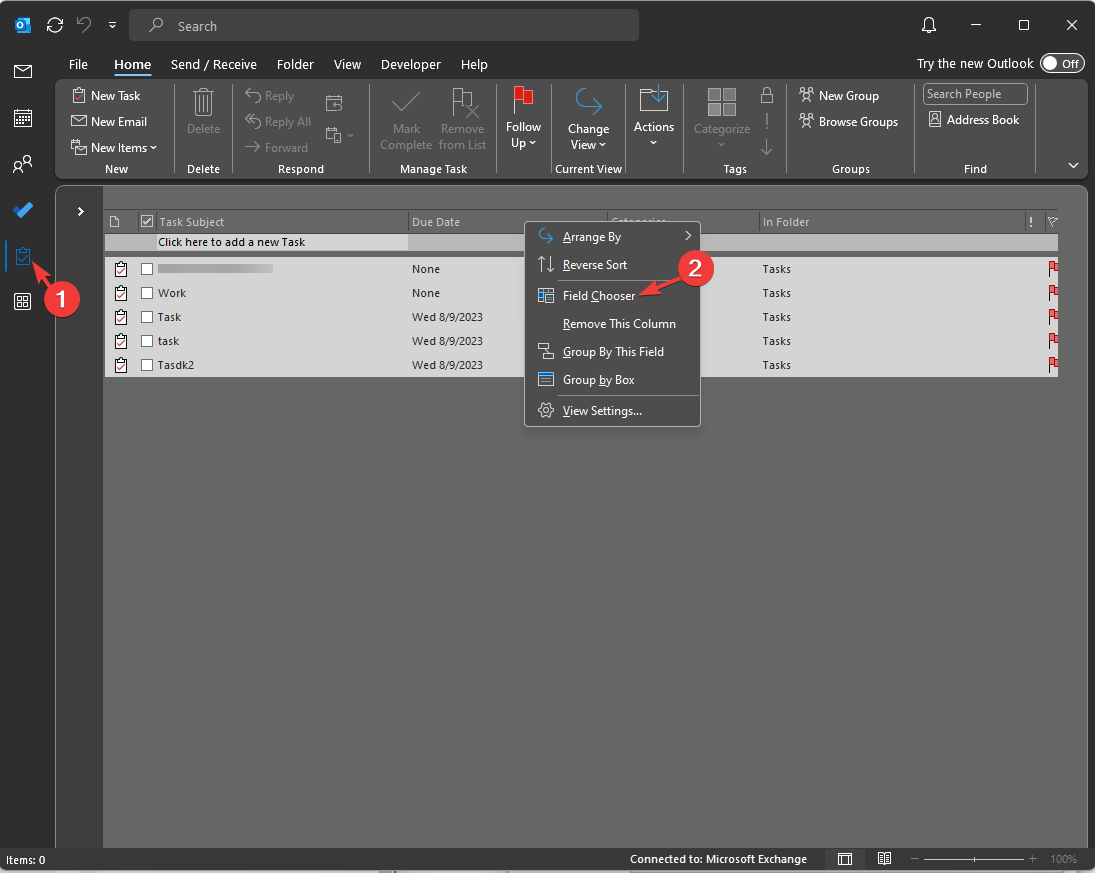
- Go to the navigation bar and select the Tasks folder. In the new window, you will see the task assigned listed in the right pane.
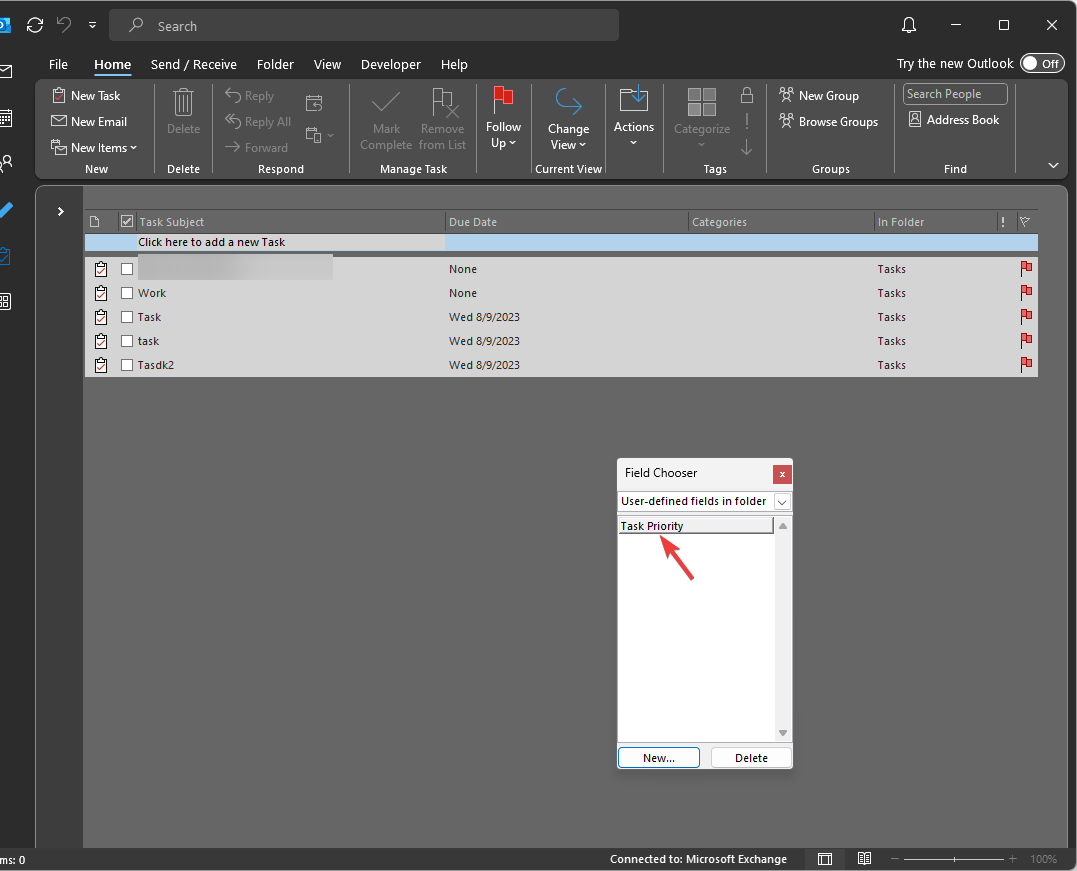
- Next, right-click the column header bar to get the context menu and select Field Chooser.
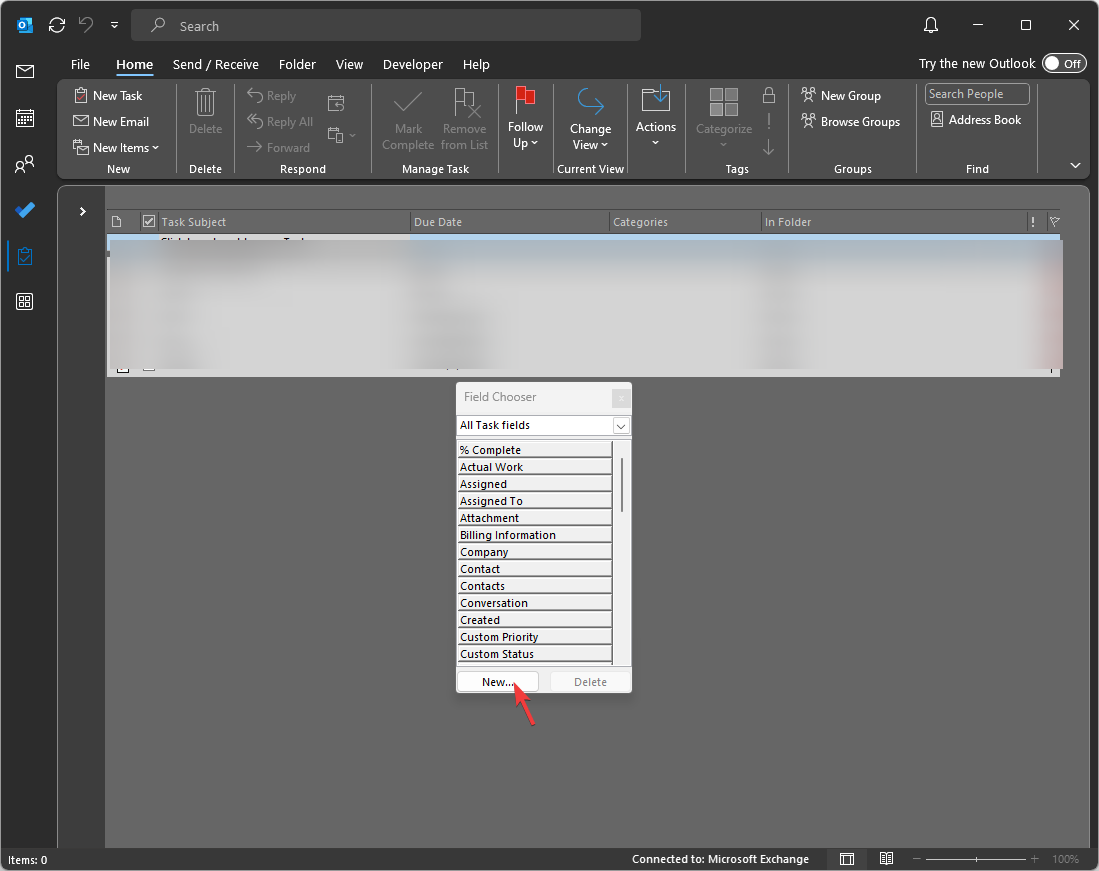
- On the Field Chooser dialog box, click New.
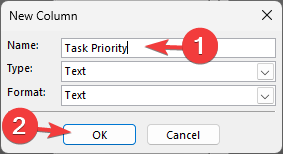
- On the New Column window, type in the name you want to assign to the column. For Type and Format, Text is selected by default, but you can change the field type according to the column name or purpose. Once you have entered all the details, click OK.
- Once the column appears in the Field Chooser window, drag and drop it to the column header bar to add it.
You can create as many columns as you like to streamline the task list further but if you add too many, things will get complicated.
2. Enable Allow in-cell editing to define the priority
 NOTE
NOTE
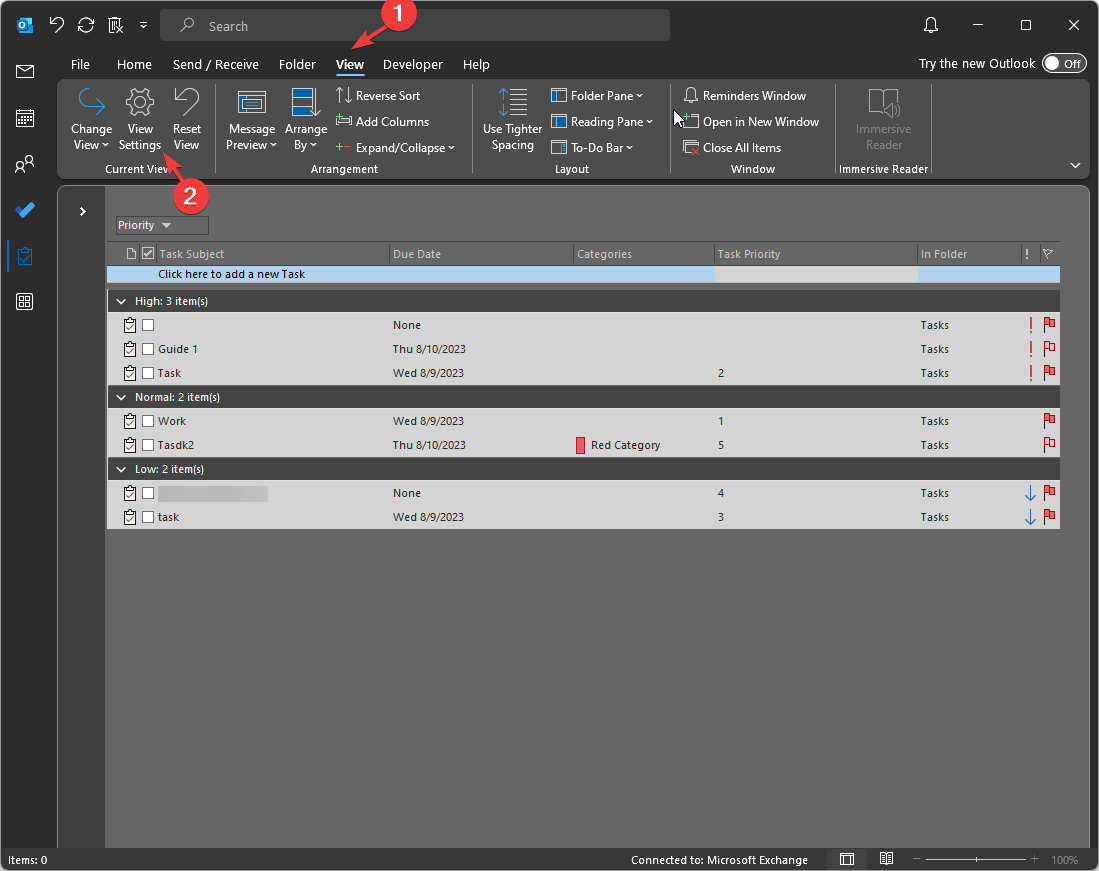
- In the Tasks folder, go to the View tab, and from the Current view header, select View Settings.
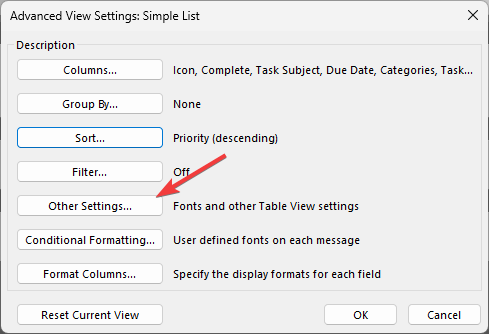
- On the Advanced View Settings window, select the Other Settings button.
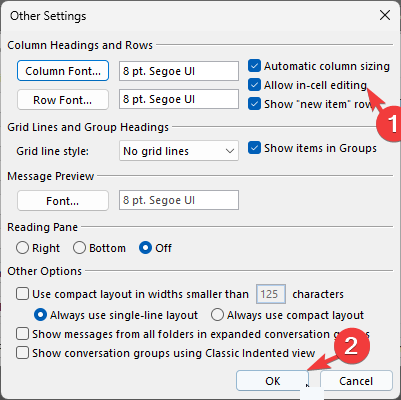
- Next, locate Column Headings and Rows, place a checkmark next to Allow in-cell editing, then click OK.
- On the task list, locate the new column you added and add the number or text defining the importance of an individual task.
If you want to prioritize your emails from a sender and ensure all of them deliver to your Inbox, you must know how to whitelist an email in Outlook.
How can I use custom priority fields?
Adding custom priority fields can help you personalize the tasks per your preferences, enhancing productivity and increasing clarity & efficiency.
Here are a few ways which can help further understand how it is useful:
- Time-sensitive projects or tasks – If some of the tasks mentioned in your list are approaching their due date, you can use the custom priority fields to assign them high-priority levels.
- Context-related priority – For different task contexts, such as high-value clients and deadlines, you can add a priority field to deal with the task accordingly.
- Risk – Add a risk priority field to display the probable risks associated with the task assigned.
- Follow-up – A Follow-up priority field can highlight the task that needs a follow-up; you can label the task as Follow-up-High.
- Team collab – Use it to inform the task importance within your team to increase communication and efficiency.
What are the best practices to follow for custom priority fields on Outlook?
For better Outlook task management, you first need to understand the context of the tasks in a project, then add an appropriate custom priority field.
Furthermore, to use the feature effectively, here are a few tips you must keep in mind:
- Relevance – While choosing a column name, type, & format, you must keep the tasks in mind, as a relevant label can help you assess task importance quickly.
- Workflow – Customizing priority fields should make sense to you and align with your workflow.
- Sorting by numbers – Using numbers as field types can help you mention the task priority in ascending or descending order, which helps assess the urgency level.
- Review task priority – You must check the custom priorities regularly to check if it fits your current requirements.
- Don’t use the same approach – Managing tasks is subjective to a person and task at hand; therefore, you must choose the custom priority fields that suit your needs and the task assigned.
- Simplify – Don’t add too many of them, as it could confuse you and defeat the purpose of providing clarity.
How do I set custom priority in Outlook tasks?
You can right-click the column header bar on the Tasks list, choose Field Chooser, add a new column, name it and define the field types accordingly.
Once it is created, you can drag and drop the column to the Task list to add it to the column header. Next, you can mention the priority according to urgency or other preferences.
So, this is how you can create a custom priority field in Outlook to label the tasks as per the context, time sensitivity, risk involved, and more.
If you find the Outlook indexing is slow and want to fix it, we suggest you check out this guide to speed up indexing in Outlook on Windows 11.
Please feel free to give us any information, tips, and your experience with the subject in the comments section below.

