PROCESS HAS LOCKED PAGES error in Windows 10/11 [FULL FIX]
10 min. read
Updated on
Read our disclosure page to find out how can you help Windows Report sustain the editorial team. Read more
Key notes
- If you wish your computer to be error-free and stable, be sure to update Windows 10 frequently.
- The updates bring improved security as well as new features, but most importantly, they also fix many issues that can cause BSoD errors such as PROCESS HAS LOCKED PAGES.
- Since drivers can be a cause for BSoD errors, we urge you to update your drivers as often as you can.
- BSoD can be pretty scary, but they are actually useful because they prevent hardware damage.

There is a wide range of BSoD errors available, and what is common for all these errors is that they crash Windows 10 and restart your computer in order to prevent damage.
These types of errors can be troublesome, therefore today we’re going to show you how to fix the PROCESS HAS LOCKED PAGES error.
How can I fix PROCESS HAS LOCKED PAGES BSoD error?
- Make sure that Windows 10 and its drivers are up to date
- Run the BSOD Troubleshooter
- Run the SFC scan
- Run DISM
- Check the hard drive
- Delete the problematic software
- Install the older version of the drivers
- Downgrade your BIOS
- Delete Cubase Application Data
- Reset Windows 10
How do I fix PROCESS HAS LOCKED PAGES error?
Solution 1 – Make sure that Windows 10 and its drivers are up to date
Windows 10 isn’t a perfect operating system, and with certain hardware and software, some issues can appear. Fortunately, Microsoft usually fixes these issues through Windows updates.
These updates bring improved security as well as new features, but most importantly, these updates fix many hardware and software issues that can cause BSoD errors such as PROCESS HAS LOCKED PAGES.
If you wish your computer to be error-free and stable, be sure to update Windows 10 frequently.
Although Windows updates can fix many problems, it’s also important that you keep your drivers up to date.
If a certain driver is out of date or corrupted, Windows 10 won’t be able to use that device, and you’ll get a BSoD error.
Since drivers can be a cause for BSoD errors, we urge you to update your drivers as often as you can.
Updating drivers on Windows 10 is simple, and you can do it directly from Device Manager. To update your drivers, do the following:
- Press Windows Key + X to open Power User Menu. Select Device Manager from the list.
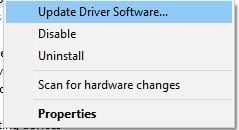
- When Device Manager opens, find the driver you want to update, right-click it and choose Update Driver Software.
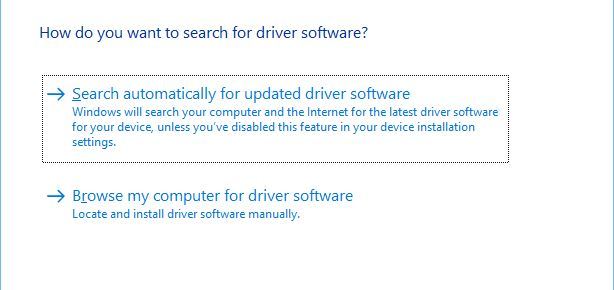
- Select Search automatically for updated driver software. Windows 10 will now download and find the best driver for your device.
- Repeat this step for all drivers that you want to update.
Update drivers automatically
Searching for drivers on your own can be time-consuming. So, we advise you to use a tool that will do this for you automatically.
Using an automatic driver updater will certainly save you from the hassle of searching for drivers manually, and it will always keep your system up to date with the latest drivers.
PC HelpSoft Driver Updater will help you update drivers automatically and prevent PC damage caused by installing the wrong driver version. It stays up to date with the most recent changes, preventing the system from triggering latency, system failures, and BSoD issues.
It really keeps your system running smoothly by installing or updating its necessary drivers. PC HelpSoft Driver Updater scans the computer, creates a status report, does the update, and the system returns to its original state.
After several tests, our team concluded that this is the best-automatized solution.
Solution 2 – Run the BSOD Troubleshooter
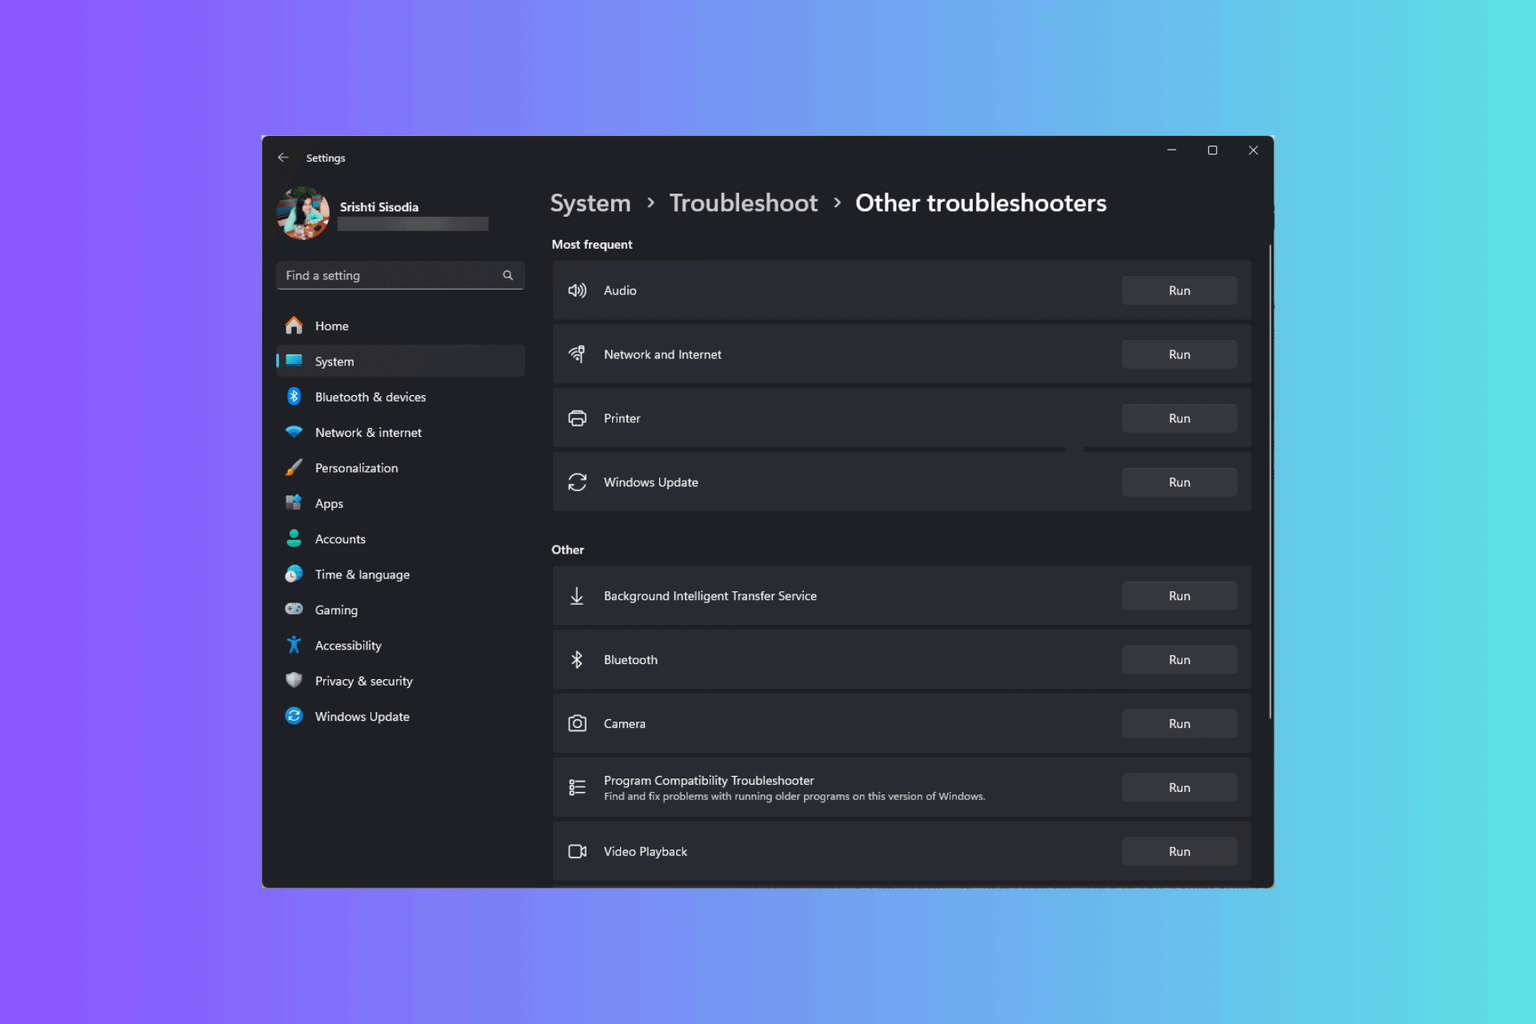
If updating your drivers didn’t get the job done, we’re going to try Windows 10’s built-in troubleshooting tool.
This tool can be used for resolving all sorts of problems inside the system, including BSOD errors.
Here’s how to run Windows 10’s troubleshooting tool:
- Open the Settings app.
- Head over to Update & Security section.
- Select Troubleshoot from the menu on the left.
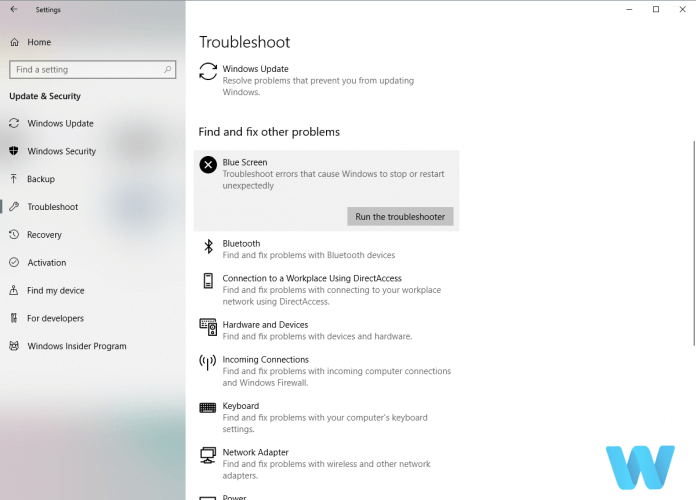
- Select BSOD from the right pane and click Run the troubleshooter.
- Follow further instructions to complete the troubleshooting process.
Solution 3 – Run the SFC scan
The next troubleshooter in line is the SFC scan. This tool checks for corrupt system files, and repairs them, if possible. So if a corrupt system file is the cause of the PROCESS HAS LOCKED PAGES error, this tool will likely resolve it.
Here’s how to run the SFC scan in Windows 10:
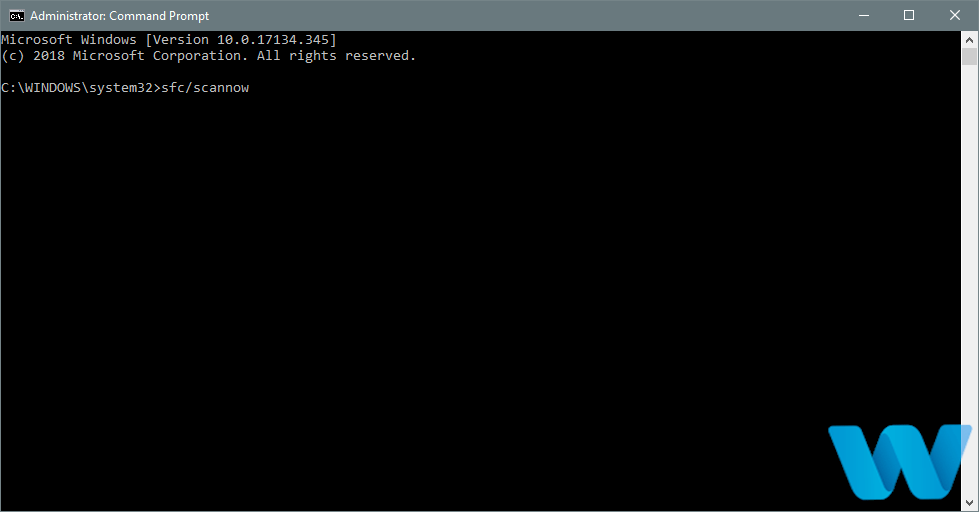
- Go to Search, type cmd, and open Command Prompt as Administrator.
- Enter the following line and press Enter: sfc/scannow
- Wait for the scan to complete.
- If the solution is found, it will be applied automatically.
- Restart your computer.
Solution 4 – Run DISM
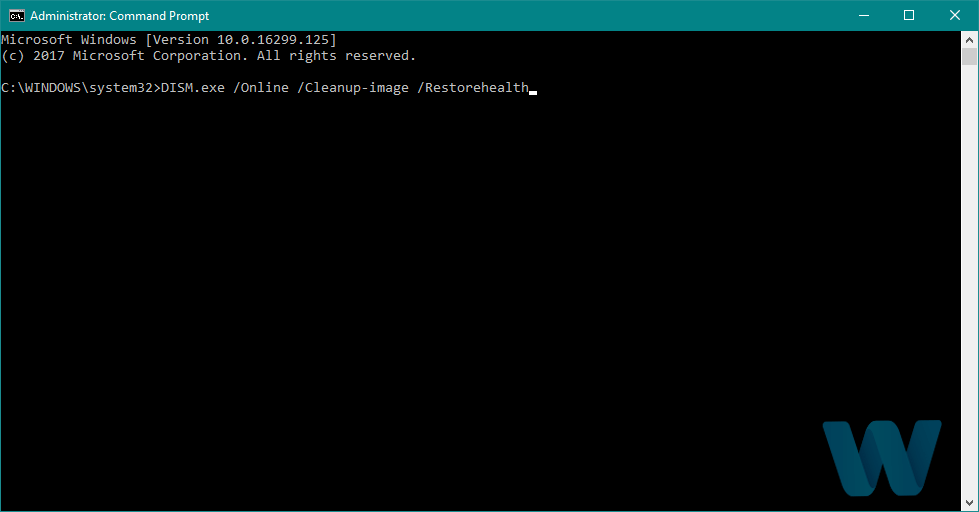
And the third troubleshooter we’re going to try here is DISM. This tool re-deploys the system image, and resolves potential issues along the way. So, it’s possible that running DISM will also resolve the PROCESS HAS LOCKED PAGES error.
We’ll walk you through both standard and the procedure that utilizes the installation media below:
- Standard way
- Right-click Start and open Command Prompt (Admin).
- Paste the following command and press Enter:
- Wait until the scan is finished.
- Restart your computer and try updating again.
- With the Windows installation media
- Insert your Windows installation media.
- Right-click the Start menu and, from the menu, choose the Command Prompt (Admin).
- In the command line, type the following commands and press Enter after each:
- dism /online /cleanup-image /scanhealth
- dism /online /cleanup-image /restorehealth
- Now, type the following command and press Enter:
- DISM /Online /Cleanup-Image /RestoreHealth /source:WIM:X:SourcesInstall.wim:1 /LimitAccess
- Make sure to change an X value with the letter of the mounted drive with Windows 10 installation.
- After the procedure is finished, restart your computer.
Solution 5 – Check the hard drive
If there’s a problem with your hard drive, BSOD issues are quite possible. To check if that’s the case, run the chkdsk command. This command will scan all your partitions for potential problems. If the solution is available, this tool will also apply it.
Here’s how to run the chkdsk command in Windows 10:
- Enter the Advanced Startup (Restart your computer while holding the Shift key).
- Choose Troubleshoot > Advanced Options.
- Select Command Prompt from the list of options.
- When Command Prompt appears, enter the following lines and press Enter after each line in order to run it:
- Some users are also suggesting that you need to run additional chkdsk commands as well. To perform these commands, you need to know drive letters for all your hard drive partitions. In Command Prompt you should enter the following (but remember to use the letters that match your hard drive partitions on your PC):
- chkdsk /r c:
- chkdsk /r d:
This is just our example, so keep in mind that you have to perform chkdsk command for every hard drive partition that you have.
- Restart your computer and check if the issue is resolved.
Although updating drivers from Device Manager is simple, some users claim that this method isn’t always reliable. According to them, Device Manager doesn’t always download the latest drivers, therefore it’s better to download drivers manually.
In order to do that, you just have to visit your hardware manufacturer’s website and download the latest drivers for your device.
Solution 6 – Delete the problematic software
Often certain software can cause PROCESS HAS LOCKED PAGES error and in order to fix this issue, it’s advised that you find and uninstall the problematic software.
According to users, the common cause for this problem can be tools such as IOBit Password Folder, so if you’re using the aforementioned tool, be sure to remove it.
Users also reported that this error can be caused by USB Disk Security antivirus, so you might have to remove this tool in order to fix this problem.
It’s worth mentioning that almost any third-party antivirus software can cause this problem, so be sure to completely remove any installed antivirus programs that you have. To completely remove an antivirus program, you need to use the dedicated uninstaller tool.
Many security companies have these tools on their website, so be sure to download one for your antivirus software.
Solution 7 – Install the older version of the drivers
Although using the latest drivers is always recommended, sometimes the latest drivers might have certain issues that can cause BSoD errors such as PROCESS HAS LOCKED PAGES to appear.
Blackmagic Intensity Pro owners reported that they had certain problems with latest drivers, and in order to fix the Blue Screen of Death errors, they had to uninstall the latest driver and switch to the older version. To uninstall a certain driver, do the following:
- Press Windows Key + X and select Device Manager from the list.
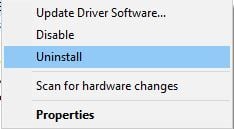
- Locate the problematic driver, right click it and choose Uninstall from the menu.
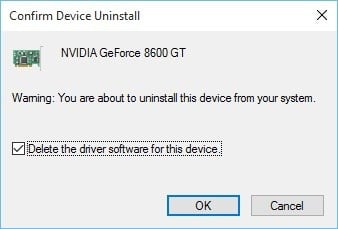
- If available, check Delete driver software for this device and click OK.
- After the driver is deleted, restart your computer.
When you restart your PC, Windows 10 will automatically install the default driver. If the default driver works and the system is stable, you can continue using it. You can update the driver if you wish, but be sure not to download and install the same problematic version.
Solution 8 – Downgrade your BIOS
Updating BIOS is always useful since it allows you to use new features and new hardware with your motherboard, but according to the users, there might be some problems after updating BIOS.
According to them, the PROCESS HAS LOCKED PAGES error started appearing after the BIOS update, and the only solution was to downgrade BIOS to the older version.
Downgrading BIOS is an advanced procedure that can cause permanent damage to your PC if you’re not careful, therefore use extra caution if you decide to perform it. In addition, be sure to thoroughly check your motherboard manual for detailed instructions.
Solution 9 – Delete Cubase Application Data
Few users reported PROCESS HAS LOCKED PAGES BSoD error while launching Cubase, and in order to fix this error, it’s required that you delete all the files from the Cubase Application Data folder. To do that, just do the following:
- Go to Cubase installation directory and locate Cubase Application Data folder.
- Open the folder and delete all files from it.
- Repeat the steps for all previous versions of Cubase that you have installed.
Bear in mind to perform these steps only for older versions of Cubase that you don’t plan to use anymore.
Solution 10 – Reset Windows 10
If the PROCESS HAS LOCKED PAGES error is caused by software, you can fix the problem by performing Windows 10 reset. Bear in mind that you need to create a backup for your files because Windows 10 reset will delete all files and folders from your C drive.
In order to perform Windows 10 reset you might also need Windows 10 installation media, so use Media Creation Tool to create a bootable USB flash drive. To reset Windows 10, do the following.
- Restart your computer while it boots in order to start Automatic Repair.
- Select Troubleshoot > Reset this PC.
- Select Remove everything > Only the drive where Windows is installed > Just remove my files. Click the Reset button.
- Follow the instructions and wait for reset to complete.
If the BSoD error appears even after Windows 10 reset, it means that the error is caused by faulty or incompatible hardware, so be sure to check your hardware and replace any faulty hardware components.
Come to our BSoD troubleshooting Hub if you need any assistance with other BSoD errors.
PROCESS HAS LOCKED PAGES BSoD error can be a major hindrance, but we hope that you managed to solve it by using one of our solutions. Share your thoughts in the comments below!



User forum
0 messages