Windows 11 Wireless Display Lag: 5 Ways to Fix it
That's your chance to resolve the lagging problem right away
![]() 4 min. read
4 min. read
![]() Updated on
Updated on
Share this article

Improve this guide
Read our disclosure page to find out how can you help Windows Report sustain the editorial team Read more
Key notes
- For various reasons like poor wireless signal, outdated system files, etc., Projecting to This PC may lag.
- A simple restart and using a powerful Wi-Fi network may be helpful in most cases.
- You also may need to update drivers, BIOS, as described in this article.
When you face problems like Projecting to This PC lag, don’t worry. You can easily get rid of this problem and enhance your experience with Windows 11.
We also have solutions to solve Wireless Display install failure. However, this article will show you the ways to troubleshoot the lagging problems with the Projecting to This PC feature.
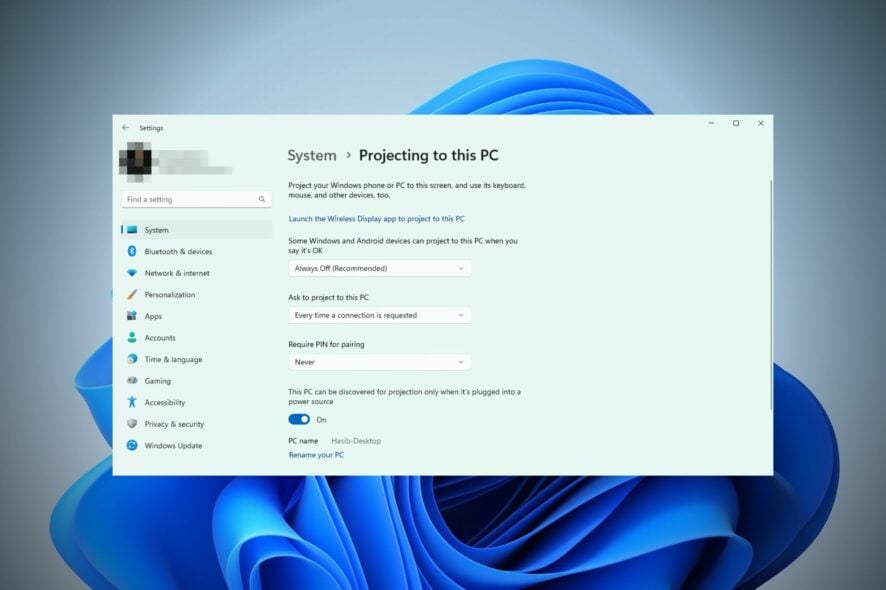
Why does Projecting to This PC lag?
Projecting to This PC feature is indeed a great feature on Windows 11. However, sometimes, it may not work because of the following reasons:
- Outdated drivers – If the display driver, network driver, and some other chipset drivers are not up to date, this problem may appear.
- Outdated version of Windows – A problematic version of Windows may be a major reason.
- Poor Wi-Fi – If the Wi-Fi signal is very weak or there are network overlaps, any wireless display will struggle to deliver a smooth experience.
- Problematic system components – Corrupted system components on Windows may make it unstable and problematic.
- Problematic BIOS/Motherboard firmware – If your motherboard BIOS or firmware software is outdated, the latest features and updates on your PC will not deliver enough performance.
The way to solve this problem is to sort out these reasons first. Then, you can take steps to fix that you can find the next part of this article.
How do you fix Projecting to This PC lag?
Before trying the actual steps, we suggest you do a few things first. These are:
- Restart your PC.
- Make sure you are using Wi-Fi rather than an Ethernet connection.
- Use a 5 GHz WiFi connection rather than 2.4 GHz. If necessary, check out these best 5 GHz routers.
Now, you can try these methods to solve lag issues with the Projecting to This PC feature.
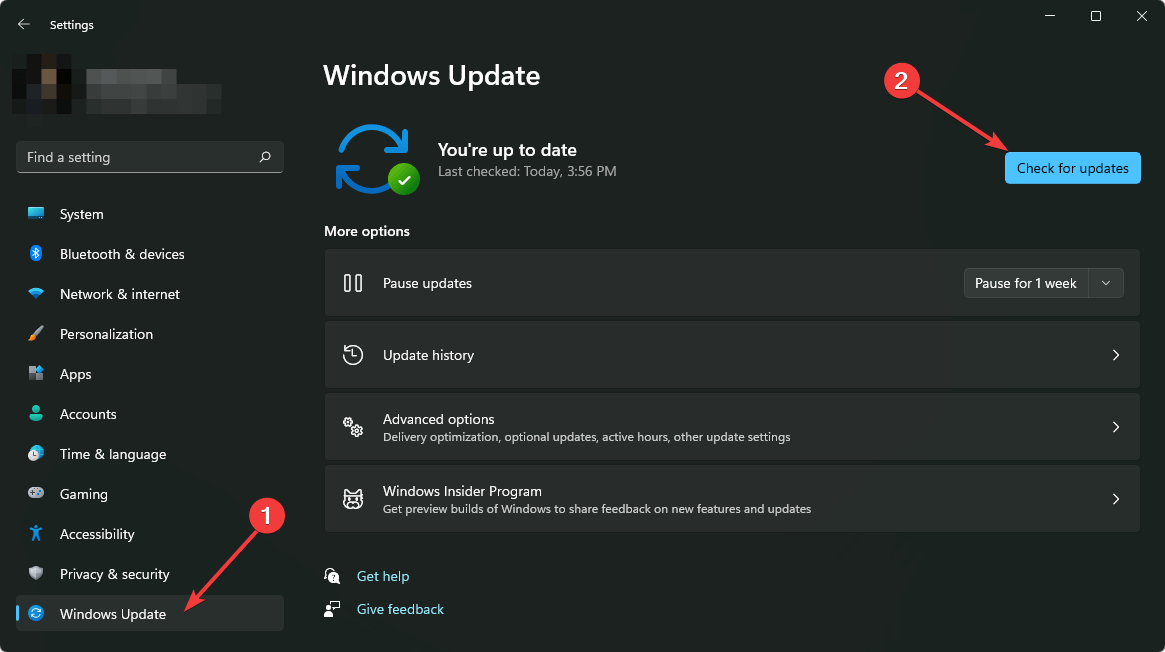
1. Check for Windows Update
- Press Windows + I on the keyboard to open Windows 11 Settings.
- Go to Windows Update and click on Check for updates.

- If any updates are available, click on Install/Download button.
2. Update display and network drivers
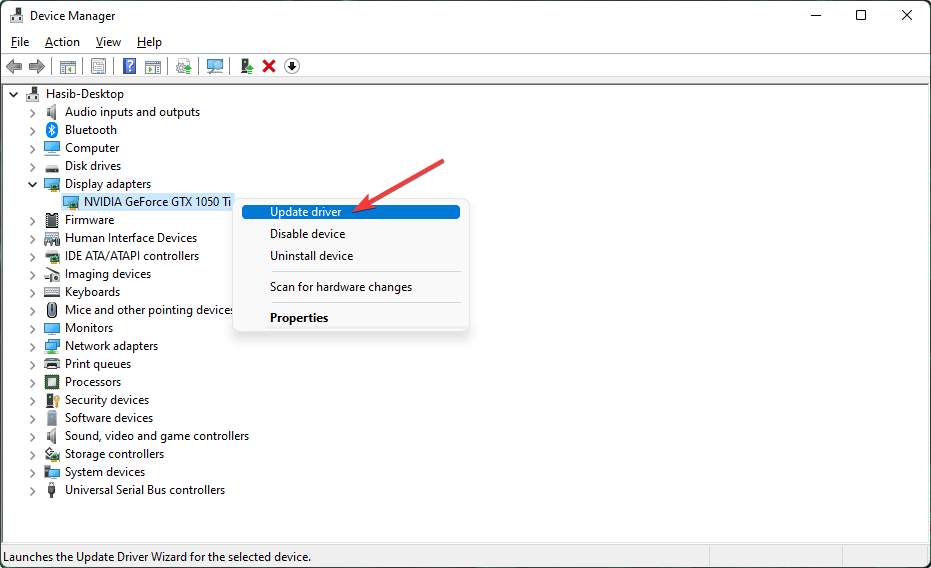
2.1 Use the Device Manager
- Open the Start Menu.
- Type Device Manager and press Enter.

- Right-click on the Display Driver and choose Update.

- Choose the preferred method to update.
- Do the same for Network adapters and other chipset drivers.

2.2 Driver updater automatically
To update drivers on Windows, Outbyte Driver Updater is one of the best tools available. It can automatically detect outdated or missing drivers and install them with just a single click.
To solve Projecting to This PC lag, updating all of the drivers using Outbyte Driver Updater will be the best idea.

Outbyte Driver Updater
Update all drivers in a few clicks to keep your system in top condition.3. Update BIOS
- Turn off your PC.
- Power it on and press F8 or F2, or Del, depending on the motherboard you are using when it shows the logo on the monitor.
- In your BIOS/UEFI settings, figure out the option to update the firmware.

- After that, try to use the Miracast feature again and see if it has fixed the problem or not.
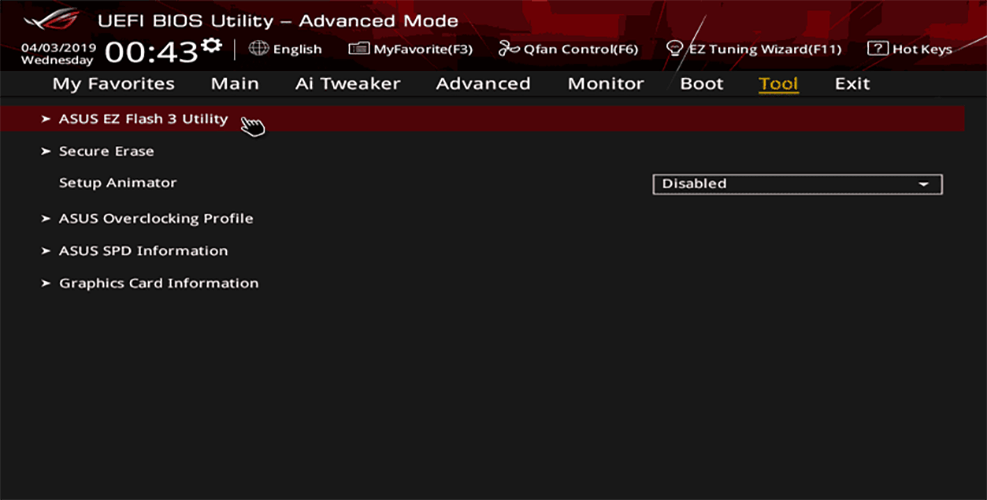
We already have a guide on how to update BIOS. Follow that if necessary. To know how you can access the BIOS or UEFI dashboard of your PC, search for the instructions on the PC/Motherboard manufacturer’s website.
4. Try in Clean Boot
- On Start Menu, type the following text and hit Enter to open the System Configuration tool.
msconfig - Go to the Services tab.
- Check on Hide all Microsoft services and click on Disable all.

- Restart your PC.
- Try to use the Projecting to This PC feature again and see if it has fixed the problem or not.
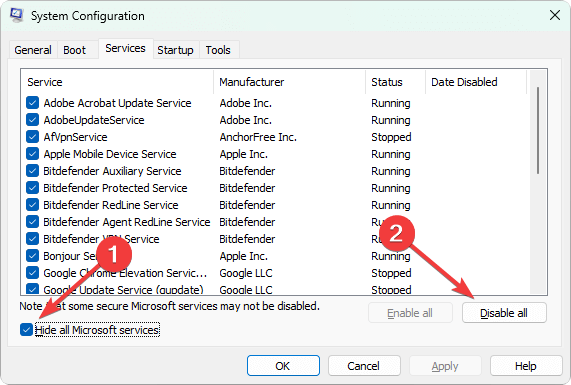
If you don’t find this feature helpful, you can undo the changes you have made in this method.
5. Repair system components
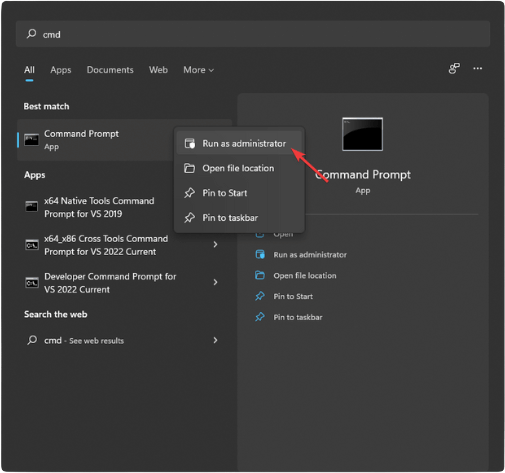
- Open the Start Menu.
- Type cmd, right-click on the Command Prompt, and choose Run as administrator.

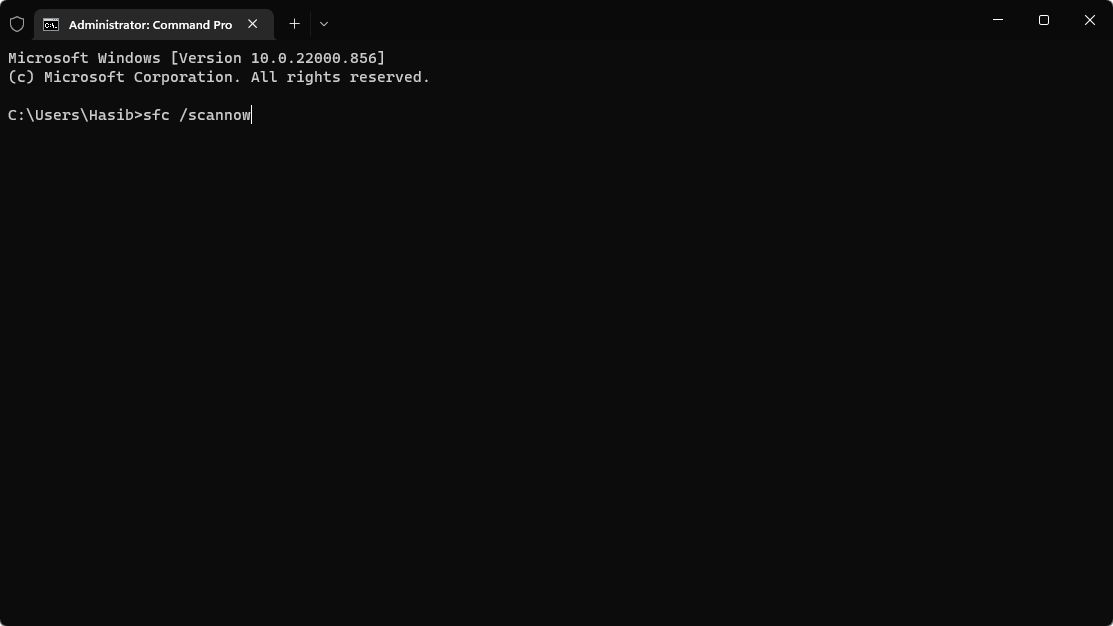
- Type the following command and hit Enter to execute it.
sfc /scannow
- Wait a bit to complete the process.
We already have a guide on it with more details. Learn how you can repair corrupted system components on Windows.
Many users have reported repairing these components has fixed their problem with the Miracast feature on Windows 11.
Doing these things will surely solve the lag in the Projecting to This PC feature. However, if the problem still persists, you can reduce active background tasks and see if it helps.
This article has featured the best method to fix the lagging issue while using Project to This PC feature on Windows 11. If you have any questions or suggestions, you can write them down in the comment box.