Miracast for Windows 10: 3 Steps to Download & Install
Setup Miracast for Windows 10 and project you screen like a pro
Let’s set up Miracast so you can connect your Windows 10 to a TV or projector wirelessly.
We’ll walk you through all the necessary steps: from checking compatibility to installing drivers and setting it up with your devices.
How do I turn on Miracast on my Windows 10 PC?
Here’s a quick video summary of the steps you have to take to install Miracast on Windows (62-bit & 32-bit). If you need more details, keep reading.
1. Check if your Windows PC supports Miracast
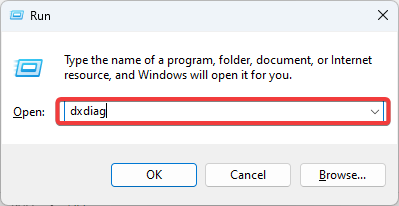
- Press the Windows + R keys on your keyboard to open the Run dialog, then type dxdiag and hit Enter.
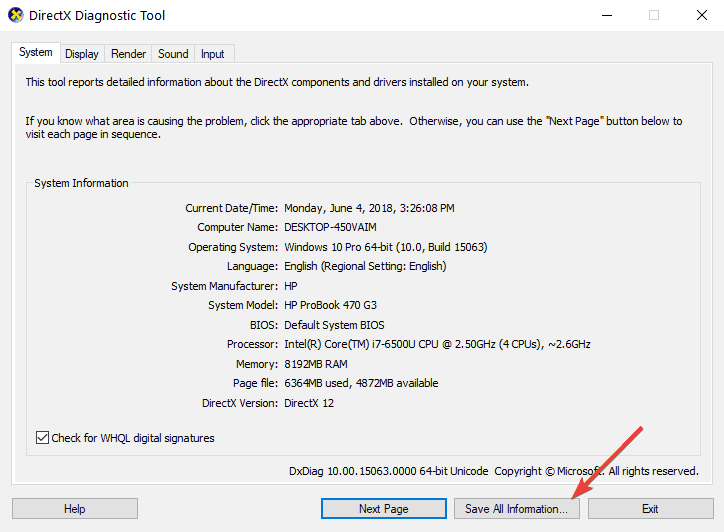
- After the tool collects all the information about your computer, click the Save all Information button.
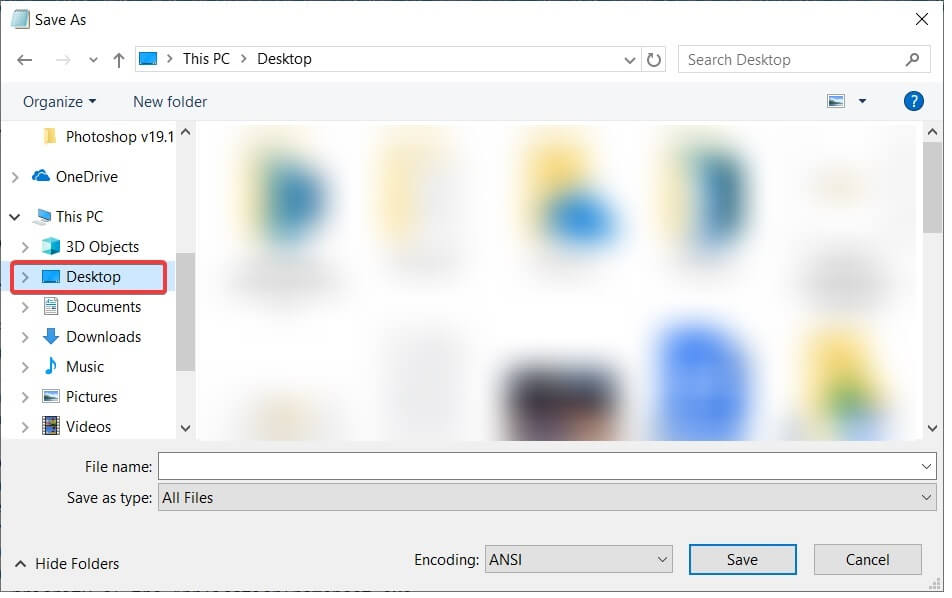
- Now you have to choose where you want to save the DxDiag.txt file on your computer. You can save it on a quick-to-access location such as your desktop.
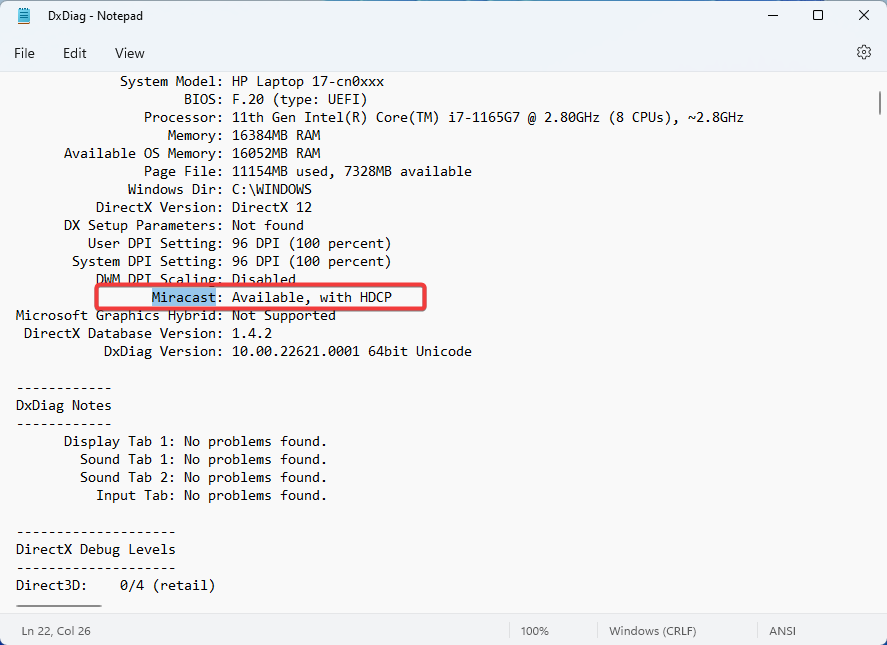
- Open the DxDiag.txt file, which is usually in notepad format.
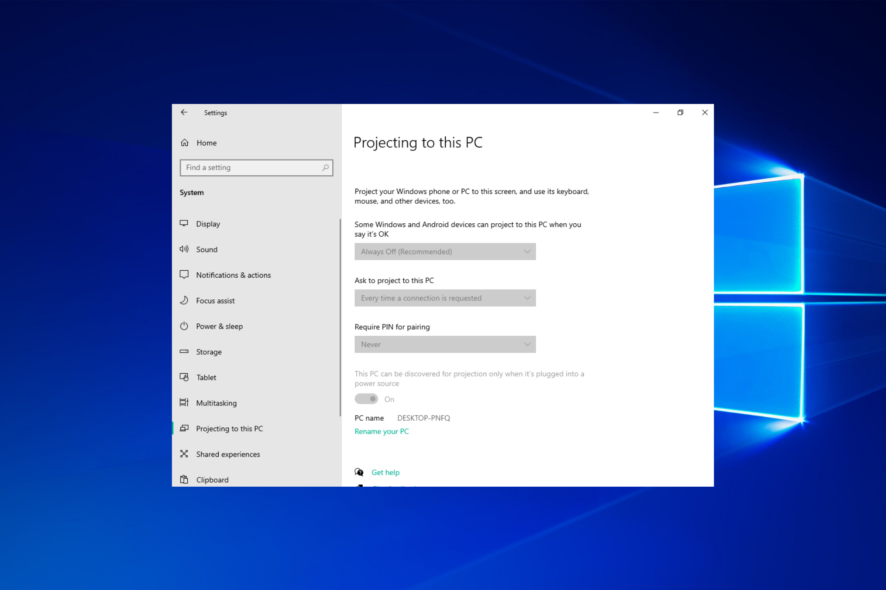
- Then, scroll toward the bottom of the report, where you will find the status of the Miracast on your PC.
- It will either read Miracast is available, in which case your PC will be ready to cast its display to a compatible device, or read Miracast not supported, which you might want to explore other options. If you see Miracast: available with HDCP, everything works correctly.
If your PC isn’t compatible with Miracast, consider using another screen mirroring software.
2. Get the current Miracast drivers for your PC
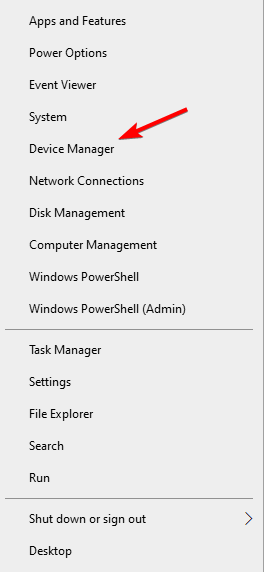
- Right-click on the Start icon and select Device Manager.
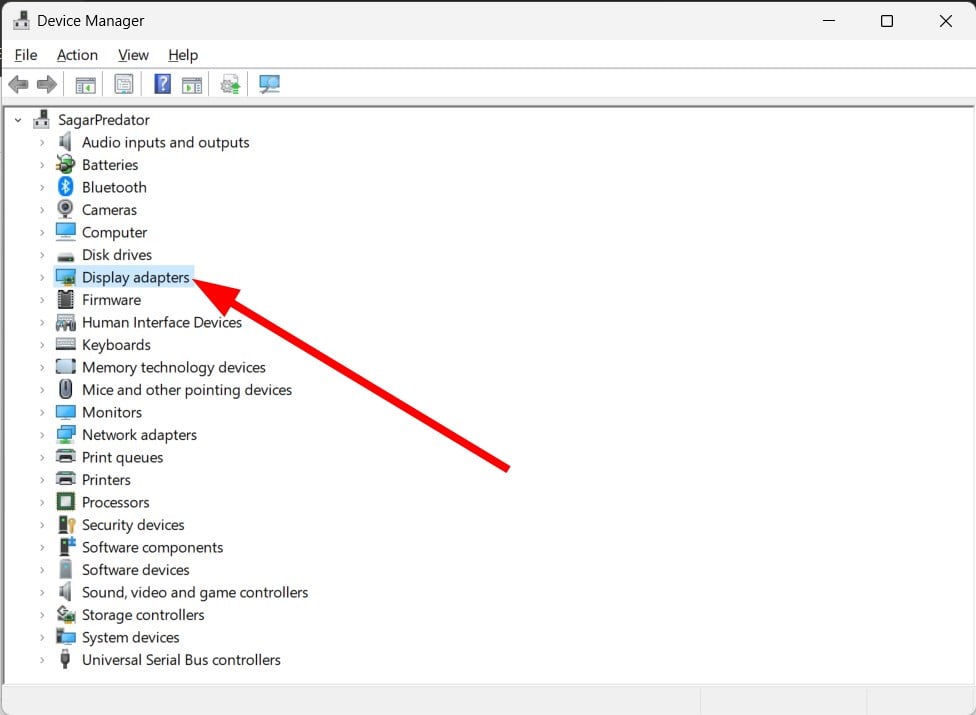
- Locate Display Adapters and expand the list.
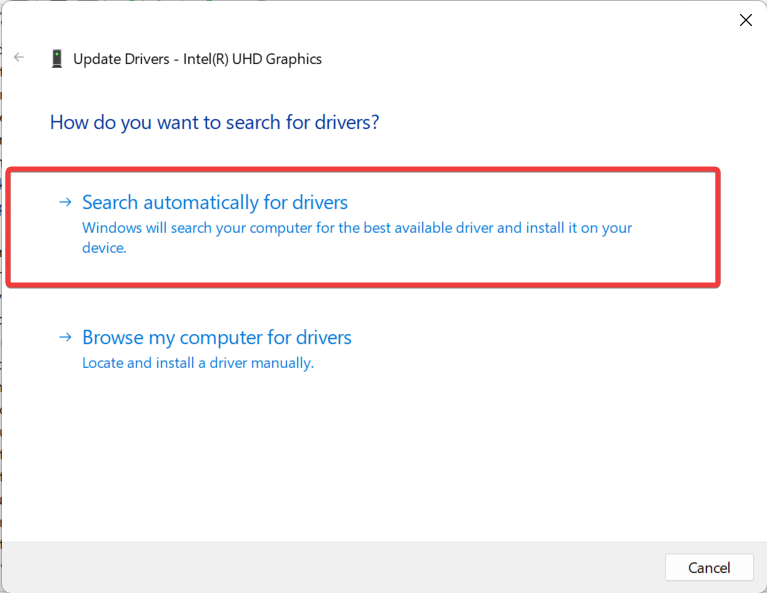
- Right-click on the WDDM driver and click Update.
- Select Search automatically for drivers and follow the on-screen instructions to finish up the process.
Even if your PC supports Miracast, you will need to have updated Miracast drivers for it to work.
Wireless (Miracast) displays can only be supported by Windows Display Driver Model (WDDM) 1.3 and later models.
If Windows cannot detect new drivers or you want to save the time and hassle of installing them manually, you can also use a specialized tool such as PC HelpSoft Driver Updater.
It allows you to download and update all your drivers and it also helps in the maintenance so you won’t run into this issue in the future.
⇒ Get PC HelpSoft Driver Updater
3. Project your Windows 10 PC to an HDTV with Miracast
- Plug the Miracast adapter into one of the HDMI ports on your TV.
- Select the correct HDMI channel.
- Now open the Start Menu on your Windows 10 computer. You will find it at the bottom left corner of your screen.
- Click on the Settings icon. It looks like a cogwheel.

- Expand the Multiple display option and then click the Connect button.
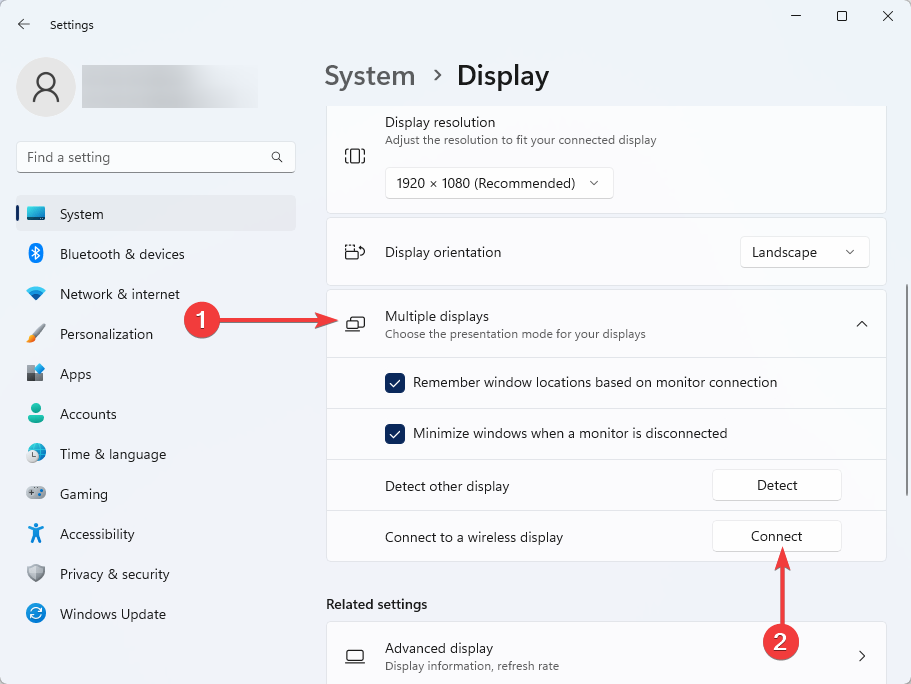
- If you have devices ready for Miracast, they will be displayed on the cast menu. You need to click on them to start the projection.

Miracast system requirements
- Windows 8.1 or newer.
- Wi-Fi chip that supports Miracast.
- The latest graphics card and network drivers installed.
- A display that has Miracast support (or Micracast adapter).
- In case your PC doesn’t meet the requirements, you’ll need to purchase a Wi-Fi adapter that supports Miracast.
Wrapping up
Unlike general screen mirroring, Miracast provides a standardized and secure connection with WPA2 encryption. So, Miracast is a particular type of screen mirroring with its own protocols and extra security.
Setting up Miracast on a PC is easy, whether you use Windows 10, Windows 11 or an older version. And if Miracast isn’t working, troubleshooting it shouldn’t take too long, as it’s a pretty stable tool.
Brands like Samsung and LG TV will work great with Miracast on Windows 10. Bur besides mirroring your content to the large screen, Miracast secures your connection with WPA2 encryption so protected content can freely flow through it.
However, if you still can’t use Miracast, we recommend that you take a look at other top software for screen mirroring compatible with Windows 10 & 11.
Tell us how you use Miracast on Windows 10 and if you have any other questions regarding the setup process, feel free to post them in the comments section below.
FAQ
Why is Miracast not working on Windows 10?
Impaired drivers are usually behind Miracost not working on Windows 10 issues. Thus, it’s possible that your graphics drivers do not support Miracast.
To fix common Miracast issues, make sure your drivers are up to date. Also make sure your device supports.
For common issues, restart devices, adjust screen resolution, or set the Miracast display as the default audio device.
What can I do if my PC does not support Miracast?
Windows PCs support Miracast by default, thus if you get the Miracast not supported error message, note that this is an internal issue and you can fix.
Is Miracast free for Windows?
Yes, Miracast is completely free and available to all Windows users without limitations. The only requirement is that you have Windows 8.1 or newer and a compatible wireless card.
What’s the difference between screen mirroring and Miracast?
Screen mirroring lets you show your device’s screen on another display. Miracast is a specific technology that uses Wi-Fi Direct to wirelessly connect devices directly.
Read our disclosure page to find out how can you help Windows Report sustain the editorial team. Read more


Improve this guide


User forum
7 messages