How to Disable Check Boxes in File Explorer
Here's how to easily remove the check boxes from File Explorer
5 min. read
Updated on
Read our disclosure page to find out how can you help Windows Report sustain the editorial team. Read more
Key notes
- Check boxes in File Explorer were added as a feature to select multiple files and folders at a time.
- If you do not want to use this feature, you can remove check box in file explorer by trying the methods in this guide.
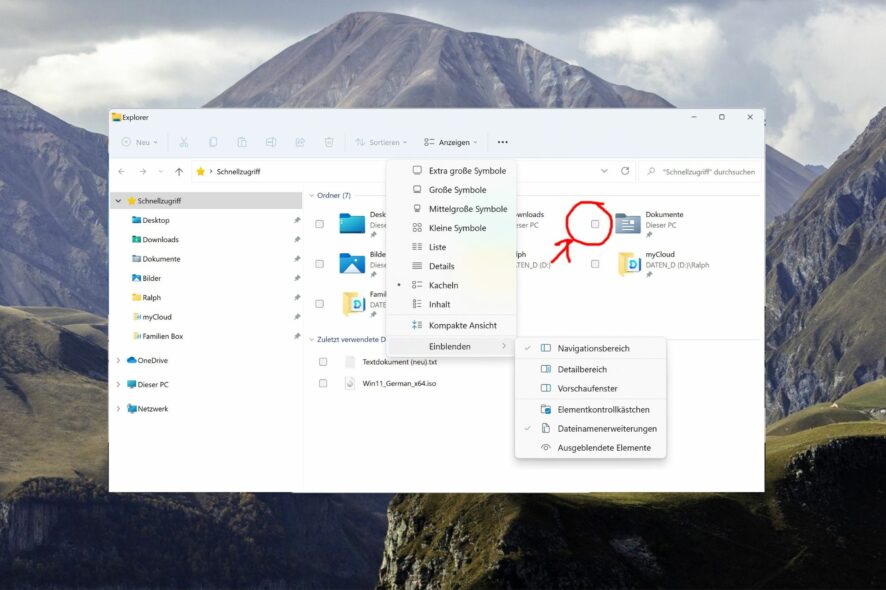
Many of our readers have been annoyed by check boxes that appear on each file or folder icon in File Explorer. Check boxes help you select multiple files and folders, especially on touchscreen devices.
However, this feature is running the user experience of most Windows users who prefer using the Shift and Ctrl shortcut to select multiple files/folders at a time.
If you are one of those users who want to remove the checkboxes in File Explorer, walk through this guide to find out the proven solutions.
How to disable folder check boxes in File Explorer?
1. Disable item checkboxes
- Launch the File Explorer using the Windows + E shortcut key.
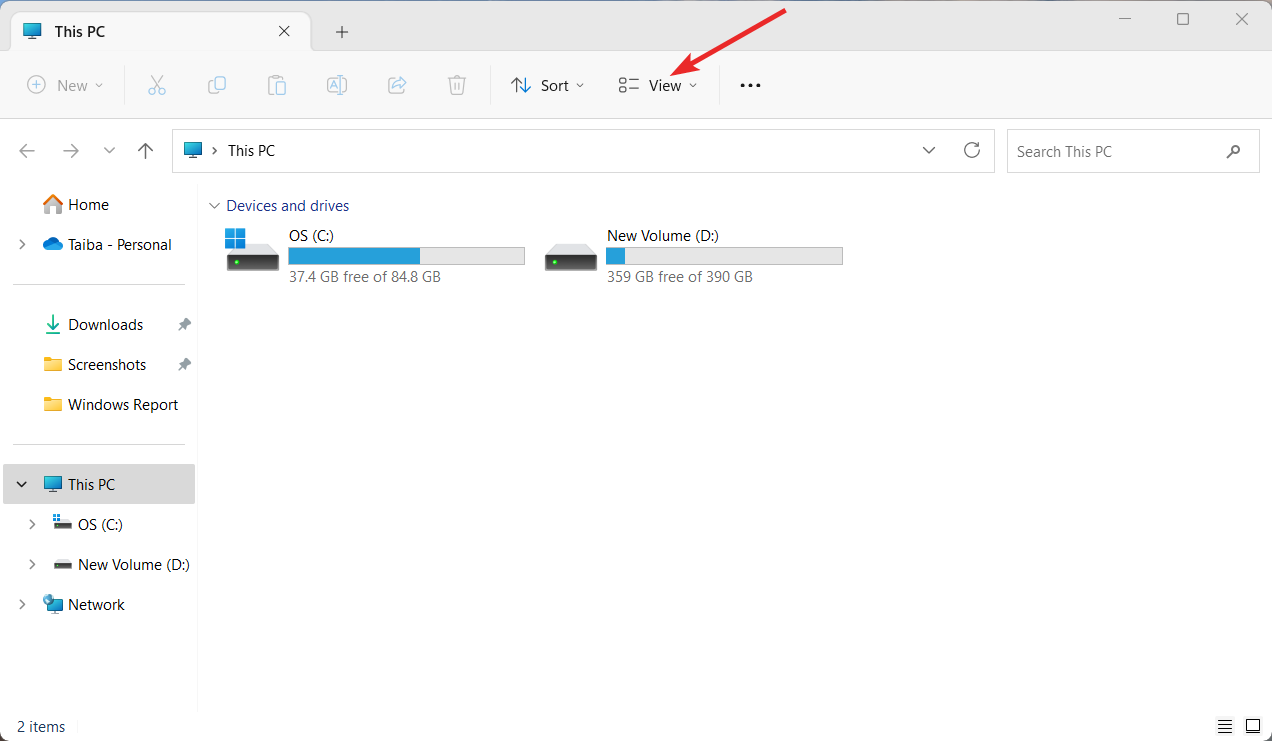
- Click the View option located on the top menu bar to reveal the related settings drop-down.
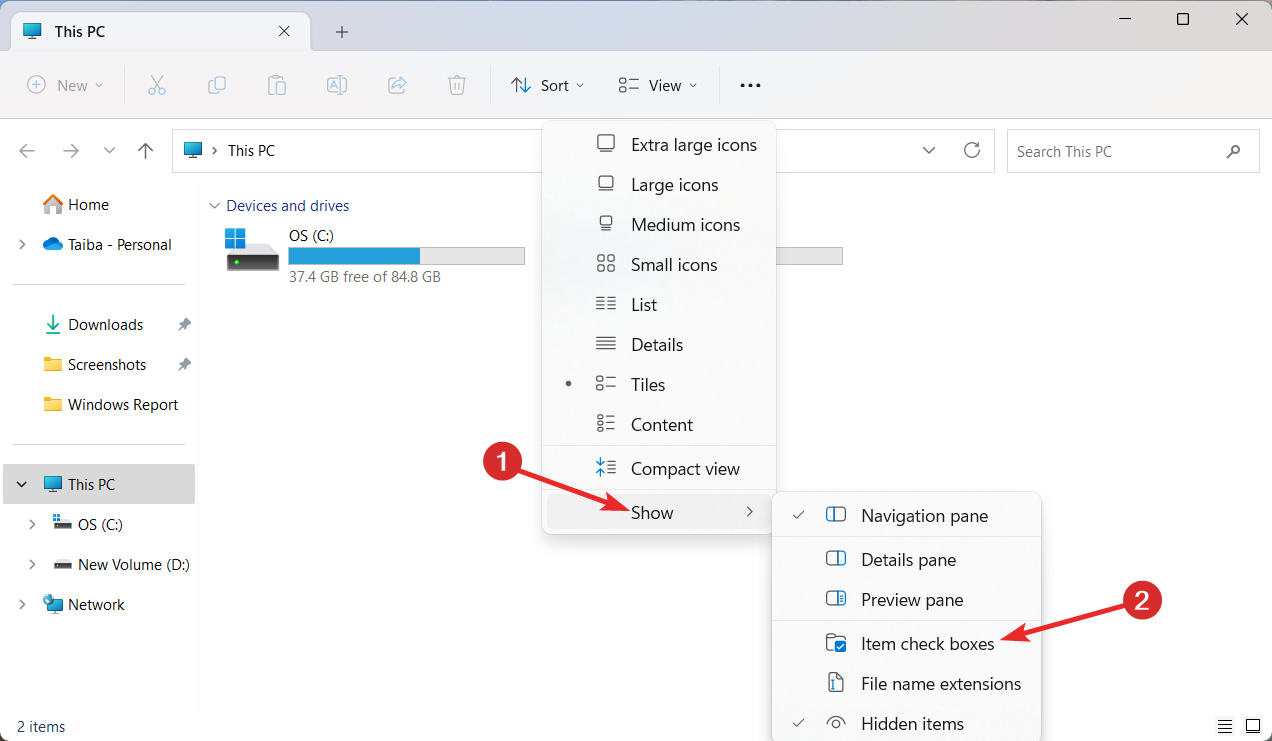
- Select Show from the dropdown menu and then click the Item check boxes option from the sub-menu if it was checked previously.
Now exit the File Explorer window and upon re-launch, the check boxes next to folders will not appear anymore.
2. Modify the Folder Options settings
- Launch the File Explorer using the Windows + E shortcut.
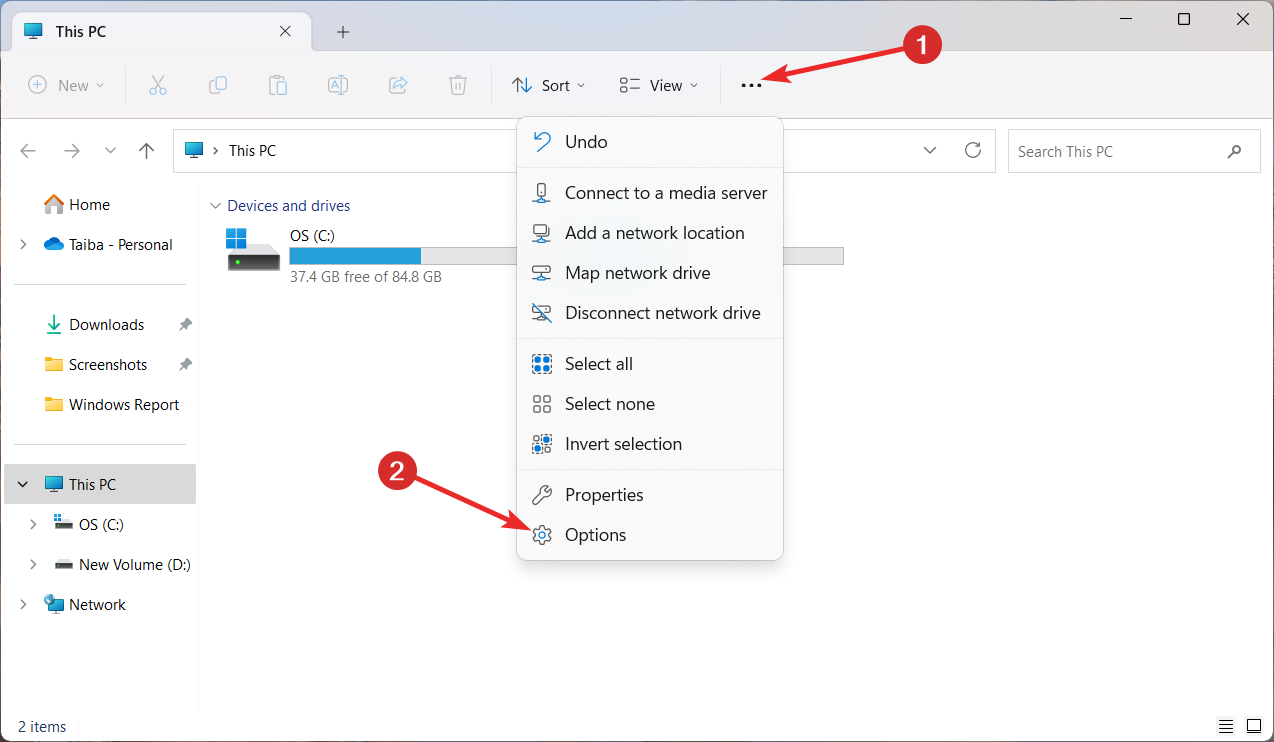
- Click on the More icon (three horizontal dots) located at the top menu bar and select Options from the drop-down menu.
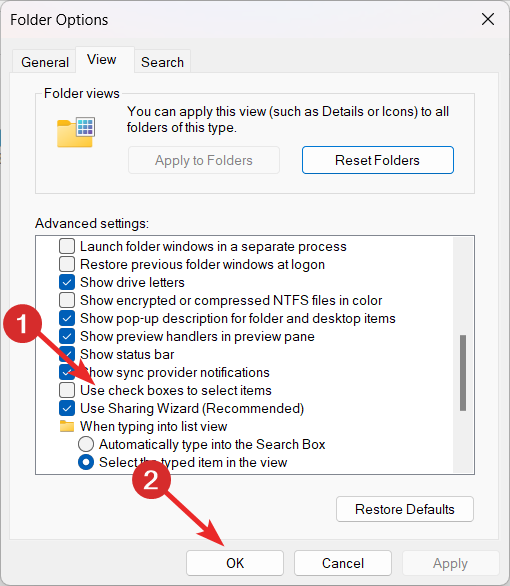
- Switch to the View tab of the Folder Options windows and scroll down the Advanced settings section.
- Uncheck the box preceding the Use check boxes to select items and click Apply to save the changes and OK to exit the window.
3. Modify the registry
 NOTE
NOTE
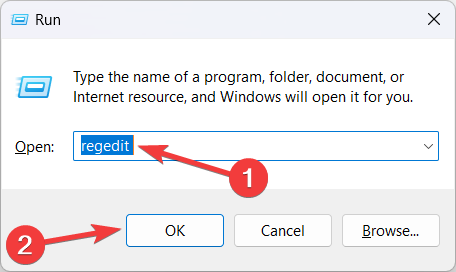
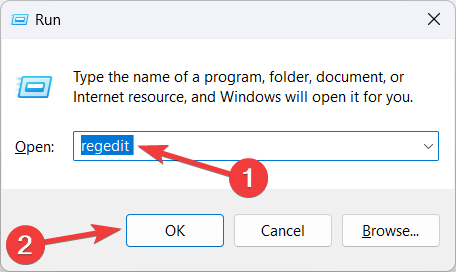
- Use the Windows + R shortcut to launch the Run dialog box, type the following command in the text box and hit the Enter key.
regedit - Expand the keys in the registry editor window to navigate to the following path.
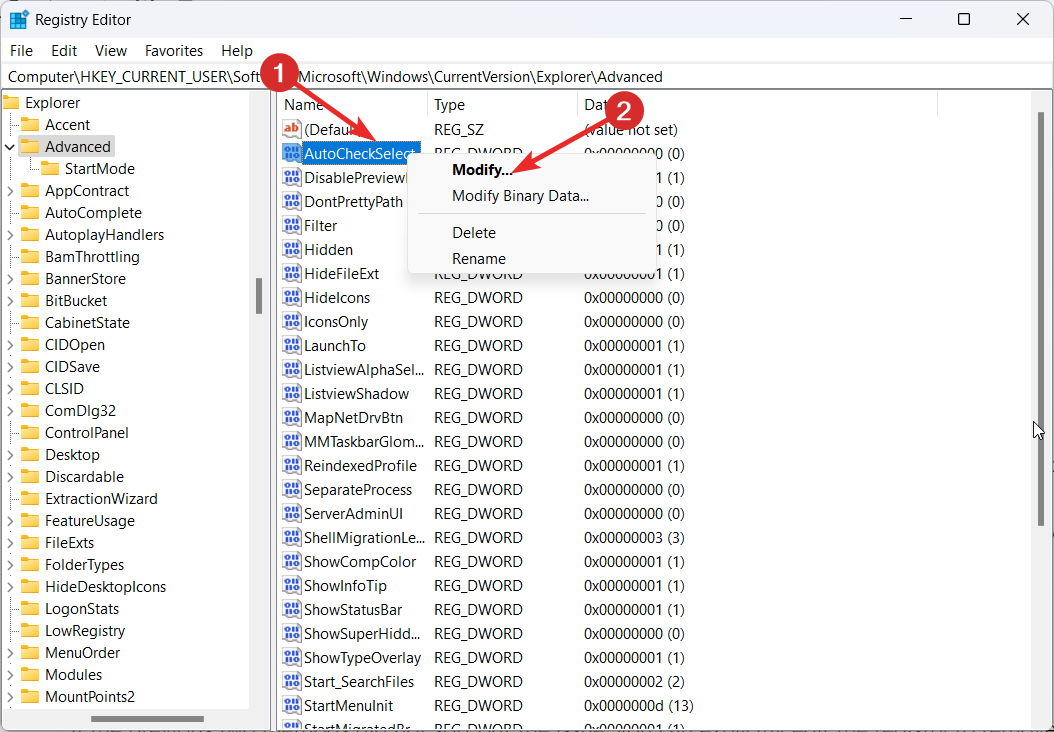
Computer\HKEY_CURRENT_USER\Software\Microsoft\Windows\CurrentVersion\Explorer\Advanced - Find AutoCheckSelect in the right section and if not found, right-click anywhere, and choose New followed by DWORD (32-bit) from the context menu.
- Rename the DWORD as AutoCheckSelect.
- Now right-click AutoCheckSelect and choose Modify from the context menu.
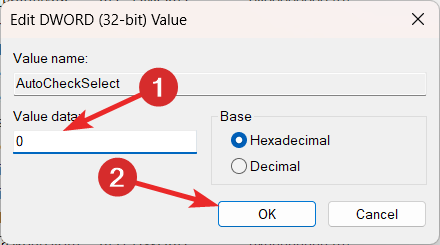
- Assign 0 to the Value data field and press OK to save the changes.
If the previous two methods did not sort out the issue, you can explicitly edit the registry to remove the check box from File Explorer.
4. Create a new administrator account
- Log into your administrator account and use the Windows + I shortcut to launch the Settings app.
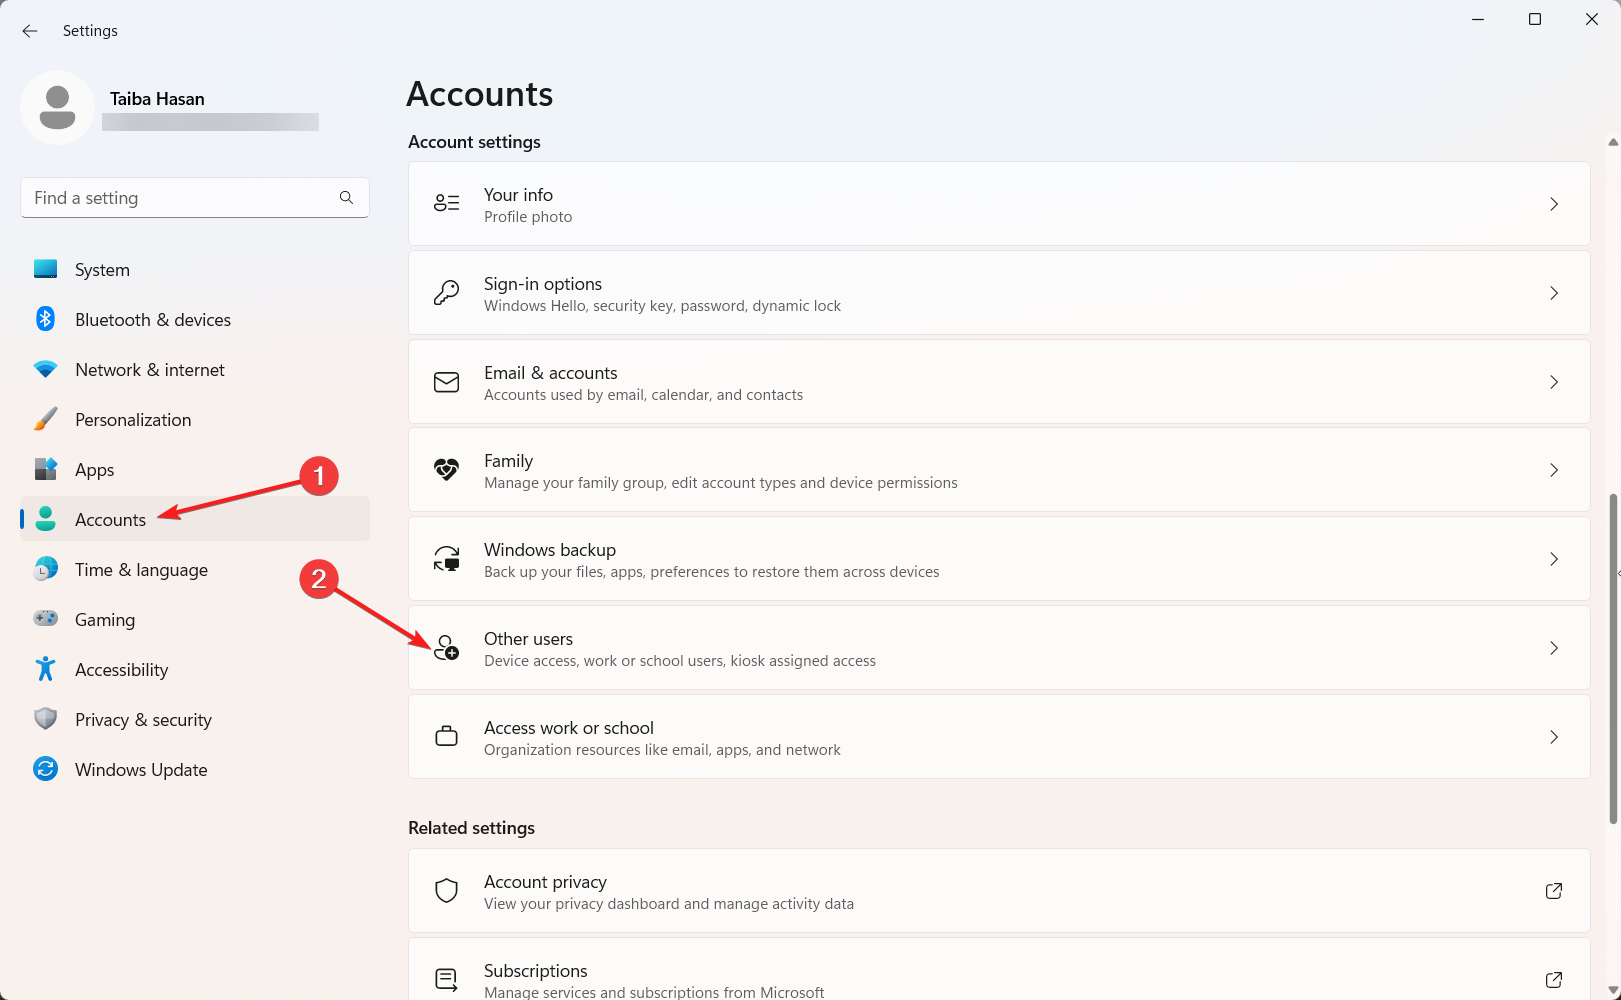
- Switch to Accounts from the left sidebar and then select Other users (Family & other users in some versions) from the right section.
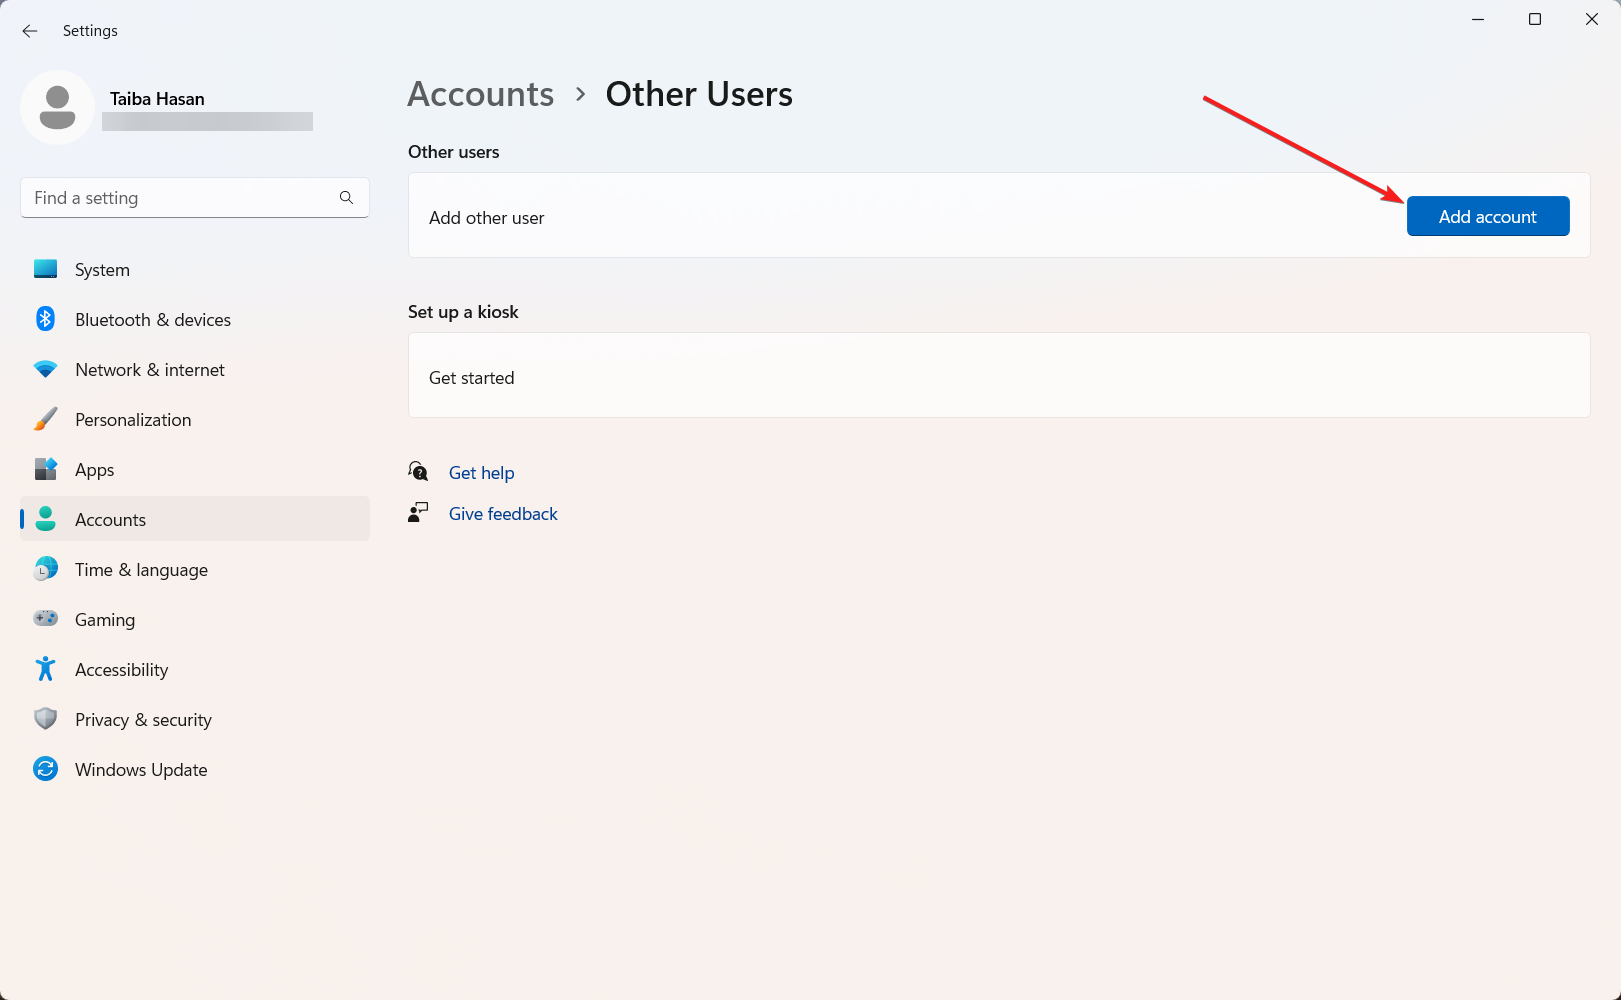
- Next, press the Add account button located next to Add other user option.
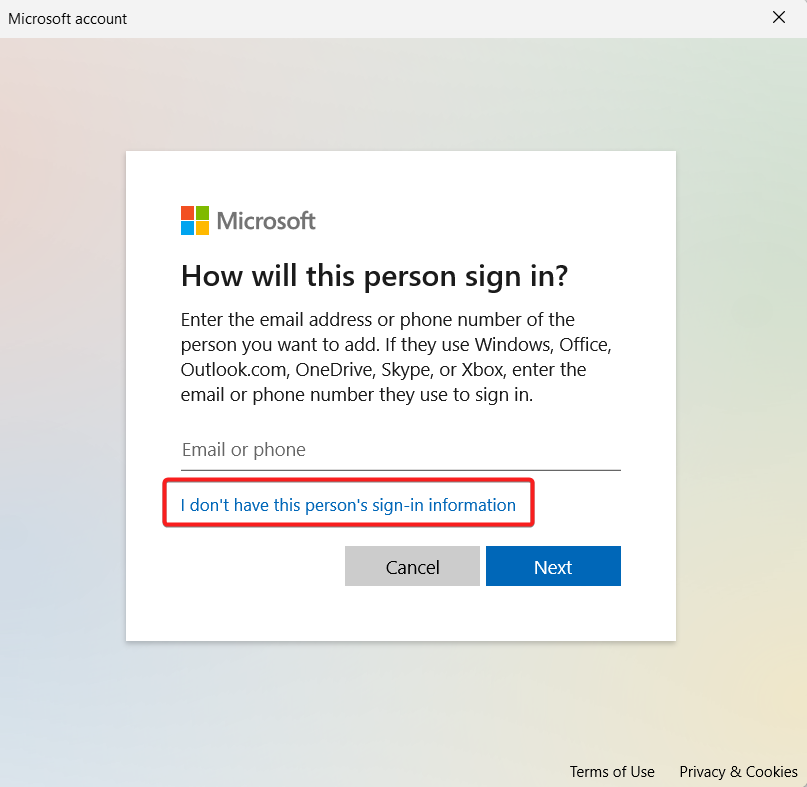
- Click I don’t have this person’s sign-in information on the new pop-up window.
- Next, select the Add a user without a Microsoft account option.
- Finally, on the next page, provide the username and confirm the password by entering it twice.
- After the new user account is created, access the Other Users section once again and click the newly created account name.
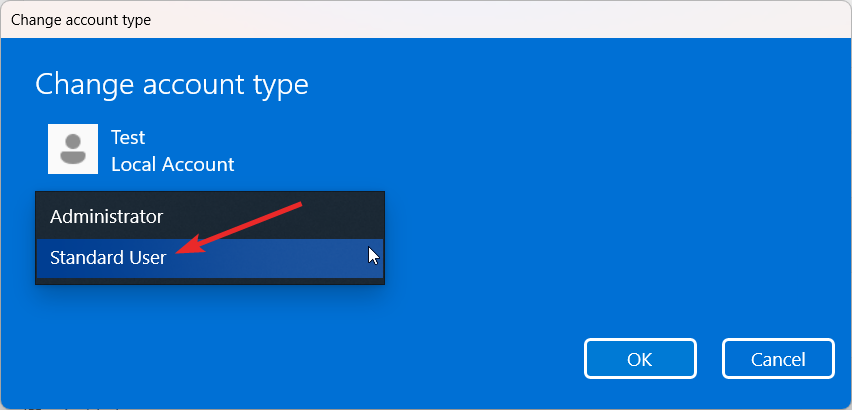
- Click the Change account type button located under the revealed settings and select the Administrator option on the popup that appears.
- Now log out of the current account you’re logged into and sign in to your newly created administrative account. Hopefully, the problem would be resolved.
Creating a new user account with administrative rights will remove the check box in File Explorer if it persisted because of a corrupt user account.
How to disable checkboxes in File Explorer on a convertible laptop?
- Switch to the laptop mode on the 2 in 1 laptop.
- Use the Windows + R shortcut to launch the Run dialog box, type the following in the text box and press OK to access the Registry Editor. regedit
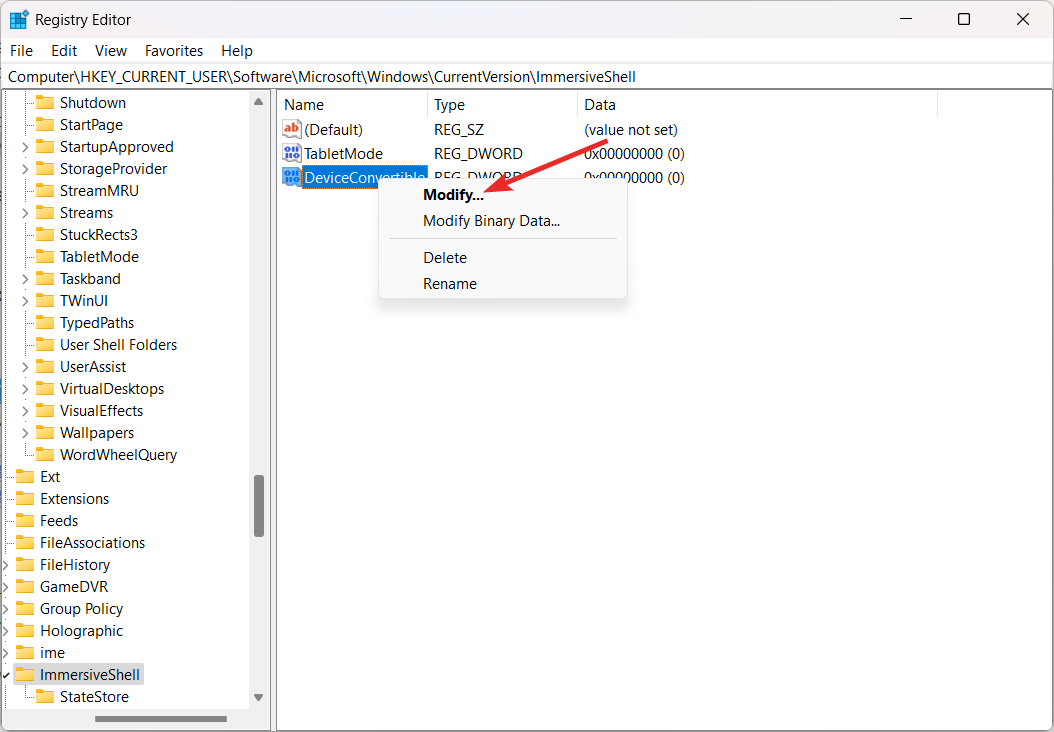
- Navigate to the ImmersiveShell key in the registry editor window by pasting the following path.
Computer\HKEY_CURRENT_USER\Software\Microsoft\Windows\CurrentVersion\ImmersiveShell - Here, right-click DeviceConvertible in the right section and choose Modify from the context menu.
- Assign 0 in the Value data field and press OK to save the changes.
- Now exit the registry editor window and sign out of your account. Wait for some time and sign back into Windows. You will see that the check boxes no longer appear near files and folders in File Explorer.
Disabling the tablet mode or touchscreen feature on your dual laptop will successfully remove the check box from File Explorer.
That’s all in this quick guide to disable the check boxes in File Explorer on Windows PC.
Before you leave, you may want to fix the file explorer search feature if it runs into issues from time to time.
In case of any comments or feedback, do reach out to us in the comments section.


User forum
0 messages