FIX: Rise of Nations doesn't work in Windows 10/11
5 min. read
Updated on
Read our disclosure page to find out how can you help Windows Report sustain the editorial team Read more
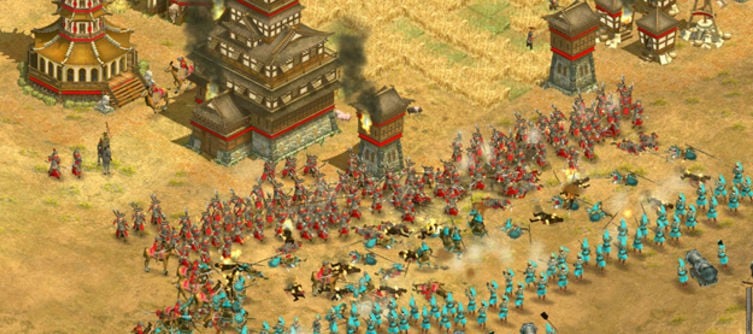
The Rise of Nations is a popular strategy game released in 2003, but it seems that Windows 10 users are having some issues with this game.
According to them, Rise of Nation isn’t working on Windows 10, so let’s see if we can fix that.
The Rise of Nations is an old game, so some issues are expected, but if this game isn’t working you might want to try the following solutions.
How to Solve problems with Rise of Nations
Table of contents:
- Run DXSETUP.exe and reinstall Visual C
- Run the game in borderless window mode
- Run the game in the compatibility mode
- Check GPU drivers
- Change the INI file
- Reinstall the game
Fix: Rise of Nations problems in Windows 10
Solution 1 – Run DXSETUP.exe and reinstall Visual C
According to users, this is supposed to be performed automatically by Steam when you start the game for the first time, but for some reason, this doesn’t happen, so you have to do this manually.
To do this, follow these steps:
- Go to The Rise of Nations installation folder. By default it should be something like c:program files (x86)steamsteamappscommonrise of nations but this could be different for your computer.
- Next go to the _CommonRedist folder > DirectX > Jun 2010 folder and run DXSETUP.exe. Wait for it to finish.
- Now go to _CommonRedist > vcredist > 2012 and install both files.
- After installing both files you should be able to run the game now.
Download Visual C++ and you won’t need additional packages!
Solution 2 – Run the game in borderless window mode
Some users claim that running the game in fullscreen mode causes issues, so let’s change the mode from fullscreen to the borderless window.
This is usually performed from game’s video options menu, but if you can’t even start the game, you can change it by changing the game’s .ini configuration file.
To do so, do the following:
- Go to C:Users<username>AppDataRoamingMicrosoft GamesRise of Nations and find a file called rise2.ini.
- Open that file and find the Fullscreen=2 line.
- Change the value from Fullscreen=2 to Fullscreen=1.
- Save the changes.
For a better gaming experience, we recommend downloading Game Fire for free. It will help with various gaming issues, such as freezes, crashes, low FPS, lags and slow PC.
Solution 3 – Run the game in the compatibility mode
Due to old age, we can’t skip on the possible compatibility issues with Windows 10. The Rise of Nations, allegedly, worked as a charm on earlier Windows iterations, both Windows 7 and Windows 8.1.
However, Windows 10 is seemingly another cup of tea and running the game in the compatibility mode should resolve some issues.
Solution 4 – Check GPU drivers
Another viable lead tracks down to GPU drivers. Things tend to complicate when the legacy classics are played on Windows 10 platform.
Occasionally, the latest properly-updated GPU drivers won’t cut it for older games. That, of course, means that you’ll need to experiment and find the right driver able to run the game.
Here are the support sites of the most-renowned OEM’s. Download the older drivers and try running the game.
Solution 5 – Change the INI file
A lot of users managed to resolve the startup issue with The Rise of Nations by a simple change of the INI file configuration values.
In order to do so, navigate to the installation folder, open rise.ini and rise2.ini files and delete all values.
Copy-paste the following configurations in both folders respectively:
rise.ini
[RISE OF NATIONS] ContentDir=Thrones and Patriots AllowLogs=0 Dialog Error Level (0 – 3)=2 BreakOnGSCommandLineCheck=0 GraphicsDLL=d3dgl.dll UseSSEDLLs=0 Sound Directory=.sounds Default Sound Directory=.. Number FX SoundPaths=0 Number VoiceOver SoundPaths=2 Number SoundTrack SoundPaths=3 IgnoreSoundWarning=0 ScriptIncludePath=.scenarioscriptlibrary script_loc_file=scen_script_loc.xml UseAutoSave=1 CheckSumDeep=0 CheckSumWindowSize=256 CheckSumFailureThreshold=2 Seed (0 for random)=0 InitialDump=0 Left Minimap=0 DEBUGROADS=0 AutoSaveLoad=0 Record Results=0
rise2.ini
[RISE OF NATIONS] Windowed Width=1024 Windowed Height=768 FullScreen=1 VSync=0 AllowAllResolutions=1 IgnoreMinimizeOnTabOut=0 ConfigDatabase=BHGVidCardConfig.txt ESCKeyGoesToMenu=1 ClickDragTiming=5 ClickDragLowSensitive=20 ClickDragHighSensitive=64 ClickDragRightSensitive=6 SkipIntroMovies=1 ForceHardwareCursor=0 ForceGDICursor=1 ForceBWCursor=0 ForceStaticCursor=0 ForceAGPVBs=0 Don’t Allow Texture Compression=0 SYS_grade_override(A-F or AUTO)=AUTO MEM_grade_override(A-F or AUTO)=AUTO CPU_grade_override(A-F or AUTO)=AUTO GPU_grade_override(A-F or AUTO)=AUTO TEXTURE_grade_override(FULL, HALF, QUARTER, AUTO)=AUTO UseAltColors=0 Console Coord Mode=0 Console Name Mode=2 Sound Enabled=1 BackVidAsSlideShow=0 UseVTUNEDLL=0 TestDelayRenderAMin=0 TestDelayRenderBMin=0 TestDelayRenderAMax=0 TestDelayRenderBMax=0 RebuildBalance=0 Force Profile Menu=0 ForceLowCPUBackgroundVid=0 EnableGraphicsToggles=0 TPModsDirectory=.Mods ScenarioDirectory=Scenarios StandaloneScriptsDirectory=Stand-alone Scripts DefaultScenarioDirectory=.scenarioCustom DefaultScriptDirectory=.scenarioScripts GameFrameTestDelayMin=0 GameFrameTestDelayMax=0 RenderMinimap=1 StartConsole=0 StartReveal=0 StartPaused=0
Save changes and try starting the game.
Solution 6 – Reinstall the game
Finally, if none of the previous solutions proved fruitful, you can always try reinstalling the game and move from there.
In addition, if you’re using Steam to run the game, you can also validate its integrity and resolve possible issues that way.
Here’s how to do it in the Steam desktop client:
- Open Steam.
- Right-click on The Rise of Nations and open Properties.
- Select Local Files.
- Choose ”Verify integrity of game files…” and restart your PC after the process ends.
Now the game should run in borderless window mode, and it should work without problems. If you have any comments, questions or suggestions, just let us know in the comments down below.
RELATED STORIES YOU NEED TO CHECK OUT:

