Solved: Run as Different User Option Missing in Windows 11
Gone but back with a click
![]() 5 min. read
5 min. read
![]() Updated on
Updated on
Share this article
Improve this guide
Read our disclosure page to find out how can you help Windows Report sustain the editorial team. Read more

We can appreciate how the run as a different user option in Windows comes in handy especially when you don’t want to interfere with profiles but what happens when it’s missing?
Potential reasons behind this anomaly have to do with permissions. It’s either your UAC settings have been reconfigured, or the system administrator has placed certain restrictions. On the other hand, a Windows update could also be behind it or some corrupt system files.
However, before you jump to troubleshooting, ensure the run as a different user feature is on your Windows edition as not all support this functionality.
What can I do if the run as a different user option is missing?
1. Restart the Secondary Logon service
- Press Windows + R to open the Run dialog box.

- Type services.msc and click OK to open the Services app.
- Locate and double-click Secondary Logon to open its properties.

- For Startup type, select Automatic from the drop-down menu.

- Click Apply and OK to save the changes, then reboot your PC.


2. Uninstall recent Windows update
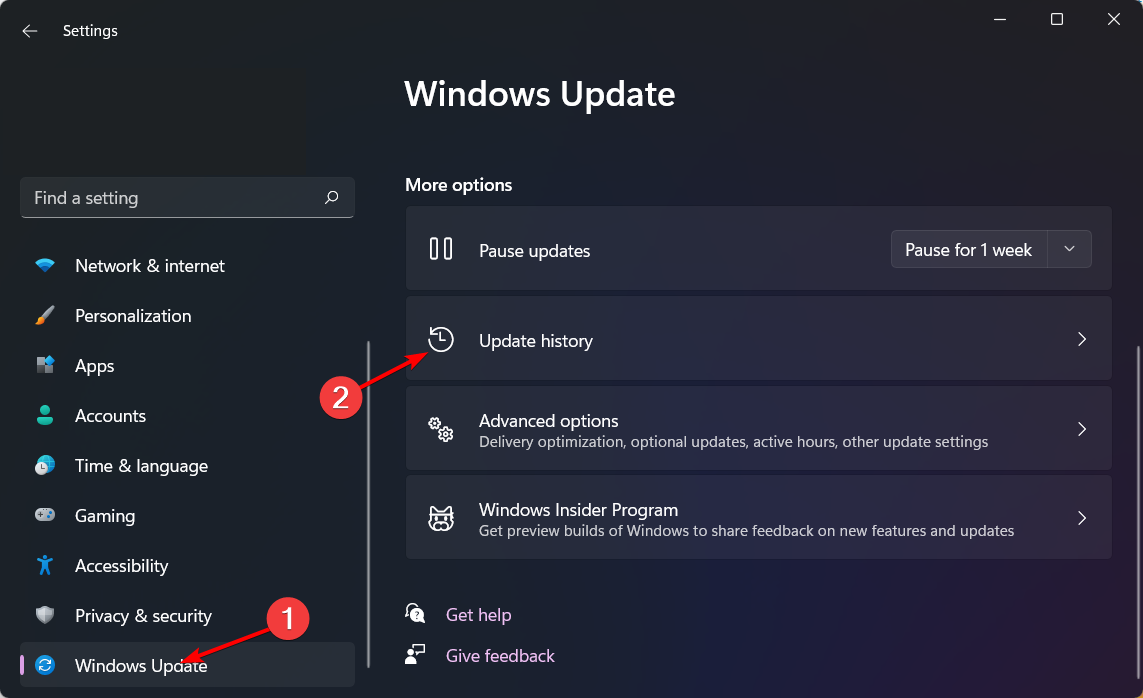
- Press the Windows + I keys simultaneously to open Settings.

- Navigate to Windows Update, then go to Update history.

- Click on Uninstall updates.
- Select the most recent update, then click Uninstall.

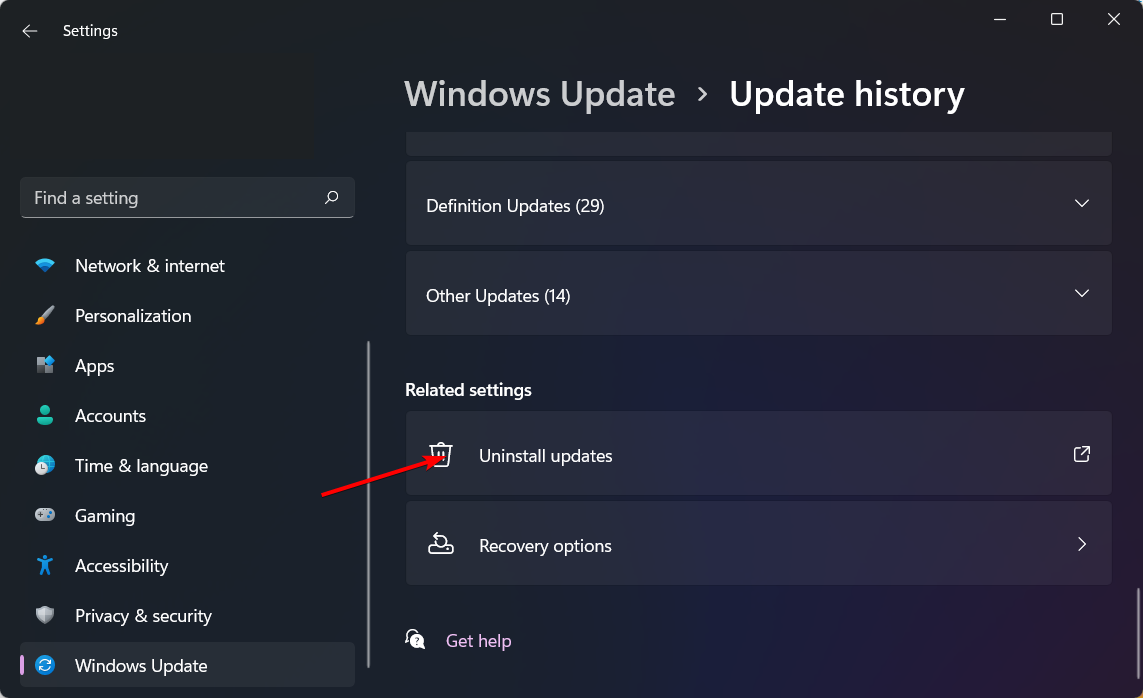
Some Windows updates can alter system settings and interfere with previously working features. If this is the case, rolling back an update should restore the run as a different user option if it was missing.
3. Run DISM and SFC scans
- Hit the Start Menu icon, type cmd in the search bar, and click Run as administrator.

- Type the following commands and press Enter after each one:
DISM.exe /Online /Cleanup-Image /Restorehealthsfc /scannow

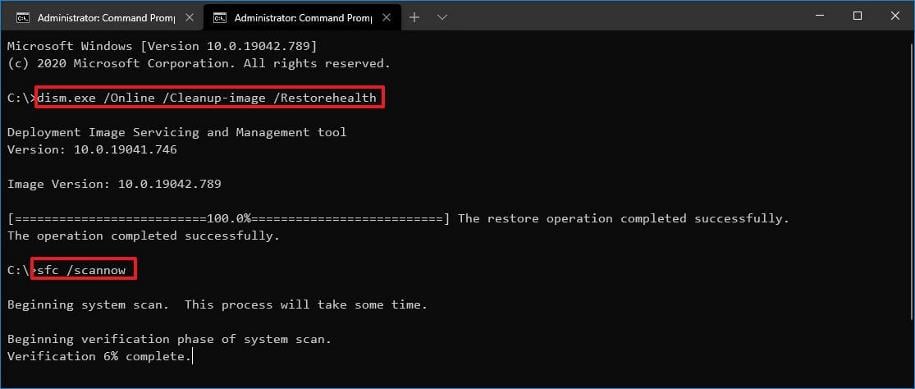
In case a Windows update or even a virus has corrupted some system files, it is possible that some features were caught up in the mix. Running a system file checker scan can repair these files and restore the run as a different user functionality that was missing.
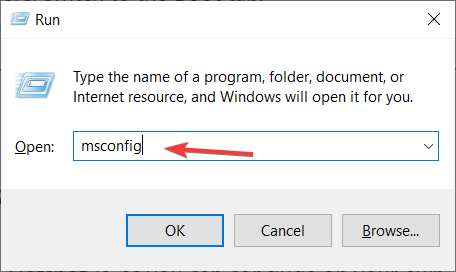
4. Adjust UAC settings
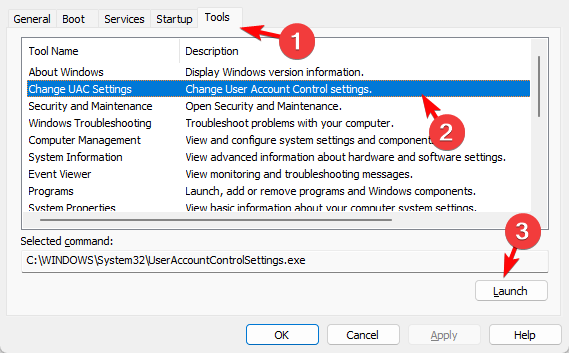
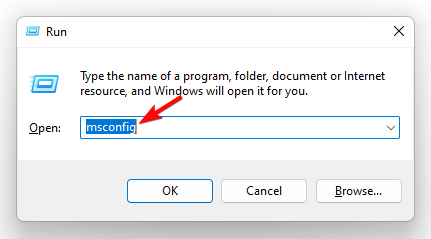
- Press the Win + R keys to launch the Run console. Then type msconfig in the search bar and hit Enter to open the System Configuration window.

- Next, go to the Tools tab in the System Configuration window, select Change UAC Settings, and press Launch.

- This will open the User Account Control Settings window. Here, move the slider on the left to Never notify, and press OK to save the changes.

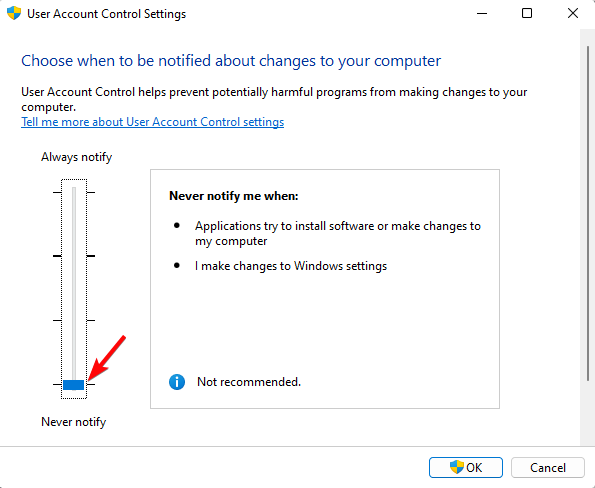
If your UAC settings are too high, you may be restricted from accessing some system functionalities especially if you’re not using an administrator account. Lowering these settings can allow you to access the run as a different user option.
Remember to adjust your UAC settings back to a secure level as disabling it exposes your system to security risks.
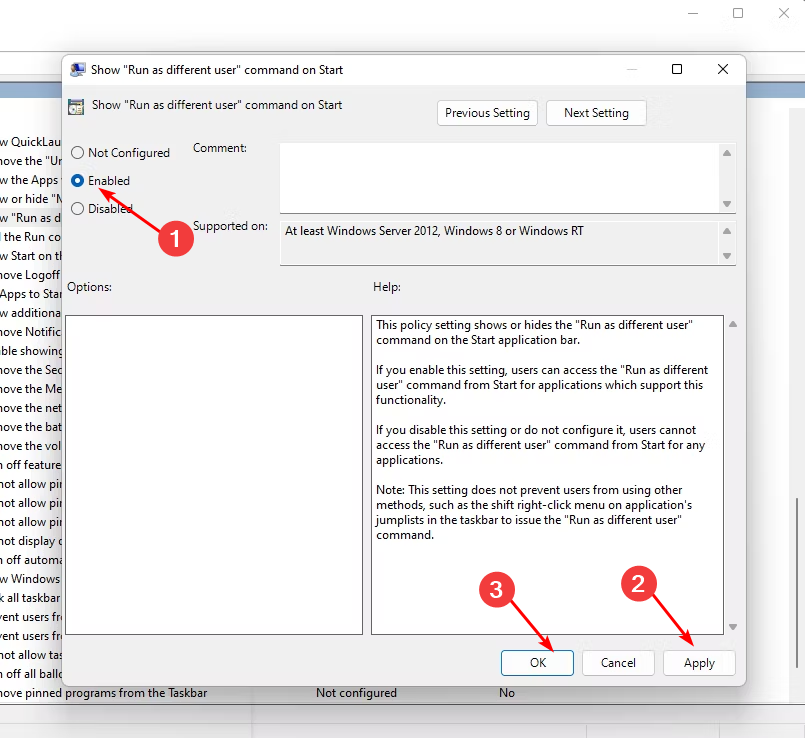
5. Use the Group Policy Editor
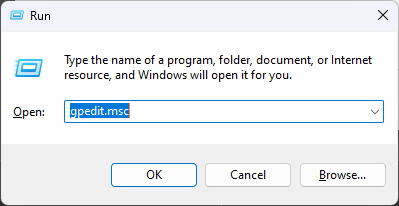
- Hit the Windows + R keys to open the Run command.
- Type gpedit.msc in the dialog box and hit Enter to open the Group Policy Editor.
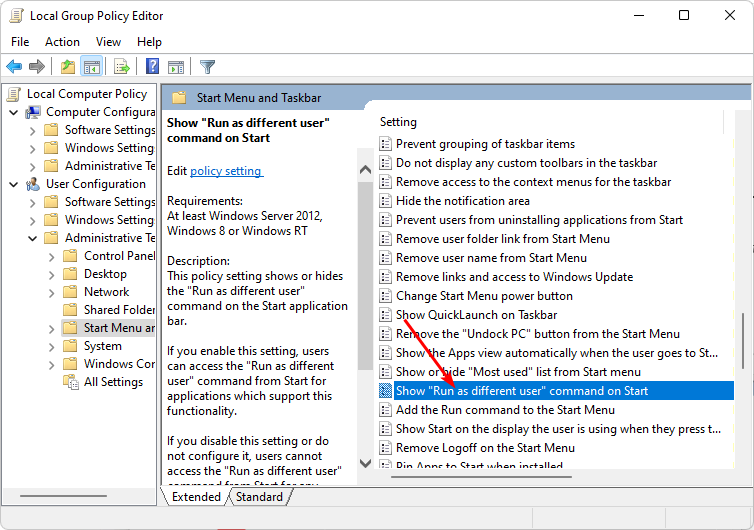
- Navigate to the following location:
User Configuration/Administrative Templates/Start Menu and Taskbar - Double-click on Start Menu and Taskbar and select Show “Run as different user” command on Start.

- In the new window, check the Enabled box then click Apply and OK to save changes.

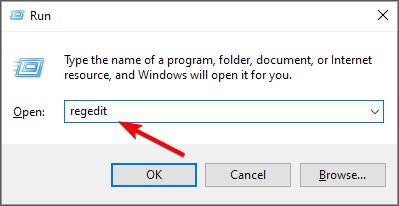
6. Use the Registry Editor
- Remember to create a restore point or backup the registry before making any edits.
- Hit the Windows + R keys to open the Run command.
- Type regedit in the dialog box and hit Enter to open the Registry Editor.
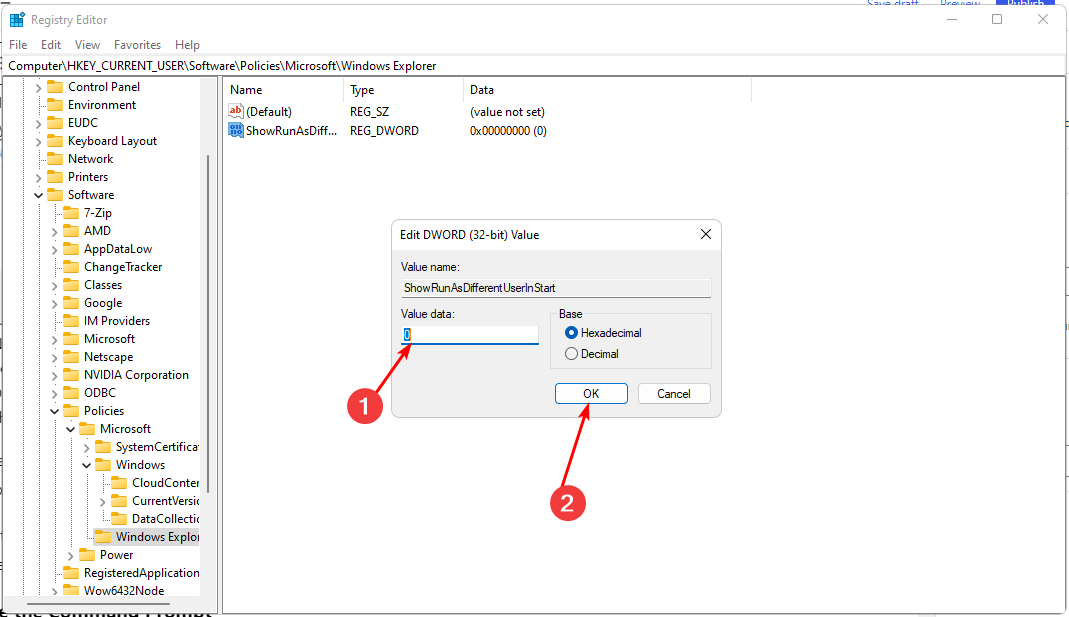
- Navigate to the following location:
Computer\HKEY_CURRENT_USER\Software\Policies\Microsoft\Windows\Explorer - Double-click on ShowRunAsDifferentUserInStart, set the Value data as 1 then click OK to save the changes.

7. Create a new user profile
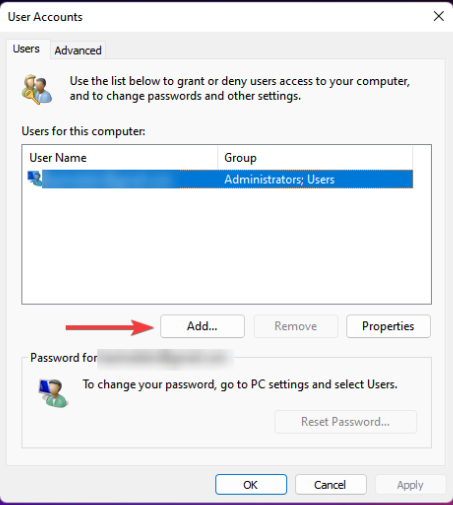
- Press Windows + R to launch the Run console, enter netplwiz in the text field, and click OK.

- Click Add in the User Accounts window.

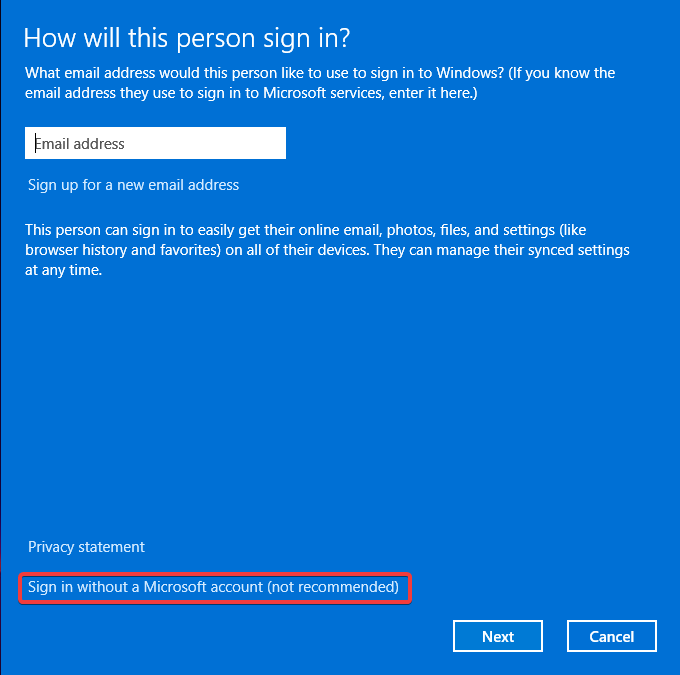
- Select Sign in without a Microsoft account (not recommended).

- Click on Local account button.

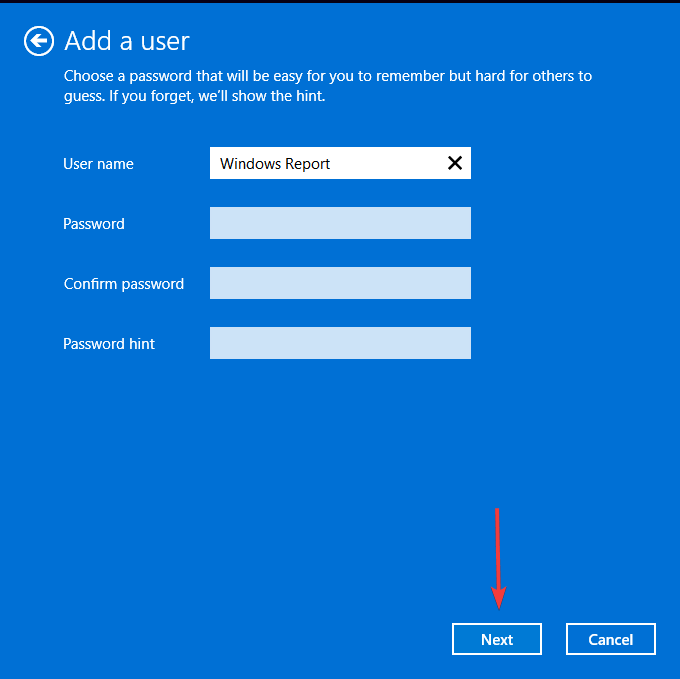
- Enter a username and password (optional) for the new user account, and a hint, in case you set a password. Once done, click on Next.

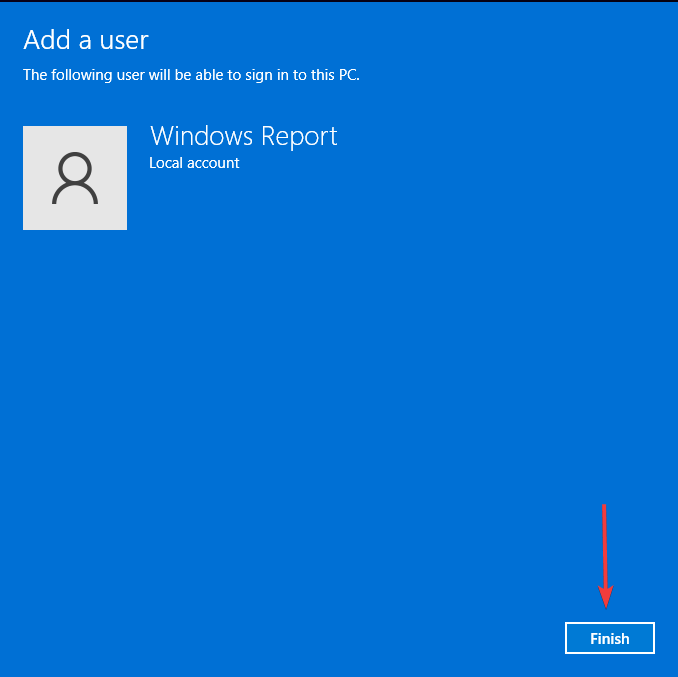
- Click on Finish to create the Local account.

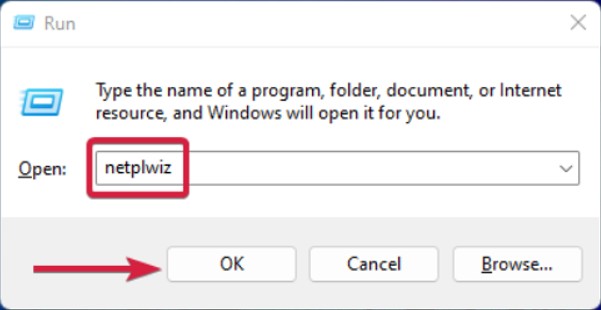

A corrupt user profile may prevent you from accessing some features. While checking for corrupt profiles, also ensure your user profile is not disabled. Creating a new profile helps you isolate the issue whether it is profile-based or system-based.
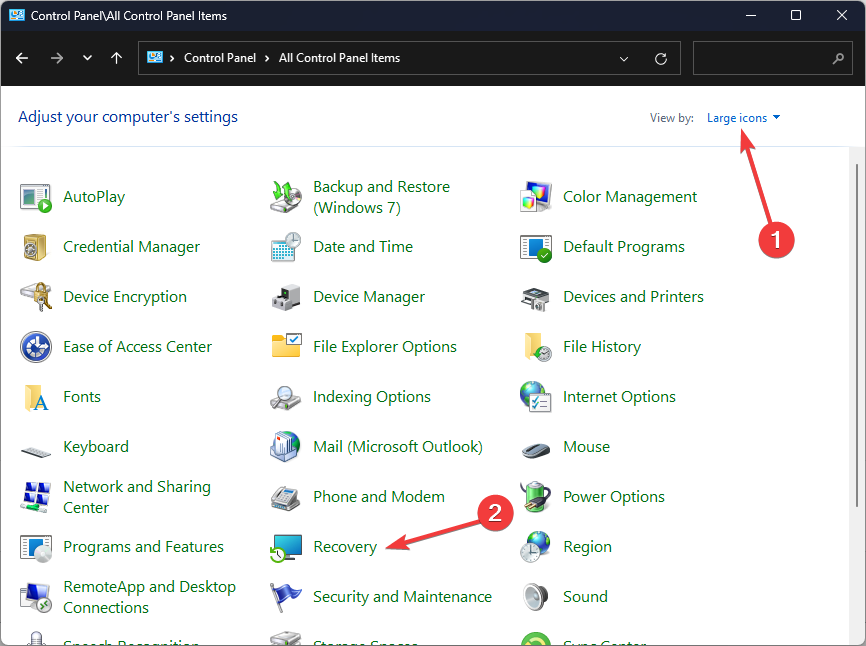
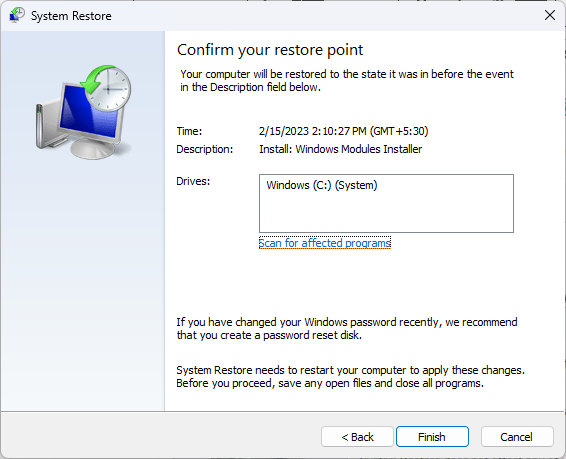
8. Perform a System Restore
- Press the Windows key, type Control Panel, and click Open.

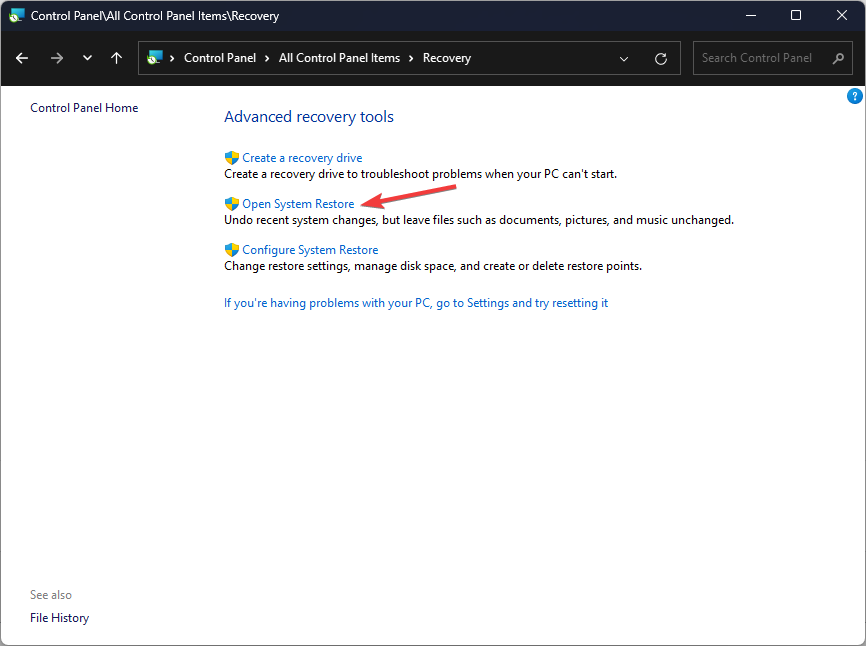
- Select Large icons as View by and click Recovery.

- Click Open System Restore.
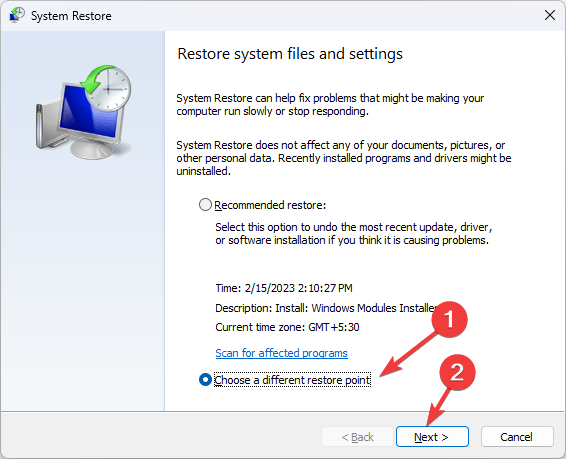
- Select Choose a different restore point and click Next.

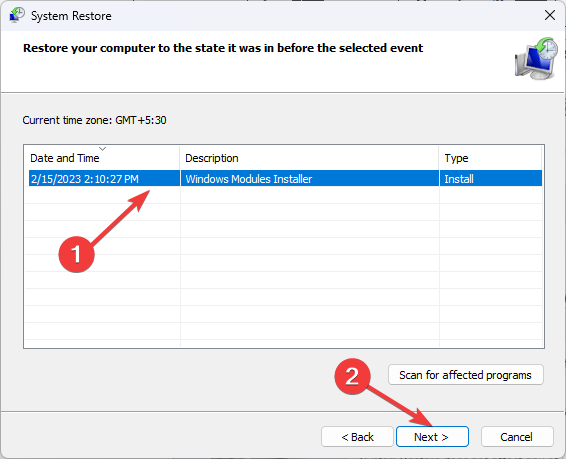
- Now select the restore point and click Next.
- Click Finish to restore the previous settings, and Windows will restart.

Note that even run as administrator may fail to work or greyed out at times but we’ve already covered how to fix it in our detailed guide. Moreover, if the Run as Different User option isn’t working properly, we’ve got you covered.
In future, as an administrator, consider making all programs available for all users. This can help address permission issues.
That’s a wrap but do let us know if you’ve been able to fix this issue. And if you have any other solutions not mentioned here but worked for you, drop us a comment down below.


User forum
0 messages