How to Run a Memory Test on Windows 10 [Quick steps]
Check out the different ways to run the Memory Diagnostic Tool on your PC
Memory problems are the worse on your PC as they can slow down your PC and impact its performance. In such a case, running the Memory Diagnostic Tool on your Windows PC is advisable to fix any memory-related issues.
While this tool is a saver, users can run into trouble opening this tool. So, in this guide, we will share many quick methods to run a memory test on Windows 10 using the Memory Diagnostic tool. So, let us get right into it.
How can I run a memory test on Windows 10 using the Diagnostic Tool?
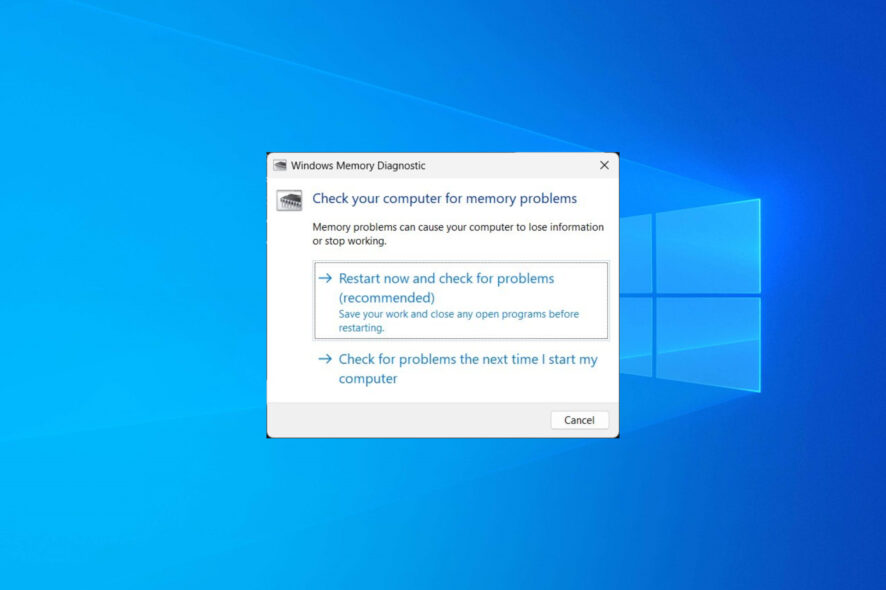
1. Use the Start menu
- Press the Win key to open the Start menu.
- Type Windows Memory Diagnostic and open it.
- You can select from the two below options:
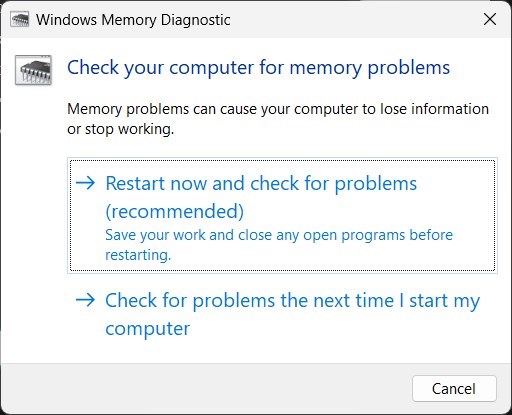
- Restart now and check for problems (recommended)
- Check for problems the next time I start my computer
- The tool will find any issues and fix the problem.
This is the easiest way to access the Windows Memory Diagnostic tool on your Windows 10 PC. But, of course, you can also follow the same steps for Windows 11.
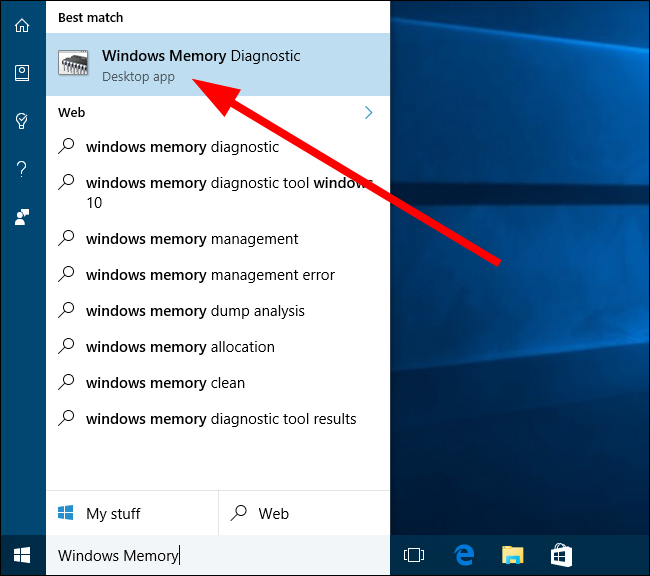
2. Use Windows Search
- Press the Win + S keys to open the Windows Search.
- Type Windows Memory Diagnostic and open it.
- Select from the two below options:
- Restart now and check for problems (recommended)
- Check for problems the next time I start my computer
- The tool will find any issues and fix the problem.
To run the memory test on Windows 10, you can also run the Windows Memory Diagnostic tool from the Windows Search.
3. Use the Command Prompt
- Press the Win key to open the Start menu.
- Open Command Prompt as an admin.
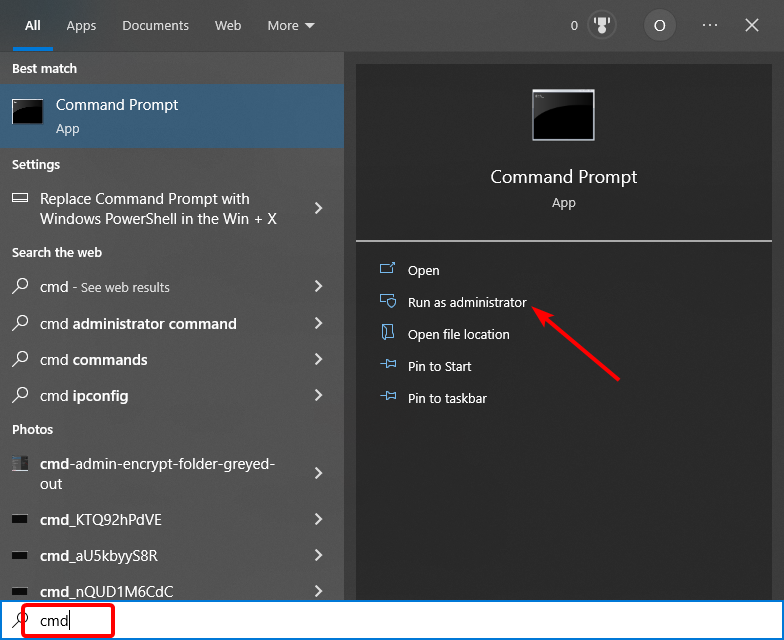
- Type the below command to run the Windows Memory Diagnostic tool and hit Enter.
MdSched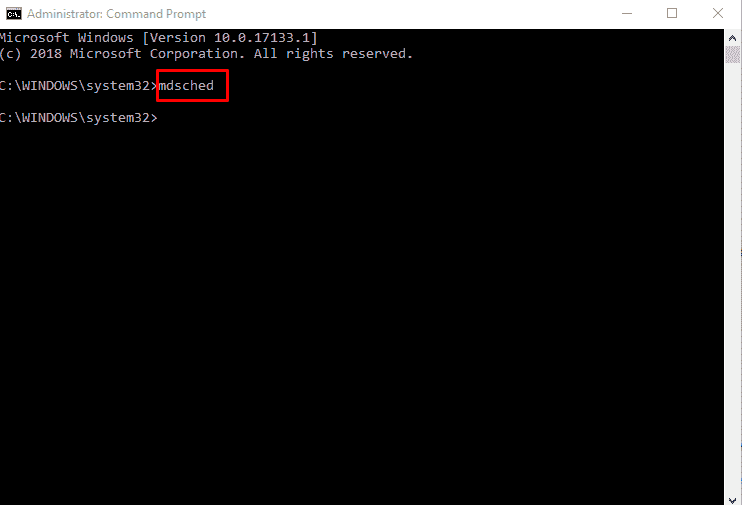
- Choose any of the two below options:
- Restart now and check for problems (recommended)
- Check for problems the next time I start my computer
- The tool will find any issues and fix the issue.
Command Prompt is another way to help you run a memory test on Windows 10. This method could come in handy when your PC isn’t booting.
In that case, you can access the recovery mode, open the command prompt, and run the tool to fix memory issues.
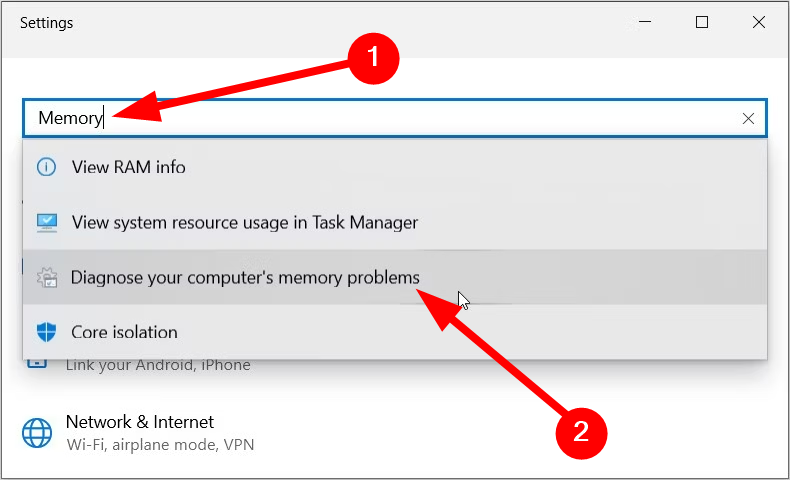
4. Use the system settings
- Press the Win + I keys to open the Windows Settings.
- Type memory in the search field and click on Diagnose your computer’s memory problems option.
- Select any of the two below options:
- Restart now and check for problems (recommended)
- Check for problems the next time I start my computer
- The tool will find any issues and fix the issue.
As the name suggests, Windows Settings includes all the settings you can tweak on your PC. Using the Memory Diagnostic Tool from settings, you can also run the memory test on your Windows 10 PC.
5. Use the Control Panel
- Press the Win key to open the Start menu.
- Open Control Panel.

- Click View by and select Small icons.
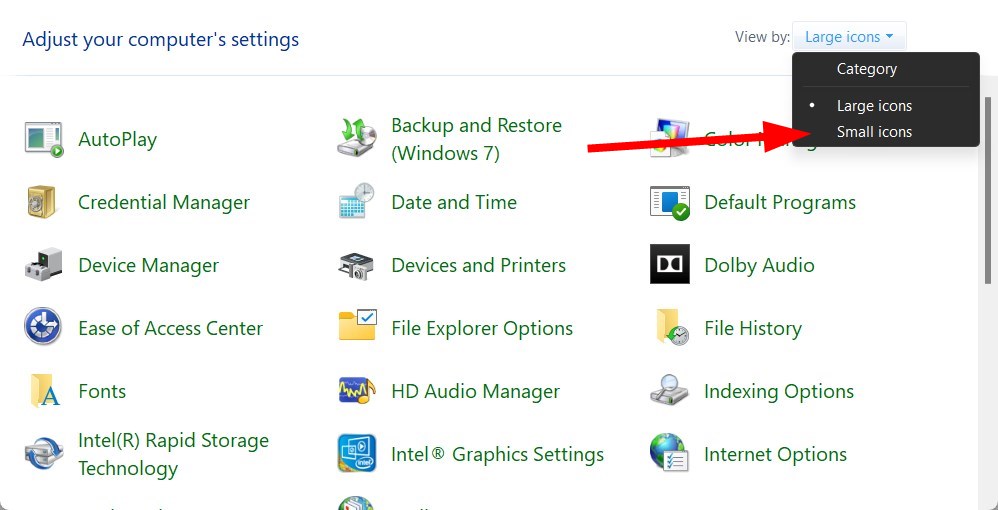
- Select the Administrative Tools option.
- Choose Windows Memory Diagnostic.

- Click any of the two below options:
- Restart now and check for problems (recommended)
- Check for problems the next time I start my computer
- The tool will find any problems and fix the issue.
Control Panel is another option for running the memory test on Windows 10 using the Diagnostic Tool.
6. Use File Explorer
- Open the File Explorer.
- In the address bar, type MdSched and hit Enter.
- Choose any of the two below options:
- Restart now and check for problems (recommended)
- Check for problems the next time I start my computer
- The tool will find any problems and fix the issue.
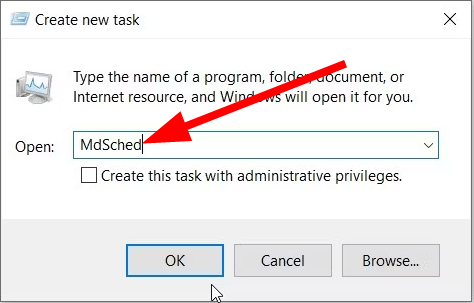
7. Use the Task Manager
- Press the Ctrl + Shift + Esc buttons to open the Task Manager.
- Click on the File tab.
- Select the Run new task option.
- Type MdSched and press Enter.
- Select any of the two below options:
- Restart now and check for problems (recommended)
- Check for problems the next time I start my computer
- The tool will find any problems and fix the issue.
It is a bit complicated to run the memory test on Windows 10; however, it can come in handy when all you have access to is the Task Manager.
8. Use the Run dialogue
- Press the Win + R key to open the Run dialogue.
- Type MdSched and press Enter.
- You can choose from any of the two below options:
- Restart now and check for problems (recommended)
- Check for problems the next time I start my computer
- The tool will find any problems and fix the issue.
That is it from us in this guide. Our guide explains what you can do if the Memory Diagnostic Tool gets stuck on your PC.
If you are getting a hardware problem with the Memory Diagnostic Tool, then you can refer to the solutions in our guide to fixing the issue.
For users facing the Memory Refresh Timer error on their Windows PCs, we have a guide that explains a bunch of solutions to resolve the problem.
Let us know in the comments below which of the above methods you used to run a memory test on your Windows 10 PC.
Read our disclosure page to find out how can you help Windows Report sustain the editorial team. Read more


Improve this guide


User forum
0 messages