Secure Boot Enabled But Not Active in Windows 10: 5 Solutions
Make sure CSM in your BIOS is disabled
Key notes
- The Windows 10 Secure boot enabled but not active issue could have occurred due to the Compatibility Support Module being enabled or your BIOS being outdated.
- This guide will discuss all the potential fixes and the causes of the issue, including how to enable Secure Boot from BIOS.

On the System Information page, if you see the Secure boot option is off, but in BIOS, it is shown as Active, which can be confusing. However, it could be due to some misconfigured settings in BIOS, and it can be sorted with a few steps.
Here in this guide, we will discuss some steps to fix this issue right after examining the causes of the issue. Let’s get started!
What causes the Secure Boot enabled but not active issue?
There could be various reasons why secure boot is not active on your computer, some of them are mentioned here:
- Secure Boot feature disabled – Check if the Secure Boot option in UEFI firmware settings is set to Disabled; the feature won’t work, even if it is technically enabled. So, double-check the settings in BIOS to be sure.
- CSM enabled – If Compatibility Support Module is enabled in UEFI settings, you might see that secure boot is not an active issue. It would be best if you disabled it to get the Secure boot option.
- BIOS is outdated – if BIOS is not up to date, it might not support the Secure boot feature. Check the manufacturer’s website to download and install BIOS updates to enable the feature.
- Scan for viruses – If your computer is infected with malware or viruses, you might see that secure boot is not active. You need to run a malware scan using a security tool.
Now that we know the problem, let’s fix it using the solutions below.
What can I do if secure boot is enabled but not active?
Before moving to actual troubleshooting steps, apply these quick steps:
- Check for Windows updates.
- The operating system must be configured to support Secure boot.
- Your device should have a valid Secure boot signature.
1. Update BIOS
- Press the Windows key, type cmd, and click Run as administrator.
- Type the following command to check the BIOS version and press Enter:
wmic bios get smbiosbiosversion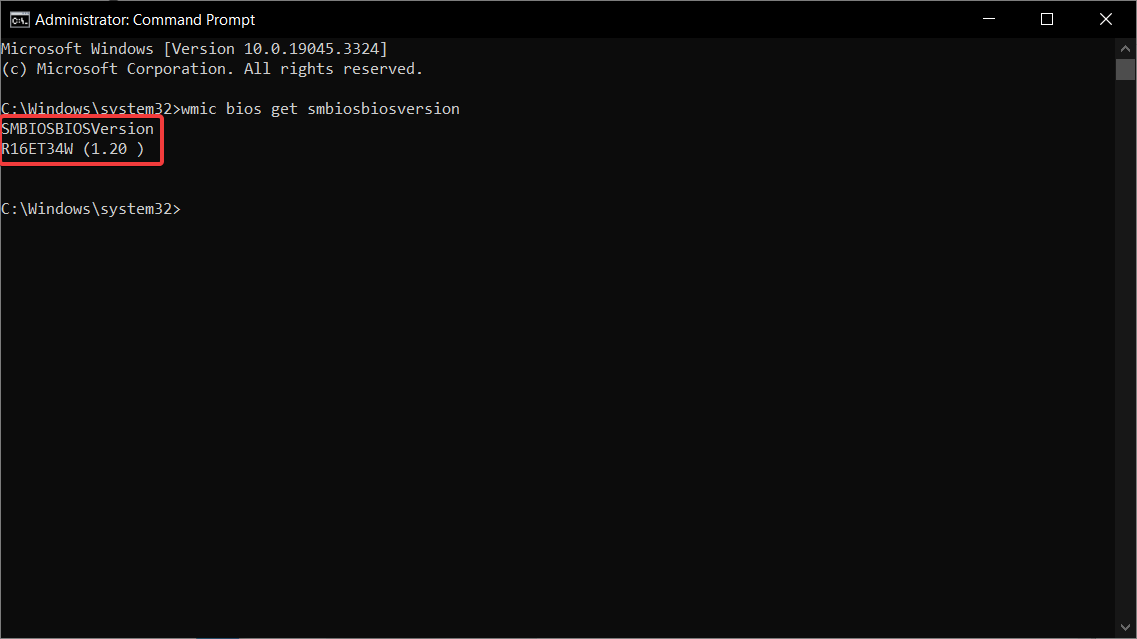
- Next, open the device manufacturer’s website or open the assistant app if provided by the manufacturer. For demonstration purposes, we are using the HP Support Assistant tool.
- Open the app. Go to Updates, then click Check for updates.
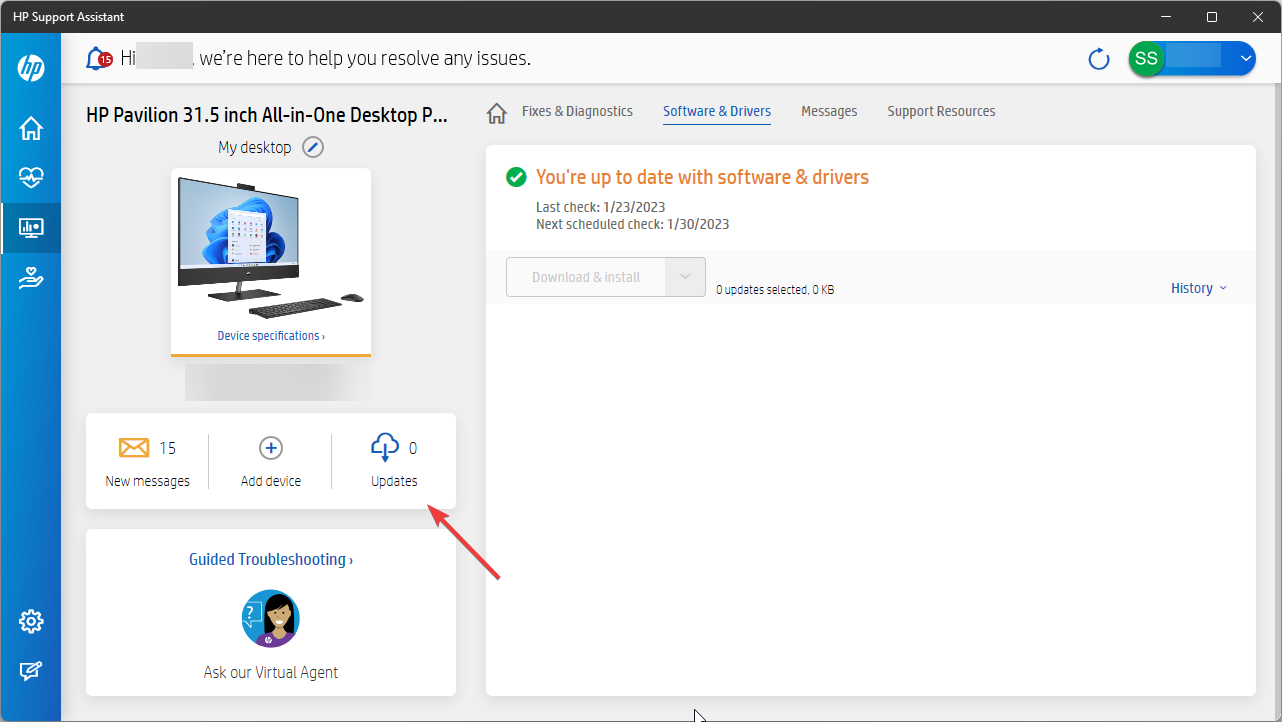
- If there is an update available, download and install the BIOS.
If you have an older BIOS version or you don’t have an update tool, we have a complete guide on how to update BIOS in Windows 10 that will provide step-by-step instructions.
2. Disable CSM
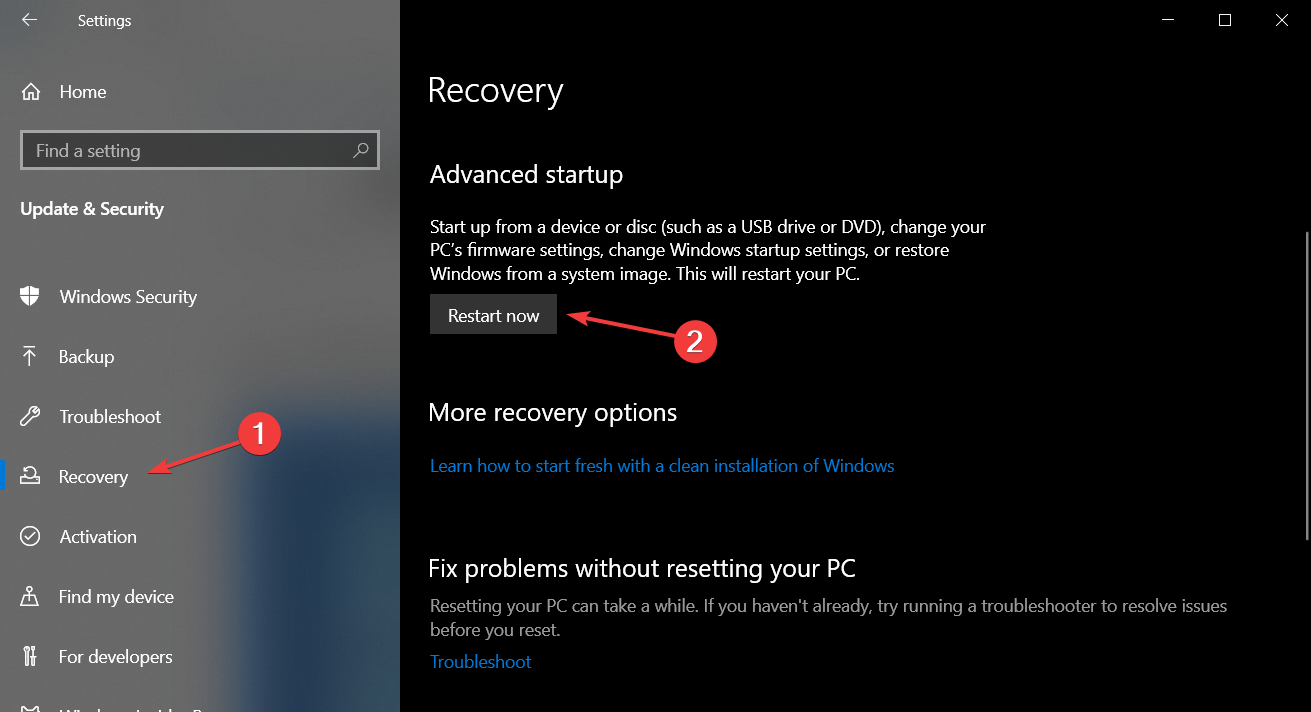
- Press Windows + I to open Settings.
- Go to Update & Security.

- Now, click Recovery from the left pane and under Advanced startup, click Restart now.
- From the Choose an option window, select Troubleshoot.

- Now select Advanced Options.

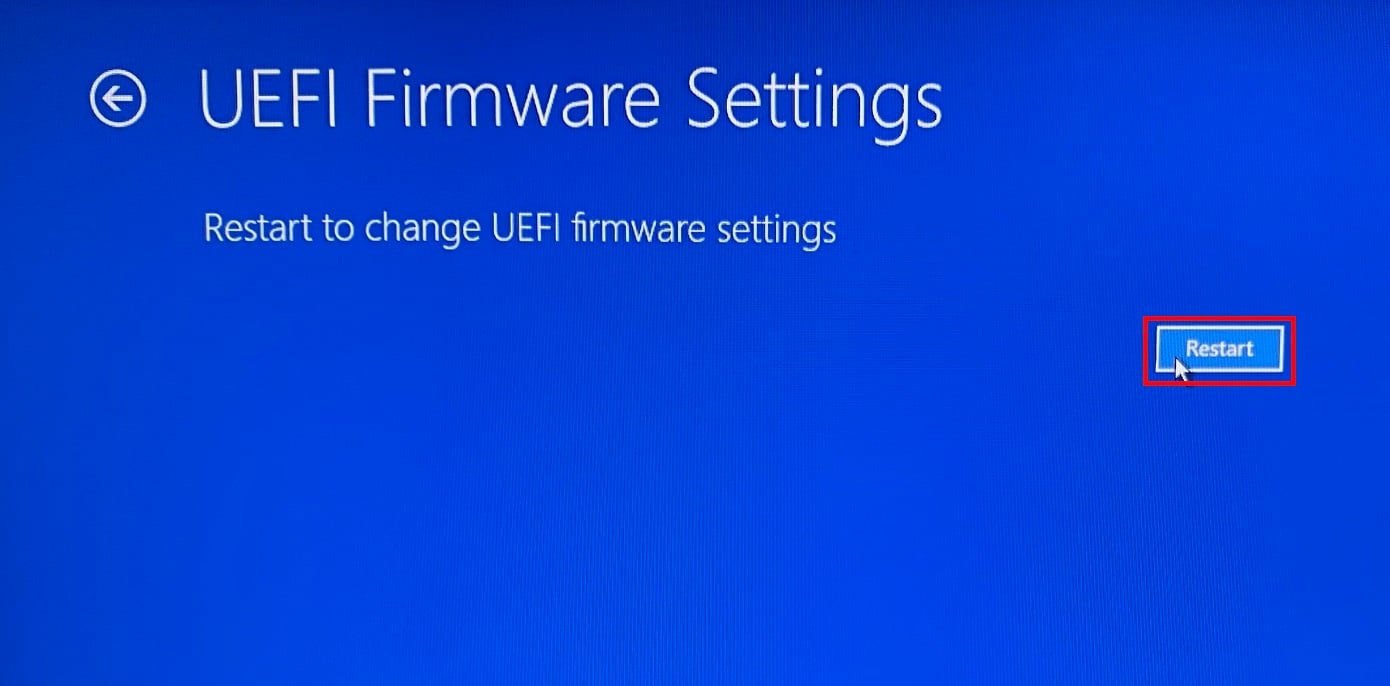
- On the Advanced Options window, select UEFI Firmware Settings.
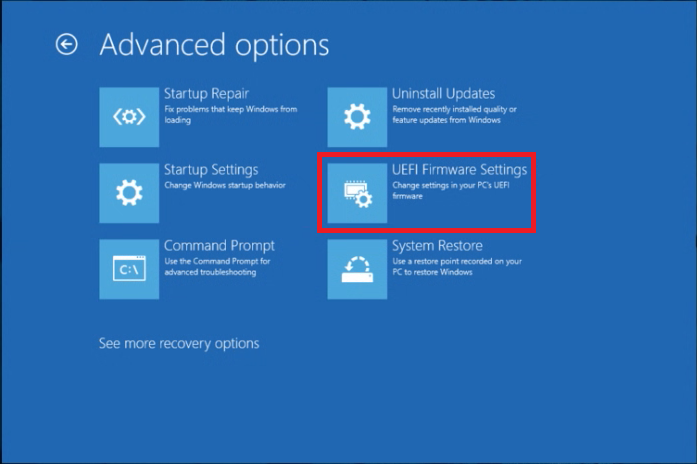
- Click Restart.
- The computer will restart and provide you with some options. First, choose the appropriate option to enter BIOS.
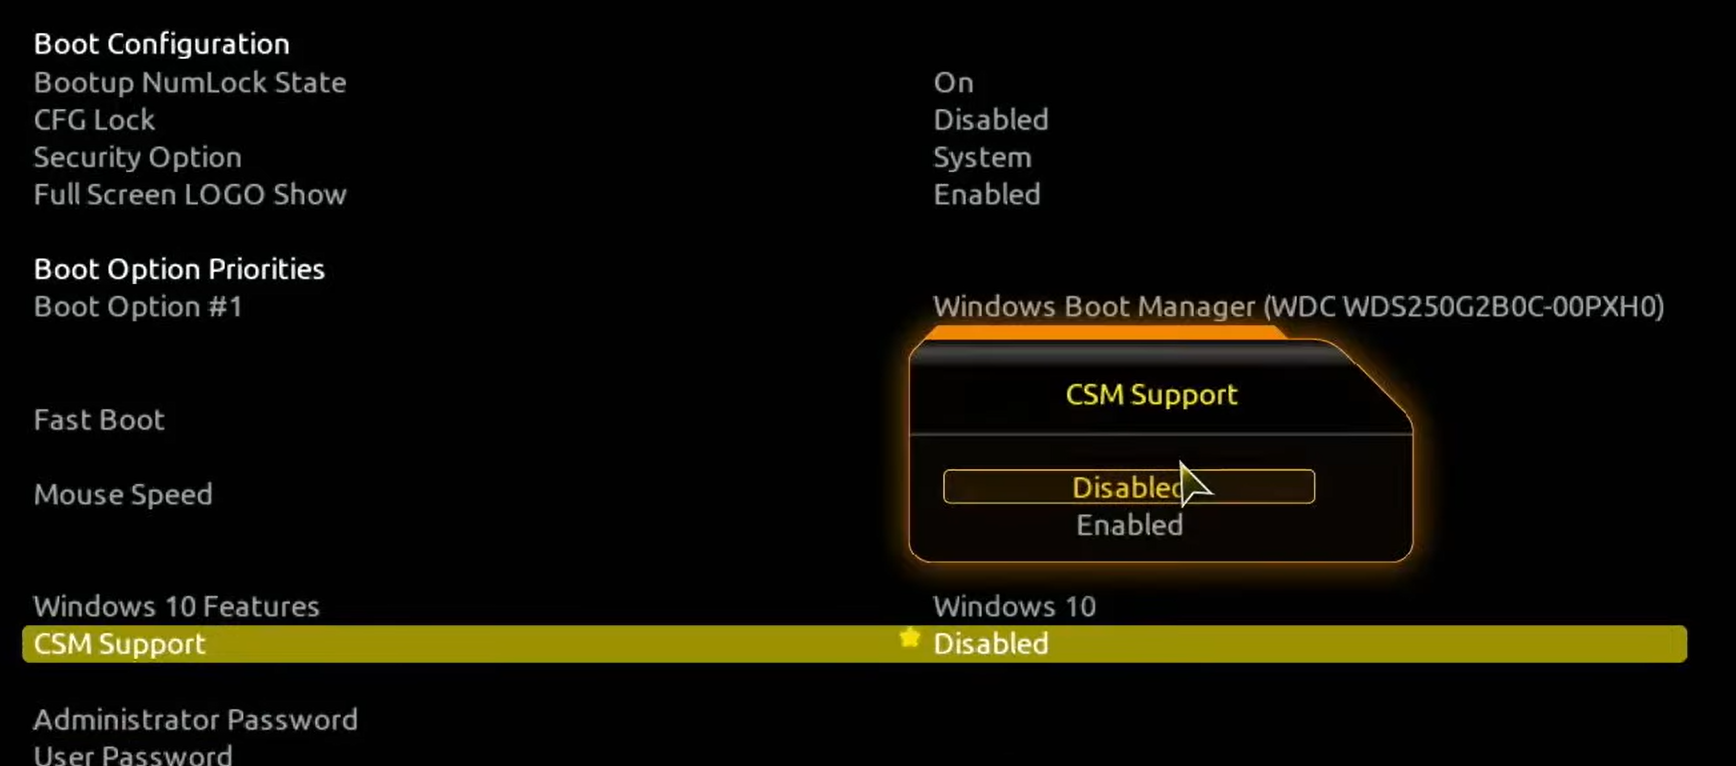
- Go to the Boot tab or Security tab, select CSM and choose Disabled.
- Now switch to the Exit tab and select Save changes and exit.
3. Change the platform
- Enter the BIOS mode using the method explained in the above method.
- Navigate to System Mode and select User instead of Setup.
- Now locate Secure Boot Mode and choose Custom if Standard is selected.
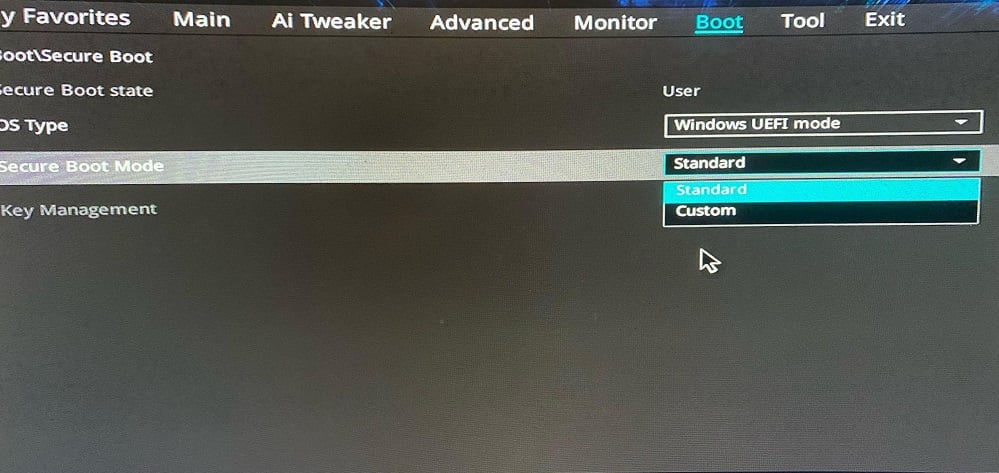
- Then again, change it back to Standard.
- Now switch to the Exit tab and select Save changes and exit.
4. Enable Secure Boot from BIOS
- Again enter the BIOS using the method mentioned in method 2.
- From the Boot menu or Security menu, choose Secure boot.
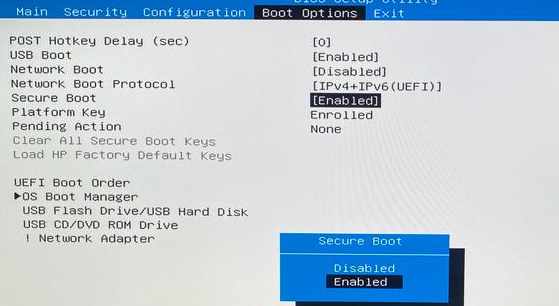
- Select Enabled. Now switch to the Exit tab select Save changes and exit.
Remember that BIOS software differs for manufacturers and motherboards, so your menu might differ from our solution. Nevertheless, you will find the Secure Boot option within its settings.
5. Scan your computer for malware
- Press the Windows key, type Windows Security, and press click Open.
- Go to Virus & Threat Protection and click Scan options.
- Now select Full Scan, and click Scan now.
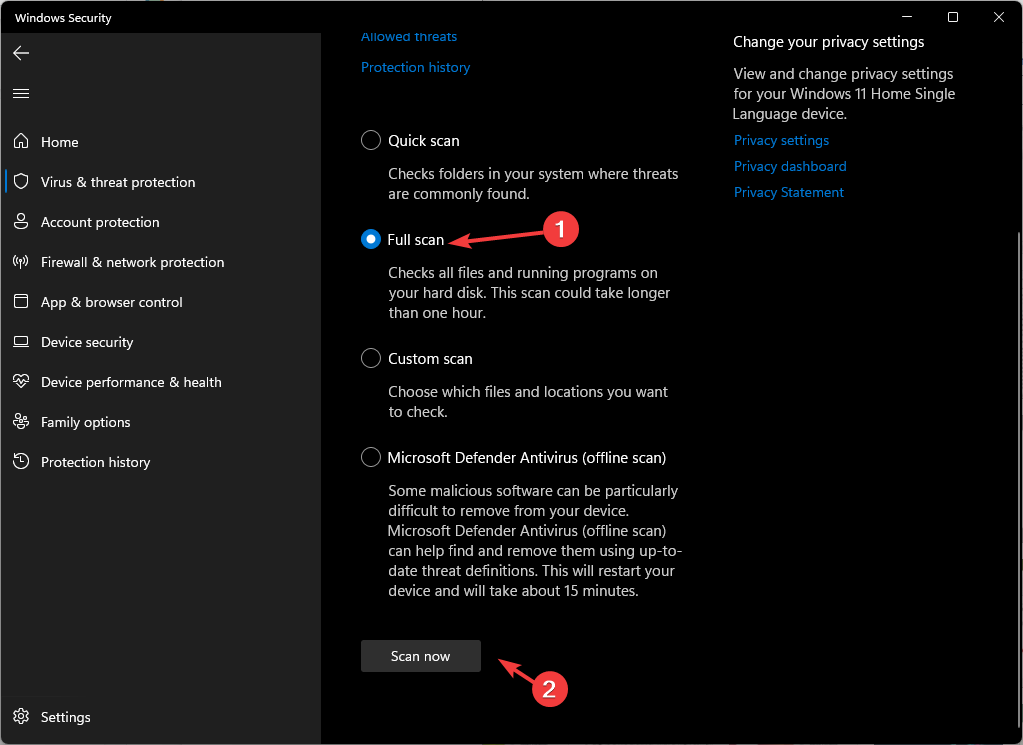
- Once the scan is complete, delete all the malicious files found.
A less probable scenario of Secure Boot being disabled is that a virus or malware did that. Scanning your system with Windows Defender might solve the problem.
Of course, you can do that with a more powerful antivirus to be absolutely sure that your computer is safe.
So, you need to follow these steps to fix the secure boot enabled but not active. If you have upgraded to the latest OS, here’s our guide on how to fix the secure boot enabled but not active on Windows 11.
Try these methods and let us know which worked for you in the comments below.
Read our disclosure page to find out how can you help Windows Report sustain the editorial team. Read more


Improve this guide


User forum
0 messages