Skype Installs Every Time I Open It: 4 Easy Solutions
Expert solutions to get Skype running like before
Key notes
- Many users reported that Skype installs on the PC every time they open it and requires a reconfiguration.
- The problem usually arises due to issues with the installation, running an outdated version of the app, or corrupt system files.
- To fix things, make sure there's no other version of the app installed on the PC and modify permissions, amongst other solutions.
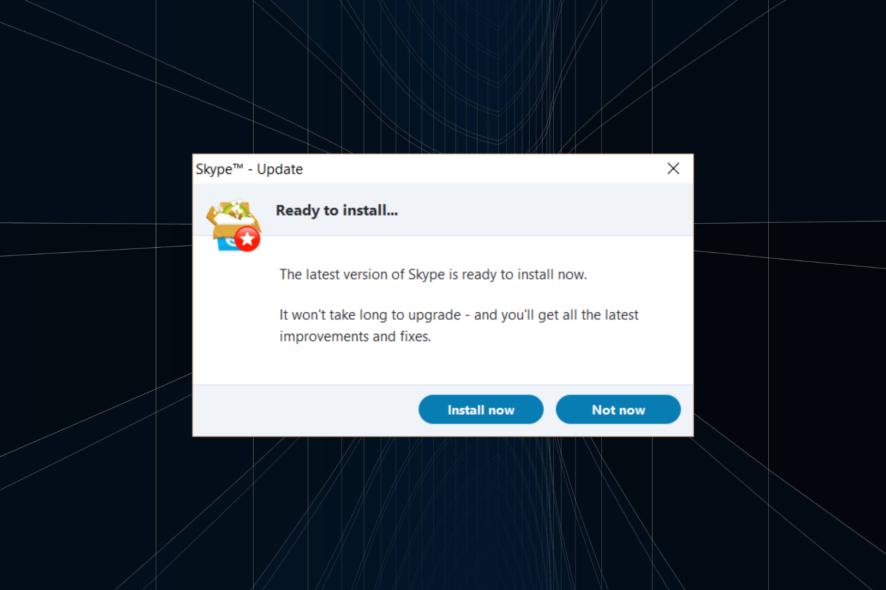
Skype is an incredibly useful tool used by several individuals and organizations for messaging and video conferencing. Though many users reported that Skype installs every time they open it.
The problem is strange, and there’s no sure-shot way to fix things. But users have shared a few solutions that worked for them, and we will present them to you as well, along with other vital information.
Why is Skype installing automatically?
Here are a few reasons Skype installs automatically on the PC every time you open it:
- Running an outdated version of Skype: In case you are running an outdated version of Skype, chances are that it is trying to install updates.
- Issues with the existing installation: If Skype wasn’t installed properly on the PC, it could be trying to install the missing files.
- Corrupt system files: When the system files are corrupt, applications, including Skype, and even some system components may not work properly.
- Third-party conflicts: Some third-party apps may also try to install Skype, leading to the issue.
What can I do if Skype keeps installing every time I open it?
Before moving to the complex solutions, here are a few quick ones to try:
- Simply uninstall skype in case you don’t need the application. Several users reported that Microsoft pushed the application in one of the updates, and once uninstalled, the app didn’t appear again.
- Disable any third-party antivirus or similar security software on the PC, and check whether that fixes the problem. If it does, we recommend you switch to a more friendly and reliable antivirus solution.
- Uninstall apps that were added around the same time the problem first appeared in case it’s a third-party conflict.
If these don’t work, head to the solutions listed next.
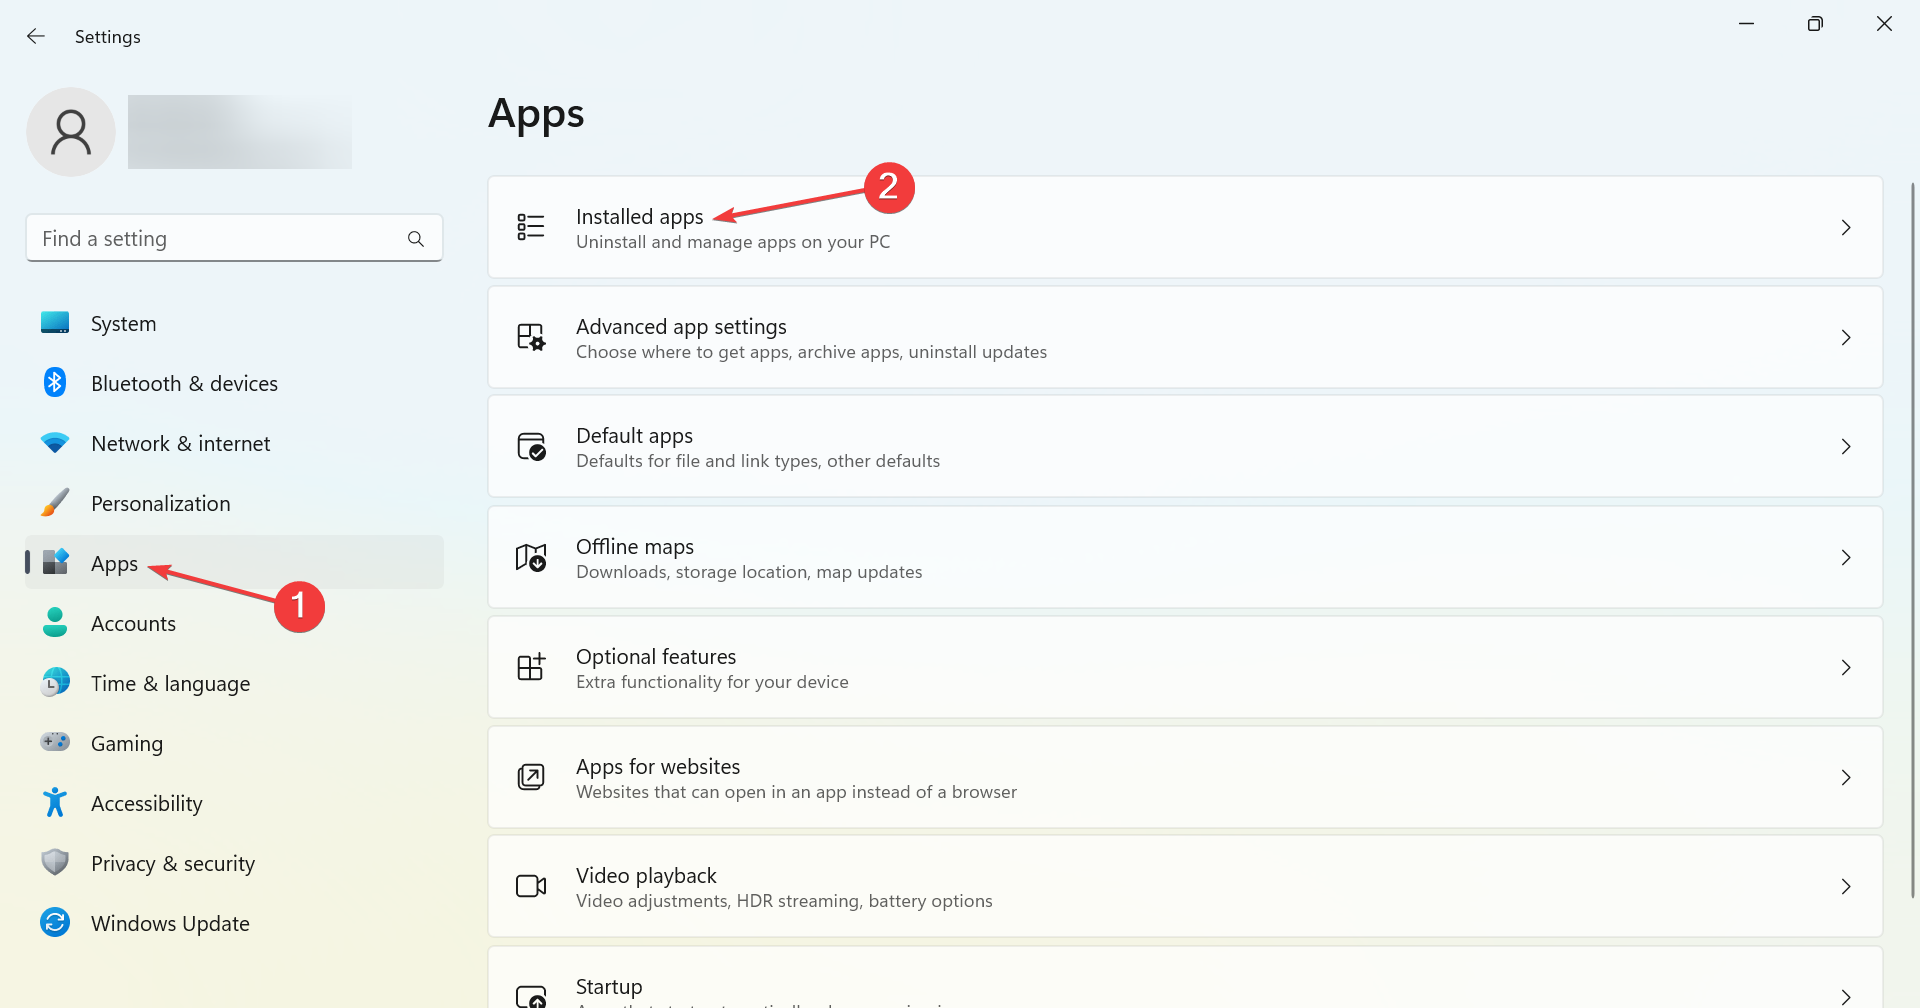
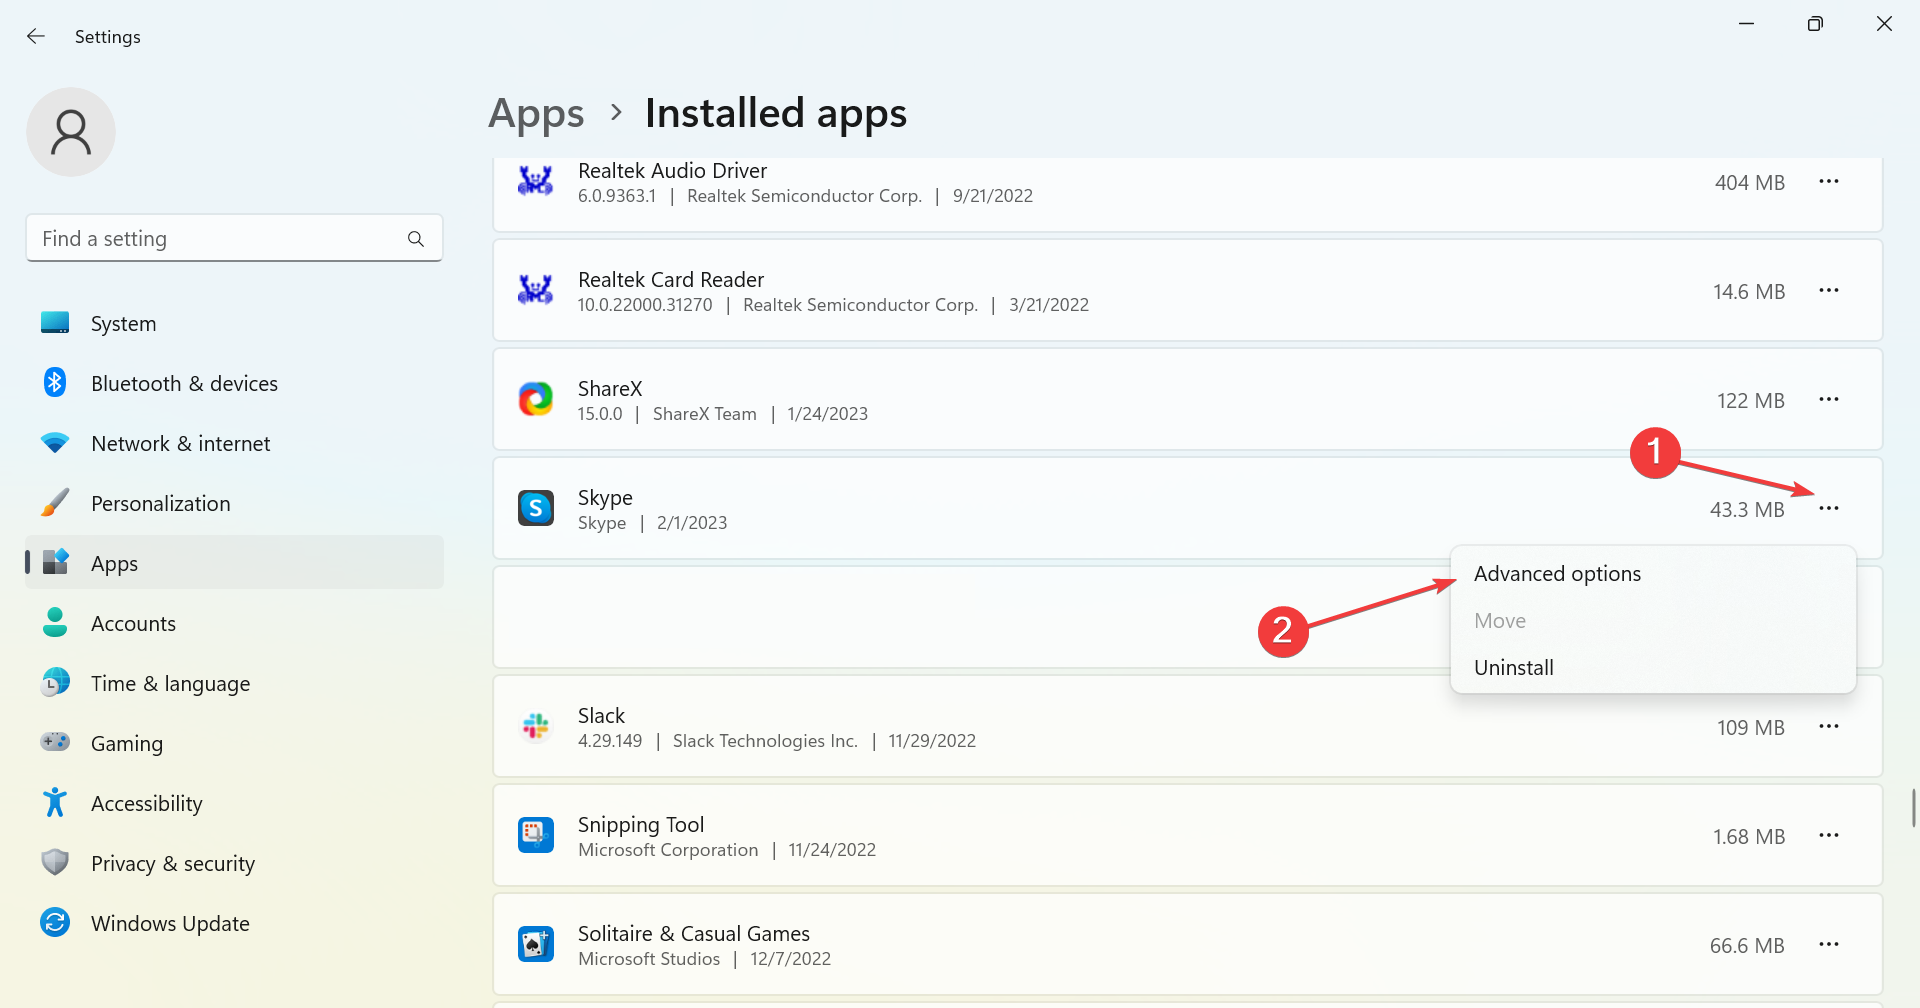
1. Reset Skype
 NOTE
NOTE
- Press Windows + I to open Settings, select the Apps tab from the navigation pane, and click on Installed apps on the right.
- Locate Skype, click on the ellipsis next to it, and choose Advanced options.
- Now, click on the Reset button.
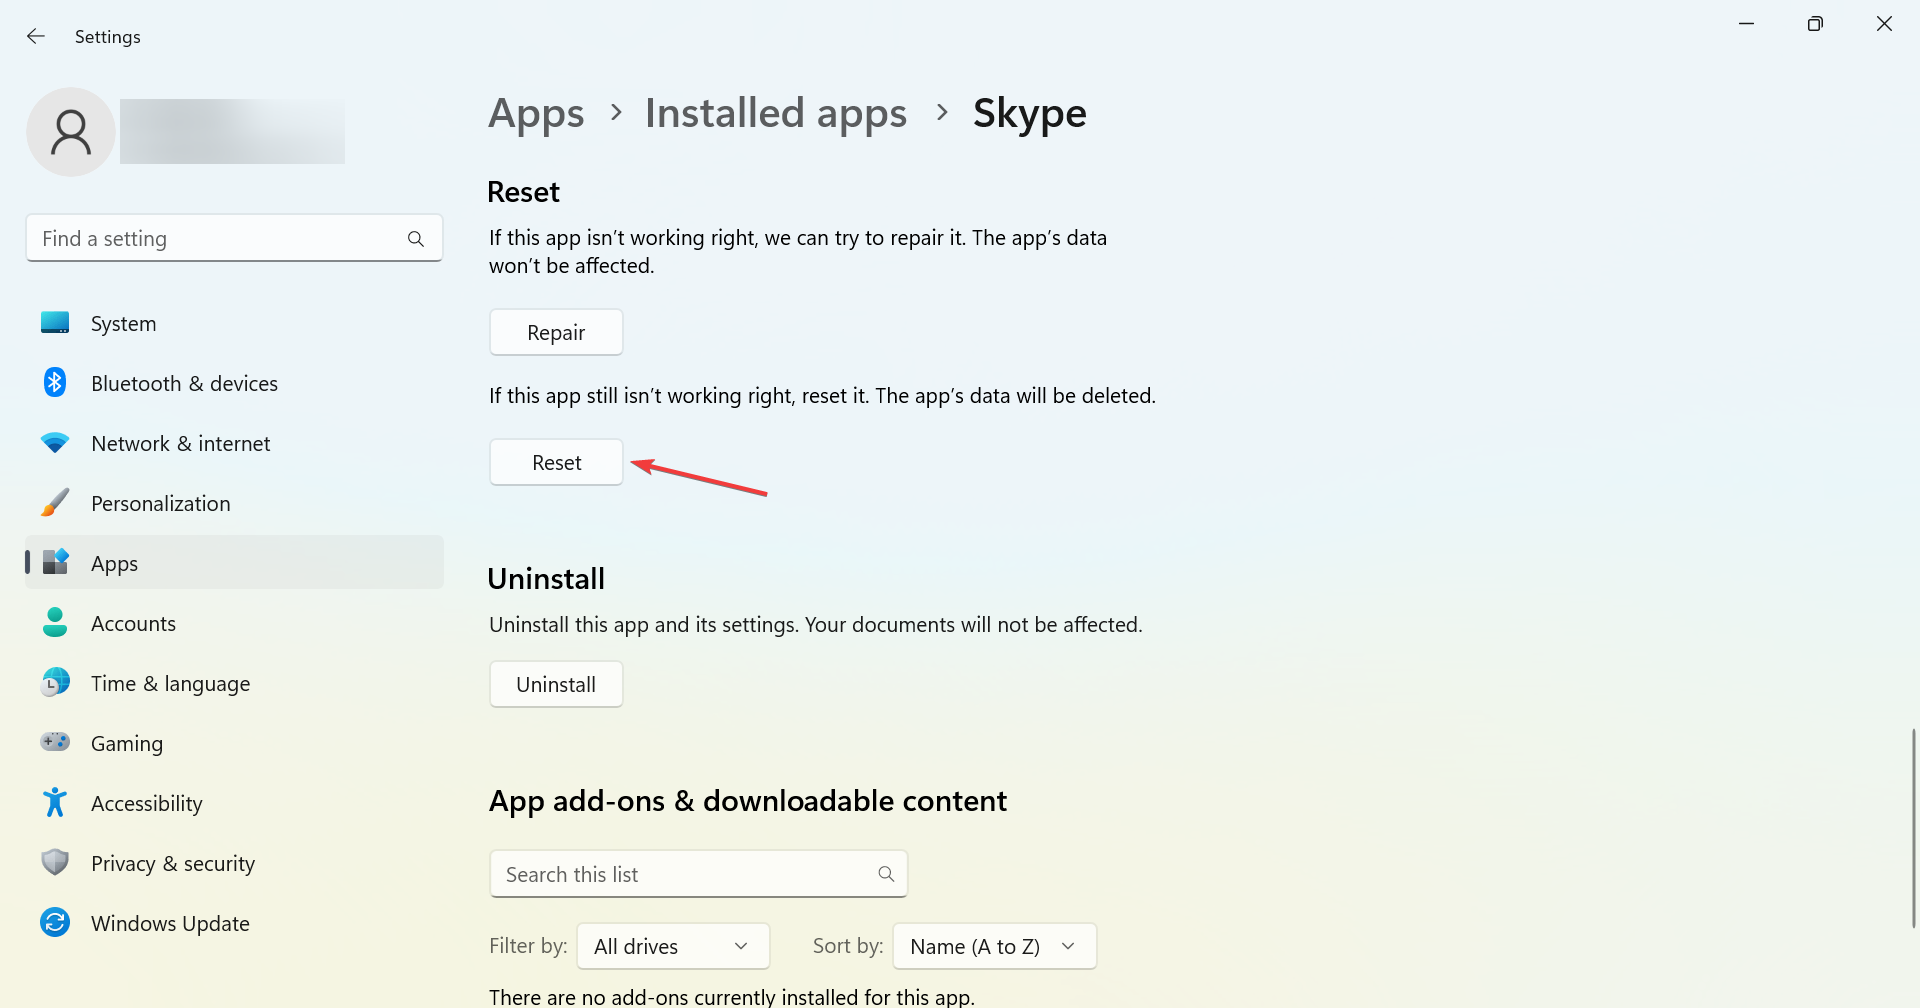
- Again, click Reset to confirm.
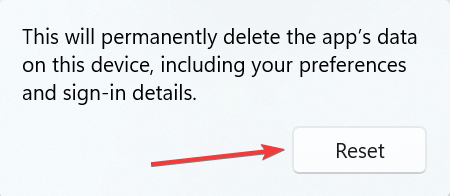
A quick way to fix things when Skype installs every time you open it is to Reset the app. Once done, the problem should be resolved.
2. Delete Skype data
- Press Windows + R to open Run, type %appdata%, and hit Enter.
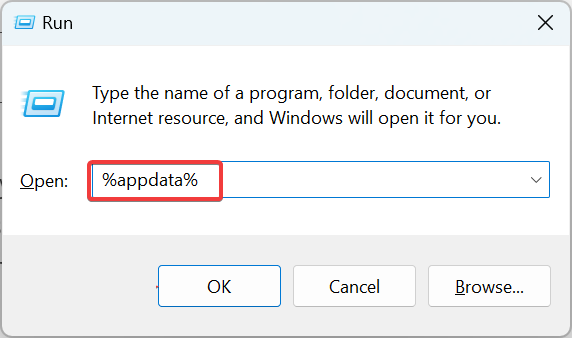
- Locate the Skype folder here and delete it.
- Now launch Skype, and it shouldn’t throw the message again.
3. Uninstall the previous version of Skype
- Press Windows + R to open Run, type appwiz.cpl in the text field, and click OK.
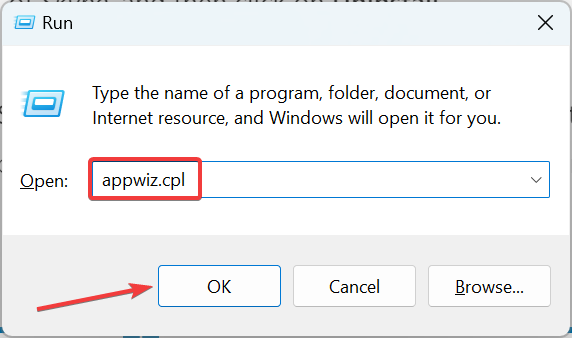
- Locate and choose the older version of Skype, and then click on Uninstall.
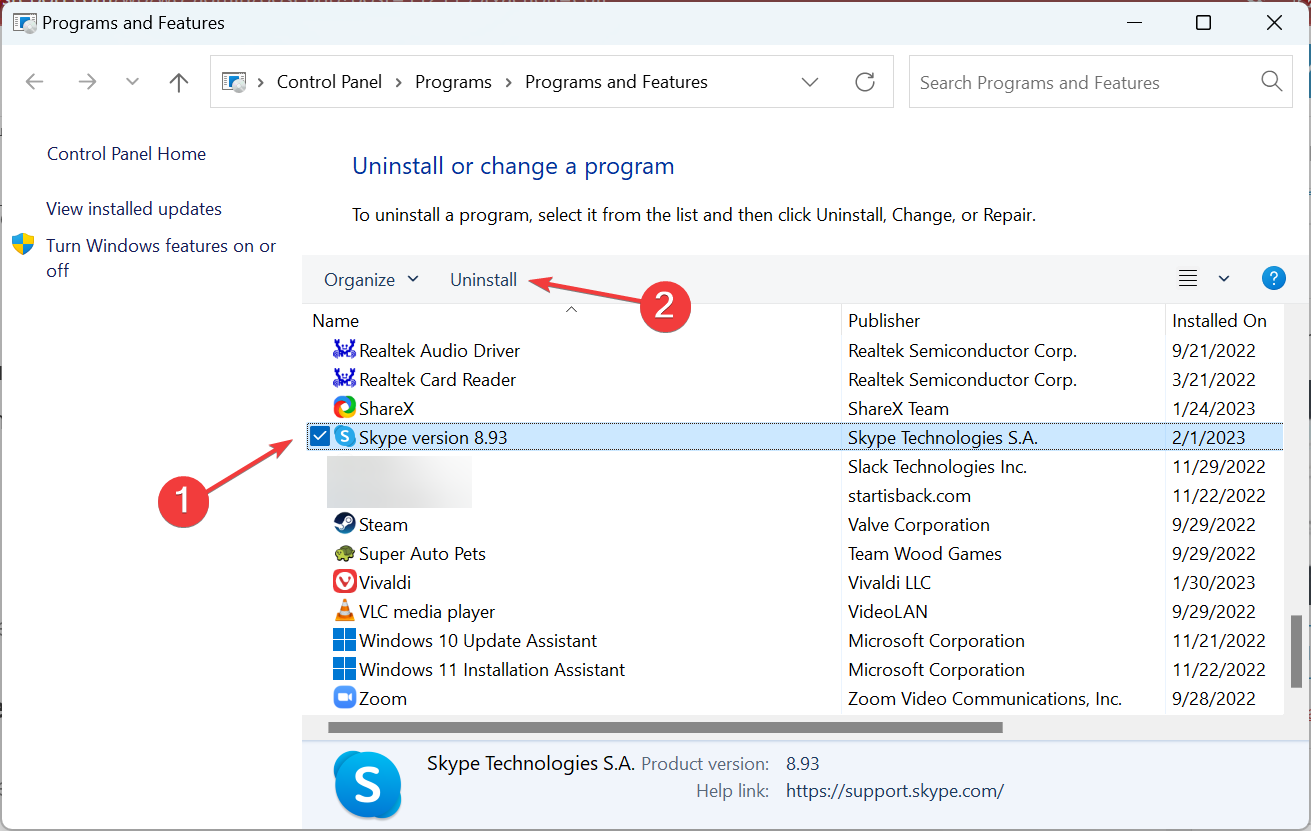
- Follow the on-screen instructions to complete the process.
In a few cases, users had two versions of Skype on the PC when an update instead of neutralizing the previous version installed as a separate application. And in this case, uninstalling the older version should do the trick.
4. Modify permissions
- Uninstall Skype from the PC.
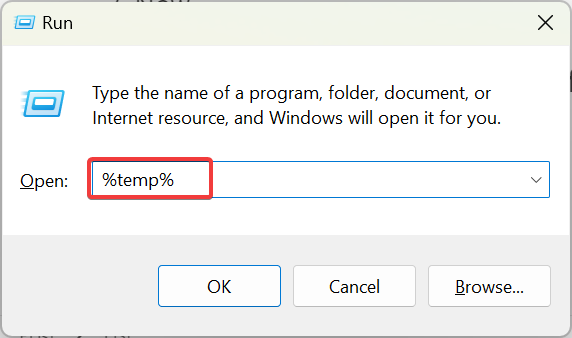
- Press Windows + R to open Run, type %temp%, and hit Enter.
- Now, locate any Skype folder/files here, and delete them.
- Next, again press Windows + R, enter %appdata%, and click OK.

- Find the Skype folder and delete it. Also, make sure to check in the Microsoft folder as well for any related files/folders.
- Once done, head to Skype’s official website, choose Get Skype for Windows, and the setup will download automatically.

- Run the setup, and choose the appropriate response when prompted to complete the installation process.
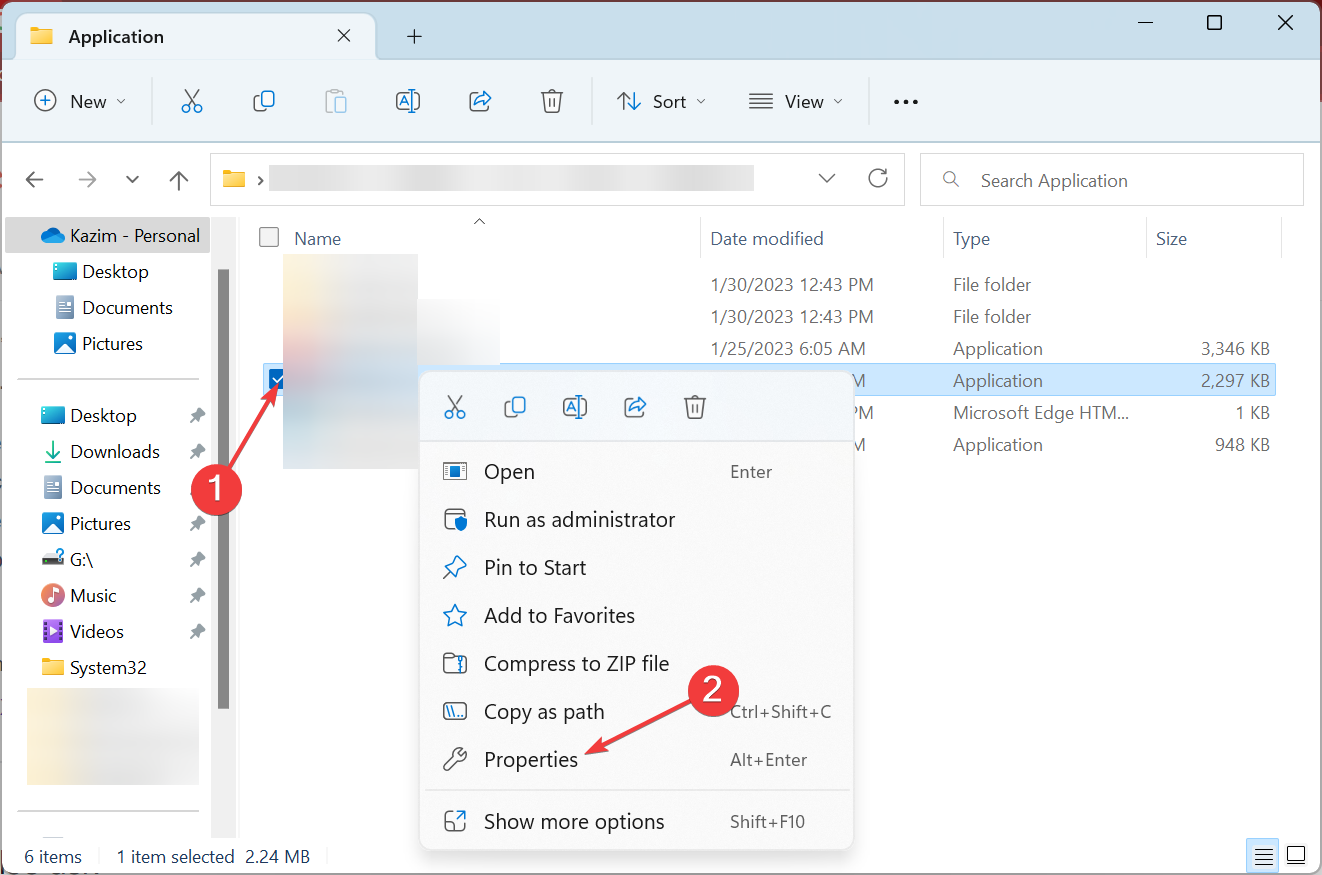
- After you have installed Skype, again head to the %appdata% folder, and delete the skype.exe (or any related file).
- Now, create a file with the same name as the one you deleted earlier, right-click on it, and choose Properties.
- Now, tick the checkbox for Read Only, and head to the Security tab.
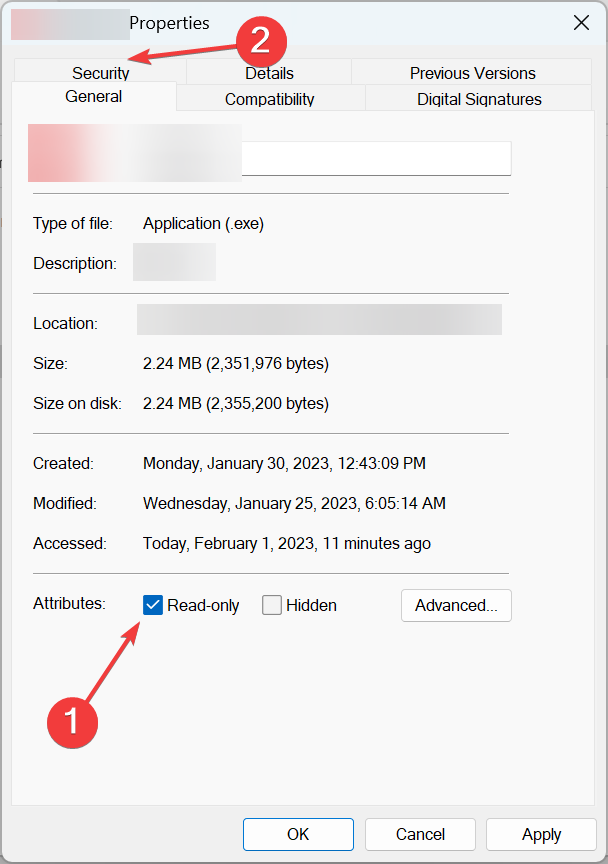
- Next, ensure all the users listed here have minimum permissions, and then save the changes.
That’s it! One of these solutions should help get things running on the PC, and Skype shouldn’t install anymore every time you click on it.
If the problem remains as it is, the last option is to get the application from the official website and remove the one downloaded from the Microsoft Store.
Also, if you are looking for an alternative, there is a wide range of video-conferencing apps that are secure and perform exceptionally well.
If you know of any other solutions that work, do drop them in the comments section below.
Read our disclosure page to find out how can you help Windows Report sustain the editorial team. Read more


Improve this guide


User forum
4 messages