Fix: Something went Wrong Initializing Creative Cloud Libraries
Running the Creative Cloud Cleaner tool should fix this
3 min. read
Updated on
Read our disclosure page to find out how can you help Windows Report sustain the editorial team Read more
Key notes
- If you are dealing with the something went wrong initializing Creative Cloud libraries error, it might be due to minor issues with the app.
- You can fix this issue by deleting Creative Cloud caches.
Creative Cloud Library makes the core design assets for your brand or personal projects available irrespective of where you want to access them.
However, sometimes while attempting to use the Creative Cloud Libraries in supported desktop applications, the panel doesn’t load and returns something went wrong initializing creative cloud libraries error.
This is a common error and can occur due to multiple reasons, including cache and temporary issues. In this article, we take a look at the best possible solutions to fix Adobe Creative Cloud something went wrong error in a Windows computer.
How can I fix the Something went wrong initializing Creative Cloud libraries error?
1. Relaunch the Creative Cloud Library
- One of the official recommendations to fix this error includes relaunching Creative Cloud Library.
- Close any open Adobe apps like Photoshop, Illustrator, InDesign, Premiere Pro, and Adobe After Effects.
- Open the Creative Cloud desktop application.
- While the CC desktop application is open, press Ctrl + Alt + R key.
- This relaunches Creative Cloud and all the related processes, including CC libraries.
- Now try to relaunch the Adobe app that was giving the Libraries error.
2. Delete and Create Creative Cloud Caches
- Close all the Creative Cloud apps that are open and running.
- Launch the Creative Cloud desktop app on your computer.
- Sign out of your account in the Creative Cloud app.
- Close the Creative Cloud app.
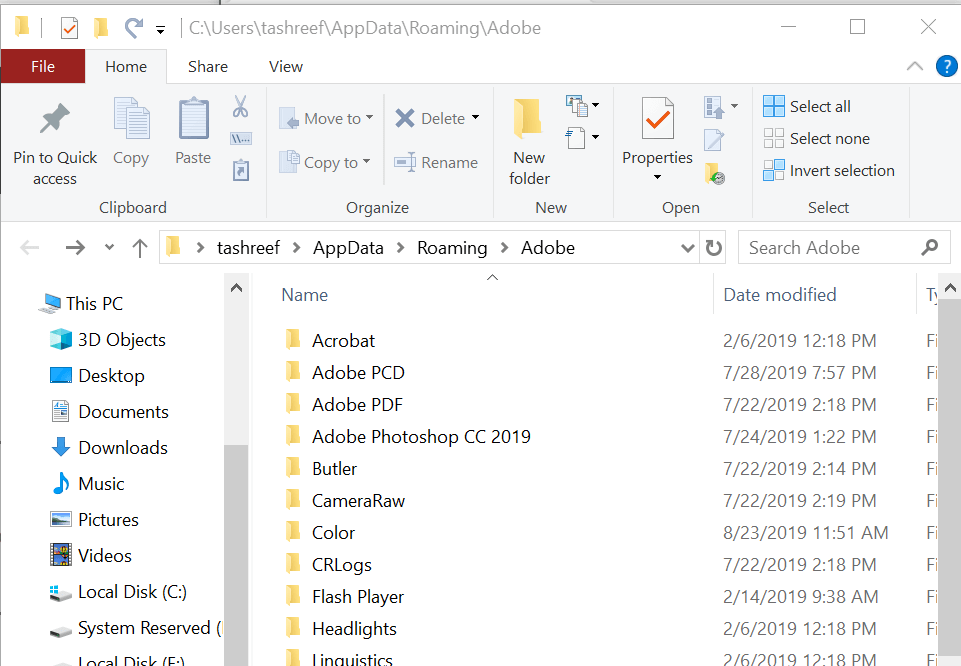
- Open File Explorer and navigate to the path below:
C:/Users/ username/AppData/Roaming/Adobe - Delete the Create Cloud Libraries folder.
- Launch your Adobe Creative Cloud desktop again and sign in to your account.
- Open the Adobe app with something that went wrong initializing creative cloud libraries, and check if the error is resolved.
3. Check your Host File
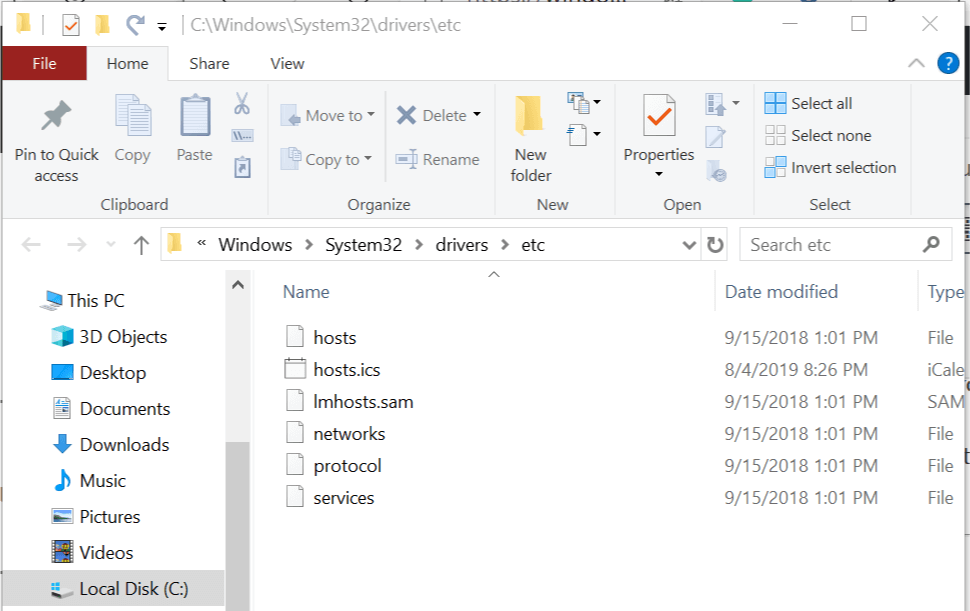
- Open File Explorer from the taskbar and navigate to the following location:
C:\Windows\System32\drivers\etc - Right-click on the Host file, select Open With, then Notepad.
- In the Host file make sure you don’t see any Adobe website listed. For example, 127.0.0.1 activate.adobe.com.
- If you see any website listed, add # at the beginning of the line to comment them out, which will look like #127.0.0.1 activate.adobe.com.
- Also, make sure that the file has the following line and that it is not commented out with a #:
127.0.0.1 localhost - Relaunch the Adobe app with the error and check for any improvements.
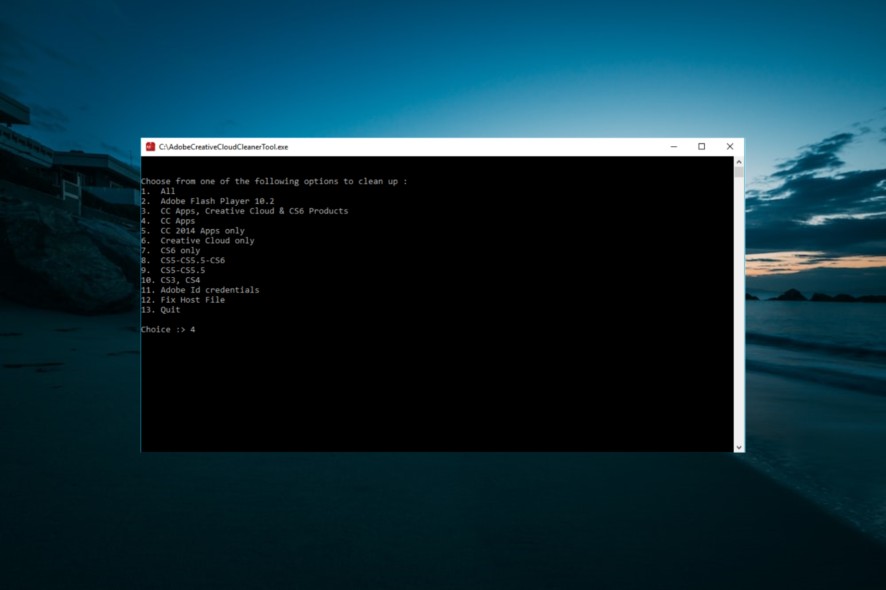
4. Use the Creative Cloud Cleaner Tool
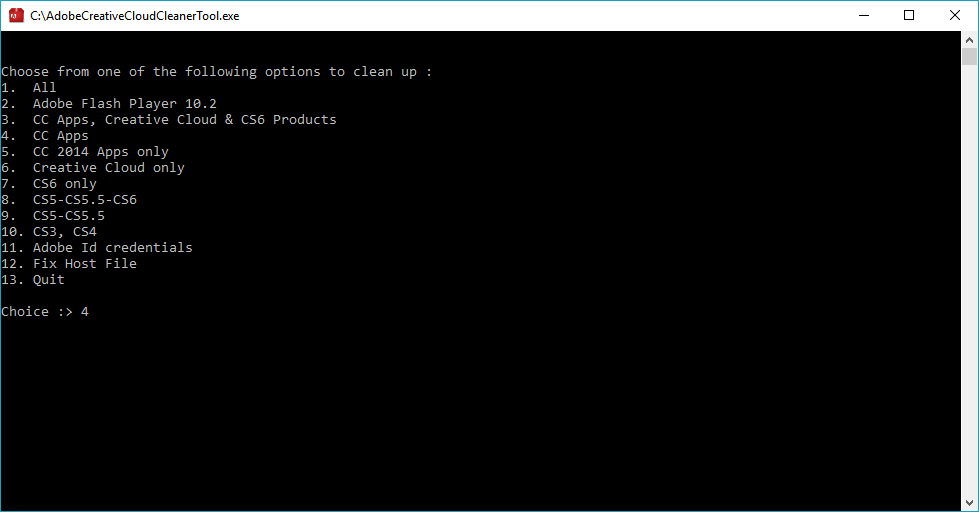
You can also use the Creative Cloud Cleaner tool to fix any installation issues as well as clean the Host file.
However, do note that to run the Creative Cleaner tool you may need to uninstall the Adobe Creative Suite and reinstall it after the cleaning is over.
5. Check Proxy Setting for Libraries
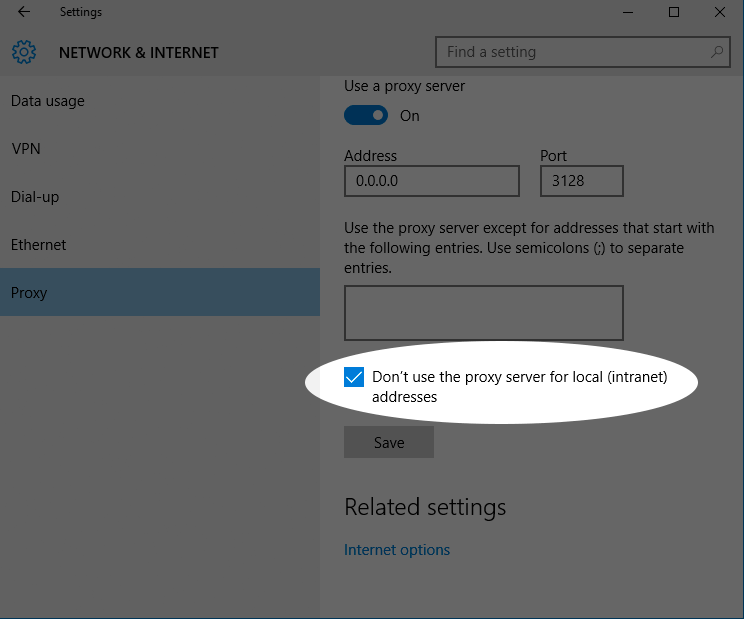
- Click on Start and select Settings.
- Click on Network and Internet.
- From the left pane, select the Proxy tab.
- Make sure the Don’t use the proxy server for local (intranet) addresses option is checked.
- Close the Settings window and check for any improvements.
We can now conclude this guide on how to fix the Something went wrong initializing Creative Cloud libraries error. You now have all the information you need to fix the error for good.
In the same vein, if the Adobe Cleaner installer fails to initialize on your PC, we have a guide that can help you fix it too.
Let us know the solution that helped you fix this error in the comments below.

