StartAllBack Causes Black Screen on Windows 11 [Solved]
Updating the StartAllBack app should work for most
3 min. read
Published on
Read our disclosure page to find out how can you help Windows Report sustain the editorial team. Read more
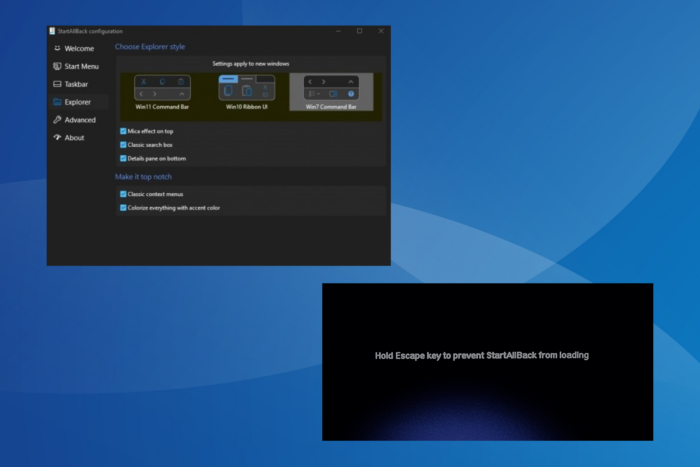
If you are using StartAllBack, there have been widespread reports of the app triggering a black screen on Windows 11. My research suggests that the issue is related to the recent changes in Windows 11 22H2 and how Microsoft is trying to block customization attempts in the OS.
This is evident as Microsoft has started blocking upgrades upon detecting StartAllBack on the PC. When installing a newer OS version using the setup, you are informed that StartAllBack causes security and performance issues on Windows.
But you don’t necessarily have to uninstall StartAllBack. Multiple solutions and workarounds allow you to continue using the app, at least for the time being!
How do I fix the StartAllBack black screen?
1. Update the StartAllBack app
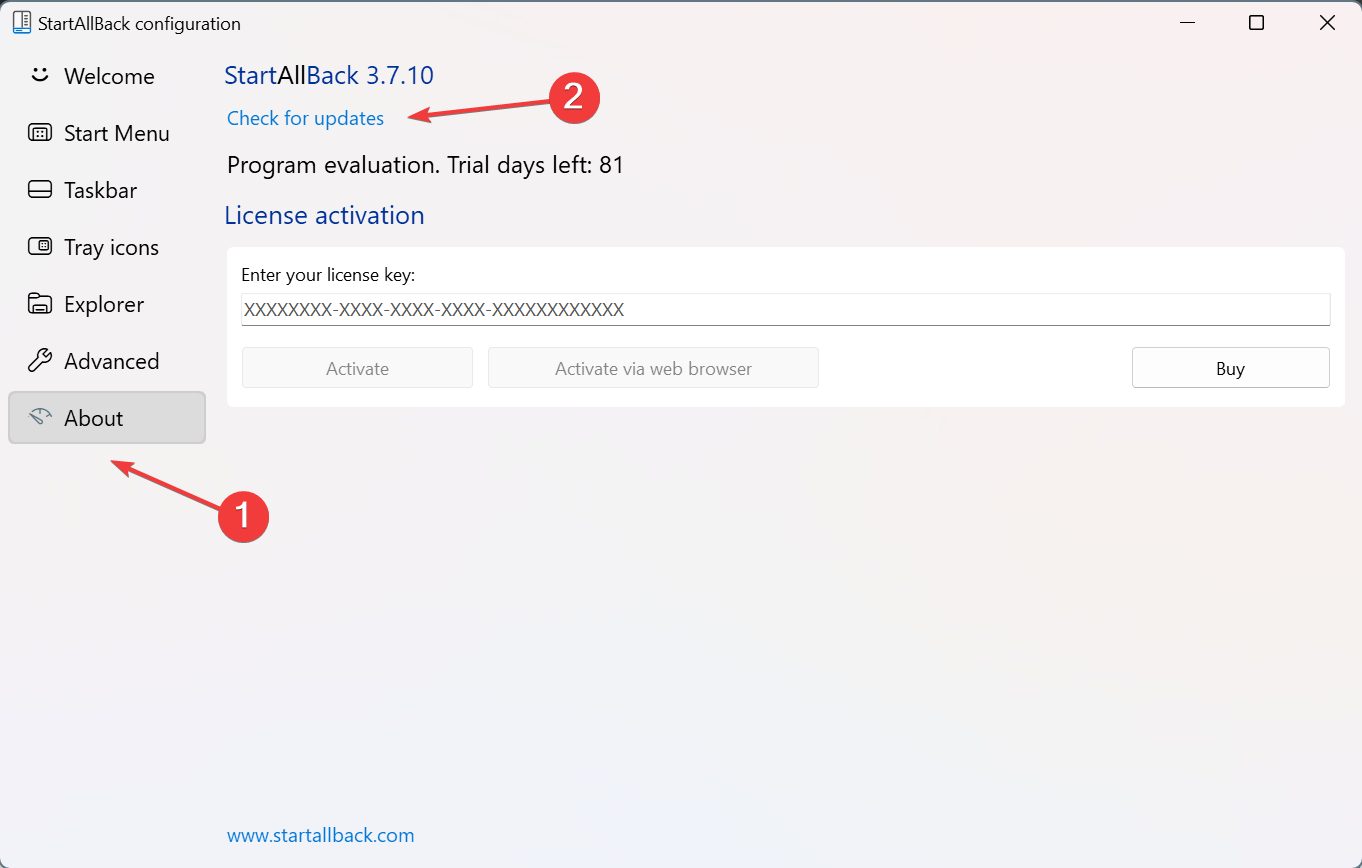
- Launch the StartAllBack app, go to the About tab, and click on Check for updates.
- If a newer version is available, wait for the installation to complete, and then restart the PC.
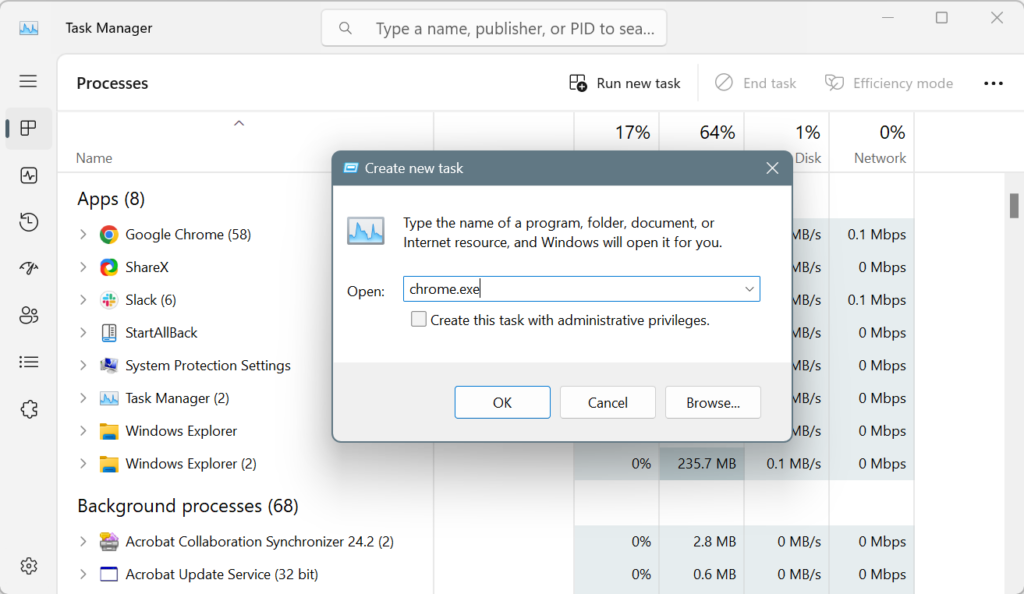
If you can’t access StartAllBack and are stuck on a black screen at startup> press Ctrl + Shift + Esc to open the Task Manager > click on Run new task > enter chrome.exe and hit Enter > visit StartAllBack’s official website > download the latest app version.
2. Disable all taskbar customizations in StartAllBack
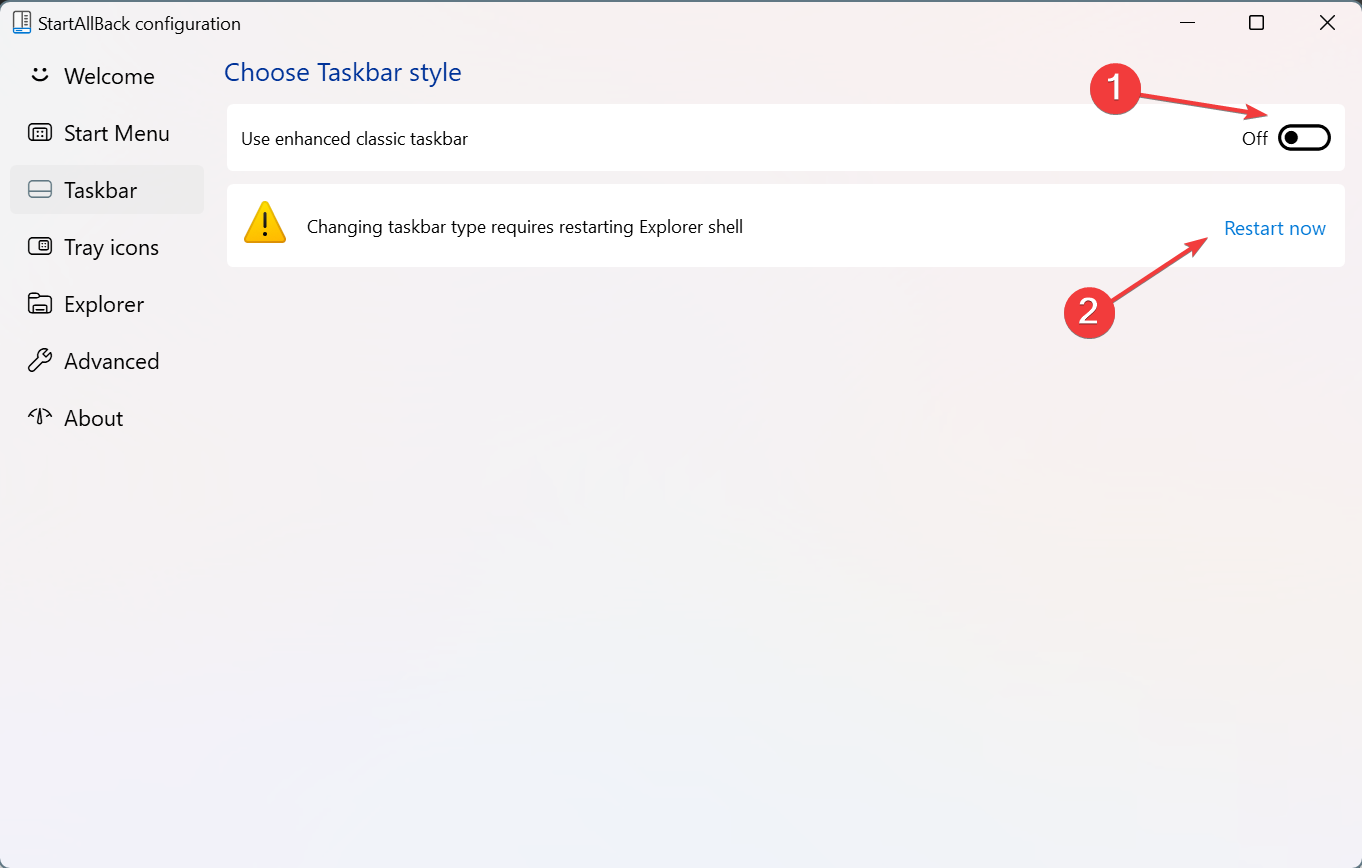
- Launch StartAllBack, and go to the Taskbar tab from the navigation pane.
- Disable the toggle next to Use enhanced classic taskbar, and click on the Restart now option to apply the changes.
3. Uninstall recent Windows updates
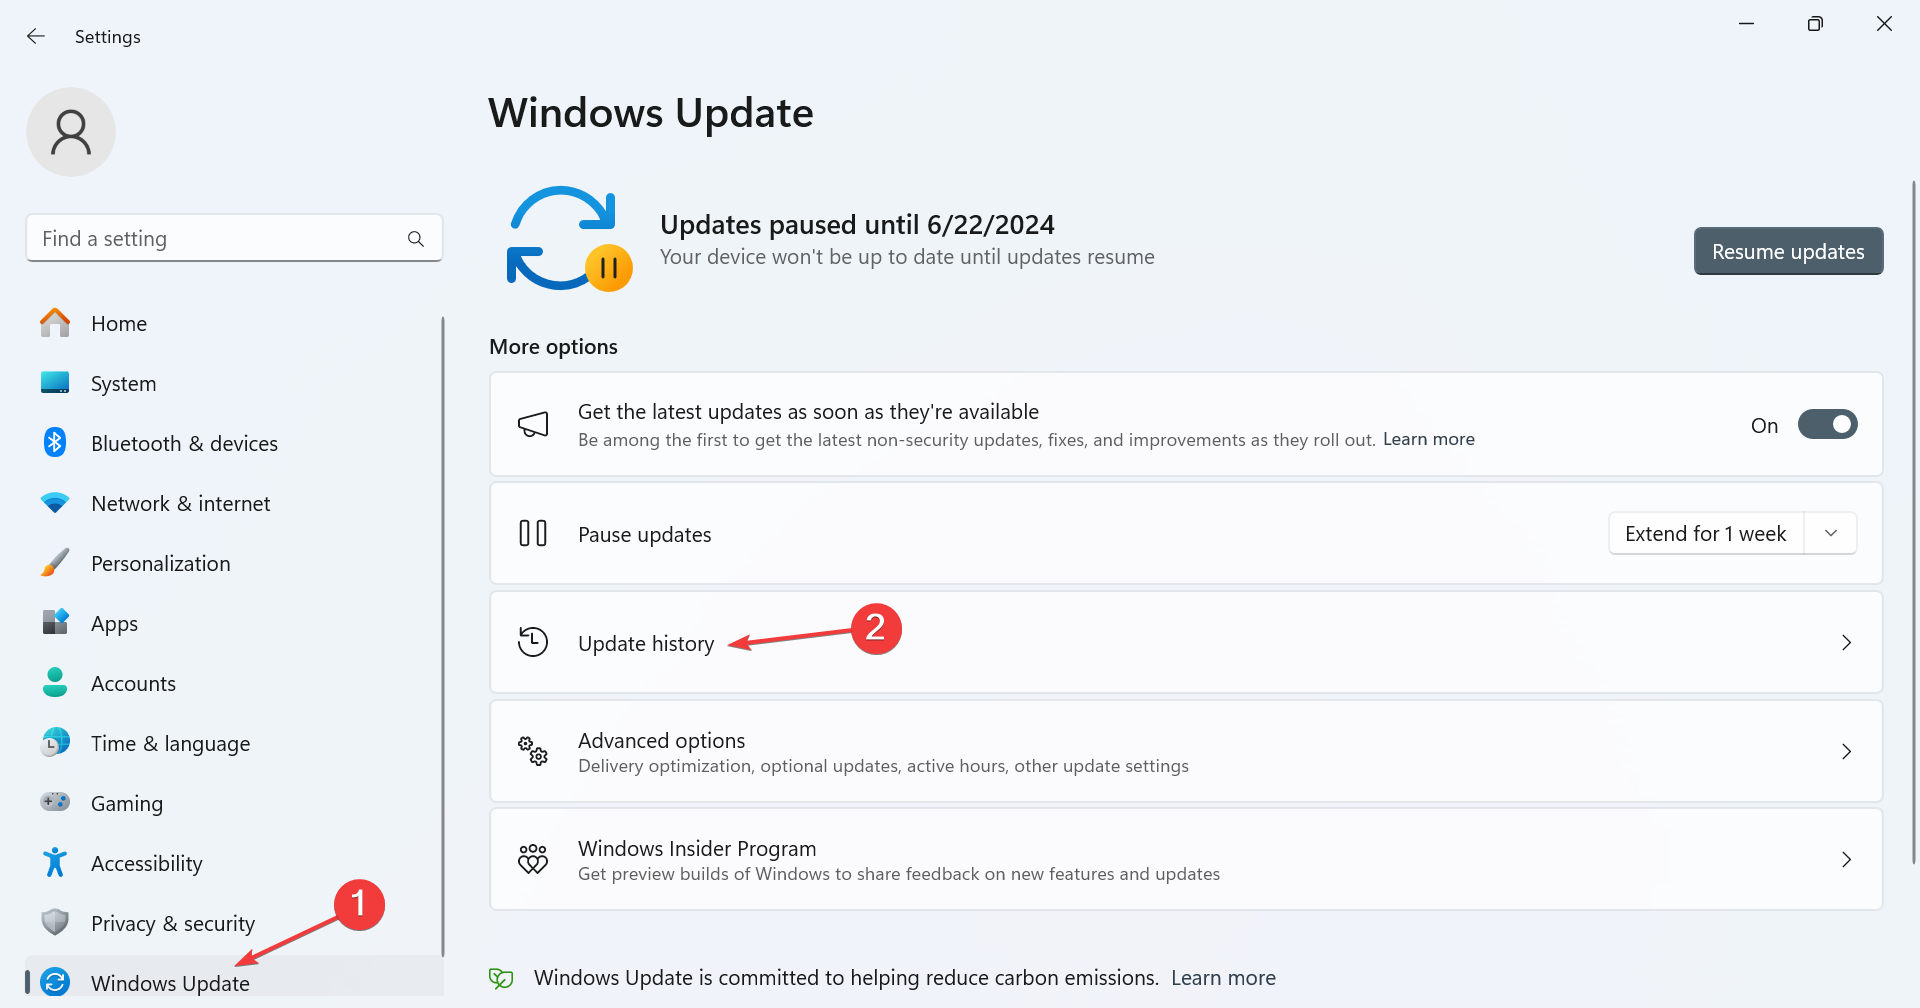
- Press Windows + I to open Settings, go to Windows Update from the left pane, and then click on Update history.
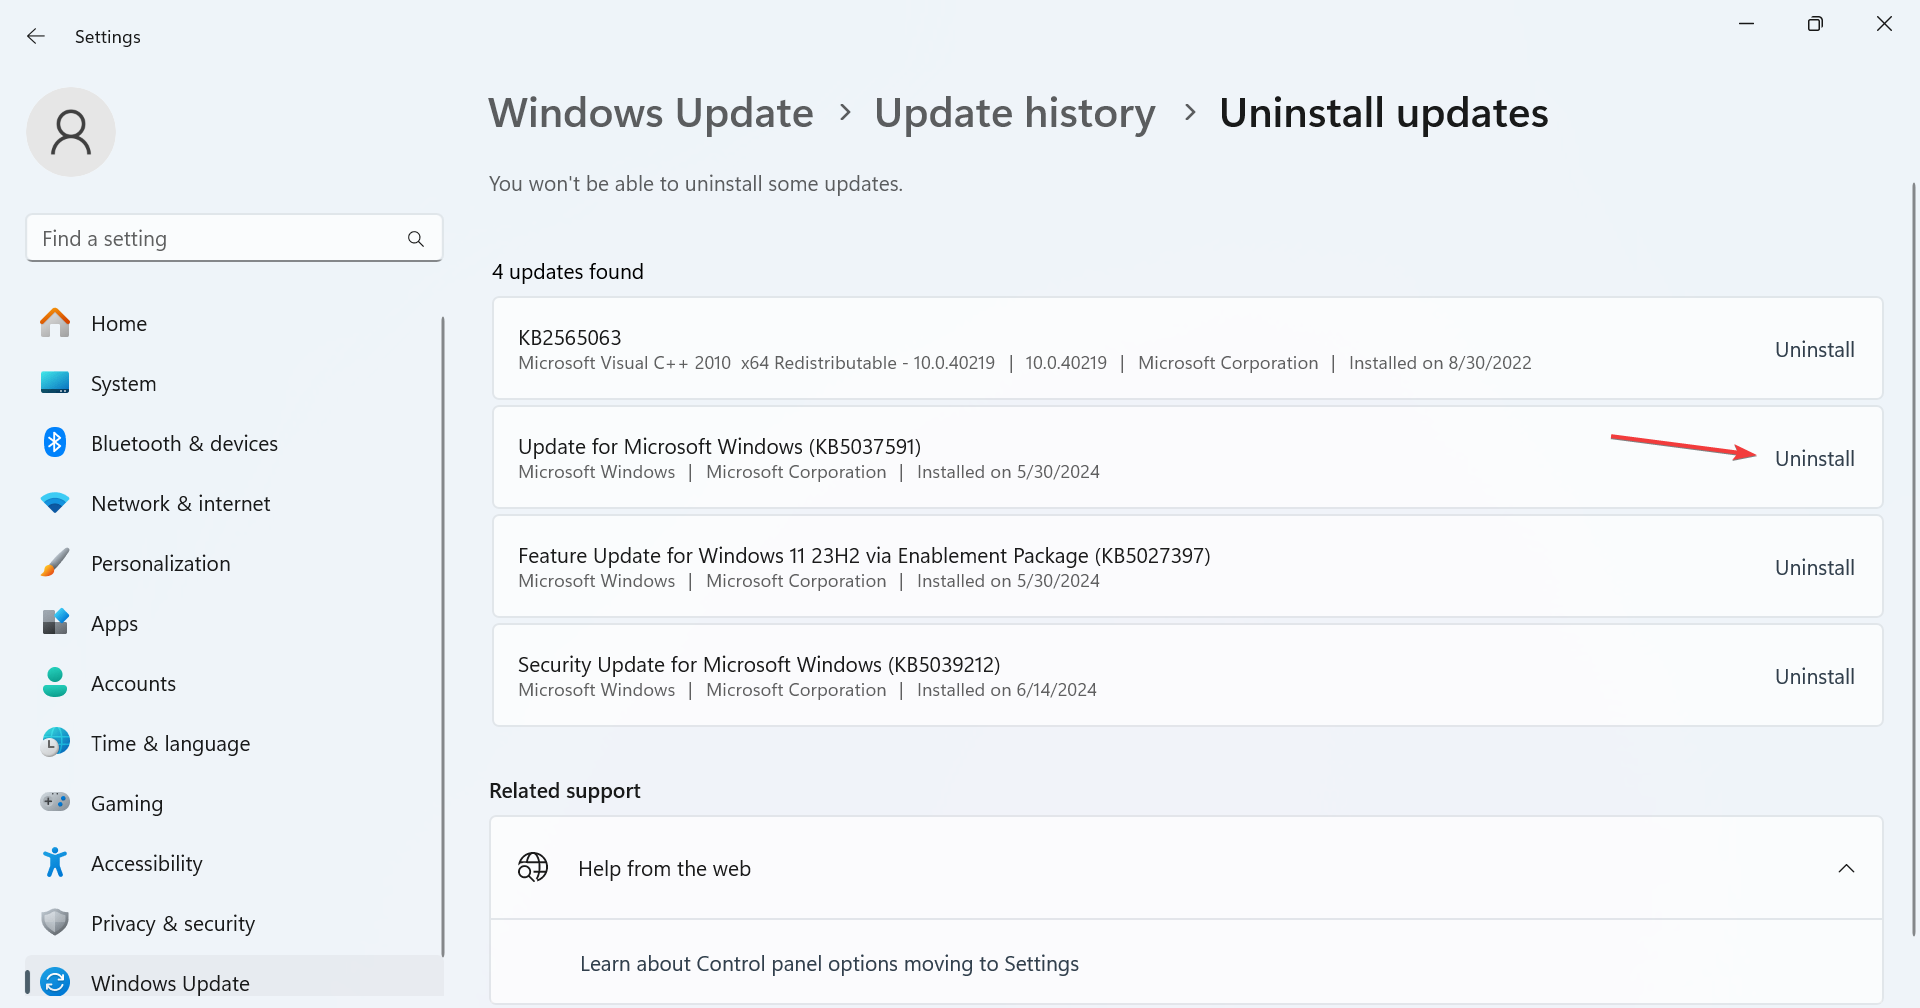
- Scroll down to the bottom and click on Uninstall updates.
- Click the Uninstall button next to the update installed right before the black screen first appeared.
- Again, click on Uninstall to confirm the change.
Often, when StartAllBack causes a black screen after updating Windows, it’s the latest OS version to blame. And if a newer version of the app is not available, you can always uninstall the Windows update. Previously, we have seen conflicts with KB5028182 and KB5034123!
4. Perform a system restore
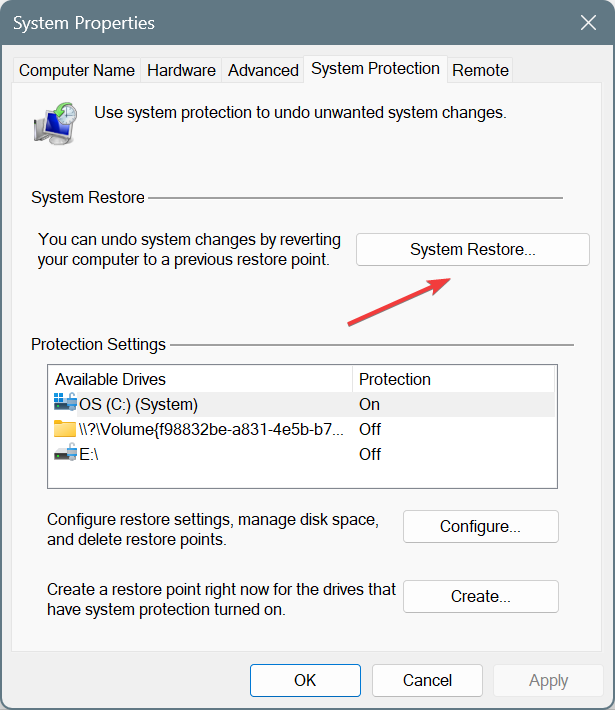
- Press Windows + S to open Search, type Create a restore point, and click on the relevant result.
- Click the System Restore button.
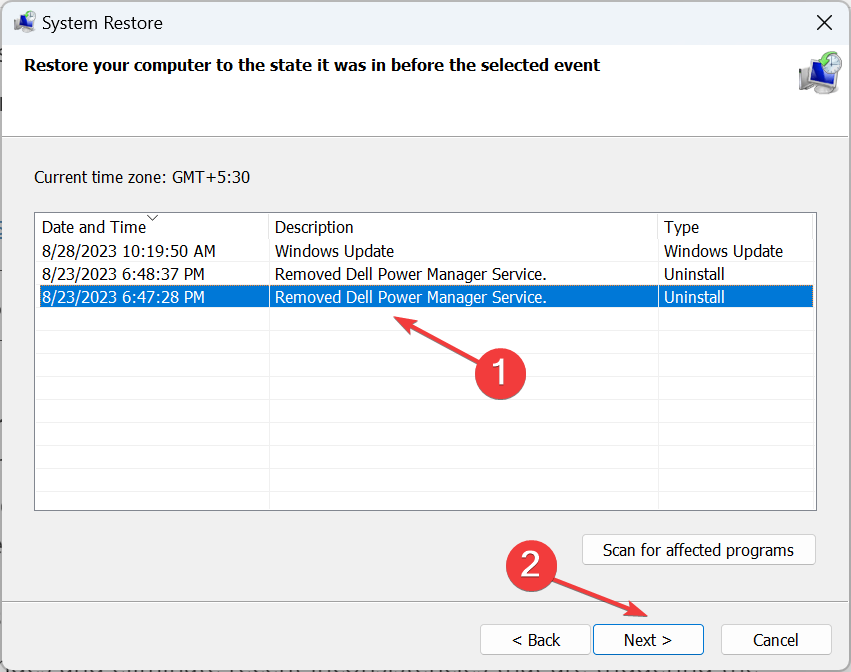
- Select the Choose a different restore point option and click on Next.
- Pick a restore point created before the black screen issue first appeared and click on Next.
- Verify the restore details, click on Finish, and then confirm the change.
- When the PC restarts after a restore, check for improvements.
5. Uninstall StartAllBack
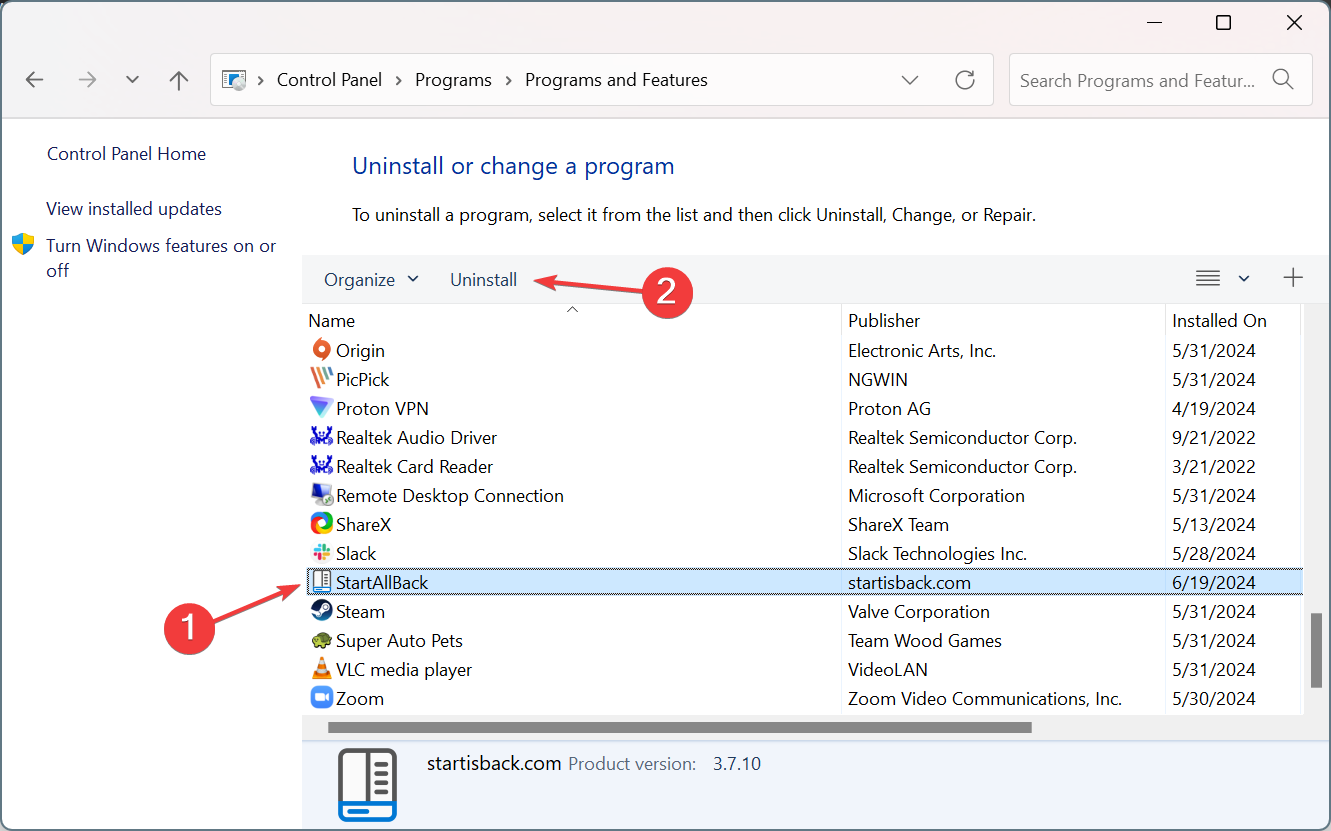
- Press Windows + R to open Run, type appwiz.cpl in the text field, and hit Enter.
- Select StartAllBack from the list of apps, and click on Uninstall.
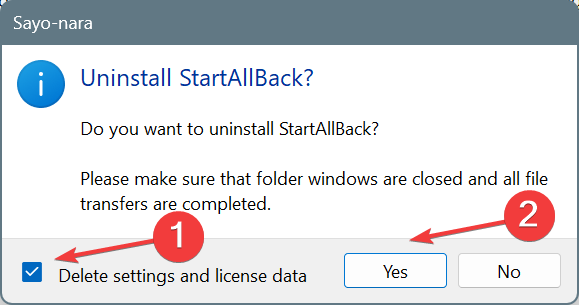
- Make sure to tick the checkbox for Delete settings and license data, and then click on Yes.
- Once done, reboot the PC for the changes to come into effect and look for improvements.
We also have a complete guide on how to properly uninstall StartAllBack and get rid of it for good.
If nothing previously worked, uninstalling StartAllBack and deleting all the configured settings should get things up and running. Don’t lose hope, you can always reinstall StartAllBack when the developers release a version compatible with the installed Windows 11 update.
In the meantime, you can switch to one of our top picks for Windows 11 customization software and personalize the OS experience!
Which fix worked for you? Share with our readers in the comments section.

User forum
0 messages